
I am participating in a sponsored campaign hosted by Advil®. I received compensation for this post. All opinions stated are my own.
Conquering the DIY Graveyard: Turning Unfinished Projects into Triumphs
Every homeowner, renter, or aspiring decorator has one: that elusive DIY project that never quite reaches completion. It sits there, a silent testament to ambition and procrastination, a nagging reminder that something is left undone. Whether you’re a seasoned DIY enthusiast or just dipping your toes into the world of home improvement, you know the feeling. Perhaps time or budget ran out, life unexpectedly intervened, or maybe, just maybe, you simply lost momentum or got discouraged. Whatever the reason, these unfinished endeavors become the “skeletons in our toolsheds” – metaphorical burdens we carry while tending to other, more pressing tasks.
The mental load of these lingering projects can be surprisingly heavy. They clutter not just our physical space, but also our minds. That half-painted wall, the uninstalled light fixture, or the bare-bones shelving unit constantly whispers, “Finish me!” It’s a common plight, and one that resonates deeply with me as I look at my own home improvement albatross.
My Personal DIY Challenge: A Closet Transformation Story
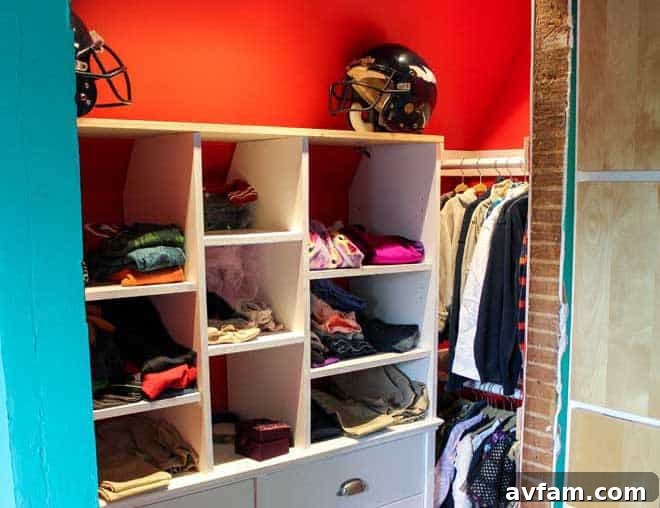
For me, that persistent, unfinished project is the built-in storage system in my children’s closet. It’s been a vision for organized bliss, a promise of streamlined mornings, and a dream of maximized space. Yet, it remains an ongoing saga, a testament to the fact that even the most well-intentioned projects can get derailed.
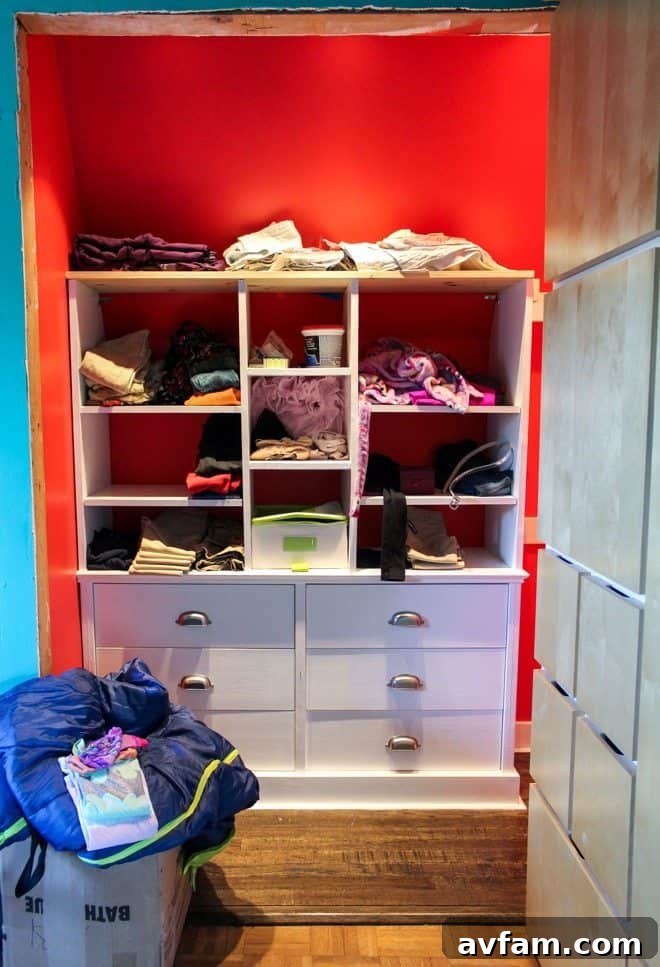
The biggest hurdle, and perhaps the primary reason for its prolonged status as “work-in-progress,” lies in the physical demands of the job. To properly finish this system, I have to contort myself into a roughly 24”x30” space – a cozy, yet challenging, corner of the closet. This isn’t a task for the faint of heart, or for anyone prone to claustrophobia.
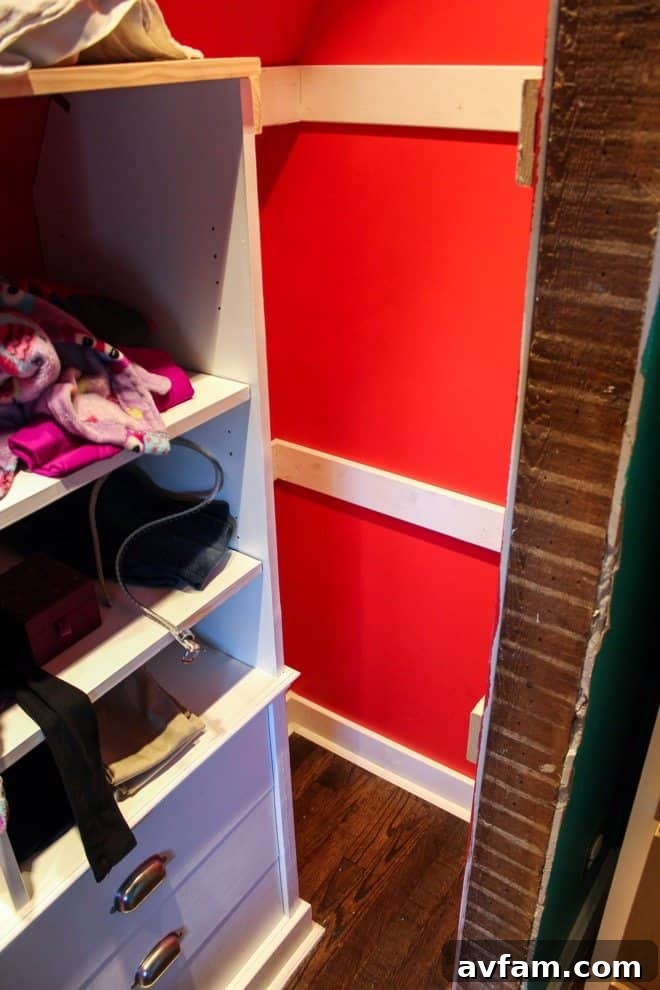
Once inside, the real work begins: the meticulous sanding of every surface, the careful application of primer, and then the precise painting to achieve that smooth, durable finish. After the paint dries, there’s the delicate task of hanging hardware – drawer pulls, cabinet knobs, and perhaps even some decorative hooks. And finally, the satisfying moment of adding the custom-cut shelves, transforming an empty shell into a functional storage marvel.
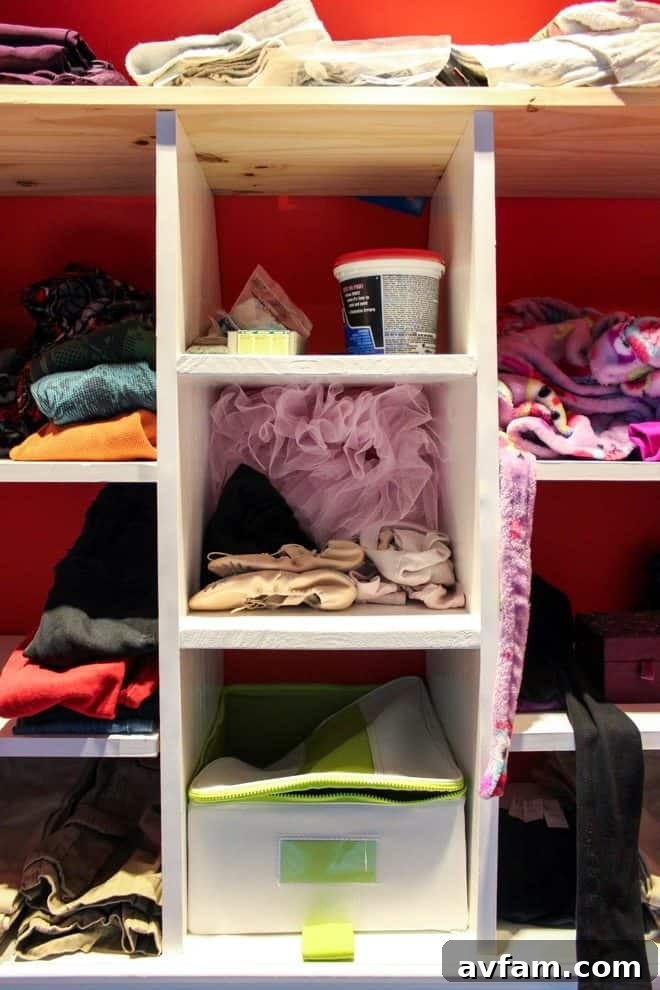
If you look closely enough at the current state of affairs, you can tell this project has been on my to-do list for quite some time. A shelf in the actively-being-used section of the closet is currently occupied by a motley collection of sundry small tools and brushes, resting just above my daughter’s ballet clothes. It’s a clear sign of a project paused, a workspace repurposed out of necessity. I won’t specify exactly how long that hodge-podge group of supplies has been residing there, but let’s just say it rhymes with “over a year.”
Renewed Focus: Why Now is the Time to Finish Strong
However, with the kids back in school and the gentle whisper of cooler autumn temperatures beginning to creep in, I’ve finally decided to bite the bullet. It’s time to commit. My children deserve a fully-functional and complete closet, free from the visual clutter of painter’s tape remnants, stray sandpaper, and drill bit kits. It’s time to move past the temporary and embrace the permanent. This isn’t just about organizing a closet; it’s about reclaiming a space, fulfilling a promise, and achieving that satisfying sense of completion.
And let me tell you, after anticipating spending a number of focused, hard-working hours in the August heat (even if it’s in the back corner of a closet!), I’ll certainly be adding Fast Acting Advil® to my list of essential supplies. Tackling a demanding DIY project often comes with its fair share of aches, pains, and muscle soreness. From crouching in tight spaces to repetitive sanding motions and overhead painting, our bodies take a toll. Having reliable pain relief is not just a luxury; it’s a necessity to stay productive and push through to the finish line without undue discomfort.
Your Partner in DIY: Advil® and the #DIYrelief Sweepstakes
If you also have a project you’ve been putting off or struggling to complete, Advil® and renowned home improvement expert Carter Oosterhouse are here to help you tackle your toughest DIY challenges. Advil® is inviting YOU to share your home, apartment, and outdoor DIY projects on Twitter or Instagram. From now until September 7th, simply use both of the hashtags #DIYrelief and #AdvilSweepstakes for a chance to win fantastic daily prizes.
But the excitement doesn’t stop there! Those entries will also be automatically placed in a drawing for the ultimate grand prize: a one-on-one video conference call with Carter Oosterhouse himself. Imagine getting personalized advice, planning assistance, and design insights from a leading expert, all tailored to a custom DIY project for your home, apartment, or outside space. And to truly bring that dream project to life, the grand prize also includes a generous $15,000 CASH prize to use toward your unique DIY endeavor. This incredible opportunity could be exactly the boost you need to transform that long-neglected project into a stunning reality.
Strategies for Conquering Your DIY “Skeletons”
Beyond the excitement of a sweepstakes, successfully completing a DIY project, especially a challenging one, often comes down to strategy and perseverance. Here are a few tips to help you conquer your own home improvement albatross:
1. Break It Down into Manageable Steps
A large project can feel overwhelming. Break it into smaller, bite-sized tasks. For my closet, it’s sanding day, priming day, painting day 1, painting day 2, hardware installation, and finally, shelf installation. Each completed mini-task builds momentum and makes the overall project seem less daunting.
2. Plan Meticulously and Gather All Supplies
Before you even pick up a tool, create a comprehensive plan. List every material you need, from paint and sandpaper to screws and specific hardware. Ensure you have all the necessary tools on hand. There’s nothing more frustrating than having to stop midway through a task to run to the hardware store for a forgotten item. This foresight prevents unnecessary delays and keeps your workflow smooth.
3. Set Realistic Expectations for Time and Skill
DIY projects rarely go exactly as planned. Be prepared for unexpected challenges and allow for extra time. If a task seems beyond your current skill level, consider watching tutorials, asking for help, or even hiring a professional for a specific part of the project. Don’t strive for perfection on your first attempt; aim for progress and learning.
4. Schedule Dedicated Work Sessions
Just like any important appointment, block out specific times in your calendar for your DIY project. Treat these sessions as non-negotiable. Consistent effort, even in short bursts, is more effective than sporadic, all-day marathons that lead to burnout.
5. Prioritize Your Well-being: Stay Hydrated and Manage Pain
DIY work can be physically demanding. Remember to stay hydrated, take regular breaks, and stretch. Listen to your body. When those inevitable aches and pains start to creep in – whether it’s a sore back from bending, tired muscles from sanding, or throbbing joints from repetitive tasks – don’t ignore them. Fast Acting Advil® can be a crucial ally, providing effective pain relief so you can continue working comfortably and efficiently. Taking care of yourself means you can enjoy the process and the end result much more.
6. Celebrate Small Victories
Acknowledge and celebrate each step you complete. Finishing the sanding? Great! Priming done? Fantastic! These small victories contribute to motivation and help you appreciate the progress you’re making towards the bigger goal.
Embrace the Satisfaction of Completion
There may only be a couple of weeks of summer left, but with kids happily settled back into school routines and the prospect of cooler temperatures making indoor projects more appealing, now truly is the perfect time to let Advil® help you put a giant “DONE” sign on your problem DIY project. Imagine the satisfaction of looking at that completed closet system, that freshly painted room, or that perfectly organized garage. The sense of accomplishment is immeasurable, and the functional benefits will enhance your daily life.
Don’t let aches and pains be the reason your project remains unfinished. With the support of Advil® for pain relief and the incredible opportunity of the #DIYrelief and #AdvilSweepstakes, you can transform that nagging “to-do” into a proud “ta-da!” So, gather your tools, make a plan, and get ready to finally check off that long-standing DIY project from your list. Your home, and your peace of mind, will thank you.