
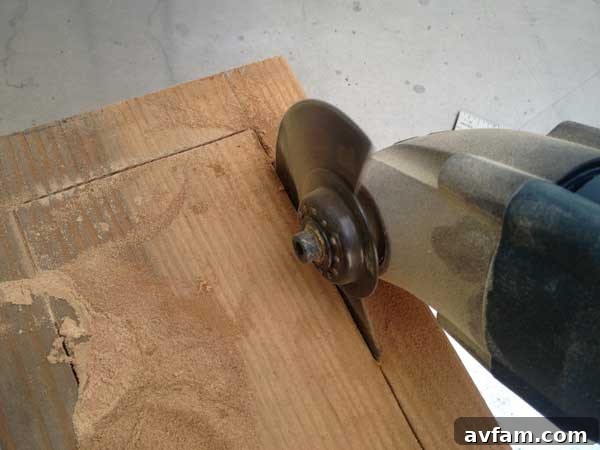
Unleashing Versatility: A Comprehensive Guide to Oscillating Multi-Tools
Imagine having a toolbox where a single power tool could flawlessly transition between cutting, sanding, scraping, and grinding, tackling nearly any project you throw its way. This isn’t a fantasy; it’s the reality of the oscillating multi-tool. Often hailed as the “Swiss Army knife” of power tools, an oscillating multi-tool consolidates the functionality of numerous specialized tools into one compact, incredibly versatile device. Whether you’re a seasoned professional or a weekend DIY enthusiast, mastering this indispensable tool can dramatically streamline your workflow and expand your capabilities.
The true genius of an oscillating multi-tool lies in its unique operating principle. Unlike rotary tools that spin or reciprocating tools that move back and forth in a linear fashion, an oscillating multi-tool vibrates its attachments in a high-speed, arc-like motion. This rapid, small-angle oscillation allows for precise cuts, delicate sanding, and effective material removal without the aggressive kickback often associated with other power tools. It’s this controlled power that makes it exceptional for intricate tasks, working in confined spaces, and achieving professional-grade results on a wide array of materials.
What Exactly is an Oscillating Multi-Tool and How Does It Work?
At its core, an oscillating multi-tool consists of a powerful motor, an oscillating head, and a quick-change attachment system. The motor drives a mechanism that causes the tool’s head to oscillate at very high speeds, typically between 10,000 and 20,000 OPM (oscillations per minute). This rapid, side-to-side motion of the attached blade or pad is what performs the work. Because the oscillation angle is so small (usually around 3 to 5 degrees), the tool offers exceptional control and minimizes the risk of damaging surrounding surfaces.
This distinct operating method provides several advantages. It allows for flush cuts, where you can cut material perfectly level with an adjacent surface. It excels at plunge cuts, enabling you to start a cut in the middle of a material without drilling a pilot hole. Furthermore, its ability to work in tight corners and awkward angles makes it indispensable for detailed work that other tools simply cannot reach. From intricate trim work to precise floor repairs, the oscillating multi-tool is designed to handle challenges that would otherwise require multiple specialized hand or power tools.
Unleashing Its Full Potential: Common Applications and Attachments
The real magic of an oscillating multi-tool comes from its vast array of interchangeable attachments. Each accessory is designed for a specific task, effectively transforming your single tool into a dedicated solution for countless projects. Understanding the different types of attachments and their applications is key to maximizing your tool’s utility:
Cutting Blades: Precision in Every Stroke
- Wood Blades: Available in various widths and tooth patterns for different wood types. Ideal for trim work, cutting baseboards for flooring installation, performing precise plunge cuts in drywall or wood, and even cutting out old window putty.
- Metal/Bi-Metal Blades: Designed for tougher materials, these blades can cut through nails, screws, copper pipes, PVC, and thin metal sheets. Essential for renovation projects where unforeseen obstacles might be encountered behind walls.
- Flush Cut Blades: Specifically shaped to allow you to cut perfectly flush with a surface, such as trimming door jambs for new flooring or cutting off protruding dowels.
- Segmented Blades: Circular blades with a flat edge, perfect for long, straight cuts in wood, drywall, and plastic, often used for cutting out floor sections or trimming door casings.
Sanding Pads: Achieving Smooth Finishes
- Delta/Triangular Sanding Pads: The most common type, these pads are ideal for detail sanding in corners, tight spaces, and intricate profiles. They use hook-and-loop sandpaper of various grits (coarse, medium, fine) to prepare surfaces for painting, staining, or simply smoothing rough edges.
- Finger Sanding Pads: Even smaller and more pointed than delta pads, these are perfect for extremely fine detail work, intricate carvings, or reaching into very narrow crevices.
- Polishing/Buffing Pads: While less common, specialized pads can be used for polishing metals or plastics, restoring shine to small surfaces.
Scraper Blades: Effortless Material Removal
- Rigid Scraper Blades: Robust and stiff, these are excellent for removing stubborn materials like old paint, dried adhesive, caulk, linoleum, or old carpet glue from hard surfaces.
- Flexible Scraper Blades: More pliable, these blades are ideal for delicate scraping tasks where you need to conform to a surface or avoid damaging the substrate underneath, such as removing wallpaper or soft caulk.
Grinding & Grout Removal Attachments: Renovation Made Easy
- Grout Removal Blades (Carbide or Diamond Grit): Essential for tile renovation, these blades allow you to precisely remove old, deteriorated grout without damaging adjacent tiles. They come in various widths to match different grout lines.
- Rasp Blades: Coarse blades used for shaping and removing material from soft masonry, concrete, or for rough grinding tasks on wood.
The Heart of Versatility: Changing Oscillating Multi-Tool Attachments
One of the most frequent operations you’ll perform with your oscillating multi-tool is changing attachments. While the original tools often required an Allen wrench, many modern versions feature tool-less quick-change systems, significantly speeding up the process. Regardless of your tool’s specific mechanism, the core principles remain the same:
Step-by-Step Attachment Change (General Guide):
- Safety First: Always ensure the tool is unplugged from the power source or the battery is removed before attempting to change any attachment. This prevents accidental starts and potential injury.
- Locate the Fastener:
- Allen Wrench System: On older or simpler models, you’ll find a bolt (often hex-shaped) at the base of the attachment holder. This is typically loosened or tightened with the included Allen wrench.
- Tool-Less System: Modern tools feature a lever, paddle, or quick-release button that, when actuated, loosens the clamp holding the attachment in place.
- Remove the Old Attachment: Once the fastener is loose, carefully pull off the existing blade or pad. If an adapter was used, ensure you save it for future use.
- Understanding Adapters:
If you are using attachments from a different manufacturer than your tool, you may need an adapter. Most oscillating multi-tools adhere to a “universal” OIS (Oscillating Interface System) standard, meaning many brands’ accessories are cross-compatible. However, some manufacturers (like Bosch with its Starlock system) have proprietary interfaces. Adapters bridge this gap, allowing you to use a wider range of accessories with your specific tool. If an adapter is required, it typically slides onto the tool’s attachment holder first.
- Install the New Attachment:
- Line up the new attachment (and adapter, if necessary) with the oscillating head. Most attachments have a multi-point mounting pattern (often star-shaped or with multiple holes) to ensure secure placement.
- Push the attachment firmly onto the holder, ensuring it is flush and correctly seated.
- Secure the Attachment:
- Allen Wrench System: Reinsert the bolt and tighten it securely with the Allen wrench. Do not overtighten, but ensure it’s snug enough that the attachment won’t slip during use.
- Tool-Less System: Close the lever or release the button, allowing the clamping mechanism to firmly grip the new attachment. Give the attachment a gentle tug to confirm it’s securely fastened.
- Test (Optional but Recommended): Briefly plug in or attach the battery and run the tool for a second to ensure the attachment is stable and vibrating correctly.
The evolution from Allen wrench to tool-less systems highlights the industry’s commitment to user convenience, making attachment changes quicker and more efficient, particularly for projects requiring frequent accessory swaps.
Choosing the Right Oscillating Multi-Tool for Your Needs
With a wide array of oscillating multi-tools on the market, selecting the right one can seem daunting. Consider these factors:
- Power Source:
- Corded: Offers consistent power for extended use without battery concerns. Generally more affordable and lighter. Ideal for workshop use or projects near power outlets.
- Cordless: Provides unparalleled portability and flexibility, especially in areas without immediate power access. Battery life and voltage (e.g., 12V, 18V, 20V) are key considerations, impacting power and run time.
- Motor Type:
- Brushed Motors: Traditional, reliable, and generally more economical.
- Brushless Motors: Newer technology, offering greater efficiency, longer run times, increased power, and extended tool life due to less friction and heat. They are typically more expensive.
- Oscillation Speed & Control: Look for models with variable speed control. This allows you to adjust the oscillation rate to suit the material and task, preventing overheating on delicate materials or providing maximum power for aggressive removal.
- Ergonomics & Vibration Reduction: A comfortable grip and effective vibration dampening reduce user fatigue during prolonged use, enhancing control and precision.
- Attachment System: While tool-less systems offer convenience, traditional Allen wrench systems are often found on robust, budget-friendly models. Ensure the tool’s mounting system is compatible with the accessories you intend to use or that suitable adapters are available.
- Brand & Accessory Availability: Reputable brands often provide better build quality, warranties, and a wider range of readily available accessories and spare parts.
Maintenance and Safety Tips for Optimal Performance
To ensure your oscillating multi-tool remains a reliable workhorse for years to come, and to protect yourself, adhere to these maintenance and safety guidelines:
- Always Wear Safety Gear: Eye protection (safety glasses or goggles) is non-negotiable. Hearing protection is also highly recommended, especially during extended use, as these tools can be quite loud. Gloves can protect hands from splinters and minor abrasions.
- Read the Manual: Familiarize yourself with your specific tool’s features, safety warnings, and recommended operating procedures.
- Secure Your Workpiece: Use clamps or a vise to firmly hold the material you’re working on. This prevents the workpiece from shifting, ensuring cleaner cuts and reducing the risk of injury.
- Choose the Right Attachment: Using the correct blade or pad for the material and task is crucial for efficiency and safety. An incorrect attachment can lead to poor results, damage to the tool or workpiece, or even kickback.
- Keep it Clean: Regularly clean dust and debris from the tool’s vents and attachment area. Built-up dust can impede cooling and affect performance.
- Inspect Attachments: Before each use, check blades for dullness, cracks, or damage. Replace worn or damaged accessories immediately. A dull blade can cause the tool to overwork and lead to unsatisfactory results.
- Proper Storage: Store your multi-tool and its accessories in a clean, dry place, ideally in a protective case to prevent damage and keep everything organized.
- Mind the Dust: Oscillating tools can generate a lot of fine dust, especially when sanding or cutting drywall. Work in a well-ventilated area or consider using a dust extraction attachment if available.
The Indispensable Advantages of Owning an Oscillating Multi-Tool
The sheer adaptability of the oscillating multi-tool translates into a multitude of benefits for anyone undertaking home improvement, renovation, or craft projects:
- Space-Saving and Cost-Effective: Instead of buying a separate saw, sander, scraper, and grinder, you get the functionality of all these in one tool, saving both space in your workshop and money in your wallet.
- Precision in Tight Spaces: Its compact design and unique oscillating action allow it to access areas where larger, bulkier tools simply cannot go, enabling intricate cuts and finishes in confined environments.
- Unmatched Versatility: Capable of working with a diverse range of materials including wood, metal, plastic, drywall, tile, and grout, making it suitable for almost any task.
- Ease of Use: Generally user-friendly, even for beginners, due to its controlled operation and minimal kickback. The precise control it offers makes complex tasks more manageable.
- Time-Saving: For many specific tasks, such as flush cutting door jambs or removing old caulk, the oscillating multi-tool performs the job faster and more efficiently than traditional methods.
- Detail-Oriented: Excels at tasks requiring fine detail, such as sanding small pieces, trimming delicate mouldings, or making exact cut-outs.
Conclusion: Your Ultimate Project Partner
The oscillating multi-tool is far more than just another power tool; it’s a versatile solution that simplifies complex tasks and empowers you to achieve professional results across a spectrum of projects. From intricate detail work to demanding demolition, its ability to transform with a simple attachment change makes it an unparalleled asset in any toolkit. By understanding its capabilities, selecting the right accessories, and adhering to proper usage and safety guidelines, you unlock a world of possibilities. Embrace the efficiency and versatility of the oscillating multi-tool, and discover your new favorite partner for every renovation, repair, and creative endeavor.