
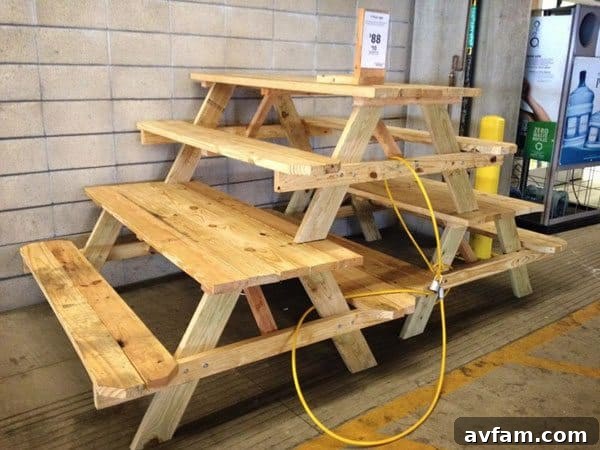
Transform your backyard into a delightful outdoor oasis this summer by building your very own picnic table. There’s something truly special about enjoying a meal al fresco, and a sturdy, custom-built picnic table takes even the most ordinary gatherings to an extraordinary level. Whether you’re hosting a barbecue, enjoying a family brunch, or simply savoring a quiet evening meal under the stars, a dedicated outdoor dining space makes every moment more memorable. Your backyard isn’t just a yard; it’s an extension of your home, and with a DIY picnic table, it becomes the perfect venue for entertaining and relaxation.
Build Your Own DIY Picnic Table: The Ultimate Guide for Outdoor Living
If you’re envisioning charming outdoor meals and lively backyard parties, a durable and attractive picnic table is an absolute necessity. Instead of settling for a mass-produced option, why not embark on a rewarding DIY project? Building your own picnic table allows for unparalleled customization, ensures quality craftsmanship, and gives you immense satisfaction. We’ll guide you through the highlights of a robust project plan, inspired by resources like The Home Depot, covering everything from essential supplies to crucial construction steps. Let’s get started on creating a focal point for your outdoor entertaining!
Why Choose to Build Your Own Picnic Table?
While buying a pre-made picnic table is always an option, there are numerous compelling reasons to undertake this rewarding do-it-yourself project:
- Cost Savings: Purchasing raw materials and building it yourself is often significantly more economical than buying a comparable, high-quality finished table from a retailer. You get more value for your money.
- Customization to Your Style: You have complete control over the design, dimensions, wood type, and finish. Want a longer table for big family gatherings? A specific color to match your patio decor? Building it yourself means it will perfectly suit your aesthetic and functional needs.
- Superior Durability and Quality: When you build it, you know exactly what materials went into it and how it was constructed. You can choose premium, weather-resistant lumber and use robust fastening techniques, ensuring your table is built to last for many years, enduring countless seasons and celebrations.
- A Sense of Accomplishment: There’s immense pride in stepping back and admiring a functional piece of furniture you crafted with your own hands. It’s a tangible representation of your skill and effort, creating a unique story for your outdoor space.
- Learning Opportunity: For aspiring woodworkers or DIY enthusiasts, this project is an excellent way to hone your skills, learn new techniques, and gain confidence in handling various power tools.
Essential Tools and Materials for Your DIY Picnic Table Project
A successful woodworking project starts with having the right tools and materials at your fingertips. Gather everything listed below before you begin cutting, drilling, and assembling to ensure a smooth, efficient, and enjoyable building process. Remember, safety should always be your top priority!
Tools You’ll Need:
- Tape Measure: Absolutely critical for accurate measurements. Precision here directly impacts the stability and appearance of your finished table.
- Ratchet and Socket Wrench: Essential for securely tightening carriage bolts, ensuring a rock-solid structural connection, especially for the legs.
- Framing Square: Used to check and ensure all your corners are perfectly square (90-degree angles), which is vital for a stable and level table.
- Combination Square: A versatile tool for marking precise cut lines, checking smaller angles, and setting depths.
- C-Clamps and Bar Clamps: Indispensable for holding lumber pieces firmly in place while you drill or fasten them. This prevents movement, ensuring accurate joints and increasing safety.
- Circular Saw: Your primary power tool for making straight and angled cuts across your lumber. Ensure you have a sharp blade for clean, efficient cuts.
- Saber Saw (Jigsaw): While less critical for a standard rectangular picnic table, a jigsaw can be useful for any intricate or curved cuts you might decide to incorporate in a custom design.
- 3/8-inch Drill and Bits: Necessary for drilling pilot holes (to prevent wood splitting) and creating bolt holes for structural fasteners. A combination countersink bit is highly recommended for creating clean, flush finishes for screw heads.
- Screwdriver (or Impact Driver): For driving deck screws. An impact driver is particularly efficient and less fatiguing for driving numerous screws into tough outdoor lumber.
- Paintbrush (or Roller): For applying wood stain, paint, or a protective sealer to finish your table.
- Safety Goggles: Non-negotiable eye protection against wood dust, flying debris, and accidental splinters.
- Hearing Protection: Recommended when operating power tools for extended periods to protect your ears.
- Work Gloves: To protect your hands from splinters and rough wood.
Materials List:
- Lumber:
- 2x4s: Typically used for structural supports, cross braces, and smaller frame components.
- 2x6s: Often utilized for bench supports, and sometimes for larger frame elements, offering good strength.
- 2x8s: The ideal choice for tabletop and bench slats. Their width provides a comfortable surface and a robust appearance.
- Wood Type Considerations: For outdoor furniture, pressure-treated lumber is highly recommended for its resistance to rot and insects. Alternatively, cedar or redwood offer natural decay resistance and beautiful aesthetics, though at a higher cost. Standard pine is a budget-friendly option but requires thorough sealing and regular maintenance for longevity.
- Fasteners:
- 3/8 x 3-inch Carriage Bolts: These are crucial for creating strong, secure connections, especially where the legs meet the main table supports. Ensure you purchase corresponding washers and nuts.
- No. 8 Deck Screws (2-1/2, 3, and 4-inch lengths): Specifically designed for outdoor applications, these screws are coated to resist corrosion and provide superior holding power in wood. You’ll need various lengths to accommodate different wood thicknesses and connections.
- Sandpaper: A variety of grits (e.g., 80-grit for initial shaping and removing imperfections, 120-grit for smoothing, and 220-grit for a fine finish) is essential for preparing the wood surface.
- Wood Glue (Optional but Recommended): For added strength and stability in certain joints, especially if using a non-pressure-treated wood. Ensure it’s rated for exterior use.
- Wood Stain, Exterior Paint, or Sealer: To protect your table from the elements (UV, moisture, mildew) and enhance its appearance. Choose a product suitable for outdoor furniture.
Planning Your Picnic Table: Design and Dimensions
Before any wood is cut, a little planning goes a long way to ensure your DIY picnic table perfectly fits your space and needs. Consider these factors:
- Table Dimensions: A standard picnic table is typically around 6 feet (72 inches) long, comfortably seating 6-8 people. You can adjust this length based on your family size or entertaining requirements. Ensure the width of the tabletop and benches provides ample space.
- Location in Your Backyard: Think about where the table will be placed. Is the ground level? Is there enough clearance for people to sit down and walk around the table comfortably? Consider proximity to other backyard features like grills, pools, or garden beds.
- Aesthetic Style: The classic A-frame design is popular for its inherent stability and timeless appeal. However, you might envision a more modern or rustic look, which could influence your lumber choices and finishing techniques.
- Wood Selection Revisited: Your choice of wood will impact the table’s weight, appearance, and longevity. Pressure-treated pine is a durable, cost-effective choice. Cedar offers beautiful grain and natural resistance, while redwood is known for its incredible durability and rich color.
Step-by-Step Guide: Building Your DIY Picnic Table
Now that you have your tools and materials ready and your plan solidified, it’s time to bring your vision to life. This section details the key construction steps, expanding on typical project plans to provide clearer guidance.
Phase 1: Preparing and Cutting Your Lumber
Accuracy in the cutting phase is non-negotiable. “Measure twice, cut once” is not just a saying; it’s the golden rule that will prevent costly mistakes and ensure a successful outcome.
- Inspect and Prepare Lumber: Lay out all your purchased lumber. Take a moment to inspect each board for significant knots, warps, or defects. If possible, plan your cuts to avoid these imperfections.
- Cut Table Slats: Using your tape measure and circular saw, carefully cut the 2×8 lumber to the desired length for your tabletop slats. For a 6-foot table, each slat will be 72 inches long. You will typically need 5 to 6 of these, depending on the overall desired width of your tabletop. Make sure all cuts are straight and clean.
- Cut Table Supports: Next, cut the lumber for the tabletop supports. These are crucial for holding the slats together and providing attachment points for the legs.
- For the two end table supports, cut a 60-degree angle on each end. These angled cuts will help form the characteristic splayed legs of the A-frame design and contribute significantly to the table’s stability.
- For the center table support, cut a 60-degree bevel on each end. A bevel cut differs from an angle cut in that it’s made across the thickness of the board, not its width. This precise angle ensures the support sits correctly and securely.
- Cut Legs and Bench Supports: Referencing your specific plan (e.g., from The Home Depot’s tutorial), cut the pieces that will form the legs and the supports for the bench slats. These cuts often involve specific angles to ensure the legs splay outwards correctly and that the benches are at a comfortable, ergonomic height. Measure each piece meticulously.
Phase 2: Assembling the Tabletop
This phase is where your table truly begins to take shape. A flat and stable tabletop is key to the entire structure, so proceed with care and attention to detail.
- Arrange and Clamp Slats: Lay your cut 2×8 table slats upside down on a clean, flat, and level workbench or floor. Use small spacers (such as 1/4-inch thick wood scraps, washers, or even coins) between each slat to create uniform gaps. These gaps are not just for aesthetics; they are essential for allowing the wood to expand and contract with changes in humidity and temperature, and they prevent water from pooling on the tabletop. Once spaced, use several bar clamps across the width of the tabletop to hold all the slats firmly together.
- Drill Pilot Holes and Countersink: With the slats securely clamped, use your drill equipped with a combination countersink bit to drill pilot holes through the slats where the end and center supports will be attached. Pilot holes are crucial for preventing the wood from splitting when screws are driven in, especially near the ends of the boards. Countersinking creates a recessed opening for the screw heads, ensuring they sit flush with or slightly below the surface of the slats, which provides a smoother finish and prevents clothing snags.
- Attach End Table Supports: Position the two end table supports (the ones with the 60-degree angles on each end) across the clamped slats, aligning them with your pre-drilled pilot holes. For now, only drive No. 8 4-inch deck screws into the two outermost slats for each end support. This initial fastening provides enough stability to allow for any minor adjustments to the inner slat spacing or alignment before fully securing all pieces. This provisional attachment is a clever trick to ensure everything lines up perfectly.
- Attach Center Table Support: Next, place the center table support (with the 60-degree bevels) across the middle of the tabletop assembly, aligning it with its respective pilot holes. Secure this support to the slats using No. 8 2 1/2-inch deck screws. Again, you might initially secure only the outermost slats to maintain flexibility for adjustments. Once you are completely satisfied with the uniform spacing and overall alignment of all tabletop slats, proceed to drive the remaining screws through all the slats into both the end and center supports. Ensure every screw is driven straight and fully seated for maximum strength and stability.
Phase 3: Adding Legs and Bench Supports
The legs provide the foundational structure and stability for your entire picnic table. Attaching them correctly is vital for a wobble-free dining experience.
- Attach Legs to End Supports: This is a critical step for the table’s overall strength. Carefully align the pre-cut legs with the end table supports. These connections are typically made using carriage bolts for maximum structural integrity. Using your drill, create through-holes for the 3/8 x 3-inch carriage bolts, ensuring they pass cleanly and precisely through both the leg and the end support. Insert the carriage bolts, then secure them with washers and nuts on the opposite side. Use your ratchet and socket wrench to tighten these bolts firmly, but avoid over-tightening which can crush the wood. Having a second person to help hold the legs in proper position during this step can be extremely helpful.
- Add Leg Cross Braces (if applicable): Depending on your specific design plan, there might be additional cross braces or stretchers connecting the legs to further enhance rigidity and prevent any side-to-side wobble. Install these components now using appropriate deck screws or bolts, ensuring they are level and create a robust, stable leg structure.
- Attach Bench Supports: Secure the bench supports (typically 2x4s or 2x6s) to the inside of the legs. These supports will act as the framework upon which your bench slats will rest. Use strong No. 8 deck screws for these connections, driving them through the legs into the supports. It’s crucial to ensure these supports are level with each other and parallel, as their height will directly determine the comfort and stability of your benches. Measure carefully to achieve an ideal seating height.
Phase 4: Assembling the Benches and Final Touches
With the main structure in place, it’s time to complete the seating and prepare your picnic table for years of enjoyment and outdoor entertaining.
- Attach Bench Slats: Lay your pre-cut bench slats (often 2x8s or 2x6s, matching the tabletop material) onto the bench supports. Just like the tabletop, space them evenly using spacers to allow for drainage and wood movement. Secure each bench slat firmly to every support using No. 8 deck screws (typically 2 1/2-inch or 3-inch, depending on the thickness of your bench slats and supports). Drive the screws straight and countersink them for a smooth finish.
- Inspect and Tighten All Connections: Before proceeding to finishing, take a thorough pass over the entire table. Inspect all screw and bolt connections. Tighten any fasteners that may have loosened during assembly or due to wood shifting. Ensure there are no sharp edges or protruding screw heads that could cause injury.
- Sanding for Smoothness: This step is crucial for both aesthetics and comfort. Begin with a coarse-grit sandpaper (e.g., 80-grit) to smooth out any rough spots, splinters, and uneven edges on all surfaces, especially the tabletop and benches. Follow this with a medium-grit (120-grit) and then a fine-grit (220-grit) sandpaper for a wonderfully smooth, splinter-free finish that feels pleasant to the touch.
- Clean the Surface: After sanding, thoroughly wipe down the entire table with a damp cloth to remove all sawdust and debris. Allow the wood to dry completely before applying any finish. A clean surface ensures proper adhesion of your chosen protective coating.
- Apply Finish (Paint, Stain, or Sealer): This is your opportunity to personalize your picnic table and, more importantly, protect it from the harsh outdoor elements.
- Wood Stain: A stain will enhance the natural beauty of the wood grain, adding color and depth. Apply with a paintbrush or rag, wiping off any excess according to the product instructions.
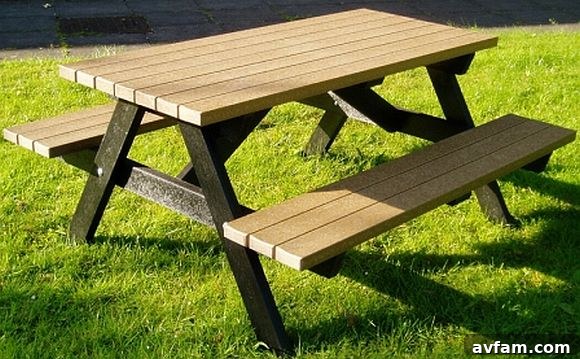
- Exterior Paint: For a vibrant, customizable look, choose an exterior-grade paint. You can paint the entire table one solid color, or consider painting the legs and supports a contrasting color, as often seen in popular designs (similar to the example pictured at the top of this post), to add visual interest. Always apply an exterior primer first for optimal adhesion and durability.
- Clear Sealer/Waterproofer: Regardless of whether you stain or paint, applying a high-quality outdoor wood sealer or waterproofer is absolutely essential. This creates a protective barrier against moisture, harmful UV rays, and mildew, significantly extending the life and beauty of your table. Apply according to the manufacturer’s directions, typically with a brush or roller.
- Allow to Cure: Let your chosen finish dry and cure completely according to the product’s instructions before using the table. This curing period can range from 24 hours to several days, ensuring maximum protection and durability.
Maintaining Your Outdoor Picnic Table for Lasting Beauty
A little routine maintenance will ensure your custom-built DIY picnic table remains a beautiful and functional centerpiece of your backyard for many years to come.
- Regular Cleaning: Periodically wipe down the table with a mild soap and water solution to remove accumulated dirt, pollen, and food spills. Rinse thoroughly.
- Re-seal/Re-stain: Depending on your local climate, the type of wood, and the finish used, plan to re-apply a protective sealer, stain, or paint every 1-3 years. Look for signs of wear, fading, or water no longer beading on the surface as indicators that it’s time for a refresh.
- Check Fasteners: Occasionally inspect all screws and bolts. Wood naturally expands and contracts with humidity, which can sometimes loosen fasteners. Tighten any that feel loose to maintain structural integrity.
- Winter Storage (Optional but Recommended): In regions with harsh winters, covering the table with a breathable furniture cover or storing it in a shed or garage can significantly extend its lifespan and preserve its finish.
Conclusion: Enjoy Your Custom-Built Outdoor Oasis
Building your own DIY picnic table is more than just a woodworking project; it’s an investment in your outdoor lifestyle. It combines the practical skills of craftsmanship with the joy of creating a functional, beautiful piece of furniture tailor-made for your home. Imagine countless summer meals, lively conversations, and cherished memories shared around a table you crafted with your own hands.
Not only will you enjoy the immense satisfaction of a job well done and potentially significant cost savings, but you’ll also have a unique, custom-made piece that perfectly complements your outdoor space and stands as a testament to your DIY spirit. So, gather your tools, follow these detailed steps, and get ready to transform your backyard into the ultimate destination for outdoor dining and entertaining with your brand-new, self-built DIY picnic table. For even more detailed cutting lists and printable plans, always refer to reputable sources like The Home Depot’s complete project tutorials.
Photo courtesy of HisAndHersDIY.com