
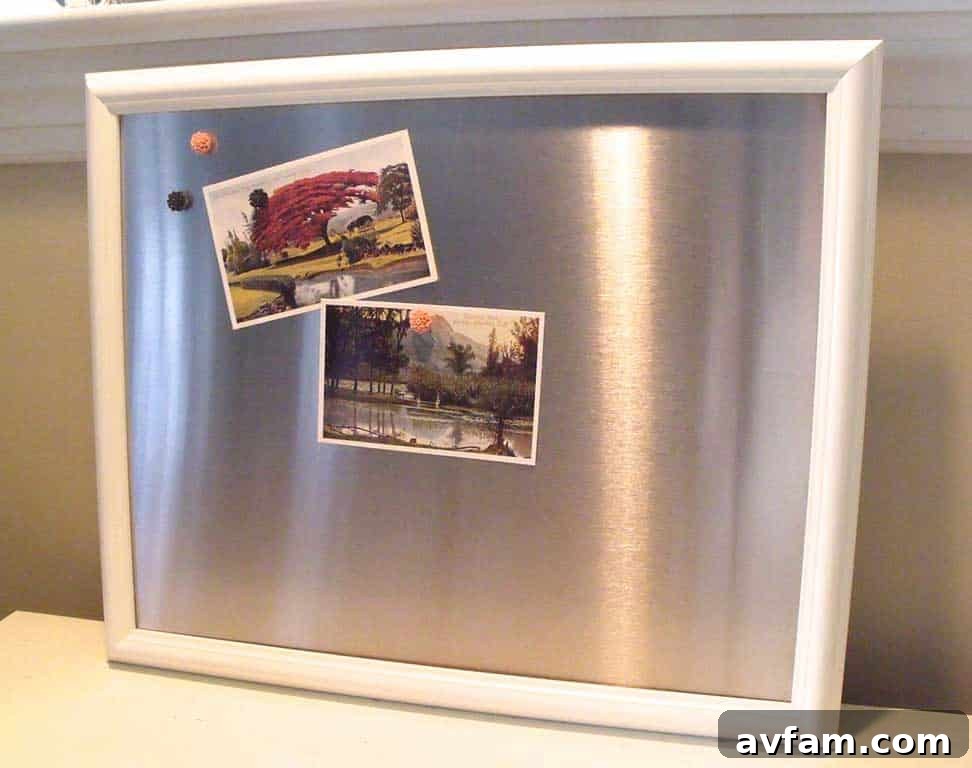
Transform Your Home: The Ultimate Guide to DIY Magnetic Bulletin Boards for Stainless Steel Refrigerators & Beyond
Are you one of the many homeowners who’ve fallen in love with the sleek aesthetic of a new stainless steel refrigerator, only to discover a frustrating truth: your beloved magnets no longer stick? Or perhaps your current fridge is simply overflowing with kid’s artwork, important notes, and cherished photos, leaving no room for new memories? You’re not alone! This comprehensive guide provides ingenious, DIY solutions to create a stylish and functional magnetic bulletin board that will bring all your cherished magnets and essential reminders back into action, whether your fridge is non-magnetic or simply at capacity.
The Unsung Heroes of Our Modern World: Magnets and Their Place in Our Homes
Magnets are far more than just decorative items on our refrigerators; they are the silent powerhouses behind much of our modern technology. From storing vast amounts of data on computer hard drives to facilitating voltage regulation in our smartphone chargers, and even enabling the futuristic levitation of high-speed trains, magnets are indispensable. Imagine a world without them: no credit cards, no efficient electrical motors, and chaotic weather patterns due to compromised atmospheric science tools. Magnets permeate almost every aspect of our daily lives, yet it’s often in their simplest form—holding a child’s masterpiece or a grocery list—that they offer the most direct and cherished functionality. While many of us could probably survive a week or two without our credit cards or most advanced gadgets, the thought of our refrigerator being bare, devoid of the charming ‘riffraff’ held by magnets, is almost unbearable for more than a day or two. These simple magnetic displays serve as dynamic canvases for our lives, holding everything from academic achievements to important doctor’s appointments.
The Modern Dilemma: Stainless Steel and the Vanishing Magnetic Surface
Thankfully, magnets themselves are in abundant supply. However, magnetic surfaces within our homes, particularly in the kitchen, have become valuable real estate. There was a time when the trusty refrigerator door was the undisputed champion for displaying everything from school schedules to family photos. But times have certainly changed. Modern kitchen designs often feature counter-depth or integrated refrigerators, maximizing space and creating a minimalist aesthetic. More significantly, stainless steel has become the top-selling finish for many new refrigerator models. While there’s an undeniable allure to a tall, sleek stainless steel fridge, its beauty comes with a practical drawback: magnets simply aren’t attracted to it. This leaves many homeowners feeling a sense of loss, as a beloved tradition of kitchen display is suddenly curtailed. Even if you’re not lucky enough (or unlucky, depending on your perspective!) to own one of these non-magnetic appliances, your existing refrigerator’s surface might already be at or nearing its capacity for displaying important items. This common predicament calls for a creative and durable solution that brings back the joy and utility of a magnetic display.
Your DIY Solution: Creating Custom Magnetic Surfaces Anywhere You Need Them
The good news is that adding a functional magnetic surface to your living space is not only simple and inexpensive but also incredibly versatile. You can place one just about anywhere convenience dictates – be it in your kitchen, home office, children’s play area, or even a craft room. With a few extra steps, you can even achieve a seamlessly integrated look by concealing your new magnetic surface flush with the wall, making it appear as if it was always meant to be there. This project empowers you to reclaim your display space and celebrate your family’s memories and important information without compromise, transforming an empty wall into a dynamic and organized hub.
Let’s gather our tools and materials and get to work on creating your custom magnetic bulletin board!
Essential Materials for Your Magnetic Bulletin Board Project
Before diving into the steps, ensure you have all the necessary items. High-quality materials will ensure a durable and aesthetically pleasing result. Consider where you’ll be installing your magnetic board – will it be a visible addition or a discreet, flush-mounted panel? Your choice will determine the full list of materials required, allowing you to tailor this project precisely to your needs and desired aesthetic.
For All Magnetic Bulletin Boards:
- Sheet Steel (1/16 inch or lighter): This is the core of your magnetic surface. Available in various dimensions, allowing for complete customization to fit any space. Look for galvanized or cold-rolled steel at hardware stores or specialty metal suppliers. Thinner gauges (like 22-gauge) are typically easier to cut and handle, yet still provide ample magnetic pull for most common magnets. Always handle edges with care or consider having them deburred at the supplier.
- Household Degreaser/Cleaner: Products such as Easy Off, Simple Green, or even rubbing alcohol are essential for preparing the metal surface. Proper degreasing removes manufacturing oils and grime, ensuring optimal adhesion for primer and paint, which is critical for a long-lasting finish.
- Foam Double-Stick Tape (High Strength): Crucial for securely mounting your visible magnetic board to a wall or cabinet. Choose a reputable brand known for strong, long-lasting adhesion, especially one designed for mounting purposes. Ensure it can support the weight of the steel sheet.
- Spray or Brush-On Primer: Non-negotiable for a professional and durable finish. Primer creates an ideal bonding surface for paint, actively prevents rust (especially important for steel), and ensures color longevity and uniformity of the topcoat. A metal-specific primer is often a good choice.
- Spray or Brush-On Paint: Your choice of color and finish (matte, satin, gloss) to match or accent your existing decor. High-quality interior paints are recommended for durability and easy cleaning. Consider low-VOC options for better indoor air quality.
- Strong Magnets: Don’t forget the main event! Ensure you have a good collection of magnets ready to adorn your new surface. Neodymium magnets offer superior holding power for heavier items or multiple layers of paper.
- Items to Display: Gather your favorite photos, children’s drawings, important notes, grocery lists – everything you plan to stick to your cool new magnetic surface!
Additional Materials for a Concealed, Flush-Mounted Magnetic Surface:
- Coarse Sanding Screen (or rough grit sandpaper, 80-100 grit): Used to gently erode a shallow depression in your drywall for the recessed installation. This creates the space for the steel to sit flush.
- Spackle (or lightweight joint compound): To smooth and finish the edges around your flush-mounted steel panel, blending it seamlessly with the wall for an invisible transition.
- Putty Knife (or drywall knife): For precise and smooth application of spackle, ensuring an even finish.
- Liquid Nails Adhesive (or similar heavy-duty construction adhesive): Provides a strong, permanent bond for securing the steel sheet within the wall recess. This adhesive is designed for demanding applications and will hold your panel firmly in place.
- Painter’s Tape: To temporarily hold the steel sheet in position while the construction adhesive cures, preventing any shifting and ensuring a perfectly level installation.
Step-by-Step Guide: Crafting Your Custom Magnetic Display Panel
Phase 1: Preparing Your Steel Panel for a Flawless Finish
Careful preparation is the cornerstone of any successful DIY project. This initial phase focuses on meticulously readying your sheet steel to ensure a durable, attractive, and long-lasting finish for your magnetic board. Don’t rush these crucial steps.
1. Thoroughly Degrease the Sheet Metal:
Your new piece of sheet metal will inevitably have a thin layer of grease, oil, or manufacturing residue on its surface. This residue must be meticulously removed to ensure proper adhesion of subsequent layers like primer and paint. Using your chosen household degreaser and a clean, lint-free cloth, scrub both sides of the sheet metal thoroughly. Pay particular attention to the edges and corners, where grime can accumulate. If your cleaner requires rinsing, do so thoroughly with water and then allow the metal to air dry completely, or wipe it dry with another clean, lint-free cloth. Any remaining residue will compromise the primer’s adhesion and potentially lead to peeling paint down the line, so take your time with this step.
2. Apply Primer to Both Sides:
This step is absolutely crucial and should not be skipped, even if you’re tempted to save time. Primer serves multiple vital functions: it promotes superior paint adhesion, actively prevents rust formation (especially important for steel), and creates a uniform surface for your topcoat, ensuring an even color application. Apply an even, light coat of your chosen spray or brush-on primer to both sides of the sheet metal. If using spray primer, hold the can about 8-10 inches away and use smooth, sweeping motions to avoid drips. Allow the first coat to dry completely according to the manufacturer’s instructions, then apply a second thin coat if recommended. Embracing the primer now will save you headaches later by ensuring your magnetic board stands the test of time and looks professional.
3. Paint the Sheet Metal (For Visible Installations Only):
Once the primer is thoroughly dry and cured (check the primer manufacturer’s recommendations), it’s time to apply your chosen topcoat. If your magnetic surface will be a visible addition to your home, paint it the color that best complements your existing decor. Again, whether using spray or brush-on paint, apply thin, even coats. Multiple thin coats are always superior to one thick coat, as thick applications are prone to drips, uneven drying, and reduced durability. Allow adequate drying time between coats and before proceeding to the next step. If you plan on concealing your magnetic surface flush with the wall, you will skip this painting step for now and follow the additional finishing steps later, as the wall itself will be painted over the installed metal.
Phase 2: Installing Your Magnetic Board – Visible or Concealed
This phase outlines the two primary installation methods: a straightforward visible mount for immediate use, or a more advanced, seamlessly integrated flush mount that blends perfectly with your wall.
Option A: Visible Magnetic Bulletin Board Installation (Quick & Easy)
This is the quicker and simpler method, perfect for adding a magnetic surface to the side of a cabinet, a pantry door, or any flat, smooth wall where you don’t mind the board being slightly raised from the surface.
4. Apply High-Strength Double-Stick Tape to the Back:
After your topcoat of paint has completely dried and fully cured (this can take 24-48 hours, so check the paint manufacturer’s recommendations), carefully apply an appropriate amount of high-strength foam double-stick tape to the back of the sheet metal. Apply continuous strips around the entire perimeter of the panel and add a few additional strips in the center to ensure maximum, even adhesion. Press the tape firmly onto the metal, making sure it bonds well. The properly primed surface will provide a much better bonding surface for the tape, reinforcing the importance of step 2. Ensure the tape is evenly distributed to prevent any wobbling or weak spots once mounted.
5. Securely Stick It to Your Chosen Surface:
Carefully position your prepared magnetic board on your desired wall or cabinet surface. If precision is critical, lightly mark your desired location with a pencil before removing the tape backing. Once aligned, peel off the protective backing from the tape and press the sheet metal firmly against the surface for at least 30 seconds to a minute, applying even pressure across the entire panel. For larger panels, it’s highly recommended to have a second person assist with placement to ensure it’s straight and properly adhered. Your new, functional, and stylish magnetic bulletin board is now ready for immediate use!
Option B: Concealed, Flush-Mounted Magnetic Surface (Seamless Integration)
This method offers a truly custom, built-in look, ideal for a minimalist aesthetic or when you want the magnetic surface to blend perfectly with your wall, appearing as if it’s an invisible part of the architecture.
4. Mark and Prepare the Wall Recess:
Hold your clean (but unpainted) sheet metal against the wall in your desired location. Using a pencil, carefully trace a precise outline of the sheet metal onto the wall. Take your time to ensure accuracy; a straight line here will make subsequent steps much easier. If you hadn’t taken my earlier advice to prime the steel, you might inadvertently transfer grease or dirt onto your wall during this tracing, creating extra work. Yet another compelling reason to embrace primer!
5. Create the Wall Depression:
Now, using your coarse sanding screen or rough-grit sandpaper, gently but thoroughly erode away a shallow depression within the traced outline on the wall. The goal is to create a recess that is slightly greater than the depth of your sheet metal (e.g., if your steel is 1/16 inch thick, aim for slightly more than 1/16 inch deep). This ensures the panel sits perfectly flush or even slightly below the wall surface. A palm sander can significantly speed up this process, but it’s not strictly necessary; patience and consistent pressure with a sanding screen will also work. Work patiently and check your depth regularly to avoid making the recess too deep or uneven. Dust thoroughly once complete.
6. Glue the Sheet Metal into the Depression:
Apply a continuous bead of liquid nails adhesive around the perimeter of the recess you created, and add a few “X” patterns or wavy lines in the center for good measure. Remember the adage: “a little goes a long way.” While there’s no use crying over spilled milk, construction adhesive is considerably harder to clean up if over-applied! Carefully place your sheet metal into the depression, pressing it firmly to ensure good contact with the adhesive across the entire back surface.
7. Secure with Painter’s Tape and Allow to Dry:
Immediately after placing the sheet metal, use painter’s tape to hold it securely in position. Apply several strips of tape across the panel and onto the surrounding wall, ensuring it’s held tightly and evenly. This prevents the panel from shifting or bowing while the liquid nails adhesive cures. Allow the adhesive to dry completely, strictly following the manufacturer’s recommended drying times (this can often be 24-48 hours, or even longer in humid conditions). Do not rush this step, as full curing is essential for a permanent bond.
8. Spackle and Sand for a Seamless Finish:
Once the glue has fully dried and cured, carefully remove the painter’s tape. Now, use your putty knife to apply a thin, even layer of spackle (or lightweight joint compound) around all the edges of the sheet metal, filling any tiny gaps between the metal and the wall. The aim is to create a perfectly smooth, even transition that visually disappears. Allow the spackle to dry completely according to its instructions. Once dry, use your sanding screen or fine-grit sandpaper (e.g., 120-220 grit) to sand the spackled areas smooth, ensuring a perfectly seamless blend with the surrounding wall. Wipe away any dust with a damp cloth or tack cloth.
9. Paint to Match the Wall:
Finally, paint the entire area, including the newly installed magnetic surface and the spackled edges, to perfectly match the rest of your wall. This is where the magic truly happens, as your magnetic panel will seemingly vanish into the wall, offering a discreet yet highly functional display area. Apply at least two coats for full, even coverage and a consistent finish, allowing proper drying time between coats. After the paint has dried, your new stealth magnetic surface is ready for discreet and highly functional use!
Beyond the Fridge: Customization and Design Ideas for Your New Magnetic Surface
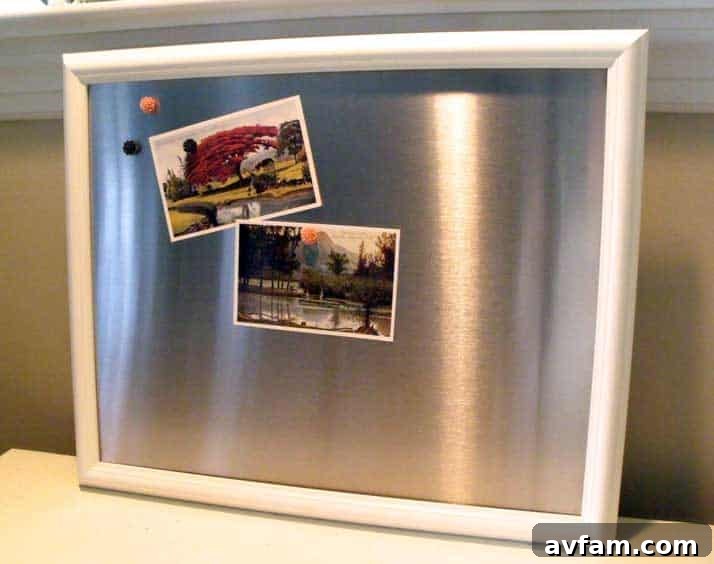
One of the greatest advantages of a DIY magnetic board is its endless potential for customization, allowing you to move beyond the limitations of a standard refrigerator. You’re not restricted to a conventional rectangle; consider different shapes—circles, hexagons, an arch, or even an irregular, abstract design—to complement your room’s aesthetic. You can frame your magnetic board with decorative molding to give it a more finished, artistic look, turning a purely functional item into a focal point of your room. For children’s rooms, paint the steel in a fun, vibrant color or use a magnetic primer and then chalkboard paint over the magnetic surface for a dual-purpose display. In a home office, a larger, flush-mounted panel can become an invaluable organizational tool, blending seamlessly into your workspace while keeping important documents, project notes, and reminders easily accessible. The possibilities are truly limitless, empowering you to create a magnetic display that is perfectly tailored to your specific needs, style, and interior design.
A Note on Magnetic Paint: Why a DIY Steel Solution is Superior
Some of you may have encountered or considered magnetic paint as an alternative to a traditional magnetic board. For those unfamiliar, magnetic paint is typically an oil-based paint infused with fine metallic elements, designed to be applied to any paintable surface, theoretically turning it into a magnetic board. While the concept sounds appealing for its apparent simplicity, I am generally not a big fan of magnetic paint, and here’s why the DIY steel solution often proves to be significantly superior:
- Weak Magnetic Force: The most significant drawback is its often disappointingly weak magnetic attraction. Despite applying multiple coats (sometimes 3-5 coats are recommended, which adds to labor and cost), magnetic paint rarely provides the strong, reliable hold that a solid piece of sheet steel offers. You often find magnets slipping, or heavier items (like multiple sheets of paper or small objects) failing to stay put, leading to frustration and fallen items.
- Potential for Trace Amounts of Lead: Some magnetic paints, due to their metallic composition (often iron particles), can contain trace amounts of lead. While manufacturers strive for safety, this is a legitimate concern for households with young children or those consciously seeking truly non-toxic and environmentally friendly solutions for their living spaces. Always check product specifications carefully.
- Cost vs. Effectiveness: Magnetic paint can be surprisingly expensive, especially when you factor in the number of coats required to achieve even a moderate magnetic pull. When you weigh the overall cost of materials and labor against its often-disappointing performance, the DIY sheet steel method proves to be a more cost-effective and undeniably superior solution in terms of magnetic strength and durability.
- Aesthetics and Texture: Magnetic paint often has a slightly gritty or textured finish, which can be difficult to paint over smoothly. Achieving a truly smooth, professional, and visually appealing finish can be challenging, even with subsequent topcoats. In contrast, a properly primed and painted steel sheet offers a flawlessly smooth and high-quality surface that integrates beautifully with any decor.
In essence, while magnetic paint offers an intriguing convenience, it rarely delivers the robust functionality, aesthetic quality, and strong magnetic force of a real magnetic surface created with sheet steel. For a truly effective, durable, and satisfying magnetic bulletin board experience, the DIY approach outlined in this guide is undoubtedly the superior choice.
Conclusion: Reclaim Your Display Space with a Custom Magnetic Board
Whether you’re battling the non-magnetic surface of a sleek new stainless steel refrigerator, seeking to declutter a crowded existing fridge, or simply looking to expand your display capabilities with an elegant and functional solution, creating a custom magnetic bulletin board is a rewarding and highly practical DIY project. With a modest investment of time and materials, you can craft a functional and aesthetically pleasing solution that perfectly integrates into your home environment. From vibrant, accessible displays for children’s artwork and school projects to discreet, seamless organizational panels for your home office, the possibilities for customization are truly endless. Say goodbye to the frustration of falling magnets and hello to beautifully organized memories, essential reminders, and creative expressions. Don’t let a non-magnetic fridge limit your family’s display traditions any longer. Start your project today and transform your living space into an organized, inspirational, and magnet-friendly haven!