
Your driveway is more than just a path; it’s a significant investment in your home’s curb appeal and functionality. Over time, exposure to the elements can take a toll, leading to cracks, discoloration, and general deterioration. This is where driveway sealing becomes an essential part of home maintenance. Proactively applying a high-quality sealant can dramatically extend the life of your concrete driveway, preserving its appearance and preventing costly repairs down the line. This comprehensive guide will walk you through everything you need to know about sealing your concrete driveway, ensuring a professional finish that stands the test of time.
The importance of sealing your driveway becomes particularly evident if you live in regions experiencing extreme temperature fluctuations, such as scorching summers followed by frigid winters. These drastic shifts cause concrete to expand and contract, leading to stress that can manifest as hairline cracks that gradually widen and deepen. Water penetration into these cracks, especially during freeze-thaw cycles, can accelerate damage, leading to spalling, potholes, and a generally compromised surface. A properly applied sealant acts as a protective barrier, safeguarding your driveway against these environmental stressors and keeping it in optimal condition for years to come.
Why Sealing Your Concrete Driveway is Non-Negotiable
Beyond the immediate aesthetic benefits, sealing your concrete driveway offers a multitude of advantages that contribute to its longevity and your property’s value:
- Protection Against Environmental Damage: Sealants create an impenetrable layer against water, ice, snow, and de-icing salts, which are major culprits behind concrete degradation. They also offer crucial protection against harmful UV rays, which can fade and weaken the surface over time.
- Prevention of Cracks and Spalling: By minimizing water absorption and protecting against temperature-induced expansion and contraction, sealants significantly reduce the likelihood of new cracks forming and prevent existing ones from worsening. They also protect against spalling, which is the flaking or pitting of the concrete surface.
- Resistance to Stains: Oil spills, grease, gasoline, and other automotive fluids can leave unsightly and hard-to-remove stains on unsealed concrete. A sealant forms a non-porous surface that repels these substances, making cleanup much easier and preserving your driveway’s pristine appearance.
- Enhanced Curb Appeal: A well-maintained, sealed driveway significantly boosts your home’s curb appeal. Sealants can restore a fresh, uniform look to your concrete, often deepening its color and providing an attractive finish, whether matte or glossy.
- Increased Durability and Lifespan: By shielding your driveway from daily wear and tear and environmental assaults, sealing extends its functional life, delaying the need for expensive repairs or complete replacement. This translates into significant long-term savings.
- Reduced Weed Growth: A sealed surface also makes it harder for weeds to sprout through cracks, keeping your driveway looking tidier with less effort.
Considering these benefits, it’s clear that sealing your concrete driveway is not just a cosmetic choice, but a wise investment in its structural integrity and the overall value of your property.
Choosing the Right Concrete Sealant
The market offers various types of concrete sealants, each with specific properties. Understanding these can help you select the best product for your driveway:
- Acrylic Sealants: These are among the most popular due to their versatility and ease of application. They form a protective film on the surface, offering good resistance to water, oil, and UV rays. Acrylics typically come in water-based or solvent-based formulations and can provide a range of finishes from matte to high gloss. They are relatively affordable and need reapplication every 1-3 years.
- Penetrating Sealants: Unlike film-forming sealants, penetrating sealants (often silane or siloxane-based) soak into the concrete pores, reacting chemically to create a water-repellent barrier below the surface. They don’t change the appearance of the concrete and offer excellent long-term protection, especially against freeze-thaw cycles and salt damage. They are more expensive but can last 5-10 years.
- Epoxy and Urethane Sealants: These are heavy-duty, highly durable options often used in commercial or industrial settings due to their superior abrasion and chemical resistance. They form a very hard, thick film and are excellent for high-traffic areas. However, they can be more challenging to apply and are generally more costly.
When selecting a sealant, consider your climate, the level of traffic on your driveway, your desired finish, and your budget. Always read product labels carefully for specific application instructions and expected durability.
The Best Time for Driveway Sealing: Weather is Key
Proper weather conditions are paramount for successful sealant application and curing. Applying sealant in unsuitable conditions can lead to poor adhesion, uneven drying, and reduced effectiveness. Before you even think about purchasing sealant, check the local weather forecast diligently. According to trusted sources like This Old House, here are the critical weather parameters:
- Temperature: The ideal temperature range for applying most concrete sealants is between 50°F (10°C) and 80°F (27°C). Critically, temperatures need to remain above 60°F (15°C) for at least 24 hours after application to allow proper curing. Applying sealant in temperatures too cold can prevent it from curing correctly, leading to a weak or hazy finish. Too hot, and the sealant might dry too quickly, making it difficult to spread evenly and potentially causing streaks or bubbling.
- No Rain: Ensure there is absolutely no rain in the forecast for at least 36 hours after application. Water on freshly applied sealant can wash it away, create milky spots, or compromise its protective qualities.
- Humidity: While not as critical as temperature or rain, very high humidity can prolong drying and curing times.
- Avoid Direct Sunlight: While you need warmth, direct, intense sunlight can cause the sealant to flash-dry too quickly, leading to uneven application and potential peeling. Ideally, apply sealant in the morning or late afternoon, or on an overcast day.
Spring or early fall typically offer the most suitable weather conditions for driveway sealing, avoiding the extreme heat of summer and the freezing temperatures of winter.
Preparation is Key: A Step-by-Step Guide for a Flawless Finish
The success and longevity of your driveway sealant largely depend on thorough preparation. Skimping on these steps will result in a less effective seal and a compromised finish. Here’s a detailed breakdown:
1. Clear the Area and Block Traffic
Begin by removing all vehicles, lawn furniture, toys, and any other items from your driveway. Sweep away loose debris like leaves, twigs, and dirt. Crucially, set up a barricade or warning signs at the end of your driveway to block all foot and vehicle traffic for the duration of the project, including the drying and curing period. This prevents accidental disturbances and ensures the sealant cures undisturbed.
2. Thorough Cleaning
This is arguably the most important step. Your driveway must be impeccably clean for the sealant to adhere properly.
- Weed Removal: Pull out any weeds or grass growing in cracks or along the edges of your driveway. Consider using a weed killer a few days prior if necessary.
- Power Washing: According to This Old House, power washing is highly recommended to remove ingrained dirt, grime, dust, and mildew. Use a pressure washer with appropriate PSI for concrete (typically 2000-3000 PSI) and work in sections, overlapping slightly. Be careful not to hold the nozzle too close, which can damage the concrete surface.
- Stain Removal: For stubborn oil, grease, rust, or paint stains, use a specialized concrete cleaner or degreaser. Apply the cleaner, let it sit for the recommended time, scrub vigorously with a stiff brush, and then rinse thoroughly. Multiple applications might be necessary for deeply set stains.
- Rinsing: After cleaning, rinse the entire driveway thoroughly with a garden hose or pressure washer to remove all cleaning solution residue. Any leftover soap or cleaner can prevent proper sealant adhesion.
- Drying: Allow your driveway to dry completely. This might take 24-48 hours, depending on humidity and temperature. The surface must be bone dry before you apply any sealant.
3. Repairing Cracks and Spalls
Once the driveway is clean and dry, inspect it for any existing cracks or spalling (surface flaking). Repairing these before sealing is vital:
- Clean Cracks: Use a wire brush or screwdriver to clean out any dirt, debris, or old fillers from cracks. Blow out dust with compressed air or a leaf blower.
- Apply Filler: Choose a high-quality, flexible concrete crack filler or caulk designed for outdoor use. Apply the filler according to the manufacturer’s instructions, ensuring it penetrates deeply into the crack. Use a putty knife or trowel to smooth the surface, making it flush with the driveway.
- Address Spalling: For spalled areas, you might need a concrete resurfacer or patch compound. Follow the product instructions carefully for mixing and application.
- Curing Time: Allow all repairs to cure completely before applying sealant. This curing time can vary from a few hours to several days, so always refer to the product label. Once the sealant is applied, it will add another protective layer, helping to keep the patch securely in place.
Applying the Concrete Sealant Like a Pro
With your driveway meticulously prepared, you’re ready for the application phase. Precision and patience are key here.
1. Safety First
Always wear appropriate personal protective equipment (PPE), including safety glasses, chemical-resistant gloves, and long sleeves/pants. If working with solvent-based sealants or in a poorly ventilated area, consider wearing a respirator.
2. Mixing the Sealant
Read the sealant manufacturer’s instructions carefully. Some sealants require thorough mixing before application. If it’s a two-part epoxy or urethane, ensure you mix the components precisely as directed.
3. Application Technique
You’ll likely need approximately two gallons of sealant for an average two-car driveway, but always calculate based on the product’s coverage rate and your driveway’s square footage. It’s often better to have a little extra than to run out midway.
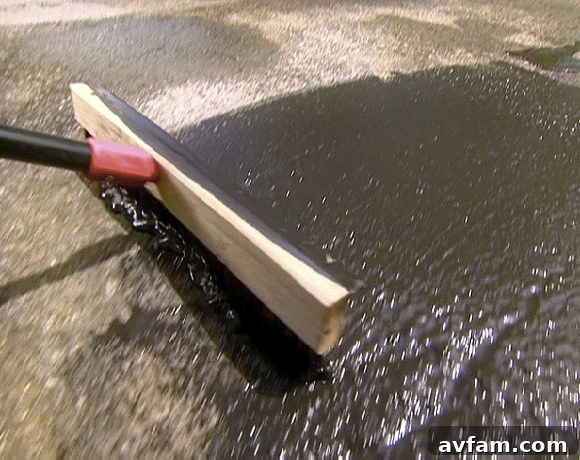
- Pour and Spread: Pour a generous bead of sealant directly onto a small section of the driveway. Using a large broom, a squeegee, or a specialized sealant roller (with an appropriate nap for the sealant type), immediately spread the sealant into a thin, even layer.
- Work in Small Areas: As This Old House advises, work in manageable sections, typically 4×4 feet or smaller. This prevents the sealant from drying before you can spread it evenly, which can lead to streaks and lap marks.
- Even Coverage: Maintain a consistent, thin application. Avoid pooling or excessively thick areas, as these can result in an uneven finish, cracking, or reduced durability. Overlap your strokes slightly to ensure complete coverage.
- Edges and Corners: Use a brush for precise application along the edges, against walls, and in tight corners where a roller or squeegee might be cumbersome.
- Multiple Coats: Many concrete sealants benefit from two thin coats rather than one thick coat. If applying a second coat, allow the first coat to dry sufficiently (check manufacturer’s instructions) before applying the next. This typically enhances durability and appearance.
Drying and Curing: The Final Stages
The job isn’t done once the sealant is applied. Proper drying and curing are critical for the sealant to achieve its full protective potential.
- Foot Traffic: Most sealants will be dry to the touch within a few hours (typically 2-4 hours), allowing for light foot traffic. However, avoid walking on it unnecessarily.
- Vehicle Traffic: It’s crucial to allow the sealant to dry overnight – ideally for at least 24 to 48 hours – before driving on it. Driving on a partially cured sealant can leave tire marks, indentations, or even peel off the fresh coat. For some heavy-duty sealants, full vehicle traffic might require several days.
- Full Curing: While dry to the touch, many sealants take several days, or even weeks, to fully cure and reach their maximum hardness and protective qualities. Avoid heavy use, chemical spills, or scrubbing during this period.
- Maintaining Barricades: Keep your barricades or warning signs in place until the driveway is fully ready for regular use.
Maintaining Your Sealed Driveway for Lasting Beauty
Sealing your driveway is an excellent start, but ongoing maintenance will ensure its beauty and protection endure:
- Regular Cleaning: Sweep or blow away loose debris regularly. Periodically wash your driveway with a mild soap and water solution, then rinse thoroughly.
- Prompt Spill Cleanup: Address oil, grease, or other spills immediately to prevent them from sitting on the surface and potentially penetrating over time.
- Avoid Harsh Chemicals: Do not use harsh de-icers (like rock salt) or strong chemical cleaners on your sealed driveway, as these can degrade the sealant.
- Re-sealing Frequency: Most concrete sealants require reapplication every 2-5 years, depending on the sealant type, traffic, and environmental exposure. Monitor your driveway for signs of wear, fading, or reduced water repellency to determine the best time for re-sealing.
Common Mistakes to Avoid During Driveway Sealing
To ensure your sealing project is a success, be mindful of these common pitfalls:
- Applying on a Dirty Surface: The number one mistake. Sealant will not adhere properly to dirt, oil, or debris, leading to peeling and a short lifespan.
- Ignoring Weather Conditions: Applying sealant in rain, extreme heat, or cold will compromise its effectiveness and finish.
- Applying Too Thick: Thick layers can cause bubbling, uneven drying, and a weaker bond. Thin, even coats are always preferred.
- Not Allowing Enough Drying Time: Driving or walking on the sealant too soon will leave marks and damage the fresh coat.
- Using the Wrong Type of Sealant: Ensure the sealant you choose is appropriate for concrete and matches your desired level of protection and finish.
Sealing your concrete driveway is a rewarding DIY project that significantly enhances your home’s appearance and protects a valuable asset. By following these detailed steps, from meticulous preparation to careful application and proper curing, you can achieve a professional-quality finish that will keep your driveway looking great and performing flawlessly for years to come.
Have you sealed your driveway recently? What tips or challenges did you encounter during the process?
Photo courtesy of This Old House