
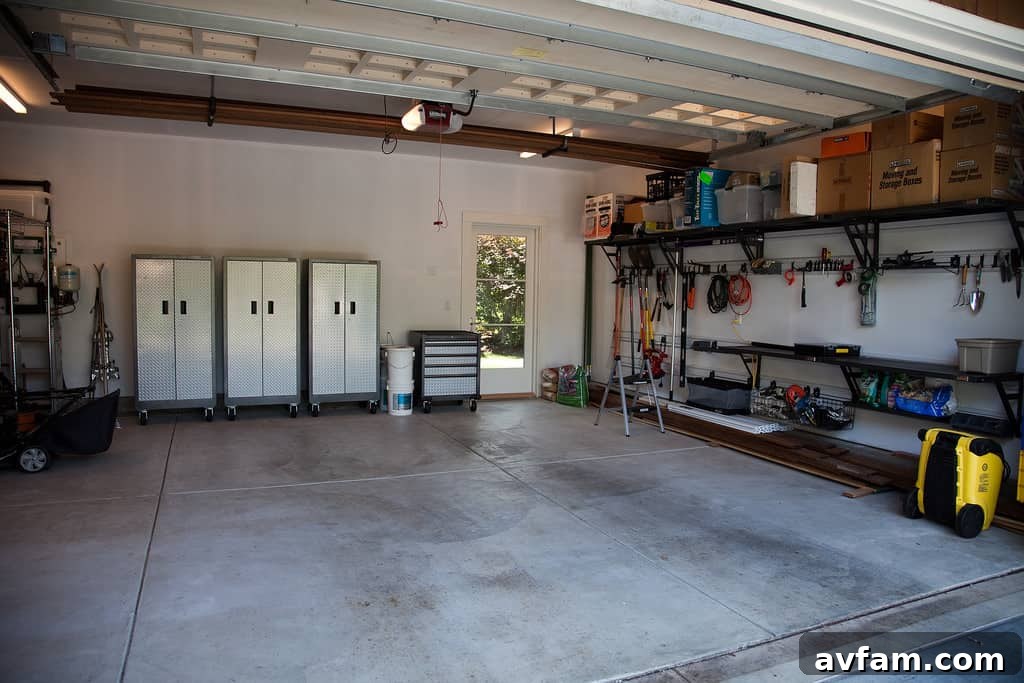
Reclaim Your Garage: Smart Organization on a Budget
For many homeowners, the garage quickly transforms into an overflowing abyss – a catch-all space where tools, holiday decorations, sports equipment, and forgotten projects pile up. It’s easy to push items out of sight, believing they’re out of mind. However, a cluttered garage can be more than just an eyesore; it can be a source of frustration, inefficiency, and even a safety hazard. Retrieving a specific item becomes a treasure hunt, valuable floor space is consumed, and the potential of your garage as a functional workshop or even a secure parking spot is lost.
While the market offers an array of sophisticated and often expensive garage storage systems and heavy-duty tool chests, achieving a beautifully organized and highly functional garage doesn’t have to break the bank. With a strategic approach and a willingness to embrace DIY solutions, you can transform your cluttered space into an organized haven. This comprehensive guide will walk you through budget-friendly strategies to organize your garage effectively, turning it into an efficient workspace or a tidy storage area just in time for any season.
Start with a Strategic Purge: The Decluttering Phase
Before you can organize, you must declutter. This crucial first step is often overlooked but is the foundation of any successful organization project. Attempting to organize without first reducing the volume of your belongings is like trying to tidy a room by simply pushing items from one side to the other. Take a weekend, or even a few dedicated hours, to go through every item in your garage with a critical eye.
The “Four-Box” Method for Efficient Decluttering
To make the process manageable, use the “four-box” method:
- Keep: Items you frequently use, are in good condition, and serve a clear purpose.
- Donate/Sell: Items that are still useful but no longer needed by you. Consider local charities, consignment shops, or online marketplaces.
- Trash/Recycle: Broken items, hazardous materials (dispose of these properly according to local regulations), or anything truly unusable.
- Relocate: Items that belong elsewhere in your home but have somehow migrated to the garage.
Be ruthless during this phase. If you haven’t used an item in over a year, or if it’s broken beyond repair, seriously consider letting it go. The less you have, the less you need to organize, saving you time, money, and future headaches.
Maximize Vertical Space with DIY Shelving Systems
One of the golden rules of garage organization is to get everything off the floor. This not only frees up valuable real estate for parking vehicles or working but also enhances safety and makes cleaning much easier. Building your own shelves is a highly effective and budget-friendly way to achieve this.
Why DIY Shelves are a Game-Changer
- Cost-Effective: Materials like 2x4s and plywood are relatively inexpensive compared to pre-fabricated shelving units.
- Customization: You can build shelves to fit the exact dimensions of your space, maximizing every inch. This is especially useful for oddly shaped garages or specific areas.
- Strength and Durability: DIY shelves, when constructed properly, can often be sturdier than many store-bought options, capable of holding heavy loads like paint cans, large toolboxes, and storage bins.
Getting Started with Your DIY Shelves
Numerous excellent DIY projects are available online with detailed plans for building sturdy garage shelves. Typically, all you need are a few common materials and basic tools:
- Materials: 2×4 lumber for the frame and legs, and plywood or OSB (Oriented Strand Board) for the shelves.
- Tools: A saw (circular saw or miter saw), drill, tape measure, level, and screws.
Design your shelves to perfectly accommodate the size of the storage bins you plan to use. This foresight prevents wasted space and creates a streamlined, uniform look. Ensure your shelves are securely anchored to wall studs for maximum stability and safety, especially when storing heavy items.
Harness the Power of the French Cleat System
For tools, smaller items, and frequently used gear, a French cleat system offers unparalleled versatility and efficiency. This ingenious DIY modular storage solution is a favorite among woodworkers and DIY enthusiasts for good reason.
Understanding the French Cleat System
A French cleat system consists of two interlocking pieces of wood, each cut at a 45-degree angle. One piece is securely attached to the wall, and the other is attached to a tool holder, shelf, or cabinet. The angled cuts allow the holder to hang securely on the wall-mounted cleat, creating a robust and easily movable storage system.
Benefits of a French Cleat Wall
- Modularity and Flexibility: You can easily add, remove, or rearrange tool holders and storage units without needing to drill new holes in your wall. This makes adapting your garage layout simple as your needs change.
- Strength: When properly constructed, French cleats can hold a surprising amount of weight, making them ideal for heavier tools.
- Space Efficiency: By getting tools off workbench surfaces and out of drawers, you free up valuable working space.
- Visibility: Tools are displayed clearly, making it easy to find what you need at a glance.
Building a French cleat system requires some precise cuts, but the investment in time and effort pays off with a highly customizable and functional storage solution. You can create custom holders for wrenches, screwdrivers, power tools, clamps, and even small parts bins.
Illuminate Your Workspace: Essential Garage Lighting
There’s nothing more frustrating than working in a dimly lit garage, where shadows obscure tools and make tasks challenging and unsafe. Stop living in a “black hole” and invest in a proper lighting system. Good lighting is not just about visibility; it’s about safety, productivity, and making your garage a more inviting space.
The Impact of Proper Lighting
- Enhanced Visibility: Clearly see everything you have and need to access, reducing eye strain and preventing errors.
- Improved Safety: Minimize tripping hazards and reduce the risk of accidents when operating machinery or handling sharp tools.
- Increased Productivity: A well-lit environment makes it easier and more enjoyable to work on projects, whether it’s a DIY repair or a craft.
- Better Aesthetics: A bright garage feels cleaner and more organized.
Budget-Friendly Lighting Solutions
You can find excellent and affordable lighting options at big-box retailers like Costco, Home Depot, or Lowe’s. LED shop lights are particularly popular due to their energy efficiency, long lifespan, and bright, clear illumination. Many models can be linked together, allowing you to create a continuous lighting system across your garage ceiling with minimal wiring.
Consider installing multiple fixtures evenly spaced throughout the garage, rather than just one central light, to eliminate dark spots and provide uniform illumination. For specific workstations, add task lighting like clamp lamps or under-cabinet lights to focus brightness where it’s most needed.
Strategic Storage with Bins and Containers
Once you have your shelving and wall systems in place, the next step is to contain your items effectively. Plastic storage bins are a workhorse in garage organization, offering protection and tidiness. However, their effectiveness hinges on strategic use.
Choosing and Using Storage Bins Wisely
- Consistency is Key: Try to acquire bins of the same size and type. This standardization allows them to stack neatly, creates a visually cohesive look, and, as mentioned, enables you to build shelves that fit them exactly, leaving no wasted space.
- Durability: Opt for sturdy plastic bins that can withstand temperature fluctuations and potential impacts. If a bin cracks, replace it promptly to prevent moisture, dust, or pests from getting in and damaging its contents.
- Clear vs. Opaque: Clear bins are great for items you need to identify quickly. Opaque bins are better for hiding clutter or storing items that are sensitive to light.
The Non-Negotiable Rule: Label Everything Religiously
This cannot be stressed enough: label every single bin. Without labels, even the most organized system quickly becomes a mess. You’ll spend precious time opening bin after bin searching for an item, defeating the purpose of organization.
- Labeling Methods: Use a permanent marker directly on the bin, adhesive labels, a label maker, or even chalk paint on darker bins.
- Be Specific: Instead of “Misc. Tools,” try “Hand Saws & Wood Chisels.” Instead of “Holiday Stuff,” try “Christmas Ornaments.”
- Update Labels: If you change the contents of a bin, update the label immediately.
Properly labeled bins allow you to locate items quickly, making your garage incredibly efficient and saving countless hours of searching.
Reclaim Your Floor Space: Go Vertical and Off the Ground
The garage floor should ideally be clear, allowing for easy movement, parking, and cleaning. Clutter on the floor is not just inconvenient; it’s a significant tripping hazard that can lead to falls and injuries. Furthermore, items stored directly on the concrete floor are more susceptible to moisture damage, pests, and chemical spills.
Strategies to Clear the Floor
- Hanging Racks for Long-Handled Tools: Instead of leaning rakes, shovels, brooms, and mops against the wall where they can easily tip over, install sturdy hanging racks. These keep tools neatly organized, visible, and safely off the floor.
- Sports Equipment Organizers: Bikes, helmets, balls, and rackets often take up a surprising amount of floor space. Invest in wall-mounted bike racks, ball claws, or mesh bags that hang from the ceiling or wall to store these items.
- Overhead Storage: For seasonal items, holiday decorations, or things you don’t access frequently, consider overhead garage storage racks. These heavy-duty platforms attach to the ceiling joists, utilizing otherwise wasted space.
- Magnetic Strips and Pegboards: For smaller metal tools like screwdrivers, drill bits, and small wrenches, magnetic strips provide quick access and visibility. Pegboards, when combined with various hooks and accessories, are incredibly versatile for organizing a wide array of small tools and craft supplies.
- Wall Hooks and J-Hooks: Use heavy-duty wall hooks for items like ladders, folding chairs, hoses, and extension cords.
Beyond the Basics: Enhancing Your Organized Garage
Once the core organization is complete, consider these additional tips to maintain and enhance your new, functional garage space:
Zoning Your Garage
Think about how you use your garage and create distinct zones. For example:
- Workshop Zone: Dedicated space for tools, workbench, and project materials.
- Sports/Recreation Zone: Area for bikes, camping gear, and sports equipment.
- General Storage Zone: Shelving for bins with household overflow, seasonal items.
- Automotive Zone: Supplies for car care, tire storage.
- Gardening Zone: Potting bench, soil, garden tools.
Clear zoning helps maintain order and makes it easier to find what you need for specific tasks.
Regular Maintenance and Decluttering
Organization is not a one-time event. Schedule a brief 15-30 minute “reset” once a month, or a more thorough decluttering session once or twice a year, to put things back in their place and prevent new clutter from accumulating. A little effort regularly goes a long way in preventing a return to chaos.
Safety First
As part of your organization efforts, ensure safety items are easily accessible. This includes a clearly marked first-aid kit, a functional fire extinguisher, and proper storage for hazardous chemicals. Flammable liquids and chemicals should be stored in locked cabinets or on high shelves, out of reach of children and pets, and away from heat sources.
Conclusion: Embrace a More Functional and Enjoyable Garage
Transforming your garage from a chaotic storage unit into an organized, functional, and efficient space is entirely achievable, even on a tight budget. By systematically decluttering, leveraging vertical space with DIY shelving and French cleat systems, enhancing visibility with proper lighting, and utilizing labeled bins, you can create a garage that serves your needs rather than hindering them.
The journey to a perfectly organized garage might seem daunting, but by tackling it step-by-step with these practical, budget-friendly strategies, you’ll reclaim valuable space, improve safety, and gain peace of mind. Start small, celebrate each improvement, and enjoy the profound benefits of a garage that finally works for you.