

Transforming your outdoor living spaces into functional and enjoyable extensions of your home often requires reliable access to electricity. Outdoor electrical outlets are the cornerstone of this transformation, providing a safe and convenient power source for everything from garden tools and festive lighting to entertainment systems and essential seasonal equipment. However, the installation of these critical components demands meticulous planning, a thorough understanding of electrical safety standards, and a keen awareness of environmental challenges. By prioritizing proper installation techniques and selecting the right components, homeowners can ensure long-term reliability and safety, even in the face of diverse weather conditions, minimizing risks and maximizing the value of their outdoor electrical projects.
Beyond simply adding an exterior socket, a successful outdoor electrical installation involves a series of crucial steps. This includes the strategic selection of robust, weather-resistant materials, ensuring meticulous grounding, and strict adherence to local and national electrical codes specifically designed for outdoor environments. Such an undertaking is a significant home improvement that many homeowners wisely entrust to a qualified residential electrician. These professionals possess the expertise to guarantee that all upgrades are compliant with current safety standards and integrate seamlessly, particularly when dealing with older wiring systems that may require special attention and modernizing.
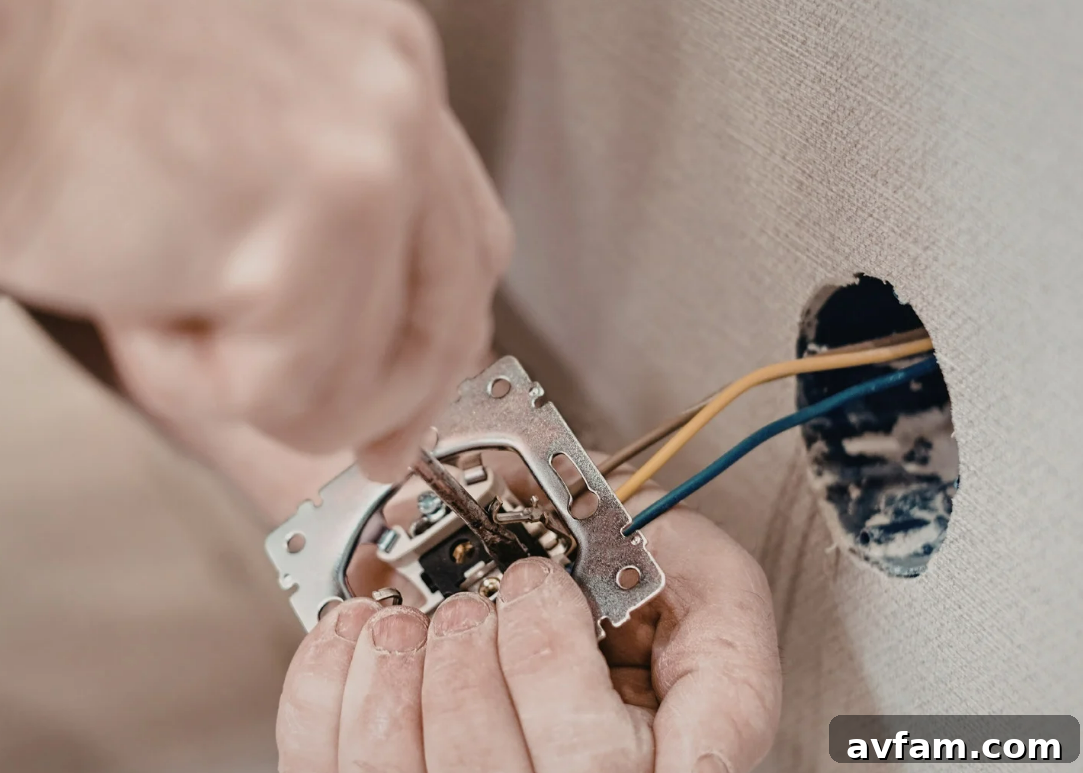
Strategic Planning: Designing Your Backyard Power Layout
The foundation of any successful outdoor electrical project lies in comprehensive planning of your power layout. This initial, critical activity determines the functionality and safety of your outdoor spaces. Begin by envisioning how you intend to use your backyard, considering specific zones for various activities. Will you have an outdoor kitchen for cooking and entertaining? Are dedicated circuits needed for landscape lighting to enhance ambiance and security? Do you require power for garden tools, a hot tub, or perhaps a projector for movie nights? Mapping out these uses will guide the placement of outlets, ensuring they are not only easily accessible but also strategically positioned for optimal usability and minimal exposure to potential hazards like water or physical damage.
When designing your layout, also take into account the proximity to your main electrical panel and any existing circuits that might supply the new outdoor installations. Strategic placement can significantly reduce the amount of wiring needed, thereby minimizing material costs, labor, and the disruption to finished surfaces within your home. Consider the current capacity of your electrical system; sometimes, adding multiple outdoor outlets may necessitate an upgrade to your main panel or the installation of dedicated circuits to prevent overloading and ensure consistent power delivery. Thinking about future needs, such as adding a new shed or an outdoor sound system, can help you create a versatile and expandable power infrastructure.
Assessing Your Current Electrical Capacity
Before committing to a layout, it’s vital to assess your home’s existing electrical capacity. Overloading circuits is a significant safety hazard. Review your electrical panel to identify available circuit breaker slots and the amperage of existing circuits. If you plan to power high-draw appliances like electric grills, patio heaters, or hot tubs, these will likely require dedicated circuits to prevent tripping breakers and ensure safe operation. A load calculation performed by a qualified electrician can determine if your current service can handle the additional demand, or if an upgrade to your main electrical panel is necessary. This proactive step can save considerable time and expense down the line, ensuring your outdoor power system is robust and reliable.
Selecting Outlet Locations with Safety as a Priority
The careful selection of outdoor outlet locations is paramount for both safety and longevity. Certain areas should be strictly avoided, such as those prone to flooding, locations directly in the path of sprinkler systems, or spots where snow accumulation is heavy. Instead, prioritize mounting outlets on exterior walls, ideally under protective overhangs like eaves or within covered patios. These locations offer natural shelter from direct rain, snow, and intense sunlight, which significantly extends the lifespan of the outlets and their enclosures.
Furthermore, ensure that the chosen locations allow for clear, unobstructed access. This prevents the need for excessively long extension cords, which can create tripping hazards and increase the risk of electrical shock or fire if overloaded or damaged. Outlets should be placed at appropriate heights, typically consistent with local building codes, to prevent strain on cords and to keep them away from ground-level moisture. When in doubt about optimal placement, load-carrying capacity, or compliance with regional electrical codes, homeowners should always seek the professional advice of an electrician Winnipeg or a local electrical contractor. Their expertise ensures that installations meet all regulatory requirements and provide safe, reliable power for years to come.
Considering Accessibility and Aesthetics
While safety is the top concern, accessibility and aesthetics also play a role in optimal outlet placement. Think about where you will most frequently plug in devices and aim for those areas. For garden tools, outlets closer to planting beds make sense. For entertaining, locations near seating areas or outdoor kitchens are ideal. At the same time, consider how the outlets will look. Can they be subtly integrated into landscaping or mounted in less conspicuous areas? While functionality is key, a clean and unobtrusive installation can enhance the overall appeal of your outdoor spaces. Modern outdoor outlet covers are available in various styles and colors to blend with your home’s exterior.
Understanding Crucial Outdoor Electrical Requirements
Outdoor electrical systems are subjected to harsher conditions than indoor wiring, necessitating exceptionally high safety standards to counteract moisture intrusion, corrosion, and extreme temperature variations. A fundamental requirement for all exterior outlets is protection by Ground Fault Circuit Interrupters (GFCIs). These critical safety devices are designed to quickly shut off power when they detect an imbalance in the electrical current, which often occurs when electricity finds an unintended path—such as through water or a person. This rapid response is essential for minimizing the risk of severe electrical shock, a common hazard in wet or damp outdoor environments.
Beyond GFCI protection, the use of weatherproof enclosures is mandatory. These enclosures, often rated for “wet locations” or “damp locations,” are specifically designed to seal off the internal electrical components from the elements. Additionally, all wiring used outdoors must be properly rated to withstand exposure to UV radiation, moisture, and temperature fluctuations over time. While specific local electrical codes can vary, most mandate GFCI protection for all exterior outlets and specify the types of wiring and conduit approved for outdoor use. Adhering to these codes is not just a legal obligation but a crucial step in ensuring the long-term safety and reliability of your outdoor electrical system. Consulting with local authorities or a licensed electrician will ensure your project meets all regional requirements.
Types of Weather Protection and Ratings
When selecting outdoor electrical components, understanding their weather ratings is key. “Weather-resistant” (WR) refers to outlets themselves that are constructed with materials designed to resist moisture and corrosion internally. “Weatherproof” generally refers to the enclosure or cover that protects the outlet. For outdoor installations, especially in exposed areas, “in-use” or “bubble” covers are often required. These covers fully enclose the outlet even when something is plugged into it, providing continuous protection against rain and snow. Look for certifications like UL (Underwriters Laboratories) that ensure products have been tested to meet rigorous safety standards for outdoor use. The National Electrical Code (NEC) provides specific guidelines on where and which type of weather protection is required based on the location’s exposure to the elements.
Power Shutoff and Essential Protection Measures
Before any electrical installation work can safely commence, the absolute first step is to completely disconnect the power to the pertinent circuit at the main breaker panel. This non-negotiable safety measure, ensuring the circuit is de-energized, must never be overlooked during any type of electrical work, indoors or out. Failing to do so can result in serious injury or even fatalities.
Beyond simply flipping a breaker, robust safety protocols are essential. This includes the consistent use of insulated tools, which provide an additional layer of protection against accidental contact with live wires. Wearing appropriate personal protective equipment (PPE), such as safety glasses and sturdy work gloves, is also critical. Furthermore, the workspace itself should be kept dry and clear of debris to prevent slips and falls, and to avoid compromising electrical components. Professional electricians often employ strict lockout/tagout procedures, physically locking the breaker in the “off” position and attaching a tag to prevent accidental re-energization by others while work is in progress. For DIYers, clearly labeling the breaker and informing other household members is a similar, important step. Thorough preparation and adherence to these safety measures are not merely suggestions; they are fundamental to executing any electrical project safely and successfully.
Implementing Lockout/Tagout for DIY Projects
Even for homeowners tackling their own outdoor electrical projects, adopting a simplified lockout/tagout procedure is highly advisable. After locating and switching off the correct circuit breaker, place a piece of electrical tape over the breaker switch to physically hold it in the “off” position. Then, attach a clear warning tag to the breaker panel door, indicating that electrical work is in progress and the circuit should not be re-energized. Inform everyone in the household about the ongoing work and the importance of not touching the breaker. This simple yet effective measure significantly reduces the risk of someone inadvertently turning the power back on while you are still working on the wiring, providing a crucial layer of personal safety.
Choosing Weather-Resistant Components for Durability
For outdoor electrical systems, the selection of components must prioritize resilience against environmental exposure. This means choosing more than just standard indoor parts. Essential components include durable, weather-resistant outlet boxes, often made from robust PVC or non-corrosive metal alloys, designed to withstand impacts and temperature extremes. Screws and fasteners should be made from corrosion-resistant materials like stainless steel or coated with protective finishes to prevent rust and maintain structural integrity over time. Crucially, the covers for the outlets must be robust and designed to seal tightly when not in use, actively preventing the ingress of moisture, dust, and insects into the system.
Investing in high-quality, purpose-built outdoor materials significantly enhances the long-term durability of your installation and minimizes future maintenance requirements. Beyond simple flip covers, consider options like “in-use” or “bubble” weatherproof covers. These innovative designs fully enclose the outlet even when a cord is plugged in, offering continuous protection during rainstorms, snow events, or prolonged periods of dampness. This added layer of protection is vital for maintaining electrical safety and ensuring uninterrupted power supply, safeguarding your outdoor electrical system against the unpredictable challenges of nature and extending its functional lifespan.
Understanding Component Ratings: NEMA and IP Codes
When selecting weather-resistant components, familiarizing yourself with NEMA (National Electrical Manufacturers Association) and IP (Ingress Protection) codes can be extremely helpful. NEMA ratings specify the types of environments an enclosure can withstand (e.g., NEMA 3R for outdoor use, resistant to rain and ice formation). IP codes provide a more detailed rating for protection against solid objects (dust, dirt) and liquids (water). For outdoor outlets, you’ll typically want an IP44 rating or higher, which indicates protection against splashing water from any direction. For very exposed or wet locations, an IP66 or IP67 rating might be necessary, offering protection against powerful water jets or even temporary immersion. Always check these ratings to ensure the components you choose are suitable for the specific outdoor conditions they will face.
Preparing the Right Tools for Installation Success
The efficiency and safety of any outdoor electrical installation are greatly enhanced by having the correct tools readily available before commencing work. A standard toolkit for such a project should include a high-quality set of wire strippers, various sizes of screwdrivers (Phillips and flathead), a reliable voltage tester to confirm circuits are de-energized, and a sturdy drill with appropriate bits for mounting boxes and running conduit. Electrical tape is indispensable for insulating connections and securing wiring. Each of these tools plays a specific role in ensuring proper connections, secure mounting, and overall safety throughout the installation process.
Beyond hand tools, it’s equally important to confirm that all electrical materials, such as wires, outlets, and circuit breakers, are correctly rated for the intended electrical load. Using undersized components can lead to overheating, circuit overloads, and system breakdowns, which not only pose significant safety risks but can also be costly and complex to rectify in the future. Always double-check product specifications against your project’s power requirements. A multimeter, while not strictly for installation, can be an invaluable tool for troubleshooting and verifying current, voltage, and continuity once the system is live. Investing in quality tools and correctly rated materials from the outset is a foundational step for a safe, durable, and reliable outdoor electrical system.
Beyond the Basics: Specialized Tools for Outdoor Wiring
For more involved outdoor electrical projects, certain specialized tools can make the job easier and safer. A conduit bender is essential if you’re running rigid or EMT conduit and need to navigate corners. Fish tape is invaluable for pulling wires through conduit, especially over longer distances or through bends. For trenching, a shovel or even a trenching tool might be needed to achieve the required burial depth for cables. A utility knife or cable stripper designed for outdoor-rated cables can simplify the process of preparing heavier gauge wires. Finally, a non-contact voltage tester offers a quick and safe way to check for live wires without direct contact, adding an extra layer of protection during the initial assessment and testing phases.
Running Electrical Cable Outdoors Safely and Efficiently
When it comes to installing electrical wiring outdoors, meticulous planning and execution are paramount to prevent damage and ensure long-term integrity. The most common and recommended method for protecting outdoor wiring is the use of conduit. Conduit, whether rigid metallic (RMC), intermediate metallic (IMC), electrical metallic tubing (EMT), or non-metallic (PVC), shields wiring from moisture, pests, and mechanical damage, such as accidental cuts from garden tools. The route for the conduit or cable must be carefully planned to minimize exposure and avoid significant disruption to existing landscaping or permanent structures. Consider paths that are least visible or can be easily hidden.
Cables intended for direct burial must be specifically rated for this purpose (e.g., UF-B cable) and installed at the proper depth, typically 12 to 24 inches depending on local codes and the type of protection used. Even with direct burial cable, placing it within conduit offers an extra layer of protection. When cables are run along exterior surfaces, they must be securely fastened and protected from physical damage. For more complex installations, or when dealing with significant distances or higher amperage requirements, engaging a qualified residential electrician is highly advisable. They possess the expertise to ensure that all wiring is correctly rated, installed to code, and compliant with all safety regulations, guaranteeing a safe and reliable outdoor power supply.
Trenching and Cable Burial Requirements
For cables that are buried underground, adhering to specific trenching and burial requirements is critical for safety and code compliance. The National Electrical Code (NEC) specifies minimum burial depths, which vary depending on whether the cable is direct-buried, in non-metallic conduit, or in rigid metallic conduit, and if it’s under a driveway or a garden bed. Typically, direct-buried cables require a minimum depth of 24 inches, while those in PVC conduit might be 18 inches, and those in rigid metal conduit 6 inches. Always check your local codes, as they can have more stringent requirements. Laying warning tape approximately 6-12 inches above the cable in the trench provides a visual alert for anyone digging in the future, preventing accidental cuts and potential hazards. Ensure the trench bottom is free of sharp rocks or debris that could damage the cable’s insulation over time.
Mounting Outdoor Electrical Boxes Securely
The stability and weather resistance of your outdoor electrical system heavily rely on the secure mounting of electrical boxes. These boxes must be firmly fixed to exterior surfaces, ensuring they cannot shift or become dislodged over time. The mounting surface itself needs to be stable and, ideally, flat to allow the box to sit flush, which is crucial for proper sealing and the subsequent installation of outlets and covers. Whether mounting on wood siding, masonry, or stucco, use appropriate, corrosion-resistant fasteners that can bear the weight of the box and withstand environmental stressors.
Once the electrical box is mounted, it is imperative to seal all openings that are not being used for conduit or wiring. This includes unused knockout holes and gaps around the mounting screws. Using outdoor-rated caulk or sealant around the edges of the box where it meets the wall is a vital step. This creates a tight barrier that prevents water, dust, and insects from entering the box, which could otherwise compromise the electrical system. A compromised seal significantly increases the risk of short circuits, corrosion, and electrical faults due to moisture exposure. Proper mounting and sealing are foundational to maintaining the integrity and safety of your outdoor electrical connections.
Choosing the Right Box Type and Fasteners
Outdoor electrical boxes come in various configurations, including single-gang, two-gang, and multi-gang, made from durable materials like PVC or die-cast aluminum. Select a box size that provides ample space for wiring connections without overcrowding. For fasteners, consider the material of your exterior wall. For wood, stainless steel screws are ideal. For masonry or concrete, tapcon screws or anchor bolts specifically designed for these materials will provide a secure hold. Always pre-drill pilot holes to prevent splitting wood or cracking masonry. Ensure that all fasteners are weather-resistant to avoid rust stains and structural degradation over time, reinforcing the longevity and safety of the installation.
Installing and Sealing Outlets with Precision
Once the electrical box is securely mounted and all preparatory wiring is in place, the outdoor outlet can be wired and installed following standard electrical practices. This involves connecting the hot (black), neutral (white), and ground (green or bare copper) wires to their respective terminals on the GFCI outlet. It is crucial that all connections are tight, secure, and properly insulated with appropriate wire nuts or electrical tape to ensure a steady current flow and to minimize the chances of overheating or short circuits. Double-check all connections to ensure they match the correct polarity and grounding scheme before proceeding.
After the outlet is correctly wired and seated within the box, the final and critical step is to seal it effectively against the elements. This is achieved by installing a high-quality weatherproof cover along with a gasket. The gasket forms a tight seal between the outlet cover and the electrical box, creating a robust shield against external factors such such as rain, snow, humidity, and even dust. These comprehensive sealing measures are meticulously designed to ensure that the outlet can operate reliably and safely through all changing seasons and a wide range of challenging weather conditions, protecting the internal components from moisture damage and extending the overall lifespan of your outdoor power solution.
Verifying Proper GFCI Wiring and Functionality
Proper wiring of a GFCI outlet is not just about making the right connections; it’s about understanding the “LINE” and “LOAD” terminals. The incoming power from the circuit breaker connects to the “LINE” terminals, while any downstream outlets or fixtures protected by this GFCI connect to the “LOAD” terminals. Incorrectly wiring these can prevent the GFCI from functioning as intended or from providing protection to downstream devices. After wiring, always test the GFCI by pressing the “TEST” button. The outlet should click off, cutting power. Then, press “RESET” to restore power. This confirms that the GFCI’s internal mechanism is working correctly and will provide crucial protection in case of a ground fault, a vital step for outdoor safety.
Testing and Long-Term Maintenance for Optimal Performance
Upon completing the installation of your outdoor electrical system, thorough testing is an indispensable final step to confirm its proper functionality and safety. Use a voltage tester to verify that power is present at the outlets and that they are wired correctly. Crucially, the ground fault protection (GFCI) must be meticulously inspected to ensure it operates as intended. This involves pressing the “TEST” button on each GFCI outlet; the power should immediately trip, indicating that the safety mechanism is active. Then, pressing the “RESET” button should restore power. This confirms the GFCI will effectively protect against electrical imbalances or moisture intrusion, which are common hazards in outdoor settings.
Long-term maintenance is equally vital for ensuring the sustained safety and performance of your outdoor electrical system. Periodically inspect all weatherproof covers for any signs of cracking, degradation, or damage, replacing them if necessary to maintain a watertight seal. Conduct routine checks for corrosion on exposed metal components, such as screws or conduit fittings, and address any signs of rust promptly. Verify that all outlets remain firmly in place and that wiring connections are secure. Regular visual inspections, along with annual GFCI testing, can proactively identify potential issues, extend the life of the system, and most importantly, keep all your backyard electrical uses safe and reliable for many years to come.
Seasonal Considerations and Troubleshooting Tips
Outdoor electrical systems face unique challenges with seasonal changes. Before winter, ensure all covers are sealed tightly to prevent ice and snow from accumulating around outlets. In spring, inspect for any damage that occurred over the colder months. If an outdoor outlet stops working, first check the GFCI’s “TEST” and “RESET” buttons. If it still doesn’t work, check the circuit breaker in your main panel. Persistent issues or frequent tripping could indicate a larger problem, such as overloaded circuits, faulty wiring, or a damaged outlet, at which point professional electrical assistance is strongly recommended. Regular visual checks for frayed wires, loose connections, or insect nests can prevent minor issues from escalating into major safety hazards.
Conclusion: Empowering Your Outdoor Spaces Safely
When installed appropriately and with an unwavering commitment to safety, outdoor electrical outlets significantly enhance the functionality, convenience, and enjoyment of your backyard and other exterior spaces. From illuminating evening gatherings to powering essential garden equipment, these installations are a cornerstone of modern outdoor living. Achieving a reliable and compliant outdoor power system requires careful, detailed planning, the judicious selection of high-quality, weather-resistant materials, and strict adherence to all local and national electrical standards. These combined efforts ensure dependable performance and maximum safety, even in challenging outdoor environments.
For projects that involve intricate wiring, significant power demands, or when dealing with older electrical systems, it is not merely a viable option but often a crucial necessity to hire a competent and licensed professional, such as a residential electrician. These experts bring invaluable knowledge of code requirements, best practices, and the technical skill to handle complex installations safely. Homeowners, particularly in regions like Winnipeg, frequently consult local electricians not only for installation services but also to receive expert advice on ensuring their setups meet stringent local standards and provide robust, long-term safety and reliability for all their outdoor electrical needs. Prioritizing professional expertise when needed ensures peace of mind and a truly empowered outdoor living experience.