
Fall Home Maintenance Checklist: Prepare Your Home for Winter & Save Energy
As the vibrant hues of autumn emerge, early fall presents the ideal opportunity to assess the condition of your home and proactively prepare it for the cold, harsh winter months ahead. Neglecting critical maintenance tasks now can lead to expensive repairs, increased energy bills, and potential safety hazards once temperatures drop. By taking a comprehensive approach to fall home maintenance, you can ensure your living space remains comfortable, safe, and energy-efficient throughout the season. This detailed guide covers essential areas to inspect and maintain, empowering you to protect your investment and enjoy peace of mind.
Get Your Mind in the Gutters: Essential Drainage System Care
Your home’s gutter and downspout system plays a crucial role in diverting thousands of gallons of rainwater and melted snow away from your roof, siding, and, most importantly, your foundation. A properly functioning drainage system prevents water damage, soil erosion around your foundation, and potential basement flooding. Clogged gutters, however, can lead to a cascade of problems including compromised exterior surfaces, rotting fascia boards, unsightly mildew growth, and even dangerous ice dams in colder climates. Furthermore, trapped debris can accelerate rust and corrosion, significantly shortening the lifespan of your gutters.
Action Steps for Gutter Maintenance:
- Thorough Cleaning: Before the leaves fully fall, meticulously clean your gutters of all debris, including leaves, twigs, and sediment. Use gloves and ensure your ladder is stable on a firm, level surface. Rinse the gutters with a hose to identify any hidden clogs or leaks.
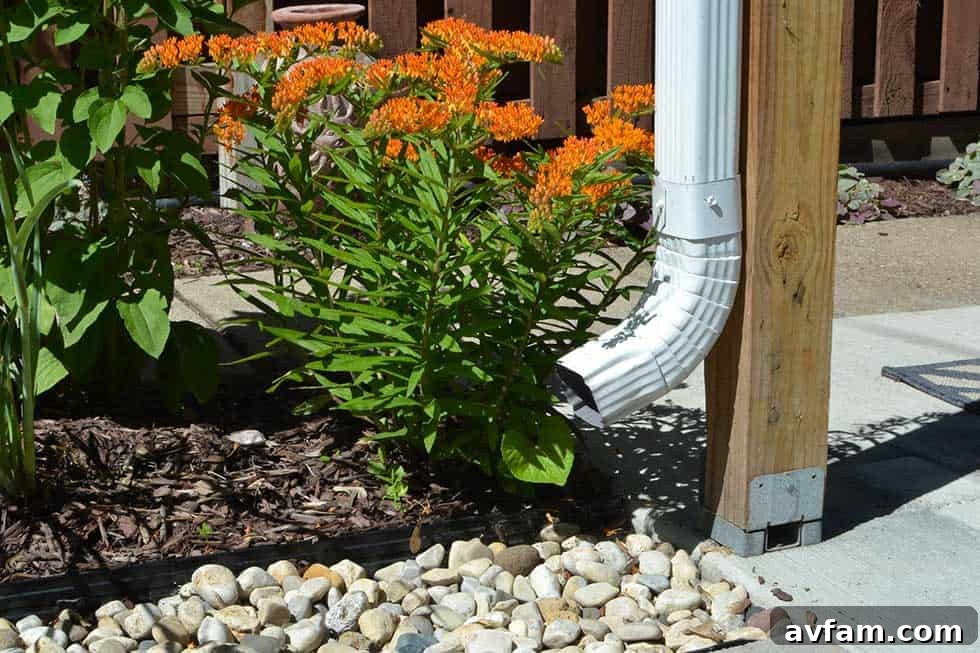
- Downspout Inspection: Confirm that downspouts are clear and properly channeling water away from your foundation. Consider adding extenders to direct water at least five to ten feet away from the house.
- Install Gutter Guards: After cleaning, install mesh or solid gutter guards to prevent future accumulation of leaves and debris, significantly reducing the frequency of cleanings needed.
- Check for Damage: Look for any signs of sagging, loose hangers, cracks, or holes in your gutters and downspouts. Repair or replace damaged sections promptly.
Seal the Envelope: Button Up Your Home Against Drafts and Air Leaks
Imagine wearing a winter coat with all its buttons undone; that’s essentially what a home with unsealed air leaks around windows and doors feels like. According to the U.S. Department of Energy, gaps in caulk and deteriorating weatherstripping can account for a significant portion—up to 10% or more—of your heating and cooling bills. Addressing these leaks is one of the most cost-effective ways to enhance your home’s energy efficiency, reduce drafts, and maintain a consistent, comfortable indoor temperature year-round.
Identifying and Sealing Air Leaks:
- Weatherstripping Inspection: Periodically check the weatherstripping around all doors and windows. Over time, this material can compress, crack, or become brittle, losing its effectiveness. If you suspect an issue, perform a simple test: close a door or window on a strip of paper. If the paper slides easily, your weatherstripping isn’t providing an adequate seal and needs replacement.
- The Candle Test: On a breezy day, close all doors and windows and hold a lighted candle or an incense stick near their frames. If the flame flickers or smoke drifts inward at any point, you have an active air leak. (Exercise extreme caution and keep the flame away from flammable materials).
- Caulking Gaps: Inspect for missing, cracked, or degraded caulk around window frames, door frames, and all entry points for electrical conduits, cable lines, phone lines, and gas pipes. Seal any identified gaps with a suitable caulk designed for exterior use. Different types of caulk (e.g., silicone, acrylic latex) are available for various applications and should be chosen based on flexibility and durability needs.
Investing a small amount of time and money in weatherstripping and caulking can lead to noticeable improvements in your home’s comfort and substantial savings on your utility bills.
On Top of It All: Prevent Costly Roof Problems
Few homeowner headaches are as frustrating or expensive as a leaky roof. Once water infiltration begins, pinpointing the source can be a time-consuming and challenging task, often leading to extensive damage to ceilings, walls, and insulation. Proactive roof inspection in the fall is critical to identify and address minor issues before winter’s ice, snow, and strong winds transform them into catastrophic failures. A well-maintained roof is your home’s primary defense against the elements.
Comprehensive Roof Inspection Guide:
While hiring a professional roofing contractor for a thorough annual inspection is always recommended, you can perform an initial visual assessment safely from the ground using binoculars, or by carefully climbing onto the roof if you have the proper safety equipment and experience.
- Shingle Condition: Look for any missing, cracked, curled, buckled, or blistered shingles. Pay close attention to the ridge shingles, which are particularly susceptible to wind damage. Granule loss from asphalt shingles, often visible as dark grit in your gutters, is a clear sign that your roof is nearing the end of its life and needs attention.
- Flashing Integrity: Inspect the metal flashing around chimneys, skylights, vents, and in valleys where roof planes meet. Ensure it is intact, unbent, and securely sealed. Deteriorated or improperly installed flashing is a common point of water entry.
- Chimney Structure: Check the chimney itself for any cracks in the mortar, loose bricks, or damage to the chimney cap or crown.
- Soffits and Fascia: Examine the soffit and fascia boards for signs of water damage, rot, or pest entry points.
- Roof-Mounted Antennas: If you have an old, unused television antenna on your roof, especially if it’s held by guy wires, consider having it professionally removed. Loose or damaged guy wires can pose a hazard, and the antenna itself can cause roof damage during high winds or heavy snow.
Addressing these issues in the fall can prevent interior water damage, mold growth, and the structural weakening of your home.
Paving the Way: Inspecting Walkways, Drives, and Steps
Damaged exterior hardscapes such as walkways, driveways, and steps are a year-round safety concern, but their dangers are significantly compounded when cold weather arrives, bringing with it ice and snow. Cracks and uneven surfaces become treacherous slip-and-fall hazards. Furthermore, small imperfections can quickly escalate into expensive, extensive damage if left untreated, as water penetrates cracks, freezes, and expands, leading to further deterioration. Fall is the ideal time to tackle these repairs.
Key Inspection Points for Hardscapes:
- Concrete Surfaces (Walkways, Patios, Drives): Look for cracks wider than 1/8-inch, uneven sections that create trip hazards, or signs of crumbling (spalling). Small cracks can often be filled with concrete crack fillers, but larger, uneven sections may require professional leveling or replacement.
- Asphalt Driveways: Inspect for potholes, alligator cracking, and crumbling edges. Seal minor cracks to prevent water infiltration and consider applying a fresh sealant coat to extend the life of your driveway.
- Loose-Fill Paths (Gravel, Pavers): Check for washed-out materials, shifting pavers, or areas where the base has eroded, creating uneven footing. Re-level and replenish materials as needed.
- Steps and Railings: Ensure all steps are solid and level. Inspect railings for any looseness, rust, or damage. Loose railings are a significant safety risk, particularly when navigating icy steps.
Many minor repairs, such as filling cracks, are well within the capabilities of a diligent do-it-yourselfer. However, significant repairs involving structural issues, extensive unevenness, or large-scale replacements are best left to experienced professionals to ensure safety and longevity.
Chill Out: Protecting Your Outdoor Plumbing from Freezing
For homeowners in regions susceptible to freezing temperatures, winterizing outdoor faucets (also known as sill cocks) and inground irrigation systems is a critical preventative measure. Failure to properly drain these lines can result in frozen pipes, which can burst and cause extensive and costly water damage to your home’s interior and exterior, often only becoming apparent once temperatures rise and pipes begin to thaw.
Winterizing Outdoor Faucets:
- Locate Shut-Off Valves: Identify the interior shut-off valve for each outdoor faucet. These are typically located on the wall closest to the faucet, often in a basement, crawl space, or utility room.
- Close Valves & Drain Lines: Turn off the interior shut-off valves. Then, open the outdoor faucets completely to allow any residual water in the line to drain out. Some sill cocks have a small cap on the side that can be loosened to facilitate more thorough draining.
- Remove Hoses: Detach all garden hoses from outdoor faucets and store them properly to prevent water from freezing inside them and damaging the spigot.
- Consider Faucet Covers: If your outdoor faucets are not “freezeproof” types (which automatically drain when shut off), you can purchase inexpensive styrofoam faucet covers from home centers to provide an extra layer of insulation.
Winterizing Inground Irrigation Systems:
Inground sprinkler systems require specific winterization procedures to prevent damage. Always consult your manufacturer’s manual for the precise steps, which typically involve:
- Shutting off the main water supply to the system.
- Draining all water from the pipes, usually by opening drain valves or, more commonly, by blowing out the lines with an air compressor. This “blow-out” method often requires specialized equipment and is best performed by a professional irrigation technician to avoid damaging the system.
Taking these steps now will save you from potential plumbing emergencies and costly repairs come spring.
Breathe Easy: The Importance of a Clean Furnace Filter
Your furnace filter is the unsung hero of your home’s HVAC system, constantly working to trap dust, pet dander, allergens, and other airborne particles that would otherwise circulate through your living spaces and settle on your furniture and woodwork. More importantly, a clean filter is vital for the efficiency and longevity of your heating system. A clogged, dirty filter restricts airflow, forcing your furnace to work harder to maintain your desired temperature. This increased strain not only leads to higher utility bills but can also reduce the lifespan of your furnace and impair its heating performance.
Furnace Filter Maintenance:
Regular maintenance of your furnace filter is one of the simplest and most impactful tasks you can perform for your home.
- Monthly Check-Up: Make it a habit to check your furnace filter monthly, especially during peak heating season. If it looks visibly dirty or dusty, it’s time for a cleaning or replacement.
- Disposable Filters: For fiberglass or pleated disposable filters, a light vacuuming can extend their life slightly, but they should be replaced entirely when dirty, typically every 1-3 months depending on usage, pet presence, and air quality.
- Washable Filters: Foam filters can be vacuumed and, if damaged, replaced. Metal or electrostatic filters are designed to be washable. Remove them and clean thoroughly with a strong water spray, and mild detergent if necessary. Allow them to dry completely before reinstallation.
- Correct Installation: Always ensure the filter is installed correctly with the airflow arrow pointing towards the furnace.
A clean filter ensures your furnace breathes freely, providing cleaner indoor air, improved heating efficiency, and lower energy costs.
Give Your Furnace a Physical: Professional HVAC Check-up
Beyond simple filter changes, your heating system requires an annual professional inspection to operate safely, efficiently, and reliably. Scheduling this crucial task in early fall, before the heating season begins in earnest, helps you avoid the last-minute rush and ensures your system is ready for the demands of winter. A professional HVAC technician can identify potential issues early, perform necessary adjustments, and verify all components are functioning correctly, preventing breakdowns when you need heat the most.
Signs You Need a Professional Inspection Sooner:
While an annual check-up is standard, certain symptoms indicate you should call a technician immediately:
- Noisy Belts or Components: Unusual screeches, whines, grinding, or rattling sounds coming from your furnace can signal worn-out belts connected to the blower motor, loose parts, or issues with bearings. These noises often indicate a mechanical problem that requires prompt attention to prevent further damage.
- Poor Performance: If your heating system isn’t keeping your home as warm as it once did, if certain rooms are consistently colder, or if it takes an unusually long time to reach the thermostat setting, it could be a sign of various underlying problems. These include blocked heating ducts, misadjusted burners, a failing blower motor, or issues with ignition. (Always ensure your furnace filter is clean first, as this is a common culprit for poor performance).
- Erratic Behavior: A furnace that cycles on and off too frequently, runs continuously without heating, or shuts down unexpectedly, exhibits erratic behavior. This can be caused by a faulty thermostat, a malfunctioning flame sensor, or a misadjusted furnace that isn’t operating within its optimal parameters.
- Unusual Odors: While a slight burning dust smell is common at the very beginning of the heating season, any strong, persistent, or unusual odors (e.g., metallic, burning plastic, sulfur/rotten eggs) warrant immediate investigation by a professional, as they could indicate serious safety concerns like gas leaks or electrical issues.
- Rising Utility Bills: A noticeable increase in your heating costs without a corresponding change in usage or outside temperature often points to a decline in furnace efficiency, suggesting it’s working harder than it should be.
Professional maintenance not only extends the life of your furnace but also ensures it operates safely, mitigating risks like carbon monoxide leaks and electrical fires. It’s an investment in your home’s safety and your family’s comfort.
Gather Round the Hearth: Ensuring Fireplace Safety
A fireplace adds warmth and ambiance to any home, but even if used only occasionally, it requires annual inspection and maintenance to ensure it remains a safe and efficient heat source. Neglecting your fireplace and chimney can lead to dangerous fire hazards and indoor air quality issues.
Key Fireplace and Chimney Inspections:
- Inspect Flue for Creosote: Creosote is a highly flammable by-product of burning wood that accumulates in your flue or chimney liner. A buildup of 1/8 inch or more is a significant fire hazard and can lead to a devastating chimney fire. It is strongly recommended to have your chimney inspected by a certified chimney sweep annually. If you use your fireplace or wood stove frequently (e.g., after each cord of wood burned), more frequent inspections may be necessary. While a professional inspection is best, you can perform a visual check by shining a bright flashlight up the flue, looking for thick, tarry deposits.
- Look for Flue Blockages: Birds, squirrels, and other small animals often build nests at the top of unprotected flues, creating dangerous obstructions that can lead to carbon monoxide buildup in your home. Ensure your chimney has a proper chimney cap in place to prevent animal entry and keep out rain and debris. If you don’t have a cap, carefully look up the flue (from inside) to ensure there are no visible obstructions.
- Exercise the Damper: The damper is the metal plate located just above the firebox that opens and closes the flue. Move it through its full range of motion—open to closed—to ensure it operates smoothly and creates a tight seal when closed. A malfunctioning damper can lead to heat loss or allow smoke into your home.
- Check Chimney for Damage: From the ground, use binoculars to inspect the exterior of your chimney. Look for any loose or missing bricks, crumbling mortar joints, or cracks in the chimney crown (the slab on top of the chimney). Ensure the flue cap (the screen or baffle covering the top) is securely in place and not damaged. These issues can allow water penetration and compromise the chimney’s structural integrity.
Regular chimney maintenance not only protects your home from fire but also helps ensure efficient burning and prevents smoke from backing up into your living space.
Keep the Humidifier Humming: Maintaining Indoor Air Quality and Comfort
During the dry winter months, low indoor humidity can negatively impact both your health and your home. Bone-dry air can exacerbate respiratory issues, dry out skin and nasal passages, and even cause fine wood furniture, flooring, and musical instruments to crack or warp. Maintaining optimal indoor humidity levels (typically between 30-50%) with a central humidifier or portable units can significantly improve comfort and protect your home’s delicate elements. However, humidifiers themselves require regular cleaning and maintenance to function effectively and safely.
Humidifier Maintenance Steps:
- Inspect and Clean Plates/Pads: For central humidifiers, locate the humidifier pads or plates. These are designed to absorb water and facilitate evaporation. Over time, mineral deposits from hard water can build up, reducing efficiency and potentially leading to bacterial growth. Carefully remove them.
- Thorough Cleaning: Clean the plates or pads in a strong laundry detergent solution. For stubborn mineral deposits, use a wire brush or steel wool to gently scrape them away. Rinse thoroughly.
- Replace Wicking Filters: Many humidifiers use wicking filters that cannot be cleaned and must be replaced regularly, typically at the beginning of the heating season or as per the manufacturer’s recommendations.
- Clean Water Reservoir: If your humidifier has a water reservoir, drain it and clean it with a vinegar solution or mild bleach solution to remove mineral scale and prevent mold/bacteria growth. Rinse thoroughly before refilling.
Regular humidifier maintenance ensures clean, moist air circulates throughout your home, benefiting your health and preserving your home’s interior.
Head Off Gas Problems: Essential Gas Heater Maintenance
Maintaining your gas-fueled heating appliances (furnaces, water heaters, gas fireplaces) in good condition is paramount for both safety and cost efficiency. An improperly maintained gas heater poses severe risks, including carbon monoxide poisoning – an odorless, colorless, and potentially deadly gas – and fire hazards. Additionally, a dirty or poorly adjusted unit will operate inefficiently, leading to higher energy consumption and increased utility bills. While some maintenance can be done by homeowners, an annual professional inspection is critical for safety.
Professional and DIY Gas Heater Maintenance:
- Annual Professional Check-up: Schedule an annual inspection by a qualified HVAC technician or a plumber for your water heater. Professionals can check for gas leaks, ensure proper combustion, verify ventilation, and inspect all safety controls, which are tasks beyond typical homeowner capabilities.
- DIY Cleaning (AFTER Shutting Off Gas): CRITICAL SAFETY WARNING: Always shut off the gas supply to the heater and allow it to cool completely before performing any DIY maintenance. If you are uncomfortable or unsure, call a professional. Once the gas is off and the unit is cool, you can perform the following:
- Check Air-Shutter Openings and Exhaust Vents: Visually inspect these areas for any accumulation of dirt, dust, or lint. Blockages can impede proper airflow and combustion.
- Vacuum Air Passages and Burner: Using a vacuum cleaner with a brush attachment, carefully clean the air passages leading to the burner and gently clean any lint, dust, or spiderwebs from the burner itself. Avoid disturbing any components.
- Follow Manufacturer’s Advice: Always refer to your appliance’s owner’s manual for specific maintenance instructions and warnings.
Never take chances with gas appliances. If you smell gas, immediately evacuate your home, call your gas company or fire department from a safe location, and do not re-enter until declared safe by professionals.
Keep the Wood Fires Burning Brightly: Wood Stove Safety
Wood-burning stoves offer a charming, efficient way to heat your home and create a cozy atmosphere. However, like any heat-producing appliance, they require regular inspections and maintenance to ensure they remain a safe and reliable component of your home. Neglecting a wood stove can lead to serious safety hazards, including house fires and the release of toxic fumes like carbon monoxide.
Essential Wood-Burning Stove Safety Checks:
- Inspect Stovepipes: The pipes connecting your wood stove to the chimney are crucial for venting smoke and exhaust. Throughout the heating season, inspect these stovepipes for any signs of corrosion, holes, cracks, or loose joints. Even small imperfections can allow toxic fumes to leak into your home. After cleaning, look for deterioration or looseness. If any damage is found, replace the stovepipe immediately.
- Examine Stove Body and Legs: Visually check the stove’s body and legs for any signs of rust, cracks, or warping. Cracks can compromise the stove’s integrity and allow smoke or embers to escape. Ensure all seals around the stove door are intact and creating a tight closure.
- Verify Safety Features and Clearances:
- Wall Protection: Confirm that any required heat shields or non-combustible wall protection behind and around the stove are installed according to the manufacturer’s specifications and local building codes. Ensure there are no combustible materials too close to the stove.
- Approved Floor Material: Check that the unit sits on an approved, non-combustible floor protector that extends the specified distance beyond the stove.
- Child Safety: If you have young children or pets, install a sturdy safety gate or fence around the wood stove when it is in operation to prevent accidental burns.
- Use Seasoned Wood: Always burn dry, seasoned hardwood. Wet or “green” wood produces more creosote, leading to a higher risk of chimney fires and less efficient heating.
By diligently following these inspection and maintenance steps, you can safely enjoy the warmth and charm of your wood-burning stove throughout the cold season.
A Comprehensive Home Safety Review: Protecting Your Family
Beyond seasonal maintenance, at least once a year, it is vital to conduct a top-to-bottom review of your home’s overall safety features. This is also an excellent opportunity to gather your family and review your emergency preparedness plans, particularly your fire evacuation strategy. Proactive safety measures can make all the difference in an emergency.
Critical Safety Checkpoints:
- Smoke and Carbon Monoxide (CO) Detectors:
- Batteries: Replace the batteries in all smoke and carbon monoxide detectors. Even if they are hardwired, backup batteries are crucial.
- Cleaning: Gently vacuum the exterior of each detector with a soft brush attachment to remove dust and cobwebs, which can impede their function.
- Testing: Test each detector by pressing the test button. Additionally, for smoke detectors, you can hold a blown-out candle or a smoke source (safely) near the unit to confirm it responds to smoke.
- Placement: Ensure you have smoke detectors on every level of your home, including the basement and outside all sleeping areas. CO detectors should also be on every level, especially near bedrooms.
- Age: Note that smoke and CO detectors have a lifespan (typically 7-10 years). Check the manufacturing date on the back and replace units that are past their recommended age.
- Fire Extinguishers:
- Type and Placement: Every home should have at least one multi-purpose fire extinguisher (rated A-B-C) capable of handling common household fires. Keep at least one in the kitchen, and consider one on each floor.
- Annual Inspection: Annually, check the pressure gauge to ensure the extinguisher is fully charged (the needle should be in the green zone). Confirm that the lock pin is intact and firmly in place, and that the discharge nozzle is clear of obstructions.
- Condition: Clean the extinguisher and inspect it for any dents, scratches, or corrosion. If the damage appears severe or the gauge is not in the green, replace the unit.
- Age: Fire extinguishers generally have a limited lifespan; most recommend replacement after six years. Mark the purchase date on new units with a permanent marker.
- Training: Ensure all adult household members know how to use a fire extinguisher (remember the PASS method: Pull, Aim, Squeeze, Sweep).
- Fire Escape Plans:
- Exit Paths: Every bedroom, including those in the basement, should have at least two clear and unobstructed exit paths (e.g., a door and a window).
- Clear Windows: Ensure windows are not blocked by furniture, heavy drapes, or other items that could impede escape.
- Rope Ladders: Ideally, upper-floor bedrooms should have readily accessible rope ladders for emergency exits.
- Practice Drills: Regularly review and practice your fire escape plan with your family. Designate a safe outdoor meeting place a reasonable distance from the house.
- General Cleanup and Hazardous Materials:
- Reduce Clutter: Rid your home of accumulations of old newspapers, magazines, cardboard boxes, and other combustible clutter, especially in basements, attics, and garages.
- Proper Disposal: Safely discard leftover hazardous household chemicals, paints, and solvents. Check with your state or local Environmental Protection Agency (EPA) or waste management services for proper disposal guidelines. Never pour chemicals down drains or dispose of them in regular trash.
- Safe Storage: Store all flammable materials (e.g., gasoline, propane, paint thinners) and poisons in approved, clearly labeled containers in a well-ventilated area, away from heat sources and out of reach of children and pets.
- Clearance Around Heat Sources: Maintain a clear, non-combustible space around all heaters, furnaces, water heaters, wood stoves, and other heat-producing appliances.
- Electrical Checks: Inspect electrical cords for frays or damage. Avoid overloading outlets.
A proactive approach to home safety provides invaluable protection for your family and property, giving you peace of mind throughout the year.
Embracing the Season with Confidence
Completing this comprehensive fall home maintenance checklist is more than just a seasonal chore; it’s an investment in your home’s longevity, your family’s safety, and your financial well-being. By tackling these tasks now, you’re not only preventing costly repairs and enhancing energy efficiency but also creating a more comfortable and secure environment for the colder months. Approach these preparations methodically, and you’ll soon be enjoying the cozy comforts of your home, knowing it’s well-equipped to face whatever winter brings. Start today, and embrace the season with confidence!
Photo from Center of Neighborhood Technology.