
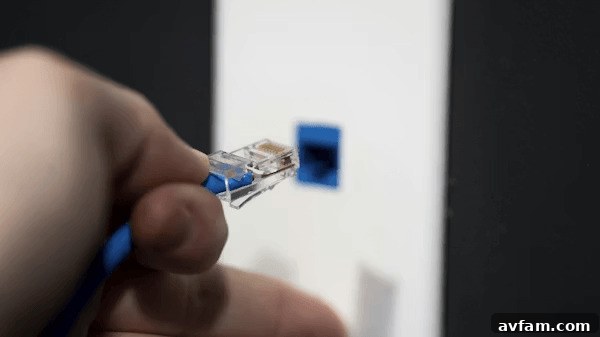
In today’s digitally driven world, a robust and reliable internet connection is no longer a luxury but a fundamental necessity for every household. While wireless signals offer unparalleled convenience, they often fall short in delivering the consistent speed and stability required for high-bandwidth activities like 4K streaming, competitive online gaming, or demanding remote work. A wired Ethernet connection, on the other hand, provides a steadfast backbone for your home network, significantly enhancing performance and reducing latency. Many homeowners dream of upgrading their residential internet performance with the superior stability of Ethernet but are deterred by the daunting prospect of tearing down walls or embarking on costly and extensive renovations. The good news is that achieving a professional-grade wired network without significant disruption is entirely feasible.
With careful planning, the right tools, and an understanding of your home’s structure, you can discreetly lay Ethernet cables. By leveraging existing pathways and employing low-impact installation methods, the process becomes manageable, clean, and surprisingly straightforward. This guide will walk you through a systematic approach, enabling homeowners to enjoy a reliable wired network that rivals commercial installations, all while minimizing damage and keeping costs well within a reasonable budget. Prepare to transform your home’s connectivity, ensuring every device has access to the fast, stable internet it deserves, eliminating buffering and lag from your daily life.
Strategic Planning: Charting Your Cable Route Before Any Work Begins
Before you even consider touching a wall or purchasing a single tool, the most critical first step is to meticulously plan the optimal route for your Ethernet cables. This proactive measure is instrumental in preventing costly errors, minimizing the need for additional holes, and ensuring the most efficient use of materials and effort. Begin by precisely identifying the entry point of your internet service provider’s line into your home and the exact location of your primary networking equipment, typically your router and modem. Once these key points are established, you can start visualizing the journey your Ethernet cables will take to reach their target rooms.
Consider less invasive pathways first. Look for existing vertical chases such as utility closets, seldom-used basements, or accessible attics. These often provide natural conduits that can lead to rooms either above or below the main floor without requiring invasive wall cuts. Walk through your home with a critical eye, mapping out potential routes on a simple floor plan. During this planning phase, it’s crucial to identify and avoid potential obstacles such as plumbing lines, electrical wiring, and dense insulation, all of which can complicate installation, pose safety risks, and interfere with signal quality. A well-thought-out plan not only simplifies the installation process but also ensures the safety and long-term reliability of your new wired network.
Leveraging Existing Wall Pathways for Minimal Disruption
One of the most effective strategies for integrating new Ethernet cables into a completed home with minimal visible impact is to utilize existing concealed pathways. Many modern and older homes alike possess these hidden routes, making it possible to run cables with significantly less disturbance to finished surfaces. Common examples include cold air returns, dedicated conduit chases (often found in older homes or near utility areas), and even the discreet spaces behind baseboards or within crown molding. These areas are specifically designed to be accessible yet hidden, making them ideal for cable routing.
Additionally, don’t overlook unused telephone jacks or coaxial cable outlets. In many cases, these existing wall plates offer direct access to wall cavities, providing an excellent entry point for new Ethernet runs. By carefully removing the old outlets, you can often gain sufficient space to feed new cables into the wall, significantly reducing the necessity to cut new openings. This approach not only preserves the aesthetic integrity of your wall surfaces but also drastically cuts down on the amount of patching, painting, and general repair work required post-installation. A thorough examination of these alternatives can save countless hours of labor and dramatically simplify the process of expanding your home’s wired network links, transforming a potentially daunting task into a manageable DIY project.
Harnessing Attics and Basements for Efficient Cable Runs
For homes with multiple stories or those requiring extensive network coverage, attics and basements frequently emerge as the most convenient and practical spaces for running Ethernet cables. These often-overlooked areas serve as ideal conduits, allowing cables to be easily dropped down or pulled up through interior wall cavities, resulting in little to no visible impact on your living spaces. The method is particularly advantageous in multi-story houses where vertical cable runs are necessary, leveraging existing structural gaps or access points that naturally extend through floors.
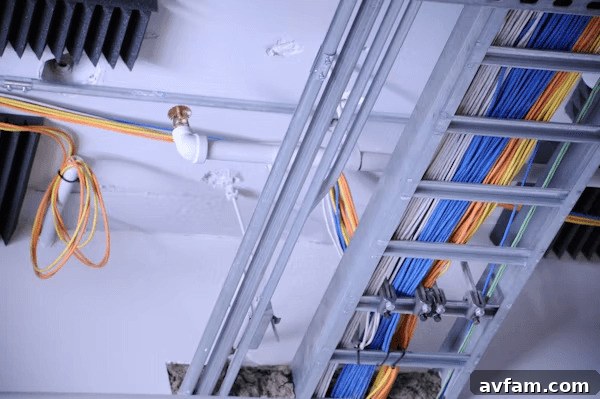
When working in attics and basements, remember to properly secure your cables using cable staples, zip ties, or conduit. This prevents sagging, protects the cables from potential damage by rodents or accidental snagging, and reduces long-term wear and tear, thereby extending the lifespan of your network infrastructure. Additionally, consider the environmental factors: ensure cables are rated for the temperature fluctuations and potential moisture levels found in these areas. By utilizing these hidden zones effectively, homeowners can expand their internet network throughout the entire homestead without significant disturbance to interior walls, maintaining a clean, professional, and aesthetically pleasing finish throughout their living spaces. This strategic use of utility spaces is key to a truly invisible wired network.
Strategically Creating Small Access Points for Seamless Installation
In scenarios where no established routes or existing pathways are suitable, creating small, strategically placed access points may be necessary to pass cables between walls. The key here is “small” and “strategic.” These openings should be as minimal as possible and typically located in inconspicuous areas, such as close to baseboards, inside closets, behind large furniture, or within utility rooms where they are less visible. The philosophy is to minimize cutting to significantly reduce the amount of repair work needed later, aiming for a “patch-and-paint” solution rather than a major drywall repair.
Once the Ethernet cable has been successfully threaded through the wall cavity, these small openings can be discreetly covered up. Options include standard single-gang wall plates, low-profile blank plates, or even simple patching material followed by painting to match the existing wall color. For a truly professional finish, consider recessed wall plates that allow devices to sit flush against the wall, minimizing protruding cables and connectors. This technique provides the necessary flexibility to guide your cable exactly where it needs to go while preserving the general aesthetic and structural integrity of the room. It’s a testament to the fact that even when cuts are necessary, they can be managed with precision and attention to detail, leaving virtually no trace of the installation.
Mastering Cable Runs with Fish Tape and Professional Pulling Tools
Navigating existing walls with Ethernet cables without causing significant damage is an art, and fish tape is arguably the most essential tool in an installer’s arsenal. This flexible, yet rigid, ribbon of metal or fiberglass allows you to meticulously maneuver inside wall cavities, reaching remote points with remarkable accuracy. The process typically involves feeding the fish tape from an access point (e.g., a hole near a baseboard) towards another desired access point (e.g., an outlet box). Once the tape emerges, the Ethernet cable is securely attached to its end, and then carefully pulled back through the wall cavity.
Beyond traditional fish tape, other specialized pulling tools can greatly assist in various situations. Glow rods, for instance, are flexible fiberglass rods that can be screwed together to extend reach, and their luminous properties make them easier to spot in dark wall cavities. Cable lubricant can also be used, especially for longer runs or when dealing with tight spaces, to reduce friction and minimize the risk of damaging the cable jacket. This method, when executed with patience and gradual movement, helps to reduce the likelihood of snagging on insulation or other internal components, ensuring a smooth, damage-free run. Successfully employing these tools enables long cable runs to be completed effectively and safely, transforming what might seem like an impossible task into a manageable and satisfying DIY project.
Crucial Safety First: Avoiding Electrical and Plumbing Hazards
Working within the confined spaces of finished walls necessitates an unwavering commitment to safety, particularly concerning existing electrical wiring and plumbing lines. These systems are typically interwoven within wall cavities and can pose significant hazards if disturbed. Coming into contact with live electrical wires can lead to severe injury or even electrocution, while puncturing water pipes can result in extensive water damage and costly repairs. Therefore, one of the most significant things to remember when undertaking in-wall cable installation is to meticulously avoid any contact with these critical home systems.
Before any drilling or feeding of cables, always use a high-quality stud finder that can also detect electrical wires and metal pipes. Modern stud finders often feature different scanning modes for wood studs, metal, AC live wiring, and even moisture. Carefully scan the intended path for your cable multiple times to confidently identify safe areas. Mark these safe zones clearly on the wall. Furthermore, it is best practice to maintain a clear separation between your Ethernet circuits and power lines to minimize potential electromagnetic interference (EMI), which can degrade signal quality. Aim for at least a few inches of separation where possible. These precautions are not just about safeguarding your network’s performance; they are paramount to ensuring your personal safety and preventing costly damage to your home during the installation process. Never cut corners when it comes to identifying and avoiding these inherent dangers.
Achieving a Flawless Finish: Expert Cable Concealment Techniques
Once your Ethernet cables are successfully installed within the walls and tested for functionality, the final crucial step is to ensure the installation is aesthetically unobtrusive and blends seamlessly with your home’s decor. The goal is to make the wired connection virtually invisible, maintaining a clean and elegant environment. For any short, unavoidable visible segments of cable, or at termination points, there are numerous effective concealment solutions available. These include paintable raceways, which are low-profile channels that adhere to walls and can be painted to match the existing wall color, effectively disappearing into the background. Recessed wall plates are another excellent option, allowing the Ethernet port to sit flush with the wall, eliminating any unsightly protrusions.
For a truly integrated look, consider using baseboard channels or crown molding that incorporate cable management features, discreetly hiding cables along the perimeter of your rooms. In certain instances, strategic placement of furniture can also effectively mask short visible cable segments or wall plates, turning them into a non-issue. A meticulously clean finish not only significantly enhances the visual appeal of your rooms but also provides crucial protection for the cables, making them less susceptible to accidental snagging, damage, or disruption over time. This attention to detail in the concealment phase is what truly elevates a DIY installation to a professional standard, ensuring your wired network is as pleasing to the eye as it is reliable in performance.
Ensuring Peak Performance: Maintaining Signal Quality and Cable Integrity
The performance of your newly installed home internet connection hinges not just on the presence of Ethernet cables, but on their proper installation and maintenance. To guarantee optimal signal quality and consistent high speeds, correct installation procedures are paramount. A common mistake that can severely degrade performance is tightly bending, kinking, or compressing Ethernet cables within wall spaces. The internal twisted pairs of wires are sensitive to sharp bends; excessive stress can alter their geometry, leading to increased signal attenuation and cross-talk, which translates into slower speeds and unreliable connections, especially over longer distances. Always strive to use smooth, gentle curves and avoid sharp 90-degree angles during routing.
Furthermore, the quality of the cable itself plays a critical role. Invest in high-quality Ethernet cables (e.g., Cat6 or Cat6a for future-proofing) that are rated for in-wall installation (typically marked CM, CL2, or CL3). These cables have more robust jackets and often better shielding, making them safer and more durable for concealed environments. Proper termination of the cables with high-quality RJ45 connectors or keystone jacks is equally important. Ensure the wire pairs are correctly crimped according to T568A or T568B standards, maintaining the twists as close to the connector as possible. Adhering to these proper installation techniques will help you achieve the highest possible speeds and a consistently stable connection across your entire house, maximizing the benefits of your wired network upgrade.
Crucial Post-Installation Verification: Testing Your Connection Thoroughly
Once the Ethernet cable is fully installed, secured, and terminated, the job isn’t complete until you’ve rigorously tested it to ensure everything is functioning perfectly. This critical step verifies that your hard work has paid off and that the new wired connection is delivering the expected performance. Begin by connecting various devices—computers, gaming consoles, smart TVs—to the new Ethernet ports. Perform speed tests using reputable online tools on each connection point. Compare these speeds to your ISP’s advertised rates and to what you typically achieve directly from your router. A simple ping test (e.g., to Google’s DNS servers at 8.8.8.8) can also reveal latency issues, with lower milliseconds indicating a more responsive connection.

Pay close attention to any weak signals, dropped connections, or significant interruptions. These can be tell-tale signs of an issue, such as an incorrectly routed cable, a faulty termination, or even physical damage to the cable during the installation process. Early and comprehensive testing allows for immediate troubleshooting and corrections to be made before you finalize and seal off any access points. A successful test not only confirms the integrity of your new wired connection but also provides the peace of mind that it is ready to facilitate stable, high-performance streaming, gaming, and general usage, liberating you from the sole reliance on sometimes-unpredictable wireless coverage. This final verification step is non-negotiable for a truly reliable network.
Optimizing Your Network: Final Setup and Long-Term Maintenance
With your wired Ethernet network now fully operational and rigorously tested, the final phase involves optimizing its setup and establishing a routine for long-term maintenance. These steps ensure that your investment in a stable connection continues to pay dividends for years to come. Begin by fine-tuning your networking equipment; ensure your router’s firmware is up to date and that any quality-of-service (QoS) settings are configured to prioritize critical applications if desired. A crucial organizational step is to clearly label all cable runs at both ends (e.g., “Living Room TV,” “Office PC”). This simple practice is invaluable for future reference, making troubleshooting significantly easier and streamlining any potential upgrades or expansions to your network down the line.
Consider creating a basic diagram or map of your cable lines, detailing where each run originates and terminates, along with any key access points. This documentation acts as a vital reference tool. For long-term maintenance, periodic visual inspections of exposed cable segments or termination points can help identify any signs of wear, damage, or loose connections. While wired networks inherently require less hands-on maintenance than their wireless counterparts, these proactive measures contribute to their enduring reliability. With proper installation and diligent maintenance, your wired network will consistently outperform standard wireless networks in terms of speed, stability, and security. This makes it a highly worthwhile upgrade option for any household seeking to boost their overall internet connection quality and enhance their digital experience for years to come.