
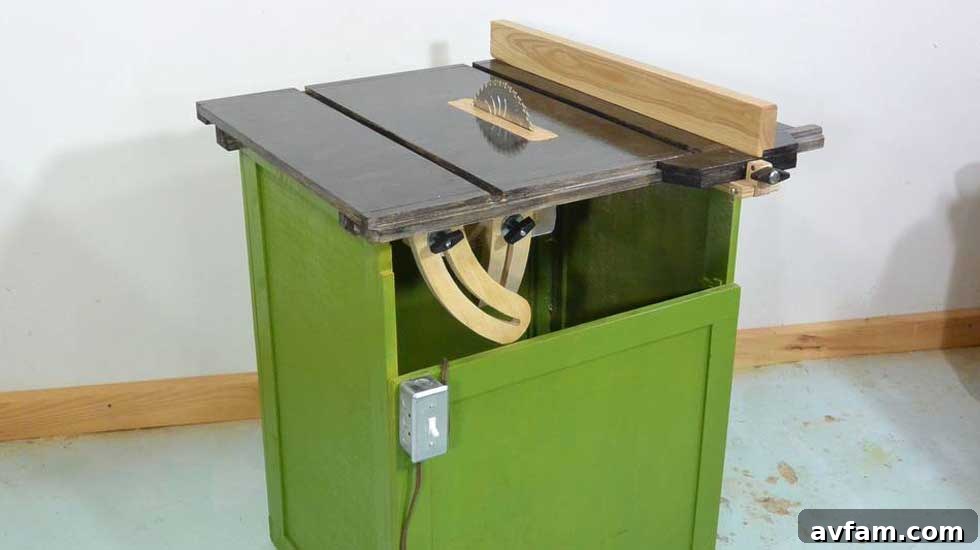
Transform Your Corded Circular Saw into a Custom Table Saw: The Ultimate DIY Woodworking Project
For many woodworking enthusiasts, the desire for a high-quality table saw is undeniable. It’s a cornerstone tool in any serious workshop, offering unparalleled precision for ripping, crosscutting, and various joinery tasks. However, the investment in a new, feature-rich table saw can often be substantial, pushing it out of reach for hobbyists or those with budget constraints. What if you could harness the power of an existing tool in your shop – perhaps a corded circular saw that’s seen better days or is simply gathering dust – and transform it into a functional, custom-built table saw?
This ingenious concept is more than just a thought experiment; it’s a practical, albeit advanced, woodworking project that demonstrates remarkable resourcefulness and engineering. While this article explores such a transformation, it’s crucial to preface that converting a handheld power tool into a stationary machine requires a deep understanding of mechanics, structural integrity, and, most importantly, an unwavering commitment to safety. This is not a project we recommend or condone for beginners, but it undeniably showcases what someone with profound tool knowledge and advanced skills can accomplish.
Matthias Wandel: The Mastermind Behind the DIY Table Saw Conversion
The individual largely credited with popularizing and expertly executing this concept is the renowned Matthias Wandel. Widely respected in the woodworking community for his innovative designs, meticulous craftsmanship, and detailed explanations, Wandel has taken the novel idea of converting a corded circular saw into a fully functional table saw and brought it to life with exceptional precision. His work serves as an inspiring example of how creativity and technical skill can overcome perceived limitations in tool design.
Wandel’s projects are characterized by their thoughtful engineering and practicality, and his homemade table saw is no exception. Instead of spending upwards of $500 or more on a brand new table saw, he demonstrates that with the cost of a few pieces of scrap lumber, some basic hardware, and a significant investment of time and skill, you can construct a surprisingly capable machine. This approach not only saves money but also provides a deep understanding of the tool’s mechanics and the satisfaction of building something truly bespoke.
Why Consider Building Your Own Table Saw?
The allure of a DIY table saw conversion extends beyond mere cost savings. It taps into the very essence of woodworking and the spirit of making. Here are several compelling reasons why a skilled individual might embark on such a project:
- Significant Cost Savings: This is arguably the most immediate and tangible benefit. By repurposing an existing circular saw and utilizing readily available or scrap materials, the financial outlay is dramatically reduced compared to purchasing a new commercial table saw.
- Unparalleled Customization: A homemade table saw can be tailored to your precise needs, workshop dimensions, and preferred workflow. You can design the tabletop size, outfeed support, fence system, and even dust collection integration to perfectly suit your specific projects and space.
- Skill Development & Learning: Undertaking a project of this complexity is an incredible learning experience. It hones your problem-solving abilities, precision woodworking skills, and understanding of tool dynamics. You learn by doing, and the lessons gained are invaluable.
- Resourcefulness and Sustainability: It’s an excellent example of maximizing existing resources and reducing waste. Giving a new life to an old, underused tool promotes a more sustainable approach to workshop outfitting.
- Deep Personal Satisfaction: There’s immense pride and satisfaction in creating a high-functioning tool with your own hands. The machine becomes more than just equipment; it’s a testament to your ingenuity and craftsmanship.
The Ingenuity of Matthias Wandel’s Design Features
Matthias Wandel’s DIY table saw stands out not just for its existence but for its sophisticated design and functionality. This is not a crude hack but a meticulously engineered tool. Every piece, from the fundamental structure to the fine adjustments, is custom-made, reflecting a deep understanding of woodworking mechanics. Key features of his design include:
- Robust Mounting Brackets: The circular saw is securely housed beneath the tabletop using custom-fabricated mounting brackets. These brackets are critical for stability, minimizing vibration, and ensuring that the saw blade remains consistently aligned and firm during operation.
- Precision Rip Fence: A table saw’s accuracy largely depends on its rip fence. Wandel’s custom rip fence is designed for exceptional straightness and easy, secure locking. This allows for precise, repeatable parallel cuts, a fundamental requirement for quality woodworking. The design often incorporates mechanisms for fine adjustment and robust clamping.
- Adjustable Depth and Angle Mechanisms: This is where Wandel’s design truly shines. He has engineered mechanisms that allow for seamless adjustment of the saw blade’s cutting depth and angle. This capability transforms the basic circular saw into a versatile machine capable of making bevel cuts, dadoes (with appropriate blade setups), and precise depth adjustments, mirroring the functionality of many commercial table saws.
- Thoughtful Tabletop Construction: The tabletop itself is crafted to be perfectly flat and smooth, providing an ideal work surface. Attention is paid to the insert plate around the blade, ensuring it supports the workpiece fully and minimizes tear-out.
For those interested in delving deeper into the specifics, Matthias Wandel shares comprehensive details, including photographs and instructions, on his dedicated website. This invaluable resource provides aspiring builders with a roadmap to understand and potentially replicate his impressive work.
Paramount Importance of Safety When Building and Operating DIY Power Tools
While the prospect of building your own table saw is exhilarating, it is absolutely paramount to address the critical safety implications. A table saw, even a professionally manufactured one, is one of the most dangerous tools in a workshop if not operated with extreme caution. When dealing with a custom-built, modified power tool, these risks are significantly amplified. This project is strictly for experienced individuals with an advanced understanding of tool safety, electrical wiring, and mechanical engineering. Before considering such an undertaking, please heed the following essential safety considerations:
- Required Expertise: This project demands a high level of skill, precision, and experience in both woodworking and tool construction. It is unequivocally not suitable for beginners or those unfamiliar with the inherent dangers of power tools.
- Structural Integrity is Non-Negotiable: Every component of the DIY table saw – the frame, the tabletop, the saw mount, and the fence – must be built with exceptional stability and rigidity. Any wobbling, flexing, or loose parts can lead to catastrophic failure, dangerous kickback, and severe injury.
- Implement a Blade Guard: A robust and effective blade guard system is absolutely essential. While commercial saws have integrated guards, a homemade version must include a well-designed guard that protects against accidental contact with the spinning blade and helps contain sawdust.
- Kickback Prevention: Understanding and mitigating kickback is vital. This includes ensuring proper blade alignment, using a splitter or riving knife (if feasible and safe to integrate), and designing anti-kickback pawls. Always stand out of the direct line of potential kickback.
- Emergency Stop Mechanism: Integrate an easily accessible, prominent, and reliable emergency stop switch that can instantly cut power to the circular saw. This is a critical safety feature often overlooked in homemade setups.
- Personal Protective Equipment (PPE): Always wear appropriate PPE, including safety glasses (at minimum), hearing protection, and suitable clothing (avoid loose garments that can get caught).
- Thorough Testing: Before making any cuts on actual material, thoroughly test all functionalities. Inspect every joint, bolt, and mechanism for stability, alignment, and secure fastening. Perform dry runs without power and then with power but without cutting material.
- Electrical Safety: Ensure all electrical connections are properly insulated and grounded. If you are not comfortable with electrical work, consult a qualified electrician.
The pursuit of DIY innovation should never come at the expense of safety. Prioritize accident prevention above all else. When in doubt, err on the side of caution or consider purchasing a commercial unit designed with integrated safety features.
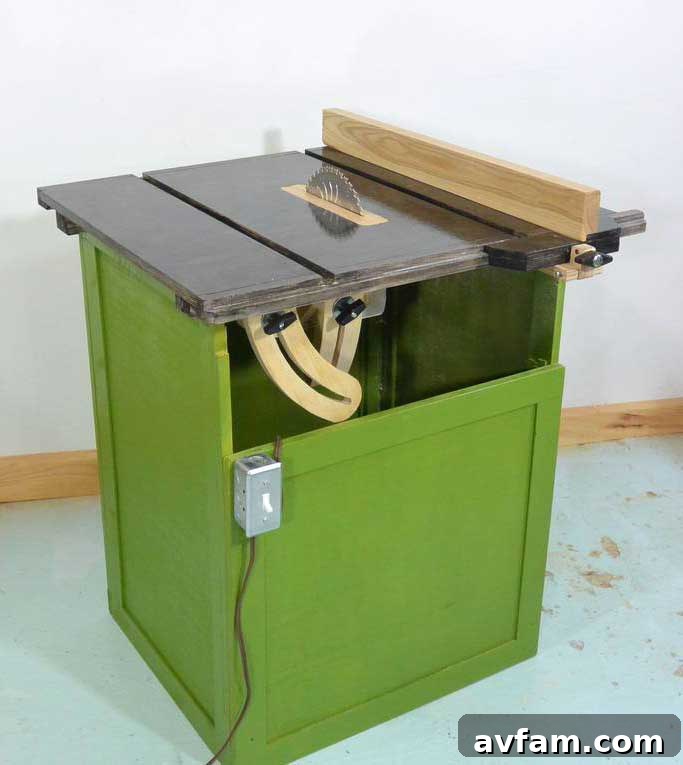
Deconstructing the Core Components of a DIY Table Saw Conversion
To fully appreciate the complexity and ingenuity of Matthias Wandel’s design, it helps to understand the fundamental components that must be meticulously constructed for a successful circular saw to table saw conversion:
1. The Tabletop and Workbench Structure
The foundation of any table saw is its work surface. For a DIY conversion, this typically involves a sturdy workbench or custom-built frame with a flat, smooth, and durable tabletop. Materials often include high-quality plywood (like Baltic birch), MDF, or even a laminated countertop material. The tabletop must be perfectly level and rigid to ensure accurate cuts and safe operation. It should also include a precisely cut slot or opening for the circular saw blade to protrude.
2. The Circular Saw Mounting Mechanism
This is the heart of the conversion. The circular saw needs to be securely mounted upside down beneath the tabletop. The mounting system must:
- Provide Rock-Solid Stability: Prevent any movement, vibration, or flex of the saw during operation.
- Allow for Blade Height Adjustment: Enable the blade to be raised and lowered to control the depth of cut.
- Facilitate Blade Angle Adjustment: Crucially, for bevel cuts, the mechanism must allow the entire saw to be tilted at various angles, maintaining stability. Matthias Wandel’s design excels in this area.
- Ensure Easy Installation/Removal: While not always a requirement, a well-designed mount allows for the circular saw to be easily detached for handheld use if desired.
3. The Rip Fence System
A high-quality rip fence is essential for making straight, parallel cuts. A DIY rip fence needs to be:
- Accurate and Parallel: It must remain perfectly parallel to the saw blade when locked.
- Rigid and Stable: No flex or movement when clamped.
- Easy to Adjust and Lock: Smooth gliding and secure locking mechanisms are critical for efficiency and precision. Many homemade fences utilize a T-square design for stability.
4. Insert Plate
The area immediately around the saw blade requires a removable insert plate. This plate supports the workpiece as it passes over the blade, minimizing tear-out and providing a safer cutting experience. Zero-clearance inserts, custom-made to fit tightly around the blade, are particularly beneficial for precise cuts.
5. Power Control and Safety Switches
While the circular saw has its own trigger, a dedicated external power switch for the table saw setup is highly recommended. This switch should be easily accessible from the front of the table, ideally with a paddle-style design for quick emergency shut-off, enhancing user safety.
6. Dust Collection Integration (Optional but Recommended)
Woodworking creates significant sawdust. Integrating a dust collection port or system underneath the blade area, though challenging in a DIY setup, can greatly improve air quality, visibility, and workshop cleanliness.
The Versatility a Table Saw Brings to Your Workshop
A table saw is often considered the most versatile tool in a woodworking shop, enabling a vast array of operations that are difficult, if not impossible, to perform accurately with handheld tools alone. By successfully converting your circular saw, you unlock these capabilities:
- Precision Ripping: Cutting boards and sheet goods to exact widths with consistently straight edges along the grain.
- Accurate Crosscutting: While miter saws excel here, a crosscut sled on a table saw can provide incredibly accurate and repeatable cuts for squaring ends or cutting to specific lengths.
- Dadoes and Rabbets: Creating grooves and shoulders for strong, flush joinery, often with a specialized dado blade set (if the circular saw arbor and mounting system can accommodate it safely).
- Bevel Cuts: Tilting the blade to make angled cuts through the thickness of the material, essential for boxes, frames, and various decorative elements.
- Sheet Good Processing: Efficiently and accurately cutting large sheets of plywood, MDF, or particleboard, which can be cumbersome and less precise with a handheld circular saw alone.
- Tapering and Tenons: With custom jigs, a table saw can precisely create tapers and tenons for more advanced joinery.
This expanded functionality significantly broadens the scope of projects you can undertake, moving beyond basic cuts to more intricate and professional-looking creations, all while minimizing the financial burden of purchasing a new high-end machine.
Watch the Ingenuity in Action
To truly appreciate the mechanical brilliance and practical functionality of Matthias Wandel’s homemade table saw, witnessing it in operation provides invaluable insight. The following video offers a dynamic demonstration of its features, showcasing the precision cuts, smooth adjustments, and thoughtful design that went into its creation. It’s a testament to how meticulous planning and execution can transform a simple tool into a versatile workshop powerhouse.
This visual experience allows you to see the custom mounting system, the robust rip fence in use, and how easily the depth and angle adjustments are made. It reinforces the idea that with the right skills and dedication, a seemingly complex piece of machinery can be fabricated within a home workshop environment.
DIY vs. Commercial Table Saws: A Balanced Perspective
While Matthias Wandel’s project exemplifies the peak of DIY prowess, it’s essential to have a realistic understanding when comparing a homemade table saw to a factory-built commercial unit. Both have their unique advantages and disadvantages:
DIY Table Saw (Pros):
- Cost-Effective: Significantly cheaper than most commercial options, leveraging existing tools and materials.
- Customization: Built to exact personal specifications, dimensions, and unique workflow needs.
- Learning & Skill Building: An exceptional opportunity to enhance engineering, woodworking, and problem-solving skills.
- Personal Satisfaction: The profound pride of crafting a functional, high-precision tool.
DIY Table Saw (Cons):
- Safety Risks: Potentially higher risk if not meticulously designed and constructed with absolute adherence to safety protocols. Lacks professional certifications and integrated advanced safety features.
- Precision Limitations: May not achieve the same micro-precision or repeatable accuracy of high-end commercial saws without exceptional craftsmanship and calibration.
- Feature Set: Might lack advanced features like integrated dust collection ports, powerful braking systems, or high-end fence mechanisms found in professional units.
- Time & Effort: Requires a considerable investment of time, patience, and advanced skill.
- Durability: Longevity and robustness might be less than purpose-built commercial machines depending on materials used.
Commercial Table Saw (Pros):
- Integrated Safety Features: Designed with multiple safety mechanisms, robust blade guards, riving knives, and often emergency stop systems (e.g., paddle switches, SawStop technology).
- Guaranteed Precision: Factory calibrated for high accuracy, squareness, and repeatability out of the box.
- Power & Durability: Typically features more powerful motors and robust construction built for heavy-duty, long-term use.
- Convenience & Reliability: Ready to use (with minor assembly), comes with warranties, and spare parts are available.
- Advanced Features: Often includes superior dust collection, efficient fence systems, and greater capacity.
Commercial Table Saw (Cons):
- High Upfront Cost: Can be a significant financial investment, especially for quality models.
- Less Customization: Standardized features and dimensions; difficult to modify substantially.
- Space Requirements: Many models are bulky and require dedicated shop space.
The decision to build or buy ultimately hinges on your budget, skill level, safety priorities, and the specific demands of your woodworking projects. For the adept and financially savvy craftsman, Wandel’s project offers a compelling and rewarding alternative.
Conclusion: A Testament to DIY Ingenuity and Practicality in Woodworking
The conversion of a corded circular saw into a custom table saw is a remarkable achievement that epitomizes the spirit of DIY woodworking. It showcases how, with profound knowledge, meticulous planning, and skilled execution, an underutilized tool can be transformed into a versatile, high-precision stationary machine. Matthias Wandel’s detailed design not only offers a cost-effective alternative to purchasing a commercial table saw but also provides an invaluable learning experience for advanced woodworkers.
While the allure of building your own tools is strong, the paramount importance of safety cannot be overstated. This is a project for those with advanced skills who prioritize stable construction, effective safety mechanisms, and responsible operation. For individuals who possess these attributes, the reward is immense: a highly customized, functional table saw that not only performs essential workshop tasks with precision but also stands as a proud testament to personal ingenuity and craftsmanship.
To explore the full scope of this project, including detailed photographs, construction notes, and further insights into its functionality, we highly recommend visiting Matthias Wandel’s comprehensive website. It’s a treasure trove of information for anyone inspired by this extraordinary DIY woodworking endeavor.