
Understanding and Testing for Lead Paint: A Comprehensive Guide to Home Safety
The insidious dangers of lead poisoning are a profound concern for homeowners, particularly those residing in older properties. For any home constructed before 1978, the likelihood is significant that lead-based paint, lead pipes, or lead solder were integral components of its original build. Understanding these risks and taking proactive measures is paramount for the health and safety of your household.
The Hidden Threat: Why Lead Paint Remains a Concern
While intact and firmly adhered to walls, lead paint generally poses little immediate threat. However, its danger escalates dramatically when the paint deteriorates, flakes, or is disturbed through renovation activities. When scraped, chipped, or sanded, lead paint transforms into hazardous dust particles or small chips, which can then be ingested by young children or inhaled by anyone in the vicinity. This is where the real danger lies, as even minute quantities of lead can have severe, irreversible health consequences.
Understanding the Health Impacts of Lead Exposure
Lead poisoning is particularly devastating for young children and pregnant women. Children are more vulnerable because their developing brains and nervous systems are highly susceptible to lead’s toxic effects, and they are more likely to put contaminated objects or hands in their mouths. Even low levels of lead in a child’s blood can result in:
- Developmental delays and learning difficulties
- Reduced IQ and attention span
- Behavioral problems, including hyperactivity
- Hearing and speech problems
- Slowed growth
- Kidney damage and anemia
Adults are also at risk, although often less acutely. High levels of lead exposure in adults can lead to:
- High blood pressure and hypertension
- Joint and muscle pain
- Headaches and memory loss
- Digestive problems
- Reproductive issues in both men and women
- Nerve disorders
The key takeaway is that there is no safe level of lead exposure. Prevention through identification and mitigation is the best approach.
Navigating the Regulatory Landscape: EPA and Lead-Safe Practices
Recognizing the widespread health risks, the U.S. Environmental Protection Agency (EPA) banned the use of lead-based paint in residential properties in 1978. Since then, the EPA has continuously updated and implemented regulations to protect public health. A significant regulation is the Lead-Based Paint Renovation, Repair, and Painting (RRP) Rule.
This rule mandates that contractors, property managers, and other entities performing renovations, repairs, or painting projects in homes built before 1978 that disturb more than six square feet of lead paint must be certified by the EPA or an authorized state program. Furthermore, they must employ lead-safe work practices to prevent lead contamination. This includes proper containment, work area preparation, waste disposal, and thorough cleanup procedures to ensure no lead dust is released into the environment. These stringent requirements underscore the seriousness with which lead hazards are viewed and the specialized knowledge required to handle them safely.
The EPA’s proactive stance and adjusted laws, which require contractors to have special certifications, are designed to ensure that professionals working on older homes are equipped with the knowledge and skills to safely manage lead paint, preventing its disturbance and subsequent harm.
Empowering Homeowners: The DIY Lead Paint Test Solution
While professional lead testing is comprehensive, many homeowners prefer an initial, cost-effective, and immediate solution for peace of mind. The good news is that reliable do-it-yourself options exist. One such highly regarded product is the Klean-Strip D-Lead Paint Test Kit. This kit is not only EPA-recognized but also ETA-verified to accurately detect the presence of lead and lead chromate paint. Crucially, it can also confirm if EPA-regulated lead-based paint is *not* present, offering a clear answer to your concerns.
The D-Lead Paint Test Kit leverages innovative color-change technology, designed to deliver clear, easy-to-read results within 13 minutes or less. This rapid response time is invaluable for homeowners seeking quick answers about their living environment.
Each kit is comprehensively equipped with all the necessary components for conducting six individual test samples. This multi-sample capacity allows homeowners to test various areas of concern within their property, providing a broader assessment. For families with new additions, like a baby, or those contemplating renovations, the decision to test is often a straightforward one, driven by an imperative to create the safest possible home environment.
A Step-by-Step Guide: How to Use the D-Lead Paint Test Kit
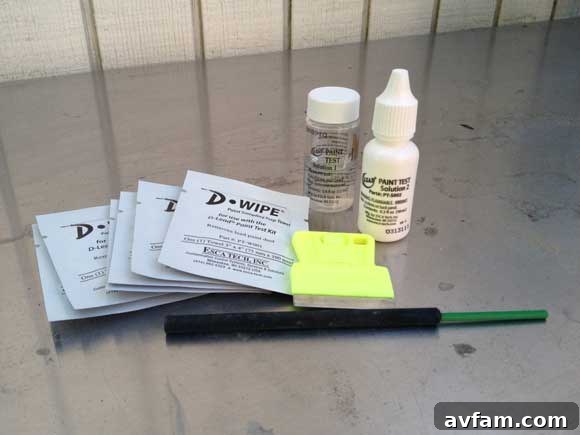
Conducting a lead paint test using the D-Lead kit is a straightforward process, designed for ease of use. However, precision and adherence to instructions are key to obtaining accurate results. Here’s a detailed breakdown of the steps involved:
- Preparation and Sample Selection: Begin by selecting a discreet area for your paint sample, such as a small chip behind a door, a hidden corner, or a less visible section of trim. It’s crucial to clean the razor blade provided (or a clean utility knife) thoroughly before use to prevent cross-contamination.
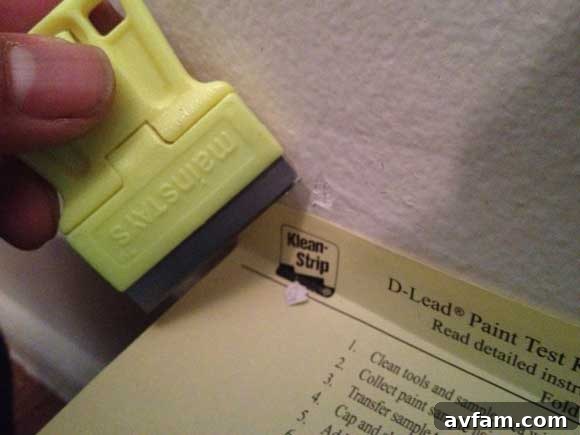
- Collecting the Paint Sample: Carefully use the clean razor blade to scrape off a paint sample. The critical aspect here is to ensure you remove not just the surface layer, but all underlying paint layers down to the bare substrate if possible. Lead paint might be buried under newer, lead-free layers, so a comprehensive sample is essential for an accurate test. Aim for a sample size roughly the size of a pencil eraser.
- Sample Segmentation: Once collected, carefully cut the paint sample into approximately four smaller pieces. This increases the surface area exposed to the testing solutions, enhancing the reliability of the result.
- First Solution Application: Drop the segmented paint pieces into the first solution provided in the kit. Close the bottle and shake it vigorously for a full 10 seconds. This step begins the chemical reaction required for detection.
- Second Solution Application: After the initial shaking, add five drops of the second solution to the bottle. Once again, close the bottle tightly and shake it for another 10 seconds to ensure thorough mixing and reaction activation.
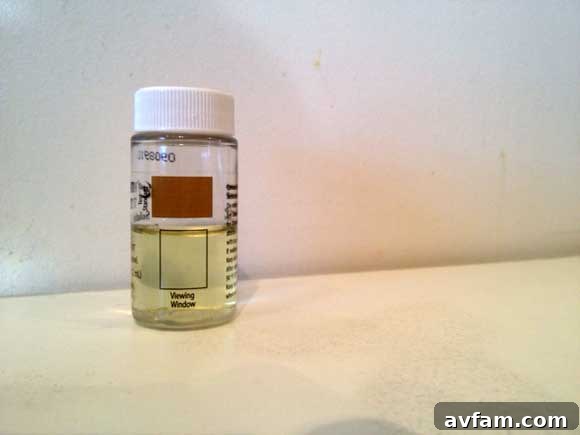
- Interpreting Your Results: Within 13 minutes or less, you will observe a color change in the solution. The D-Lead kit includes a handy color-coded viewer directly on the bottle, making interpretation simple. Compare the color of your solution to the test color chart. If the solution’s color is darker than the designated test color, there is a strong indication that your paint contains lead.
- Verification Step: For an added layer of confidence, the kit also provides another strip that you can drop into the solution. This strip serves as a verification tool, further confirming the presence or absence of lead based on an additional visual cue.
This entire process is designed to be very user-friendly, taking only a few minutes to complete. The peace of mind it offers is truly invaluable. Many homeowners, even those in properties built as early as the 1950s, have reported negative results, bringing significant relief. For others, a positive result serves as a crucial alert to take further action.
Beyond DIY: When to Consider Professional Lead Testing
While DIY kits like the Klean-Strip D-Lead provide an excellent initial screening, they do have limitations. They are best suited for detecting the presence of lead in specific paint samples. They typically do not quantify the concentration of lead, assess lead in dust or soil, or provide legal documentation. For more comprehensive assessments, especially during real estate transactions, before major renovations, or if health concerns persist, professional lead testing is highly recommended.
Certified lead inspectors use advanced equipment, such as X-ray fluorescence (XRF) analyzers, to non-destructively determine lead content in paint, plaster, and other materials. They can also collect dust wipe samples, soil samples, and water samples for laboratory analysis. A professional report offers a detailed understanding of lead hazards throughout your property, including their location and extent, which is essential for developing an effective lead hazard control plan.
Navigating a Positive Result: What to Do If Lead Is Found
If your DIY test indicates the presence of lead, or if a professional inspection confirms lead hazards, it’s crucial not to panic. This information empowers you to take informed action to protect your family. The primary goal is to manage or remove the lead hazard safely.
Several strategies exist for addressing lead-based paint, categorized by the EPA into interim controls and abatement:
- Interim Controls: These are temporary measures designed to reduce human exposure to lead hazards. They include specialized cleaning, repairs, maintenance, painting, temporary containment, and ongoing monitoring. For example, simply painting over intact lead paint with a new layer of non-lead paint can serve as an interim control, provided the underlying lead paint is stable.
- Abatement: This refers to more permanent solutions for eliminating lead hazards. Abatement options include:
- Encapsulation: Applying a specialized coating that creates a durable, airtight barrier over lead-based paint, effectively sealing it in.
- Enclosure: Covering the lead-painted surface with a new, durable material such, as drywall, paneling, or vinyl siding.
- Removal: The complete physical removal of lead-based paint from surfaces. This is often the most intrusive and costly option but provides the most definitive resolution.
Any work involving the disturbance or removal of lead paint should always be performed by EPA-certified lead abatement professionals. Attempting to remove lead paint yourself can inadvertently create a much greater health hazard by releasing large quantities of lead dust. Professionals are trained in lead-safe work practices, have the necessary specialized equipment, and can ensure proper containment and disposal of lead waste, minimizing risks to occupants and the environment.
Maintaining a Lead-Safe Home Environment
Even after testing or abatement, ongoing vigilance is beneficial:
- Regular Cleaning: Keep your home clean, especially floors, windowsills, and other surfaces, to minimize any potential lead dust accumulation. Use wet cleaning methods (wet mops, wet cloths) as dry dusting can spread lead dust.
- Hygiene: Encourage frequent handwashing for children and adults, especially before eating and after playing outdoors.
- Maintenance: Promptly repair any damaged paint or plaster to prevent chipping and flaking.
- Nutrition: Ensure children have a diet rich in iron and calcium, as good nutrition can help reduce lead absorption in the body.
Conclusion: Prioritizing Health and Peace of Mind
The potential dangers of lead paint in older homes are a serious concern, but they are also manageable. The availability of reliable, easy-to-use DIY testing kits like the Klean-Strip D-Lead Paint Test Kit empowers homeowners to quickly assess their environment. This simple, affordable test is a vital first step towards ensuring the safety of your living space and, most importantly, the health of your loved ones.
Whether you’re a new parent, a renovator, or simply an owner of an older property, investing approximately $35 in a D-Lead Paint Test Kit offers invaluable insights and unparalleled peace of mind. These kits, along with other Klean-Strip products, are readily available at major home centers, mass merchants, and hardware stores nationwide. Take the proactive step today to safeguard your home and family against the unseen threat of lead.