
DIY Custom Planter Boxes: Elevate Your Backyard with Thriving Bougainvillea
Transforming your outdoor space doesn’t have to be a daunting task. With a bit of creativity and some basic woodworking skills, you can create stunning features that add color, character, and curb appeal. For our recent backyard makeover, our vision was clear: introduce vibrant color and lush greenery. We decided on the beautiful bougainvillea, a plant renowned for its stunning blooms and resilience, especially in the sunny climate of Southern California. To truly make these magnificent plants shine and to integrate them seamlessly into our landscape design, we embarked on a rewarding DIY project: building custom planter boxes.
This project not only allowed us to utilize some leftover lumber from a previous see-saw build, demonstrating excellent resourcefulness, but also proved to be incredibly straightforward and achievable for anyone, regardless of their woodworking expertise. We only needed to acquire a few additional 2x4s and 10-inch pine board pieces to complete our material list. The result? Two beautifully crafted planter boxes that perfectly complement our outdoor aesthetic and provide an ideal home for our new bougainvillea plants. Join us as we detail the steps to creating your own custom planters, bringing life and color to your outdoor living area.
Planning Your Perfect Planter: Dimensions and Design
Before diving into construction, meticulous planning is key to a successful DIY project. Our backyard layout called for two distinct planter boxes to maximize impact and fit the available space. We decided on one larger unit, spanning an impressive 8 feet in length, and a shorter, complementary box at 4 feet long. Both planters were designed to be a consistent 20 inches high. This specific height was achieved by simply stacking two 10-inch wide pine boards on top of each other, a simple yet effective design choice that contributed to the clean lines and robust structure of the planters.
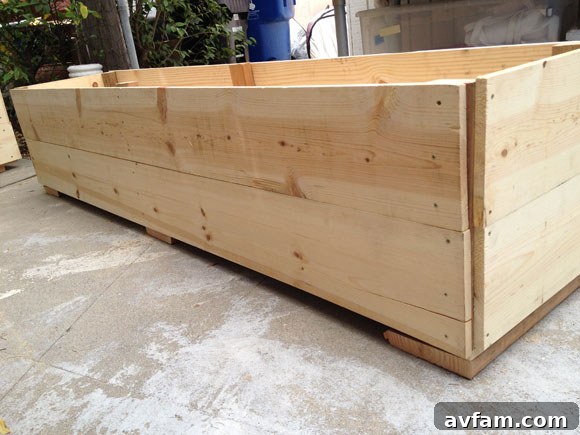
Our primary goal was a clean, simple design that didn’t demand extensive time or complex joinery. As self-proclaimed novice woodworkers, we prioritized ease of construction without compromising on aesthetics or durability. This approach is perfect for beginners looking to add custom elements to their yard. The straightforward design minimized cuts and intricate assembly, making the project enjoyable and manageable from start to finish. We wanted a design that would highlight the beauty of the bougainvillea, not overshadow it with unnecessary complexity. The dimensions were carefully chosen to provide ample space for the bougainvillea roots to grow, ensuring the plants would thrive for years to come.
Tools and Materials: Getting Started with Confidence
Every successful DIY project begins with gathering the right tools and materials. For these planter boxes, we combined existing lumber with a few essential purchases, making it a cost-effective endeavor. Here’s what we used:
Essential Materials:
- 2×4 Lumber: Primarily for the structural supports, providing a sturdy framework for the planter sides.
- 10-inch Pine Boards: These formed the visible sides of our planter boxes, chosen for their ease of use and aesthetic appeal.
- 2 1/2-inch Deck Screws: Crucial for strong, weather-resistant connections, ideal for outdoor projects.
- Valspar Paint (Dark with Transparency): We selected a high-quality outdoor paint that offered durability, a rich color, and allowed the natural wood grain to show through, adding character. Its shade also perfectly matched our new Lowe’s outdoor patio furniture, creating a cohesive look.
- Plastic Liner: An indispensable component for protecting the wood from moisture and soil.
- Pea Gravel: For optimal drainage at the bottom of the planter.
- Soil Mix: A specific blend of peat moss, garden soil, and vermiculite designed to provide the best growing environment for bougainvillea.
Key Tools:
- DeWALT Jigsaw: Excellent for precise cuts, especially when dealing with slightly irregular pieces or making any necessary adjustments.
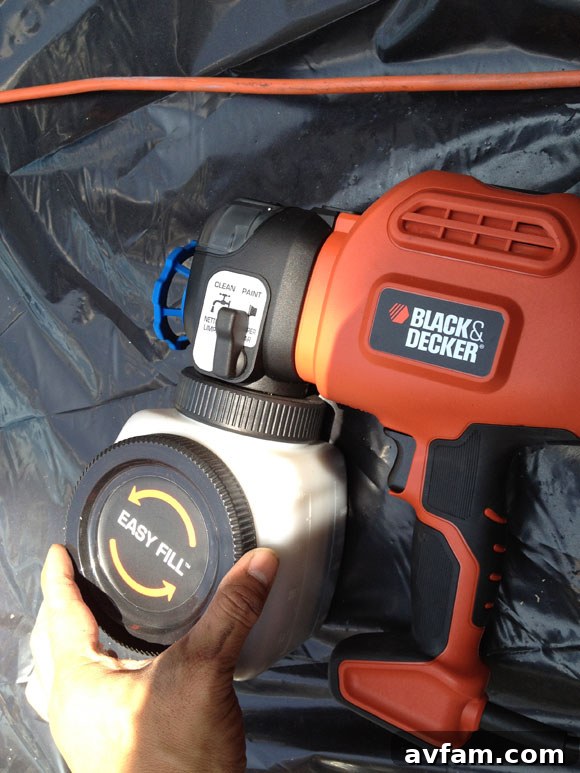
- Black & Decker Spray Paint Gun: A game-changer for achieving a smooth, even paint finish quickly and efficiently.
- Drill/Driver: Essential for fastening screws and drilling drainage holes.
- Measuring Tape and Pencil: For accurate measurements and markings.
- Safety Gear: Gloves, safety glasses, and hearing protection are always recommended for any woodworking project.
Both the DeWALT jigsaw and the Black & Decker spray paint gun performed exceptionally well, making the construction and finishing stages smooth and enjoyable. Investing in reliable tools, even for occasional DIY, can significantly impact the quality and efficiency of your projects.
Step-by-Step Construction: Building Your Planter Boxes
With our design finalized and materials gathered, it was time to bring our custom planter boxes to life. We focused on a straightforward assembly process, perfect for enthusiasts of all skill levels. Here’s how we built our durable and attractive planters:
1. Assembling the Planter Base
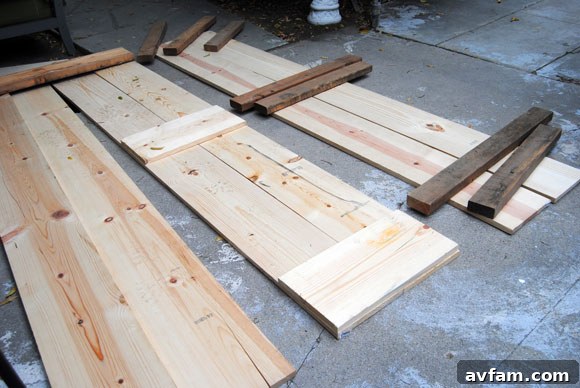
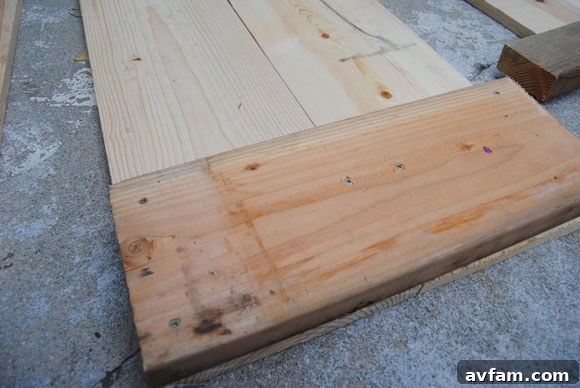
The foundation of any good planter is a sturdy base. We started by laying out the base components, ensuring they were perfectly aligned. For each planter, we used three 20-inch by 10-inch boards. These were carefully positioned side-by-side to form the bottom of the planter. Using a drill and appropriate screws, we securely fastened these three boards together, creating a solid platform that would support the entire structure and its future contents. Precision in this step is crucial for the overall stability of your planter.
2. Attaching the Structural Supports
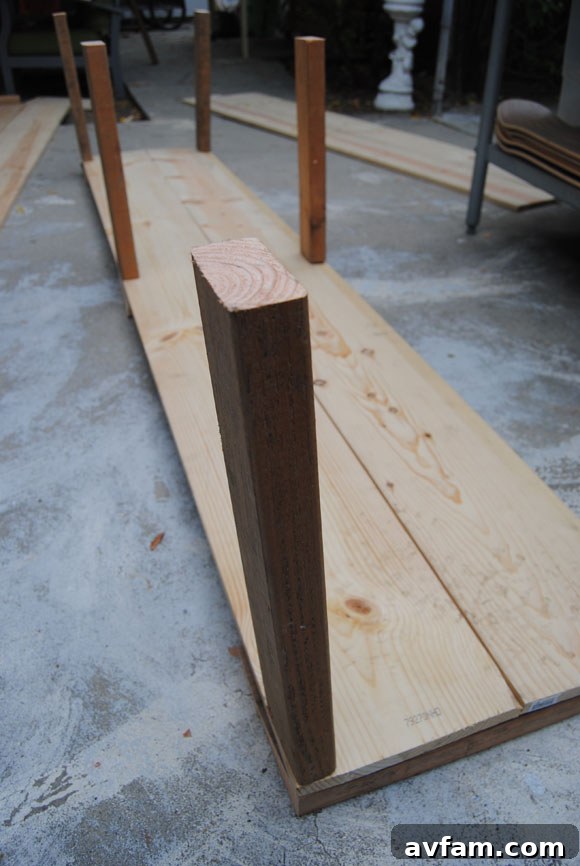
Once the base was assembled, we flipped it over to attach the vertical supports. These supports are vital for providing rigidity to the planter’s sides. We used six 2x4s for this purpose, strategically placing them along the length of the base. Each 2×4 was secured to the base using 2 1/2-inch deck screws, ensuring a strong and lasting connection. These supports not only bear the weight of the side panels but also add significant structural integrity, making the planter robust enough to withstand the elements and the weight of soil and plants. Proper alignment of these supports is essential for a square and level planter.
3. Installing the Side Panels
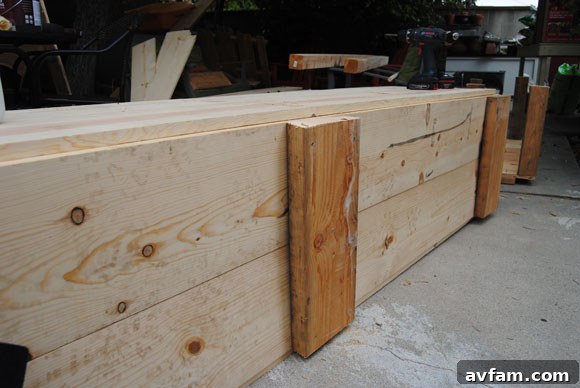
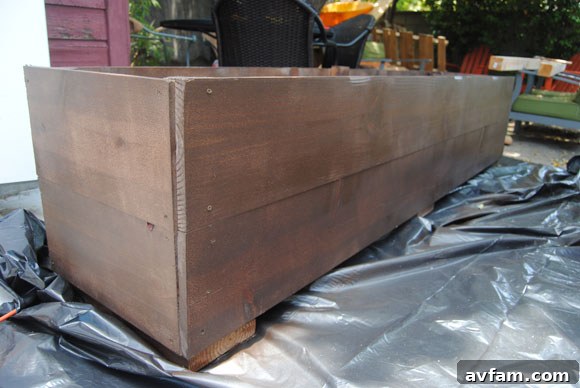
With the base and supports in place, the next step was to attach the side panels. We began from the bottom-most 10-inch pine board and worked our way up. Each board was carefully aligned with the 2×4 supports and securely fastened using deck screws. As mentioned, by stacking two 10-inch boards, we effortlessly achieved our desired 20-inch planter height. This method creates a clean, uniform look and significantly simplifies the construction process, avoiding complex cuts or joinery. The sides came together quickly, revealing the emerging form of our custom planters.
4. Painting for Protection and Aesthetics
Painting is a critical step, not just for aesthetics but also for protecting the wood from moisture, rot, and UV damage. We chose a dark Valspar outdoor paint that featured a slight transparency, allowing the natural beauty of the wood grain to peek through. This choice created a sophisticated and organic look. What made this step particularly enjoyable was the use of our Black & Decker spray paint gun.
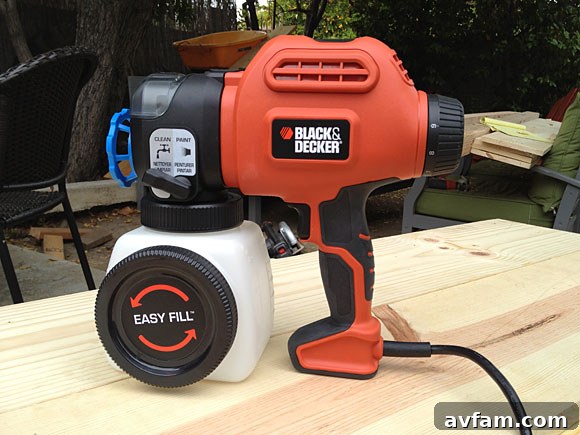
The spray gun was incredibly user-friendly, allowing us to achieve a smooth, even coat without brush marks. Its “easy fill side” feature was a significant convenience, making paint refills simple and mess-free – a huge improvement over traditional methods that often involve detaching the entire canister. After finishing, cleaning was a breeze; a few sprays of water through the system and it was ready for storage. The chosen paint color also perfectly complemented our new patio furniture from Lowe’s, tying the entire backyard aesthetic together beautifully.
Preparing for Planting: Ensuring a Thriving Environment
With the construction and painting complete, the next crucial phase was preparing the planters to be the perfect home for our bougainvillea. Proper preparation ensures healthy plant growth and longevity.
5. Installing a Protective Liner and Drainage Holes
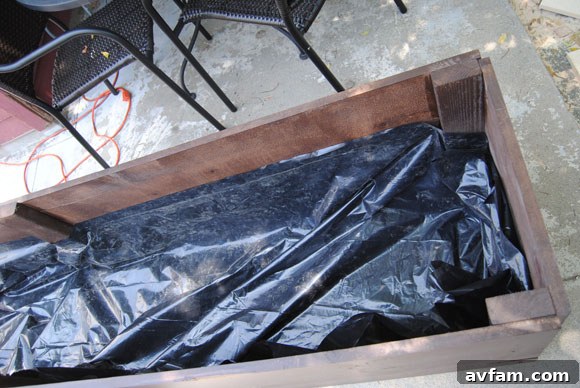
Once the paint had fully dried, we carefully laid a plastic liner inside the planter. We actually reused the plastic sheet we had laid down to protect our work area during painting, demonstrating another act of resourcefulness. This liner is vital as it creates a barrier between the soil and the wood, protecting the planter from moisture damage and extending its lifespan significantly. After placing the liner, we drilled several 1-inch holes through both the plastic and the wooden base of the planter. These drainage holes are absolutely essential to prevent waterlogging, which can be detrimental to plant health and lead to root rot. Good drainage is key for thriving bougainvillea.
6. Creating an Optimal Drainage Layer
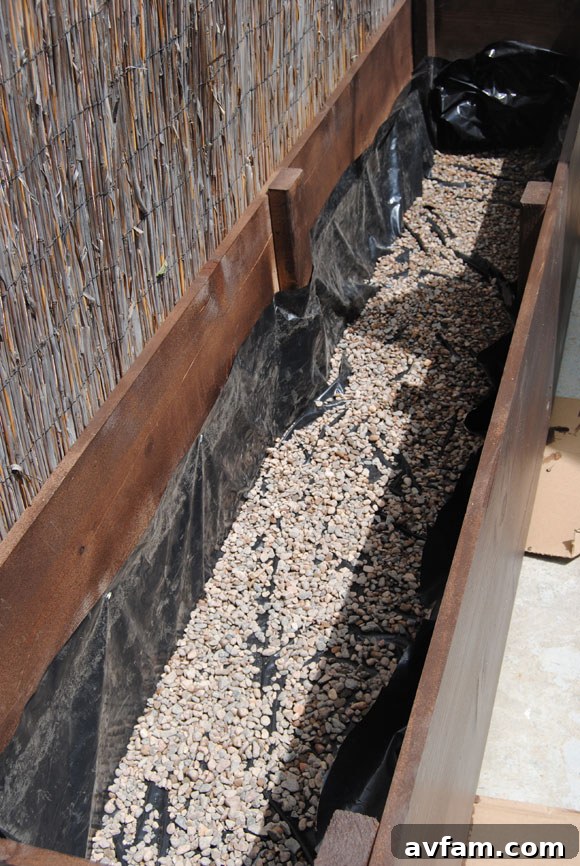
To further enhance drainage and prevent the drainage holes from becoming clogged with soil, we added a light layer of pea gravel to the bottom of the planter, directly over the plastic liner. This gravel layer acts as a coarse buffer, allowing excess water to flow freely out of the drainage holes while keeping the potting mix contained. This simple step is a critical component of healthy container gardening, especially for plants like bougainvillea that prefer well-drained conditions.
7. Crafting the Perfect Soil Mix for Bougainvillea
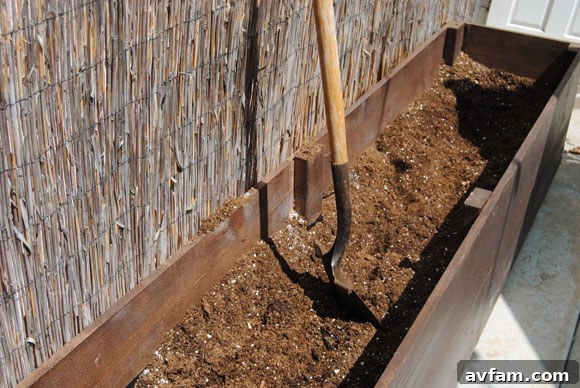
The right soil mix is paramount for bougainvillea to flourish. Instead of using plain garden soil, we opted for a specialized blend. Our mix consisted of peat moss, general garden soil, and vermiculite. This combination offers several advantages:
- Peat Moss: Improves soil structure, increases water retention, and provides a slightly acidic environment that bougainvillea often prefers.
- Garden Soil: Provides essential nutrients and a robust base for the mix.
- Vermiculite: A lightweight mineral that enhances aeration, improves drainage, and helps retain moisture and nutrients, making them available to the plant’s roots.
This well-balanced soil mix ensures excellent aeration, proper moisture retention without waterlogging, and a rich nutrient profile, creating an ideal environment for bougainvillea to establish strong roots and produce abundant blooms.
The Grand Finale: Planting and Enjoying Your Bougainvillea
With our custom planter boxes meticulously built and prepared, it was time for the exciting moment: planting our bougainvillea. We carefully placed each plant into its new home, ensuring proper depth and spacing. After backfilling with our specialized soil mix and giving them a good initial watering, we stepped back to admire our handiwork.
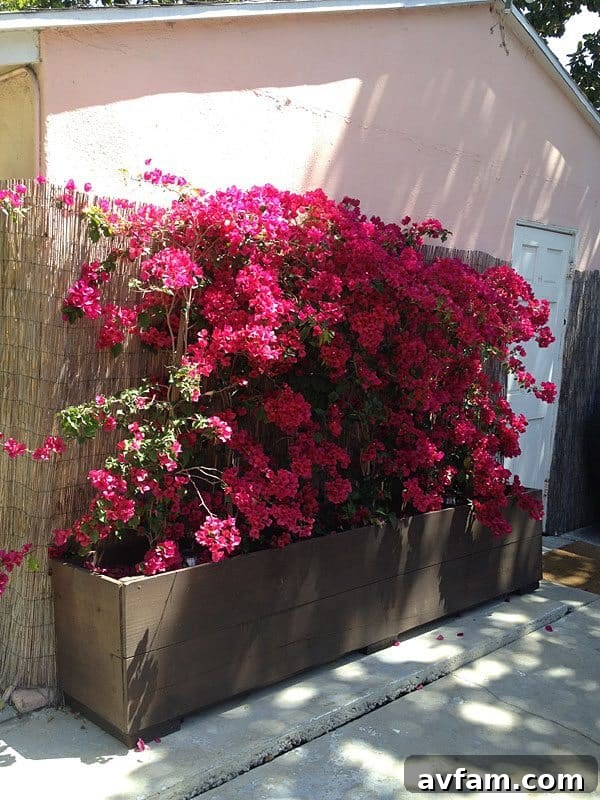
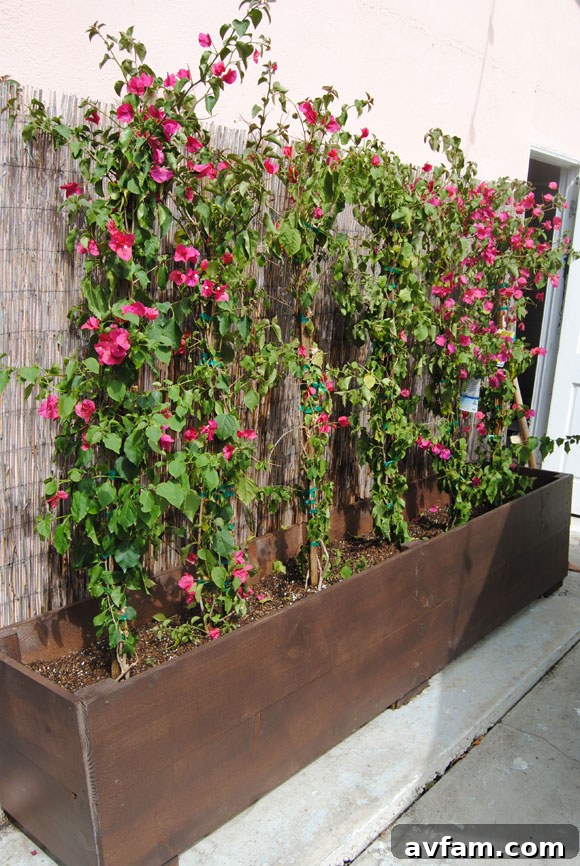
The immediate transformation was remarkable, but the true reward came after just two weeks. Our bougainvillea plants were not just surviving; they were thriving! We observed clear signs of vigorous growth, and, to our immense delight, they had already begun budding brilliant red flowers. This sight was exactly what we had envisioned and hoped for – a burst of radiant color that would enliven our entire backyard.
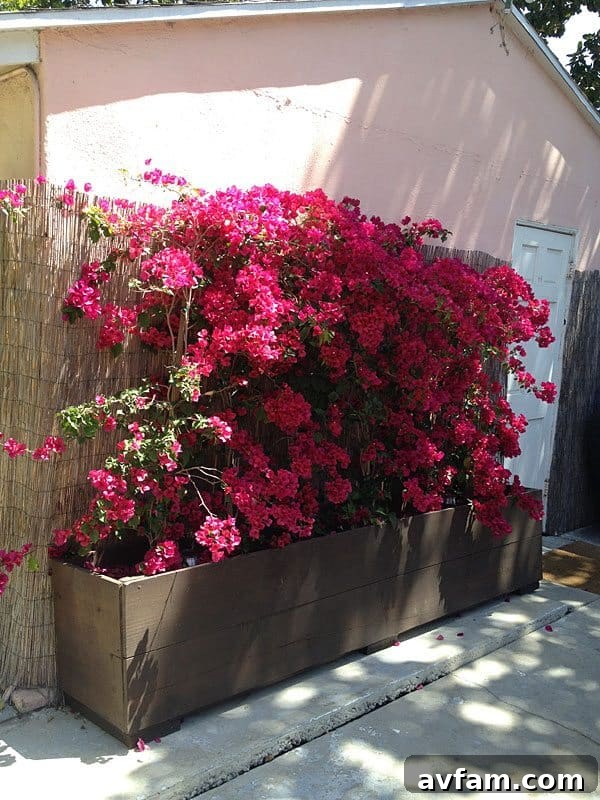
A few weeks later, the planters were overflowing with spectacular blooms, a testament to the healthy environment we had created. The bougainvillea cascaded over the edges, creating a vibrant display that brought a touch of Mediterranean charm to our Southern California home. The dark, transparent paint on the planter boxes beautifully contrasted with the vivid red flowers, enhancing their brilliance and making them a focal point of our outdoor living space.
Unleash Your Inner DIYer: Build Your Own Dream Planters
This project proves that creating a beautiful, personalized outdoor space doesn’t require professional expertise or an exorbitant budget. If you have a corner of your garden, a patio, or a deck that’s yearning for a touch of greenery and color, we wholeheartedly encourage you to design and build your own custom planter boxes. The satisfaction of creating something with your own hands, tailored precisely to your needs and aesthetic preferences, is incredibly rewarding. You’ll be surprised at how easy and enjoyable the process is, and the enduring beauty they bring to your home will be a constant source of pride. Start your DIY journey today and transform your outdoor living dreams into a vibrant reality!