
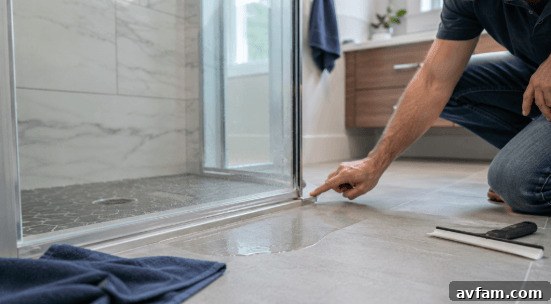
Most significant bathroom issues don’t appear suddenly. They begin with a whisper, not a bang. It might start as a small, seemingly innocent puddle of water on the floor just outside the shower. You wipe it up, assuming it was a one-time splash, only to find it there again the next day. Or perhaps you notice the bottom of the glass door has a faint yellow tinge, the clean white caulk is developing stubborn dark spots, or the drain is taking just a little longer to clear.
These subtle signs are your bathroom’s early warning system. They often indicate that water is pooling where it shouldn’t or seeping through tiny gaps that are meant to be sealed shut. Effective bathroom maintenance goes far beyond simply cleaning the mirror, toilet, and countertops. The true longevity of your bathroom depends on the less glamorous, often overlooked details: the integrity of shower seals, the condition of the caulk, the clarity of the drainage, the state of tile grout, and the presence of hidden leaks.
Ignoring these small details can lead to much larger, more expensive problems down the road, including rampant mold growth, swollen and ruined cabinetry, and structural water damage. By incorporating a few simple checks into your routine, you can catch these issues early and prevent them from escalating. Here are seven crucial maintenance checks that will help protect your investment and keep your bathroom in prime condition for years to come.
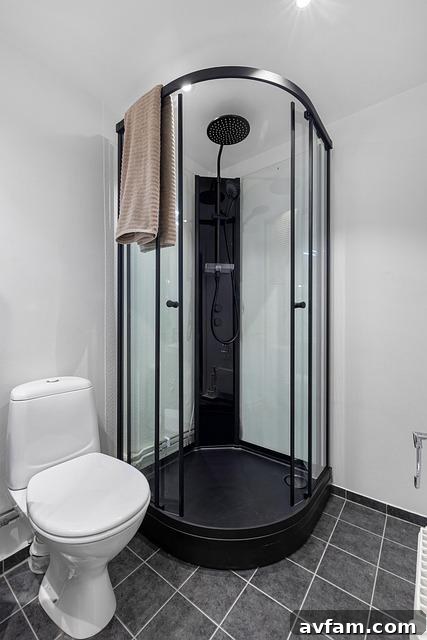
1. The First Line of Defense: Inspecting Your Shower Door Seals
If you consistently find water on the floor after a shower, your first inspection point should be the seals on your shower door. These vinyl or plastic strips are the primary barrier designed to keep water inside the enclosure.
Shower door seals are typically fitted along the bottom edge of the glass (a drip sweep), the vertical closing edge, or between a fixed panel and the door. Every day, they are exposed to a harsh environment of hot water, soap scum, mineral deposits from hard water, and chemical cleaning products. This constant assault causes them to degrade over time, becoming hard, yellowed, brittle, or cracked.
To check their condition, run your fingers along the clear seal. A healthy seal feels flexible and sits snugly against the shower tray, floor, or adjacent glass panel. If you find that it’s curled away, loose, stiff, or discolored with black or yellow stains, it has likely lost its ability to create a proper seal. This is a common and easily fixable source of leaks.
A frequent mistake homeowners make is trying to patch a leaking door with a bead of silicone caulk. Caulk is not designed for moving parts. Since the shower door must open and close, the caulk will inevitably stretch, weaken, and pull away from the glass, restarting the leak. It can also interfere with the door’s ability to close properly and is notoriously difficult to remove from glass later on.
The correct solution for a moving glass edge is a replaceable shower door seal. These are designed to move with the door and can be easily swapped out when they wear down, without the messy process of scraping away old silicone. Before buying a replacement, you need more than just the length. Measure the thickness of your glass (e.g., 1/4″, 3/8″), the profile of the seal (e.g., T-shape, H-shape), and the size of the gap it needs to cover. There are many types of shower door seals, including bottom seals with drip rails, side seals, magnetic seals for a tight closure, and bulb-style seals for cushioning. Using the wrong type won’t solve the problem.
2. Guarding the Gaps: A Close Look at Your Caulk Lines
While seals are for moving parts, caulk is the essential sealant for fixed, stationary joints. You’ll find it around the perimeter of bathtubs and shower trays, in the vertical corners where tiled walls meet, along the backsplash of a vanity, and where fixed glass panels join a wall or floor. Its critical job is to create a waterproof barrier that prevents water from seeping into walls, subfloors, and cabinets.
When inspecting your caulk, look for more than just surface dirt. Dark spots or speckles could be mildew on the surface, but if mold has penetrated the silicone, cleaning will only provide a temporary fix. More importantly, check for any signs of lifting, peeling, or separation. Run your fingernail along the edge where the caulk meets the tile or tub. If you can feel a gap or see the caulk pulling away, water is likely already getting behind it, creating a perfect environment for mold and rot.
Never apply a new layer of caulk over the old, failing layer. Old caulk is contaminated with soap scum, oils, and mold, which prevents the new caulk from forming a strong, lasting bond. The proper method is to completely remove the old caulk, thoroughly clean the joint with a solvent like denatured alcohol to remove all residue, allow it to dry completely, and then apply a fresh bead of high-quality, 100% silicone bathroom-grade caulk that is specifically formulated to resist mold and mildew.
3. Prevent Clogs: Keeping Your Shower Drain Flowing Freely
A slow shower drain is a problem that rarely happens overnight. It’s a gradual accumulation of hair, soap residue, shampoo, conditioner, and body oils that cling together inside the pipe. At first, the water might drain a few seconds slower. Before you know it, you’re standing in a pool of ankle-deep water by the end of your shower.
The most effective maintenance is prevention. Get into the habit of collecting visible hair from the drain cover after every shower. A simple tissue or your hand can pull the hair out before it has a chance to go down the drain. Once hair enters the pipe, it acts like a net, catching soap scum and forming stubborn clogs that are much harder to remove.
For routine cleaning, periodically remove the drain cover and clear any visible debris. A simple plastic drain hook or a soft brush, followed by a flush of very hot water, is often enough to clear minor buildup. This approach is far better for your plumbing than relying on harsh chemical drain cleaners, which can corrode pipes, damage metal finishes, and harm septic systems over time.
4. A Hidden Culprit: Cleaning Your Framed Shower Door Tracks
If you have a framed shower door, the bottom metal track can be a deceptive source of leaks. These tracks are designed to channel water back into the shower through small, built-in “weep holes.” However, these tiny holes can easily become clogged with hard water deposits, soap scum, hair, and other debris.
When the weep holes are blocked, water that gets into the track has nowhere to go. It fills up the channel and eventually spills over the outer edge onto your bathroom floor. This can make it seem like your door seal is failing when the real problem is simply a blocked drainage path. To check this, dry the track completely, then spray a small amount of water against the inside of the door. Watch to see if it drains back into the shower or sits in the track. If it pools or spills out, your weep holes need cleaning. Use a soft brush, a cotton swab, or a toothpick to gently clear the blockage. Avoid using hard metal tools, which can scratch and damage the track’s finish.

5. Beyond the Surface: Checking Your Tile and Grout Integrity
While ceramic and porcelain tiles are highly water-resistant, the grout between them is not inherently waterproof. Grout is porous, and its primary job is to lock tiles in place and prevent water from easily reaching the waterproof membrane behind the wallboard.
Pay close attention to the areas that receive the most water: the lower shower walls, inside corners, the joint where the floor meets the wall, and the shower curb or threshold. These areas are most susceptible to grout cracking or wearing away. If your grout looks consistently dark or discolored even when dry, it may be stained or, more worryingly, saturated with moisture. Gently scrape it with a fingernail; if it feels soft or crumbles away as a powder, it needs to be repaired or replaced.
Don’t forget to inspect the edges around trim pieces, niches, and fixed glass panels. Even a hairline crack in the grout is a potential entry point for water, which can lead to loose tiles and serious damage to the wall structure behind them. Periodically applying a quality grout sealer can help repel water and prevent stains, extending the life of your grout.
6. Winning the War on Water Spots: Managing Hard Water Buildup
That cloudy, white film that builds up on your glass shower doors is more than just a cosmetic annoyance. These are mineral deposits, primarily calcium and magnesium, left behind as hard water evaporates. This limescale buildup can make routine maintenance much more difficult.
Hard water deposits love to collect near the bottom of the glass, around seals and hardware, and inside shower door tracks. Over time, this buildup can become rock-hard, making seals difficult to clean and potentially blocking the track’s weep holes. The best strategy is prevention. Use a squeegee to wipe down the glass and seals after every shower. It only takes 15 seconds and dramatically reduces the mineral and soap residue that can accumulate. For existing buildup, a solution of white vinegar and water can help dissolve the deposits without resorting to abrasive pads that can scratch glass and metal finishes.
7. Look Deeper: Uncovering Leaks Under the Sink and Around the Toilet
Not all water damage comes from the shower. Some of the most destructive leaks are slow, silent, and hidden from view. A slow drip from a supply line under the sink, moisture seeping from the base of the toilet, or a P-trap that isn’t perfectly sealed can go unnoticed for months.
Once a month, make it a point to open your vanity cabinet and perform a quick inspection. Use a flashlight to get a clear look at the drain pipe, the hot and cold water supply lines, the shutoff valves, and the floor of the cabinet itself. Be on the lookout for any signs of trouble: water marks, musty odors, discoloration, bubbling paint or laminate, or wood that feels soft or spongy to the touch.
Give the area around the base of your toilet the same attention. If the floor is frequently damp, wipe it dry and check back later to see if the moisture has returned. Persistent dampness could indicate a failure of the wax ring that seals the toilet to the drainpipe—a problem that requires immediate attention to prevent damage to your subfloor. Catching these hidden leaks early can save you from the massive expense of replacing flooring, subflooring, and cabinetry.
Your Proactive Bathroom Maintenance Checklist
The next time you finish a shower, take just two minutes to perform a quick scan. Glance at the floor for puddles. Check the bottom edge of the door. Look at the caulk lines in the corners. Note how fast the drain is clearing. These simple observations are the key to a healthy, long-lasting bathroom. Most costly repairs begin as a small, fixable problem: a worn-out seal, a cracked line of caulk, a slow drain, or a hidden drip. By catching these signs early, you can turn a potential disaster into a simple, inexpensive weekend fix.