
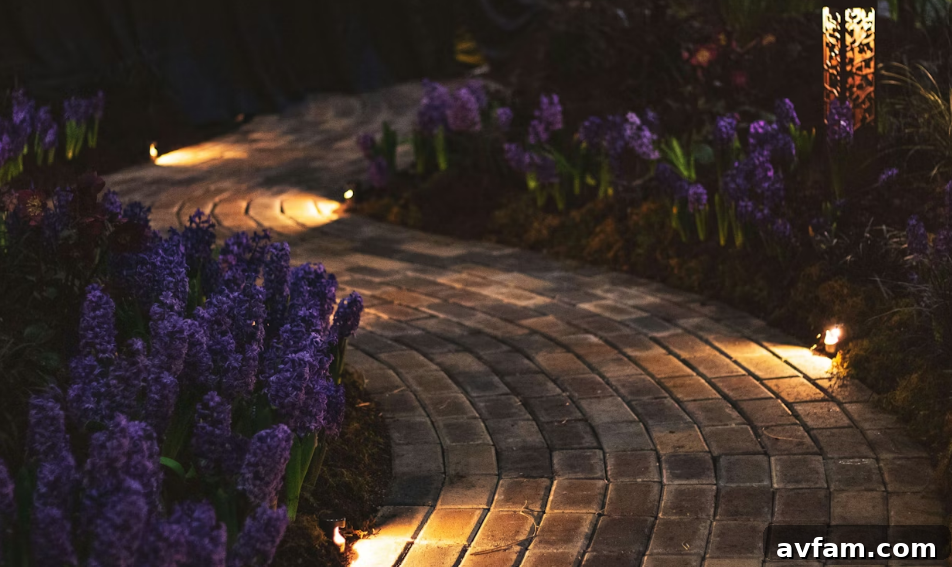
Outdoor ambiance lighting does more than just illuminate your yard after sunset; it completely transforms the feel and functionality of your exterior spaces. When designed and maintained properly, it creates a warm, inviting atmosphere, highlights architectural features, enhances security, and extends the usability of your patio, garden, or pathways. Imagine a beautifully lit landscape, inviting you to relax and enjoy the evening. However, when these systems malfunction, the dream can quickly turn into a frustrating reality for homeowners.
Common issues like flickering bulbs, uneven brightness, or entire sections that refuse to turn on can disrupt your outdoor enjoyment and diminish your property’s curb appeal. These seemingly minor glitches are often symptoms of underlying problems that, if ignored, can escalate into more significant electrical concerns or even safety hazards over time. Understanding how to diagnose and address these issues effectively is crucial for maintaining a stunning and safe outdoor environment.
While fixing defective outdoor lighting might seem daunting, it doesn’t always require calling in an expert immediately. Many common problems can be resolved with a methodical approach, a bit of patience, and attention to detail. This comprehensive guide will equip you with the knowledge to troubleshoot, repair, and maintain your outdoor lighting system, transforming those dim, unreliable lights into a consistently brilliant display you can enjoy every evening. Let’s illuminate your path to a perfectly lit outdoor sanctuary.

Prioritize Safety: Essential Steps Before You Begin Any Repair
Before you even think about touching a single wire or fixture, it is absolutely paramount to pause and prioritize safety. Outdoor lighting systems are inherently complex, involving direct exposure to electricity, varying weather conditions, and often hidden wiring installed beneath surfaces. A small oversight or an incorrect step can lead to serious consequences, including electrical shocks, burns, short circuits, or extensive damage to your entire lighting infrastructure.
Your first and most critical action must always be to switch off the power supply to the affected lighting system at your home’s main electrical breaker. Do not rely solely on a wall switch or a timer, as these may only control the circuit’s live side and could still leave parts of the system energized. Verify that the power is off using a non-contact voltage tester on various points of the system, particularly near fixtures and connections you intend to inspect.
Furthermore, ensure you use the appropriate tools specifically designed and insulated for electrical work in outdoor conditions. This includes insulated screwdrivers, pliers, and wire strippers. Protect yourself by wearing heavy-duty gloves, safety glasses, and sturdy, non-slip footwear. Always work in dry conditions; avoid attempting repairs during rain, in damp soil, or near standing water, as moisture significantly increases the risk of electrocution. Keeping your work area dry and clear of obstructions will minimize unnecessary risks throughout the process.
Open or exposed wires pose severe and immediate risks, especially when they are vulnerable to moisture, frequent foot traffic, or contact with landscaping tools. These situations can result in electric shock, serious injury, unexpected accidents, and costly system damage if neglected for too long. Improperly insulated or damaged wiring can also cause ground faults, which may lead to circuit breaker trips or even electrical fires. It’s not just about functionality; it’s about protecting your home and loved ones.
Accidents due to faulty electrical installations are not uncommon. For example, a severe incident was reported in Atlanta where a worker suffered an electrical shock after equipment contacted live power lines. While such industrial accidents highlight extreme dangers, they underscore the universal need for caution. If your existing outdoor lighting system was installed by contractors, and you or someone else suffers an injury due to a faulty connection, exposed wires, or non-compliant installation, you might have grounds for a legal claim. Seeking advice from a personal injury lawyer can help you understand your rights and the potential for compensation for medical expenses, lost wages, and emotional distress resulting from negligence. Holding responsible parties accountable ensures safer practices and prevents similar incidents from occurring in the future, promoting higher industry standards.
Identifying the Root Cause: A Systematic Approach to Troubleshooting Outdoor Lighting Issues
Defective outdoor lighting rarely manifests without a clear underlying reason. The problem could stem from a variety of sources, ranging from simple component failures to more complex issues deep within the wiring or power supply system. Environmental factors such as persistent rain, accumulating dust and debris, extreme temperature fluctuations, and even UV radiation from the sun can significantly degrade components over time, impacting performance and lifespan.
To effectively diagnose the problem, adopt a slow and careful inspection process, systematically examining each component of your lighting system. Begin with the most accessible parts and work your way inward. This includes checking the bulbs themselves, the sockets they screw into, the wiring connecting each fixture, and any switches, timers, or sensors controlling the system. A methodical approach ensures that no minor but crucial detail is overlooked during your inspection.
Common Culprits and How to Spot Them:
- Bulbs: Are they burnt out? Do they have a loose connection? Sometimes simply re-tightening a bulb can resolve flickering or non-functional lights. Ensure you are using the correct wattage and voltage for your fixtures.
- Sockets: Check for corrosion, dirt, or debris inside the socket. Pitted or rusted contacts can prevent proper electrical flow.
- Wiring: Inspect for cuts, fraying, chewed insulation (from rodents), or loose connections at splices and terminals. Pay particular attention to buried low-voltage wiring, which can be easily damaged by gardening tools or shifting soil.
- Fixtures: Look for water ingress, cracked housings, or corrosion inside the fixture itself. Seals and gaskets can degrade, allowing moisture to damage internal components.
- Transformers (for Low-Voltage Systems): Listen for humming sounds, check for signs of overheating, and verify the voltage output with a multimeter. A failing transformer can cause dimming or total system failure.
- Switches, Timers, & Sensors: Test the functionality of wall switches, programmable timers, and motion or dusk-to-dawn sensors. Ensure they are clean, properly wired, and set correctly.
Beyond individual component checks, pay close attention to patterns in how the lighting fails across your outdoor space. For instance, if a specific section consistently flickers or goes out, it strongly suggests a localized issue, such as a loose splice or a damaged wire segment nearby. If multiple lights fail simultaneously or the entire system goes dark, the problem is likely linked to a central power source, a main breaker, a ground fault circuit interrupter (GFCI) outlet, or the primary transformer. Observing these patterns can significantly guide you toward a more accurate diagnosis, reducing unnecessary guesswork and saving time.
It’s also worth noting the reality of modern lighting technology. As CNET reports, approximately 95% of LED bulbs typically last within two standard deviations of their average life expectancy, following a normal distribution pattern commonly observed by industry experts. This means that while LEDs are known for their longevity, a small percentage of bulbs will inevitably fail earlier than anticipated due to manufacturing defects or unforeseen stresses. Consequently, if you’re using LED bulbs outdoors, don’t immediately rule out the possibility that they simply burned out prematurely. Always keep this statistical reality in mind as you troubleshoot.
Repair or Replace: Thoughtful Solutions for Faulty Outdoor Lighting Components
Once you’ve successfully identified the root cause of your outdoor lighting problem, the next crucial step is deciding whether repair or replacement is the most appropriate and cost-effective solution. This decision often hinges on the severity of the damage, the age of the components, and your overall budget. Minor issues, such as loose electrical connections, dirty contact points, or minor corrosion on accessible surfaces, can often be resolved with straightforward repairs without much difficulty.
For example, cleaning debris and oxidation from bulb sockets with a soft brush and electrical contact cleaner, or simply tightening loose wire nuts and terminal screws, can often restore proper functionality quickly and efficiently. Applying dielectric grease to connections can also help prevent future corrosion. These simple maintenance tasks can extend the life of your system and prevent recurring issues.
However, severely damaged wires with compromised insulation, deeply corroded metal components that are structurally weakened, cracked fixture housings, or burnt-out transformers usually necessitate complete replacement for safety and long-term reliability. Attempting to patch up heavily worn, broken, or extensively corroded parts may lead to recurring malfunctions, unreliable performance, or even hazardous electrical conditions down the line. In such cases, replacing the component ensures that the repair is robust and lasting, providing peace of mind.
Choosing the Right Replacement Components:
When replacement is the chosen path, always select materials and products specifically designed for outdoor use and built for durability. The outdoor environment can be harsh, with constant exposure to moisture, UV rays, temperature extremes, and potential physical damage. Look for features such as:
- Weather-Resistant Fixtures: Opt for fixtures made from robust materials like brass, copper, marine-grade aluminum, or high-quality composites that resist rust and corrosion.
- Sealed Connections: Utilize waterproof wire connectors, heat-shrink tubing, and outdoor-rated junction boxes to protect electrical splices from moisture ingress.
- Outdoor-Rated Wiring: Ensure you use appropriate wiring, such as UF (Underground Feeder) cable for direct burial or low-voltage landscape lighting cable for low-voltage systems, designed to withstand environmental exposure.
- Correct Voltage and Wattage: Always match the voltage and wattage requirements of new components with your existing system setup. Installing mismatched components can lead to circuit overloads, dimming, or premature failure of both new and old parts.
- Compatibility: If you have a smart lighting system, ensure new bulbs and fixtures are compatible with your existing smart home hub or control system.
The global outdoor lighting market is a rapidly expanding sector. According to Grand View Research, this market was valued at a significant $17.06 billion in 2024, with experts projecting substantial growth to $28.43 billion by 2030. This robust expansion indicates a continuous influx of innovative and durable lighting options, ensuring that you’ll always have a wide selection of high-quality products to choose from for your yard or landscaping project. This market growth also drives advancements in energy efficiency and smart technology, providing more sophisticated and reliable solutions.
Take your time during installation to ensure everything fits correctly, connections are secure, and all seals are properly in place. After completing the repair or replacement, test the system thoroughly to confirm it operates as expected and that the original problem has been fully resolved. A thoughtful and meticulous approach to repair ensures your outdoor lighting remains reliable, visually appealing, and safe for a significantly longer period, enhancing your property’s beauty for years to come.
Proactive Maintenance: Extending the Life and Brilliance of Your Outdoor Lighting
Beyond troubleshooting and repair, regular preventative maintenance is key to ensuring the longevity and consistent performance of your outdoor lighting system. A proactive approach can prevent minor issues from escalating and significantly extend the lifespan of your investment. Establish a routine for checking your lights, ideally at least once or twice a year, or more frequently if you live in an area with harsh weather conditions.
Key Maintenance Practices:
- Regular Cleaning: Dirt, dust, leaves, and insect nests can accumulate on fixtures and lenses, dimming their output and trapping heat. Gently clean fixtures with a soft cloth and mild soap and water. Ensure lenses are clear for optimal light dispersion.
- Inspect Wiring and Connections: Periodically check all visible wiring for signs of wear, fraying, or rodent damage. For low-voltage systems, ensure wire connections at fixtures and transformers are secure and free of corrosion. Re-bury any exposed wires to prevent accidental damage.
- Check Bulbs and Sockets: Even if lights are working, check bulbs for signs of dimming or flickering. Replace any that are nearing the end of their life to maintain consistent illumination. Inspect sockets for moisture, dirt, or corrosion and clean as necessary.
- Adjust Fixture Positioning: As plants grow, they can obstruct light beams, creating dark spots or reducing effectiveness. Adjust fixture positions or trim foliage to ensure lights are optimally illuminating their intended areas.
- Test Timers and Sensors: Confirm that your timers are set correctly for seasonal changes and that any motion or dusk-to-dawn sensors are functioning properly. Clean sensor eyes to ensure they aren’t blocked.
- Inspect Transformers and Power Supplies: For low-voltage systems, ensure the transformer unit is clean, properly ventilated, and protected from direct moisture. Check for any unusual humming sounds or signs of overheating.
- Winterization (if applicable): In colder climates, consider protecting delicate fixtures or disconnecting certain components if they are not rated for extreme winter conditions.
By integrating these simple maintenance tasks into your home care routine, you can drastically reduce the occurrence of unexpected failures and costly repairs. Proactive care ensures your outdoor lighting system remains a reliable, beautiful, and energy-efficient asset to your home for many years.
FAQs About Outdoor Lighting Repair and Maintenance
How much does it cost to install ambient landscaping lighting?
According to a comprehensive LawnStarter analysis, professional landscape lighting installation typically ranges between $2,000 and $4,500. Most homeowners can expect to pay around $3,250 for a complete, professional setup, which usually averages out to about $100 per fixture, depending on the type and complexity. Alternatively, for those who prefer a DIY approach, setting up a system of ten solar-powered lights can cost up to $1,500, offering a more budget-friendly option for smaller projects.
What are common outdoor LED lighting mistakes homeowners make?
Several common mistakes can diminish the effectiveness and lifespan of outdoor LED lighting. Choosing incorrect brightness (lumens) or color temperature (Kelvin) can lead to either poor visibility and harsh, unwelcoming light or an overly dim, unfunctional space. Improper placement often results in glare, creating uncomfortable hotspots, or leaving significant dark spots that compromise security and aesthetics. Ignoring the weather rating (IP rating) of fixtures is another critical error, as non-weatherproof lights will quickly fail when exposed to the elements. Furthermore, poor installation practices, such as inadequate wire connections or improper sealing, can significantly reduce the system’s lifespan. Lastly, overlighting certain areas not only wastes energy but also contributes to unnecessary light pollution, disrupting natural environments and potentially bothering neighbors.
How do I test an outdoor light fixture to find a fault?
To effectively test an outdoor light fixture, begin by ensuring the power is safely turned off at the breaker. First, check the bulb by replacing it with a known working one; sometimes the simplest solution is the answer. Next, inspect the bulb’s socket for corrosion or debris. If the issue persists, carefully check all visible connections to the fixture for looseness or damage. Use a non-contact voltage tester to confirm power is reaching the fixture (after turning the breaker back on safely for testing). If no power, trace the wiring back to the switch or power source, inspecting for cuts or breaks. Test the functionality of any switches, timers, or sensors associated with the fixture. If issues persist after these checks, consider replacing the entire fixture or consulting a qualified electrician for a professional diagnosis.
When should I consider upgrading my outdoor lighting system?
Consider upgrading your outdoor lighting system if your current setup frequently malfunctions, if you notice significant energy consumption, or if your aesthetic preferences have changed. Older halogen or incandescent systems can be upgraded to energy-efficient LED technology, which offers longer lifespan and reduced operating costs. An upgrade is also advisable if you want to integrate smart home features like remote control, automated scheduling, or color-changing capabilities. Finally, if your existing fixtures show extensive signs of wear, corrosion, or damage, upgrading to new, durable, weather-resistant models will enhance reliability and curb appeal.
Fixing defective outdoor or landscape lighting can be a manageable and even rewarding task when approached with the right knowledge and a systematic mindset. Each step, from prioritizing safety and meticulously identifying the root cause to thoughtfully repairing or replacing faulty components, builds upon the previous one, creating a comprehensive and practical solution for all your outdoor illumination concerns.
Approaching this process with patience, a willingness to learn, and an eye for detail will make a noticeable difference in the results you achieve. Slowly but surely, your outdoor space will regain its enchanting charm, enhanced functionality, and consistent reliability, allowing you to fully enjoy your perfectly lit evenings without constant interruptions or frustration.