
Mastering Woodturning: A Comprehensive Guide for DIY Enthusiasts
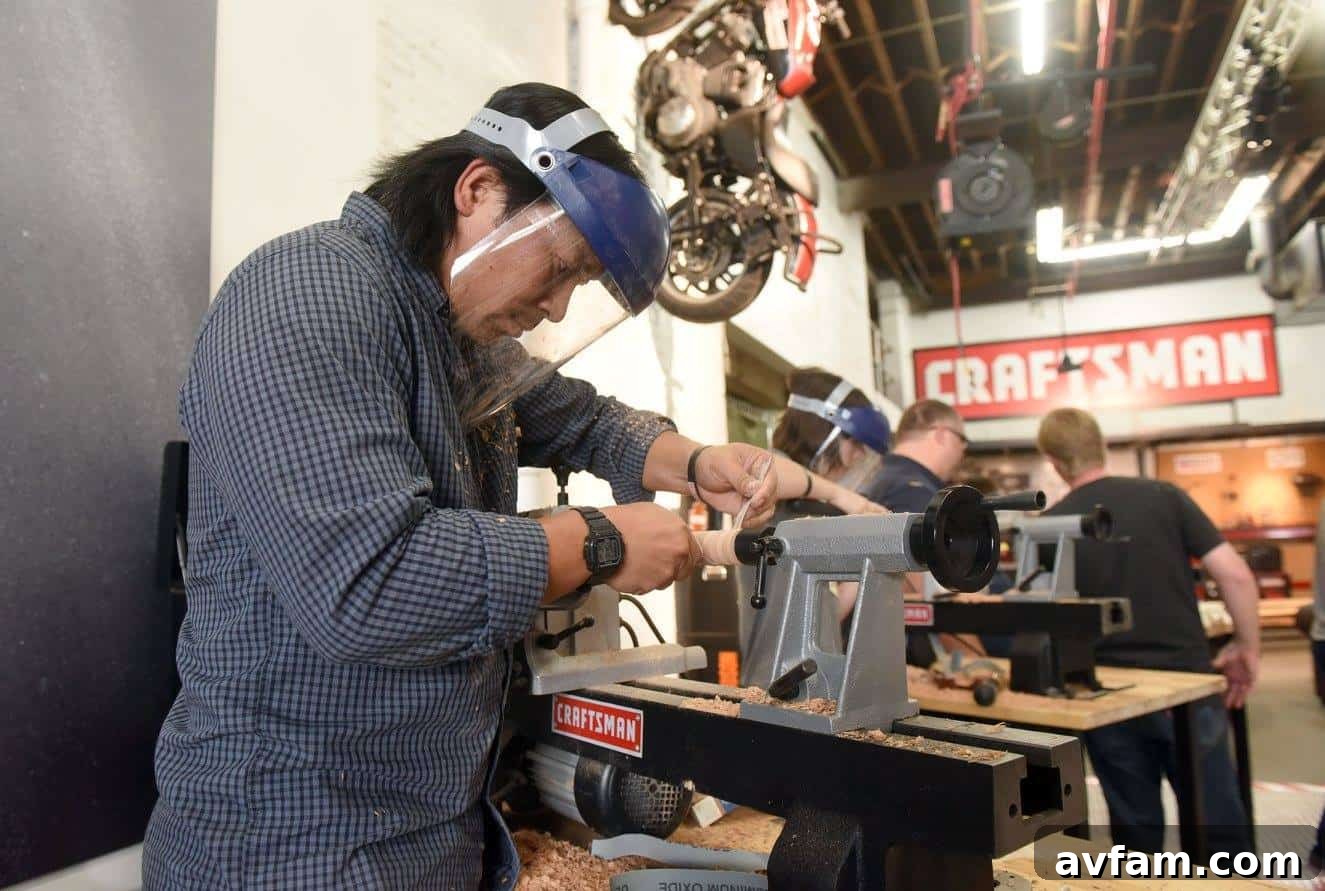
Woodturning stands as a timeless craft, offering an incredibly rewarding experience for anyone eager to delve into the world of woodworking. Unlike many other woodworking disciplines that often demand an ever-growing arsenal of large, expensive machinery as your skills progress, woodturning uniquely allows you to create stunning wooden objects with just a fundamental setup: a reliable wood lathe and a select few hand tools. This accessibility makes it an ideal pursuit for DIYers looking to explore a new creative outlet without significant initial investment. I recently had the enriching opportunity to learn the intricacies of woodturning from Dan Cary of Woodworkers Journal, an experience that truly highlighted the beauty and simplicity of this ancient craft.
At its core, woodturning is a specialized form of woodworking dedicated to shaping wooden pieces on a lathe. A wood lathe is a powerful machine that rotates a piece of wood, known as a blank, around a fixed axis. As the wood spins rapidly, various specialized carving tools are expertly applied to remove material, gradually transforming a rough block into an elegant, symmetrical form. From intricate spindle work to the graceful curves of bowls and platters, the possibilities are virtually limitless once you master the foundational techniques.
The allure of woodturning lies in its ability to produce a diverse range of functional and decorative items. Imagine crafting your own unique wooden bowls for your kitchen, sturdy and aesthetically pleasing table legs that give character to furniture, delicate candle holders, or even personalized goblets. These are just a few examples of the beautiful products you can create through the art of woodturning. If you’re ready to embark on this exciting journey, understanding the essential tools and techniques is your first step.
Choosing Your First Wood Lathe: The Heart of Your Workshop
Every wood lathe shares the fundamental purpose of rotating a piece of wood, enabling precise shaping. However, significant differences exist primarily based on the size and type of woodturning projects you intend to undertake. Key specifications to consider include the “swing capacity” – which denotes the maximum diameter of a workpiece the lathe can accommodate – and the “distance between centers,” indicating the longest spindle a lathe can turn. These measurements are crucial for matching the lathe to your aspirations.
Types of Lathes and Key Considerations:
- Benchtop Lathes (Mini and Midi Lathes): These compact models are perfect for beginners or those with limited workshop space. Mini lathes typically offer a 10-inch swing and are ideal for smaller projects like pen turning, small spindles, and perhaps small bowls. Midi lathes, with an 11-12 inch swing, provide slightly more versatility for larger bowls and spindles, striking a balance between size and capability.
- Full-Size/Floor-Standing Lathes: For serious hobbyists or professionals planning to turn large bowls, platters, or furniture components, a floor-standing lathe is often necessary. These units boast larger swing capacities (16 inches or more) and greater distances between centers, along with heavier construction for stability and vibration dampening.
When starting, a lathe with at least 1/2 horsepower and a 12-inch swing capacity is an excellent baseline for general purpose woodturning. Models like the Craftsman offering for around $414 provide a robust entry point. If your budget allows and you anticipate tackling slightly larger or harder woods, bumping up to a 1 horsepower motor with a 12 1/2-inch swing capacity, such as the Delta model priced at approximately $610, will offer enhanced power and versatility, ensuring smoother cuts and less strain on the motor. Investing in a lathe with variable speed control is also highly recommended, as it allows for precise speed adjustments crucial for different turning stages and wood types.
Essential Lathe Maintenance for Longevity and Performance:
Proper maintenance is paramount to ensure your lathe performs optimally and safely for years to come. Regular lubrication of moving parts, such as the headstock and tailstock components, is vital. Always refer to your manufacturer’s specific recommendations for lubricants, which may include specialized grease and oil. Furthermore, make it a routine practice to inspect all nuts, bolts, and fasteners for tightness. Vibrations during turning can loosen components, leading to potential hazards or reduced accuracy. A well-maintained lathe not only extends its lifespan but also contributes significantly to the safety and quality of your woodturning experience.
Decoding Woodturning Accessories: Tools of the Trade
Beyond the lathe itself, a critical component of your woodturning setup is a quality set of turning tools. These specialized chisels are your primary means of shaping wood, each designed with a unique profile to achieve specific cuts and effects. Additionally, understanding lathe chucks and other workholding devices is essential for securely mounting your wood blank.
The Art of Turning Tools:
Turning tools broadly resemble chisels but feature distinctly shaped and beveled points tailored for specific woodturning tasks. The two main categories are spindle turning tools and bowl turning tools, though many woodturners eventually acquire both sets for maximum flexibility:
- Gouges: These are arguably the most common and versatile tools.
- Spindle Gouges: Designed for detail work on spindles, coves, and beads. They have a shallower flute compared to bowl gouges.
- Bowl Gouges: Featuring a deeper flute and thicker shaft, bowl gouges are built for aggressive cutting into end grain and shaping the curves of bowls and platters.
- Skew Chisels: With a sharp, angled edge, skew chisels are excellent for creating clean, smooth cuts, beads, and for planing surfaces on spindles. They require practice to master but yield superb finishes.
- Parting Tools: Used to cut off completed pieces from the remaining stock, create tenons, and define specific depths.
- Scrapers: These tools are used for refining curves and smoothing surfaces, often after initial shaping with gouges. They typically have a flatter grind.
For beginners, a basic 8-piece set of high-speed steel (HSS) turning tools, often available for around $75, is a good starting point. However, HSS tools require regular sharpening to maintain their edge, a skill that every woodturner must learn. You’ll need a bench grinder and appropriate jigs to keep them razor-sharp. Alternatively, carbide-tipped tools, such such as those from Rockler priced at approximately $129, offer a convenient solution. When the carbide tip dulls, you can simply rotate it to expose a fresh, sharp edge. Once all sides are dull, the tip can be easily replaced, eliminating the need for frequent sharpening.
Lathe Chucks and Workholding Solutions:
Securely attaching your wood blank to the lathe is critical for safety and successful turning. While some lathes may come equipped with a basic chuck, expanding your collection of workholding accessories will enhance your capabilities.
- Spur Drive and Live Center: This combination is standard for spindle turning. The spur drive grips the wood at the headstock, while the live center in the tailstock supports the other end, allowing the wood to spin freely.
- Faceplates: Essential for turning bowls and other objects that require support from one end (faceplate turning). The wood is screwed directly onto the faceplate, which then mounts to the headstock spindle.
- Four-Jaw Scroll Chucks: These versatile self-centering chucks are invaluable for a wide range of projects, especially bowl turning. They use interchangeable jaws to grip various tenon and mortise sizes, offering strong and precise workholding without screws.
- Mandrels: Primarily used for small, precise work like pen turning, a mandrel holds multiple pen blanks simultaneously between centers.
Preparation and Safety: Your Foundation for Success
Before any wood touches the lathe, meticulous preparation of your workspace and strict adherence to safety protocols are non-negotiable. A clean, organized environment not only enhances efficiency but significantly reduces the risk of accidents. Ensure your workshop is well-lit, free from obstructions, and provides ample space around the lathe so you won’t be bumped or distracted during operation.
Crucial Safety Tips for Woodturners:
- Personal Attire: Always roll up long sleeves above your elbows and remove all jewelry, including rings, watches, and necklaces. Loose clothing and accessories can easily get caught in the spinning workpiece, leading to severe injury.
- Eye Protection: This is paramount. Always wear safety glasses or, even better, a full-face shield to protect against flying wood chips, dust, and potential tool kickbacks.
- Hearing Protection: Lathes can be noisy, especially when turning rough blanks or hard woods. Use earplugs or earmuffs to prevent long-term hearing damage.
- Dust Collection: Woodturning generates a considerable amount of fine dust. Invest in a good dust collection system or wear a quality respirator to protect your lungs from inhaling wood particles, some of which can be allergens or irritants.
- Lathe Control: Always stop the lathe completely before making any adjustments to the workpiece, taking measurements, or changing tools. Never attempt to adjust tools or inspect the work while the lathe is spinning.
- Emergency Stop: Familiarize yourself with the location of your lathe’s emergency stop button or switch before you begin any operation. Knowing how to quickly shut down the machine in an emergency can prevent serious harm.
- Tool Rest Placement: Position the tool rest as close as possible to the workpiece (typically 1/8 to 1/4 inch) to provide maximum support for your turning tool and minimize the risk of the tool catching or digging in.
- Secure Workholding: Always double-check that your wood blank is securely mounted to the chuck or faceplate before starting the lathe. A loose piece of wood can become a dangerous projectile.
- Initial Speed: Always start the lathe at its lowest speed, especially with rough or unbalanced blanks. Gradually increase the speed as the piece becomes rounder and balanced.
Embarking on Your First Turn: From Blank to Masterpiece
The journey of woodturning truly begins with selecting the right wood. This is one of the most exciting aspects of the craft, as each species offers unique characteristics, colors, and grain patterns. Walnut, maple, and cherry are highly popular choices among turners for their beautiful finishes and ease of working. Experimenting with various woods allows you to discover their individual properties and the distinct aesthetic they bring to your finished pieces.
For convenience and consistent quality, you can purchase pre-cut turning stock online or from specialty lumberyards. This wood is typically kiln-dried to a stable moisture content and specifically selected for woodturning applications, ensuring fewer cracks or warps. Alternatively, many turners enjoy sourcing their own wood from fallen trees, allowing for unique pieces but often requiring careful drying and preparation.
The Basic Turning Process:
- Mounting the Blank: Securely attach your chosen wood blank to the appropriate workholding device (chuck or faceplate), and then attach this assembly to the lathe’s headstock. Ensure it’s centered and tightly fastened.
- Roughing Out: With the lathe set to a slow speed, use a roughing gouge to remove the corners and bring the blank to a cylindrical or generally round shape. This process eliminates significant wobbles and helps balance the workpiece.
- Shaping: Gradually increase the lathe speed and begin using various turning tools (gouges, chisels, scrapers) to define the desired profile and contours of your project. This stage requires patience, precision, and a keen eye for symmetry.
- Detailing and Finishing Cuts: Once the basic shape is achieved, switch to finer tools and lighter cuts to refine details, create smooth transitions, and eliminate tool marks.
- Sanding: With the lathe still spinning (at a slower speed), begin sanding the workpiece. Start with a coarse grit (e.g., 80 or 100 grit) and progressively move to finer grits (up to 320, 400, or even higher), removing all sanding marks between grits.
- Applying Finish: Once sanding is complete, you can apply your chosen finish while the piece is still on the lathe. Popular finishes include friction polishes, waxes, oils, and lacquers, each offering different levels of protection and aesthetic appeal.
- Parting Off: After the finish has cured, use a parting tool to carefully separate your completed piece from the remaining waste stock.
Woodturning is a remarkably safe and relatively inexpensive hobby that promises immense satisfaction as you transform raw wood into beautiful, functional, or decorative objects. The more wood you turn, the more intuitive your movements will become, and your skills will advance rapidly. Join local woodturning clubs, watch instructional videos, and continuously seek knowledge to hone your craft. Before you know it, you’ll be churning out finished wood projects with confidence and artistry, discovering a lifelong passion in the process.