
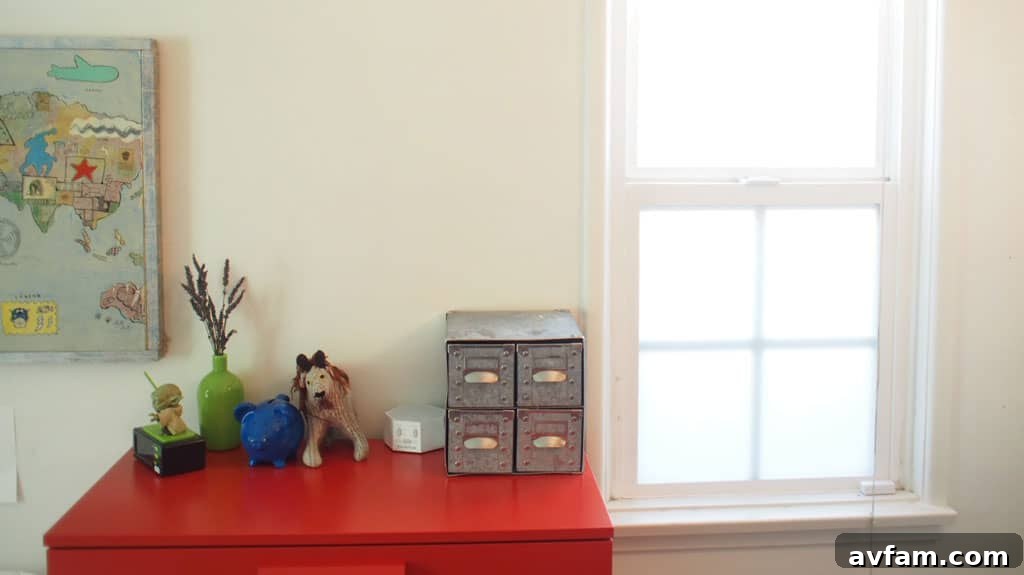
Many homeowners face a common dilemma: how to maintain privacy in rooms with windows that are close to neighbors or directly face a busy yard, without sacrificing precious natural light. Traditional window treatments like blinds or heavy curtains often block out sunlight entirely, leaving rooms feeling dim and enclosed. This challenge is precisely where innovative solutions like Gila® window film come into play, offering a perfect blend of privacy, light, and aesthetic appeal.
Gila window film provides a diverse range of do-it-yourself privacy window films designed to transform your living spaces. These films allow you to keep your windows uncovered, inviting the warmth and brightness of natural light into your home, while simultaneously ensuring your personal space remains private. Beyond just privacy, Gila films introduce a decorative element, enhancing the visual flair of any room.
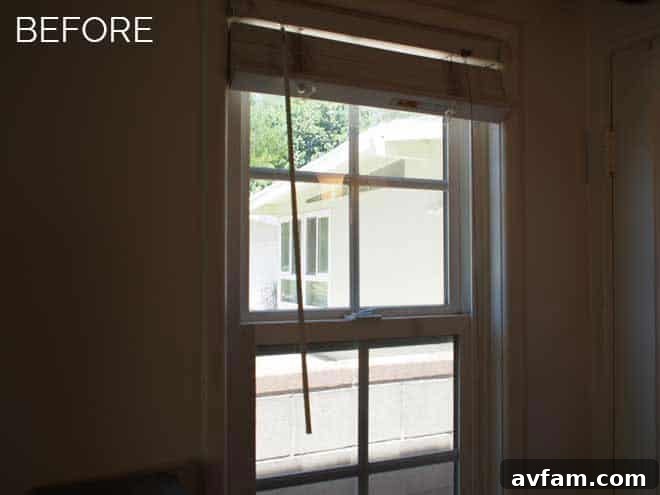
Our experience with Gila window film began with our son’s bedroom. It features a side window that is an excellent source of ambient light, and ideally, we prefer to leave it uncovered to maximize brightness. However, recent concerns about neighborhood security, including a noticeable increase in break-ins, prompted us to seek an enhanced privacy solution. This particular window, being one of two more secluded windows in our house, presented a potential vulnerability. Our goal was to render the window opaque enough to deter prying eyes or potential intruders, while crucially ensuring the room continued to be filled with abundant natural light. Gila window film promised to deliver exactly this balance.
For this specific project, we selected Gila’s “Frost” film. This particular option comes in a generous 4’x6.5′ roll, which was more than ample for our side window. The Frost film provides a beautiful, subtle translucence that mimics etched or sandblasted glass, offering robust privacy without making the room feel dark. In addition to a variety of practical privacy film patterns, Gila also offers a sophisticated décor series. These films are designed to provide the elegant look of custom etched glass, allowing you to infuse your windows with unique design flair and artistic character, transforming them into focal points within your home.
The DIY aspect of Gila window film is incredibly appealing, making professional results accessible to any homeowner. To ensure a smooth installation, we procured the essential Gila window film application kit from Home Depot for a modest price of $9. This comprehensive kit includes everything needed: the specialized window film application solution, a professional-grade squeegee for smoothing, a precise trim tool for neat edges, and a low-lint cloth for streak-free cleaning. With these specialized tools at hand, we were able to complete the entire window film application process in approximately 30 minutes, a testament to its straightforward and user-friendly design.
Transform Your Home: The Benefits of Gila Window Film
Installing Gila window film offers a multitude of advantages that go far beyond simple privacy. It’s a smart investment for any homeowner looking to enhance their living environment in several key ways:
- Uncompromised Privacy: The primary benefit is achieving privacy without the trade-off of losing natural light. Unlike blinds or curtains that block light entirely, Gila films allow daylight to filter through, maintaining a bright and airy atmosphere while obscuring the view from outside. This creates a more comfortable and private sanctuary within your home, especially for windows in sensitive areas like bedrooms and bathrooms.
- Enhanced Home Security: Privacy films act as a visual deterrent. By making it difficult for outsiders to see into your home, potential intruders are less likely to target your property, as they cannot easily scout for valuables or determine if someone is home. This added layer of opacity can significantly contribute to your family’s sense of safety and security.
- Superior UV Protection: Gila window films are engineered to block a significant percentage of harmful UV rays. This is crucial for protecting your interior furnishings, flooring, and artwork from fading and deterioration caused by sun exposure. Moreover, reducing UV radiation contributes to a healthier indoor environment, safeguarding your family’s skin from damaging rays even while indoors.
- Improved Energy Efficiency: Certain Gila films offer impressive solar control properties. They can help reject excessive heat during warmer months, reducing the strain on your air conditioning system and leading to lower energy bills. Conversely, some films can aid in retaining indoor heat during colder periods, providing year-round insulation benefits. This makes your home more comfortable and eco-friendly.
- Aesthetic Versatility: With a wide array of patterns, textures, and finishes, Gila window films can dramatically enhance the aesthetic appeal of your windows. From frosted and opaque options to decorative designs that mimic etched glass, you can customize the look of your windows to complement your interior decor, adding a touch of elegance and personal style without the high cost of custom glass.
- Cost-Effective DIY Solution: Compared to replacing windows, installing custom-etched glass, or even purchasing elaborate window treatments, Gila window film is an incredibly affordable alternative. Its DIY nature means you save on installation costs, making it an accessible upgrade for any budget.
Choosing the Right Gila Window Film for Your Needs
With a variety of Gila window films available, selecting the perfect one for your specific needs is key to achieving your desired outcome. Consider the following types and their benefits:
- Privacy Films (e.g., Frost, Opaque): Ideal for bathrooms, bedrooms, or ground-level windows where maximum privacy is a priority. These films obscure visibility from both sides while still allowing natural light to enter, creating a soft, diffused glow.
- Decorative Films: Perfect for adding a stylish touch to any window, whether it’s for privacy in a living room or simply to enhance the aesthetic of a glass cabinet or shower door. They come in various patterns, from geometric designs to nature-inspired motifs, simulating the look of custom decorative glass.
- Glare Control Films: If you struggle with harsh sunlight causing glare on screens or making a room uncomfortable, these films are designed to reduce glare significantly while maintaining visibility and allowing light in.
- UV Protection Films: While most Gila films offer some UV protection, specialized films provide even higher levels, crucial for areas with valuable artwork or south-facing windows that experience intense sun exposure.
- Energy Saving Films: For those looking to improve their home’s energy efficiency, these films are specifically formulated to block more solar heat, keeping interiors cooler in summer and warmer in winter.
When making your choice, consider the room’s function, the level of privacy required, the amount of natural light you wish to retain, and your home’s overall aesthetic. Gila offers solutions for every scenario, ensuring you find the perfect film to meet your specific requirements.
Tools & Materials for Flawless Gila Window Film Installation
Before you begin your DIY Gila window film project, it’s highly recommended to consult the wealth of resources available online. Gila provides a handful of incredibly helpful how-to installation videos, meticulously detailing each step of the process. For this particular project, the Privacy install video proved to be an invaluable guide. Having the right tools and materials is paramount for a successful, professional-looking application. Here’s a comprehensive list of what you’ll need:
- Gila Privacy Control window film: Ensure you choose the correct pattern and size for your window.
- Gila window film application kit: This essential kit typically includes the specialized application solution, a precise trim tool, a squeegee card for smoothing, and a low-lint cloth. Each component is designed to facilitate a clean and bubble-free installation.
- Scissors: Sharp scissors are necessary for initial cutting and sizing of the film.
- Tape measure: For accurate measurement of your window and the film. Precision here will save time and effort later.
- Window cleaner: A standard glass cleaner for the initial cleaning phase.
- Razor blade scraper: Crucial for removing stubborn debris, paint specks, or old residue from the glass surface. Use with caution to avoid scratches.
- Clear tape: Two pieces of clear tape are used for a clever trick to separate the film from its protective liner.
Step-by-Step Gila Window Film Installation Guide
Clean the Glass Thoroughly
Surface preparation is, without exaggeration, the most critical step to ensure the longevity and flawless adhesion of your window film. Any dust, dirt, smudges, or invisible residues will prevent the film from adhering properly, leading to bubbles, peeling, or an uneven finish. Begin by liberally spraying your window with a high-quality window cleaner. Use a fresh razor blade scraper to meticulously remove any paint splatters, old stickers, stubborn grime, or embedded dirt. Hold the scraper at a slight angle and apply even pressure. Repeat this cleaning and scraping process multiple times to ensure the glass is impeccably smooth and pristine. Finish by wiping the entire surface dry with a clean, low-lint cloth, ensuring no fibers are left behind. The goal is a perfectly clean, squeaky-clean glass surface.
Measure Your Window Precisely
Accurate measurements are vital for a successful installation. Using your tape measure, carefully obtain the exact height and width of your window glass from edge to edge, ensuring you measure within the frame. Once you have these precise dimensions, add an extra inch to both the height and the width. This additional allowance provides a comfortable margin for error during cutting and ensures that the film can be trimmed perfectly to size after application, guaranteeing full coverage without gaps. Double-check your measurements to avoid costly mistakes.
Cut the Window Film to Size
Find a large, clean, and flat surface to unroll your window film. This could be a kitchen table or a cleared section of your floor. To prevent the film from curling back up, place a heavy, flat item on one end to keep it securely in place. Carefully transfer your measured dimensions (with the added inch) onto the film. Use a straight edge or ruler and a marker to draw clear, precise cut lines. Then, using a sharp pair of scissors, carefully cut the film along your marked lines. Once cut, hold the film up against your window to perform a final double-check of the sizing. This quick visual confirmation helps catch any major discrepancies before proceeding to the next step.
Remove the Window Film Liner
The Gila window film comes with a clear protective liner that must be removed before installation. This can sometimes be tricky to separate. To simplify this, attach one piece of clear adhesive tape to a top corner on the front side of the window film, and another piece of clear tape to the corresponding top corner on the liner side. Press the tape firmly onto both surfaces. Then, firmly and quickly pull the two pieces of tape apart. This action will effectively separate the liner from the actual window film. As you slowly peel away the entire liner, continuously and liberally spray the exposed adhesive side of the window film with the Gila application solution. This keeps the adhesive moist and prevents it from sticking to itself or attracting dust.
Apply the Window Film to the Window
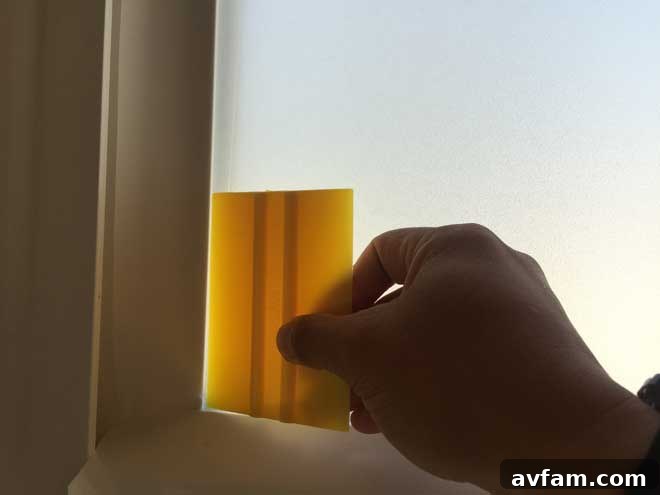
Before placing the film, generously spray your freshly cleaned window glass with the application solution. The more solution, the easier it will be to position and maneuver the film. With the film’s adhesive side already wet from the previous step, carefully grasp the top two corners. Align one of the film’s factory edges (the original, untrimmed edge) with one of the window’s edges. Gently place the film against the wet window. The ample application solution will allow the film to float and be easily repositioned. Once roughly in place, use your hands to gently push out any large air bubbles, starting from the center and moving outwards. Immediately after, spray the surface of the applied window film again with solution to lubricate it, and then use your squeegee. Start from the center and work your way to the edges, applying firm, even pressure to push out all remaining air bubbles and excess solution. Overlap your squeegee strokes slightly to ensure comprehensive coverage and a smooth finish.
Trim the Edges for a Perfect Fit
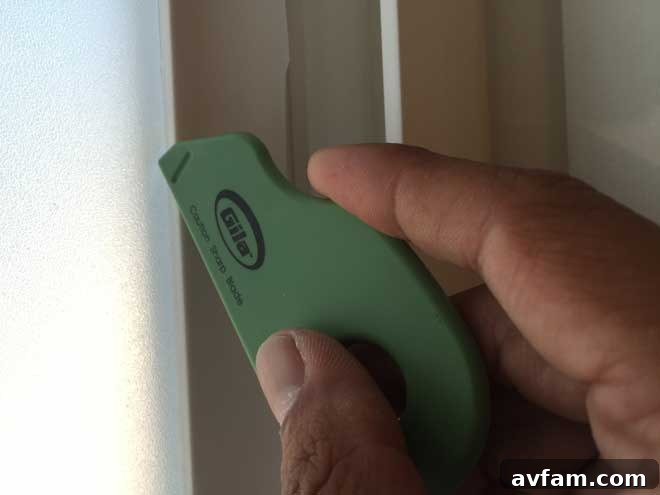
Once you’ve successfully removed all visible air bubbles and excess solution with your squeegee, it’s time to achieve a professional, custom fit. Use the trim tool provided in your Gila application kit. This tool is designed to create a small, consistent gap between the film’s edge and the window frame, allowing the film to fully adhere and cure without touching the frame. Place the trim tool firmly against the window frame, guiding your razor blade along its edge. Carefully and steadily cut away the excess film. Take your time with this step to ensure clean, straight cuts, as this will significantly impact the final appearance of your installed film. Precision here makes all the difference.
Admire Your Work and Allow for Curing
With the edges neatly trimmed, you can now step back and take pride in your newly installed Gila window film. You will immediately notice a significant increase in privacy, transforming your room into a more secluded haven. While the privacy benefits are instantaneous, the film will require approximately one to two days to fully cure and dry. During this period, you might observe a slight haziness or a few tiny water pockets as the remaining application solution evaporates. This is completely normal and will dissipate as the film fully adheres and dries. Avoid touching or cleaning the film vigorously during the curing process to allow for optimal adhesion.
We are absolutely delighted with the enhanced privacy our son’s bedroom now enjoys, and equally pleased that we did not have to compromise on the beautiful natural light that fills the room. The Gila window film has successfully addressed our security concerns while preserving the bright and open feel of the space, striking a perfect balance between functionality and aesthetics.
If you’re seeking an uncomplicated, effective, and aesthetically pleasing method to introduce privacy to any room in your home, Gila window film stands out as an excellent do-it-yourself solution. Its ease of installation, combined with its numerous benefits, makes it a highly recommended home improvement project. Gila window films are widely accessible, available at thousands of trusted retailers across both the United States and Canada, making it convenient for homeowners everywhere to embark on their own window transformation journeys.
I was compensated by Gila and received product for this post, but the opinions expressed are 100% my own and reflect my genuine experience.