
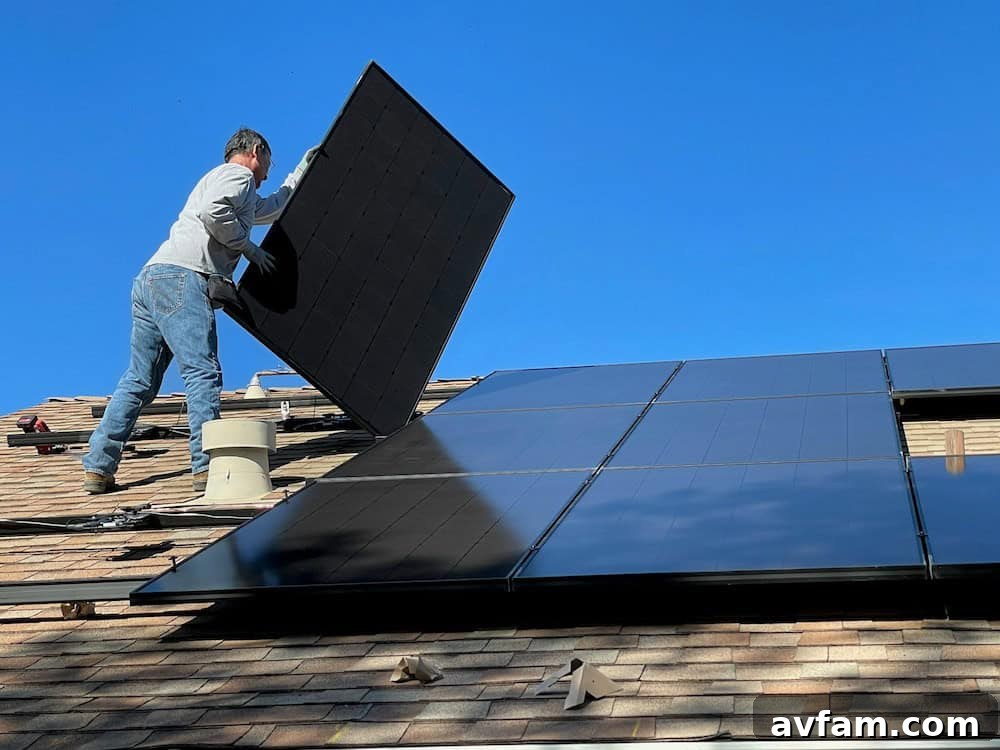
Embarking on the journey to install a solar panel system at home is a transformative decision, allowing you to harness the abundant power of the sun and significantly reduce your reliance on conventional energy sources. This eco-friendly choice not only benefits the planet but also empowers you with greater energy independence and substantial long-term savings on utility bills. As the world shifts towards sustainable living, residential solar power stands out as a smart, future-proof investment for any homeowner.
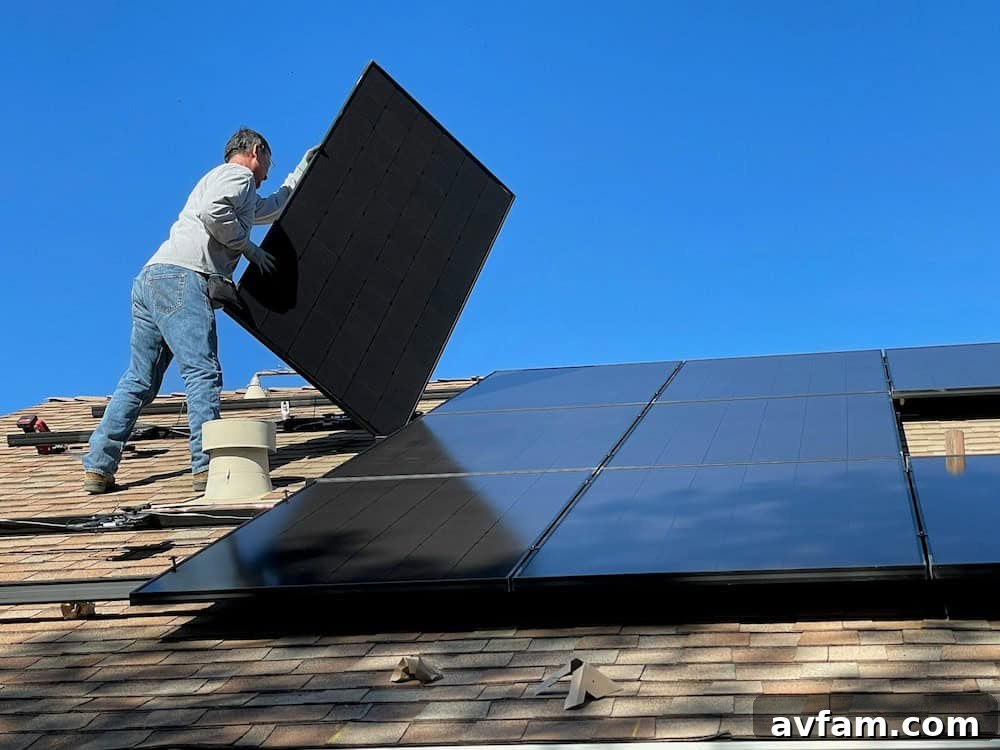
This comprehensive guide is designed to walk you through the entire process of installing a solar panel system, from initial conceptualization to the final grid connection. We’ll cover everything from understanding the fundamental principles of solar energy and evaluating your home’s suitability, to selecting the right components and navigating the step-by-step installation. Whether you’re considering a DIY approach or hiring professionals, this guide will equip you with the essential knowledge needed to make informed decisions and achieve a successful solar installation. Let’s illuminate your path to renewable energy!
Understanding Your Home Solar Panel System
Before diving into the practical aspects of installation, it’s crucial to grasp the underlying principles and components of a solar panel system. Solar energy, derived directly from the sun’s powerful rays, represents a cornerstone of renewable energy. Its conversion into usable electricity for your home involves a fascinating process known as the photovoltaic effect, which takes place within each solar panel.
The sheer scale of available solar energy is astonishing; the amount of sunlight that reaches Earth’s surface in just one hour far exceeds the global energy consumption for an entire year. This immense potential highlights why investing in solar power is not just an environmental choice but a strategic move towards a sustainable and energy-independent future. By embracing solar, you contribute to reducing greenhouse gas emissions and decreasing the strain on finite fossil fuel resources, paving the way for a cleaner world for generations to come.
The Fundamentals of Solar Energy and Its Benefits
Solar energy is lauded for being clean, inexhaustible, and environmentally sound. Unlike traditional fossil fuels, it produces no harmful greenhouse gases, air pollutants, or water contaminants during operation. By converting sunlight directly into electricity, homeowners can drastically reduce their carbon footprint, playing a vital role in combating climate change. This commitment to sustainability is often accompanied by significant financial advantages, primarily through lower monthly energy bills and protection against rising electricity costs.
Beyond the immediate financial and environmental gains, solar energy systems offer remarkable longevity and resilience. Modern solar panels typically come with performance warranties guaranteeing output for 25 to 30 years, often continuing to produce electricity beyond this period. This durability, coupled with minimal maintenance requirements, makes solar power a highly cost-effective and reliable long-term investment. Furthermore, installing solar panels can increase your property value, making your home more attractive to potential buyers who prioritize energy efficiency and sustainable living.
Key Components of a Complete Solar System
A functional solar panel system is a symphony of several interconnected components, each playing a vital role in transforming sunlight into usable electricity for your home. At the heart of the system are the **solar panels (photovoltaic modules)** themselves, composed of individual solar cells that capture photons from sunlight and convert them into direct current (DC) electricity.
Following the panels, the **inverter** is arguably the second most critical component. Since most household appliances and the electrical grid operate on alternating current (AC), the inverter’s job is to convert the DC electricity generated by the panels into AC electricity. Depending on your system’s design, you might use a central string inverter, microinverters (one per panel), or power optimizers paired with a string inverter, each offering distinct advantages in terms of efficiency, monitoring, and shading resilience.
The **racking system** provides the structural support, securely mounting the solar panels to your roof or ground array. This system must withstand various weather conditions, including strong winds and heavy snow loads, while ensuring optimal tilt and orientation for maximum sun exposure. Additionally, **electrical wiring** and **conduit** safely route the DC and AC currents throughout the system. Many modern solar installations also include **monitoring systems**, which allow homeowners to track real-time energy production, consumption, and system performance via online portals or mobile apps, enabling greater energy management and quick identification of potential issues. For those seeking energy independence or aiming to store excess power, **battery storage systems** are increasingly integrated, providing backup power during outages and optimizing energy usage during peak demand times.
Evaluating Your Home’s Solar Potential and System Sizing
Before making any financial commitments or purchasing equipment, a thorough assessment of your home’s solar potential is paramount. This crucial phase involves not only understanding if your property is suitable for solar but also determining the optimal size of the system needed to meet your energy demands efficiently. A well-planned evaluation lays the groundwork for a successful, high-performing solar installation that delivers maximum benefits.
Beyond the practical considerations, embracing solar energy installation inherently carries a significant positive environmental impact. By generating your own clean electricity, you directly reduce your household’s reliance on fossil-fuel-based power generation, thereby lowering your overall carbon footprint. This commitment to renewable resources contributes directly to mitigating climate change, preserving natural ecosystems, and fostering a healthier planet for future generations. Understanding this broader context can further solidify your motivation to go solar.
Assessing Your Home’s Solar Potential: Sun Exposure and Roof Analysis
The first and most critical step is to evaluate your home’s unique solar potential. This multifaceted assessment involves several key factors. **Roof orientation and tilt** are primary considerations; generally, a south-facing roof (in the Northern Hemisphere) with an optimal pitch (often matching your latitude) is ideal for maximizing sunlight exposure throughout the day and year. However, east and west-facing roofs can also be highly effective, especially for balancing morning and afternoon energy generation.
Equally important is a comprehensive **shading analysis**. Trees, neighboring buildings, chimneys, or other roof structures can cast shadows on your solar panels, significantly reducing their efficiency. Professional installers use specialized tools and software to map out shading patterns throughout the year, identifying the best placement for panels to minimize energy losses. Furthermore, the **available roof space** is a practical constraint. You need sufficient unobstructed area to accommodate the desired number of panels. Beyond the roof, considerations for **roof material, age, and structural integrity** are crucial. Some roofing materials are more compatible with solar mounts than others, and a roof nearing the end of its lifespan might need replacement before solar installation. A structural engineer’s assessment may be necessary to ensure your roof can safely support the additional weight of the panels and racking system, ensuring the longevity and safety of your investment.
Determining the Right Size for Your Solar System: Energy Needs and Future Planning
Once your home’s solar potential has been thoroughly assessed, the next vital step is to accurately determine the optimal size of your solar energy system. This calculation hinges primarily on your household’s historical energy consumption patterns. Reviewing at least 12-24 months of electricity bills will provide an accurate average of your kilowatt-hour (kWh) usage, helping to size a system that can offset all or a significant portion of your energy needs.
Beyond current consumption, it’s essential to consider **future energy needs**. Are you planning to expand your family, purchase an electric vehicle (EV), install a heat pump, or add other energy-intensive appliances in the coming years? Factoring in these potential increases in demand allows you to design a system that remains adequate in the long run, avoiding the need for costly upgrades later. An experienced solar installer or energy consultant can assist with this intricate calculation, often using specialized software that combines your energy data with local sunlight availability and system efficiency estimates. They will help you balance the desire for complete energy offset with practical constraints like available roof space and your budget, ensuring your solar system is perfectly tailored to your lifestyle and financial goals.
Choosing the Right Solar Panels, Inverter, and Storage Solutions
The selection of solar panels, inverters, and potential battery storage systems represents a critical phase in your solar journey. These core components dictate the efficiency, reliability, longevity, and overall cost-effectiveness of your entire solar installation. Making informed choices here is essential for maximizing your return on investment and ensuring your system performs optimally for decades to come.
Before finalizing your component choices, it is imperative to thoroughly assess your specific energy needs, long-term goals, and budget. Understanding your average daily and peak electricity consumption helps determine the required power output of your system. Consider factors such as local climate (temperature fluctuations can affect panel performance), potential shading issues, and available space for installation. Consulting with reputable solar professionals during this stage can provide invaluable insights, helping you navigate the technical specifications and ensure compatibility between components for a seamlessly integrated and highly efficient solar power system.
Navigating the Types of Solar Panels: Efficiency, Durability, and Aesthetics
The market offers several types of solar panels, each with distinct characteristics regarding efficiency, cost, and physical appearance. Understanding these differences is key to selecting the best fit for your home:
- Monocrystalline Solar Panels: These panels are easily recognizable by their uniform, dark black appearance and rounded edges on the individual cells. Made from a single, pure crystal of silicon, monocrystalline panels boast the highest efficiency ratings (typically 17-22% and sometimes higher), meaning they can produce more power from a smaller footprint. They perform well in low-light conditions and hot temperatures but are generally the most expensive option. Their sleek look is often preferred for residential aesthetics.
- Polycrystalline Solar Panels: Distinguished by their fragmented, bluish appearance, polycrystalline panels are made from multiple silicon crystals melted together. While slightly less efficient than monocrystalline panels (typically 15-17%), they are more cost-effective to manufacture, making them a popular choice for homeowners seeking a good balance between performance and affordability. They offer reliable performance, though their efficiency drops a bit more in very hot conditions.
- Thin-Film Solar Panels: These panels are made by depositing a thin layer of photovoltaic material onto a substrate. Common materials include amorphous silicon (a-Si), cadmium telluride (CdTe), or copper indium gallium selenide (CIGS). Thin-film panels are notably lightweight, flexible, and can perform better than crystalline panels in diffuse light or partial shade. However, their efficiency is generally the lowest (around 10-13%), meaning they require significantly more space to generate the same amount of power as crystalline panels, making them less common for typical residential rooftop installations but suitable for specific niche applications or very large ground mounts.
When selecting panels, consider their **temperature coefficient** (how much efficiency drops as temperature rises), their **degradation rate** (how much power output declines over time), and the manufacturer’s **product and performance warranties**. A longer warranty often signifies greater confidence in the panel’s longevity and quality.
Selecting a Suitable Inverter and Exploring Battery Storage Options
The **inverter** is the brain of your solar system, responsible for converting the DC electricity from your panels into usable AC power for your home. The choice of inverter significantly impacts your system’s efficiency, monitoring capabilities, and performance in various conditions:
- String Inverters: The most traditional and cost-effective option, a single string inverter connects to a “string” of multiple solar panels. All panels in the string are affected if one panel is shaded or underperforming. They are best suited for roofs with uniform sun exposure and minimal shading.
- Microinverters: Instead of one central inverter, microinverters are installed on each individual solar panel. This allows each panel to operate independently, maximizing its power output even if other panels are shaded or dirty. They offer panel-level monitoring, enhanced safety (DC electricity is converted to AC at the panel), and greater flexibility for complex roof layouts or future expansion. They are typically more expensive upfront but can offer better overall system performance over time, especially with shading issues.
- Power Optimizers: These combine aspects of both string inverters and microinverters. An optimizer is attached to each panel to condition the DC power and optimize its output, then sends the optimized DC power to a central string inverter for conversion to AC. They offer similar benefits to microinverters in terms of shading resilience and panel-level monitoring, often at a slightly lower cost.
When selecting an inverter, prioritize models with high **efficiency ratings**, robust **warranty coverage**, and proven **reliability**. Compatibility with your chosen solar panels is also crucial for seamless operation. Many modern inverters also come “battery-ready,” simplifying the integration of future energy storage solutions.
Speaking of **battery storage systems**, these are becoming increasingly popular for homeowners seeking greater energy independence and resilience. A solar battery allows you to store excess electricity generated by your panels during the day and use it during the evening, at night, or during power outages. This can significantly reduce your reliance on the grid, especially during peak utility rates. Common battery chemistries include lithium-ion, and choices often depend on capacity needs, discharge rates, warranty, and cost. Integrating battery storage moves your system towards a truly resilient and optimized energy solution, offering peace of mind and further reducing your carbon footprint.
Planning Your Solar Installation: Permits, Safety, and Design
A successful solar panel installation hinges on meticulous planning, which extends beyond merely acquiring components. This phase involves navigating regulatory requirements, prioritizing safety, and ensuring a robust system design. Proper preparation can prevent costly delays, ensure compliance with local codes, and safeguard both installers and homeowners.
Navigating Permits, Regulations, and Essential Safety Measures
Before any physical work begins, obtaining the necessary **permits and approvals** from your local municipality or county is a non-negotiable step. This typically includes electrical permits, building permits, and sometimes zoning permits. The permitting process ensures that your solar installation adheres to local building codes, safety standards, and structural requirements. Failure to secure proper permits can result in fines, forced system removal, or difficulties with insurance and selling your home. It’s advisable to research your local requirements early, as this process can sometimes take several weeks or even months. Many professional solar installers will handle the entire permitting process on your behalf, leveraging their experience to streamline approvals.
**Safety measures** are paramount throughout the installation process, whether you’re doing it yourself or supervising professionals. Installing solar panels involves working at significant heights and handling complex electrical components, which presents inherent risks. Essential safety precautions include:
- Wearing appropriate **Personal Protective Equipment (PPE)** such as hard hats, safety glasses, gloves, and non-slip work boots.
- Utilizing proper **fall protection equipment**, including safety harnesses securely anchored to the roof structure, especially when working on pitched roofs.
- Adhering strictly to **electrical safety guidelines**, which means always turning off the main power supply to your home’s electrical panel before working on any wiring. Employing a “lockout/tagout” procedure can prevent accidental re-energization.
- Ensuring all **ladders and scaffolding** are stable, correctly positioned, and rated for the required weight.
- Working with a partner, especially when handling heavy panels or operating power tools.
- If you are unsure about any aspect of electrical work, always defer to a **licensed electrician**.
Essential Tools for Solar Installation and System Design Overview
A well-equipped toolbox is crucial for an efficient and safe solar panel installation. While specific tools may vary slightly depending on your system and mounting type, a general list includes:
- Power Drill/Impact Driver: For securing racking and other components.
- Wrenches and Socket Sets: Various sizes for tightening bolts on racking and panel clamps.
- Wire Cutters and Strippers: For preparing electrical cables.
- Multimeter: Essential for testing electrical connections and ensuring correct voltage/current.
- Conduit Benders and Cutters: For routing electrical wiring safely through conduit.
- Caulking Gun and Sealant: For weatherproofing roof penetrations.
- Stud Finder: To locate roof rafters for secure mounting.
- Tape Measure and Level: For accurate positioning of components.
- Safety Gear: As mentioned, including gloves, safety glasses, and fall protection.
Beyond tools, a fundamental aspect of planning is the **system design**. This involves creating a detailed schematic that outlines the layout of panels on your roof, the routing of electrical conduit and wiring, the placement of the inverter, and the connection points to your main service panel. A professional solar designer or engineer will produce these drawings, ensuring the system meets electrical codes, maximizes energy production, and is structurally sound. These design plans are often a mandatory component of your permit application and serve as a blueprint for the entire installation process, ensuring every component is correctly integrated and optimally positioned for peak performance and safety.
Step-by-Step Guide to Your Home Solar Panel Installation
With all the necessary preparations complete—your home assessed, components chosen, and permits secured—it’s time to commence the physical installation of your solar panel system. This multi-stage process requires precision, adherence to safety protocols, and careful attention to manufacturer guidelines to ensure a high-performing and durable system.
Phase 1: Mounting the Solar Panels and Racking System
The initial step in the physical installation involves preparing your roof and securely installing the racking system that will hold your solar panels. This phase is critical for the structural integrity and longevity of your entire setup.
- Roof Preparation: Begin by clearing the installation area on your roof, ensuring it’s free of debris. Identify the location of your roof rafters using a stud finder – these are the structural elements to which your racking system must be anchored.
- Attaching Flashing: For pitched roofs, you’ll need to install flashing plates directly over the roof sheathing and under the shingles, aligned with your rafter marks. These metal plates provide a waterproof seal where the racking mounts penetrate the roof, preventing leaks.
- Installing Standoffs/L-Feet: Secure the mounting hardware (often called standoffs or L-feet) directly into the rafters through the flashing. These sturdy components are the anchor points for your racking rails. Ensure they are level and properly sealed to maintain your roof’s integrity.
- Attaching Racking Rails: Connect the aluminum racking rails to the installed L-feet. These rails run parallel to the roof’s edge or slope and will support the solar panels. Use a level to ensure the rails are perfectly aligned and spaced according to the panel manufacturer’s specifications. This precise alignment is vital for the aesthetic appeal and structural stability of your array.
- Mounting Solar Panels: Carefully lift each solar panel onto the racking rails. Use mid-clamps to secure panels to the rails between two panels, and end-clamps for the panels at the very ends of each row. Ensure all clamps are tightened to the manufacturer’s recommended torque specifications for a secure fit that can withstand wind and weather.
- Grounding the Array: Properly ground the entire solar panel array and racking system according to electrical codes. This involves running a grounding wire from the racking to a grounding point, protecting the system from lightning strikes and electrical surges.
Phase 2: Wiring the System and Installing the Inverter
Once the panels are securely mounted, the focus shifts to the electrical connections and the installation of the inverter, the central component that makes your solar power usable.
- DC Wiring (Panels to Inverter): Connect the individual solar panels together in “strings” using MC4 connectors. The positive (+) and negative (-) leads from each panel connect in series or parallel, depending on your system design and inverter type. Ensure all connections are tight and waterproof. Route these DC cables through conduit from the roof down to the location of your inverter, protecting them from environmental exposure and physical damage.
- Installing the Inverter: Mount your chosen inverter (string, micro, or power optimizers) in a suitable location. String inverters are typically installed on a wall in a garage, basement, or outside in a shaded area, away from direct sunlight and extreme temperatures, while maintaining proper ventilation. Microinverters are attached directly underneath each panel. Follow the manufacturer’s instructions for secure mounting and wiring.
- AC Wiring (Inverter to Main Panel): If using a string inverter, you will now connect the inverter’s AC output to your home’s main electrical service panel (breaker box). This involves running AC conduit and wiring from the inverter to a dedicated breaker in your main panel. For microinverter systems, the AC power is combined on the roof and typically routed to a single AC disconnect switch before connecting to the main panel. This connection allows the solar-generated electricity to feed directly into your home’s electrical system.
- Installing Disconnects and Safety Switches: Install a DC disconnect switch (for string inverter systems) between the panels and the inverter, and an AC disconnect switch between the inverter and the main service panel. These switches allow for safe shutdown of the system for maintenance or emergencies, as required by electrical codes.
Phase 3: Connecting to Your Home’s Power Supply and Finalizing the System
The final phase involves integrating your new solar system with your existing electrical infrastructure and ensuring it meets all regulatory requirements before activation.
- Main Service Panel Connection: Ensure the connection of the AC output from your inverter to your home’s main electrical panel is correctly wired to a dedicated circuit breaker. This step is critical and often requires the expertise of a licensed electrician to ensure compliance with local electrical codes and safety standards.
- Metering Installation (Net Metering): For grid-tied systems, your utility company will likely need to install a special bi-directional meter (net meter). This meter tracks both the electricity you draw from the grid and any excess solar electricity your system sends back to the grid, allowing you to earn credits for your surplus production. This process is typically coordinated with your utility provider after your system passes inspection.
- System Commissioning and Testing: Once all physical connections are complete and verified, the system can be powered on. This involves carefully following the inverter’s startup procedure and monitoring the system’s initial performance. Check for correct voltage and current readings, and ensure the inverter is operating as expected.
- Final Inspection and Grid Connection: Before you can officially energize your system and connect to the utility grid, a final inspection by local electrical authorities is usually required. This inspection ensures that the installation complies with all relevant electrical, building, and safety codes. Once approved, the utility company will give final authorization to connect to the grid, and you can begin generating your own clean power.
By diligently following this detailed step-by-step guide, you can confidently install a robust and efficient solar panel system at home, setting the stage for decades of clean energy production. Beyond the immediate satisfaction of reducing your carbon footprint, you will enjoy significant savings on energy bills and gain a greater sense of energy independence. Embrace the future of sustainable living—start harnessing the power of the sun today and transform your home into a beacon of renewable energy!