Build Your Own Patriotic “Stars and Stripes” Cornhole Boards: A Comprehensive DIY Guide
Whether you call it bean bag toss, cornhole, or simply a fantastic lawn game, there’s no denying the immense popularity of this classic American pastime. From lively tailgating parties and competitive backyard BBQs to casual family gatherings, cornhole is a game that truly transcends age and athletic ability, inviting everyone to join in the fun. It’s more than just a game; it’s a staple of outdoor entertainment, fostering laughter, friendly competition, and memorable moments.
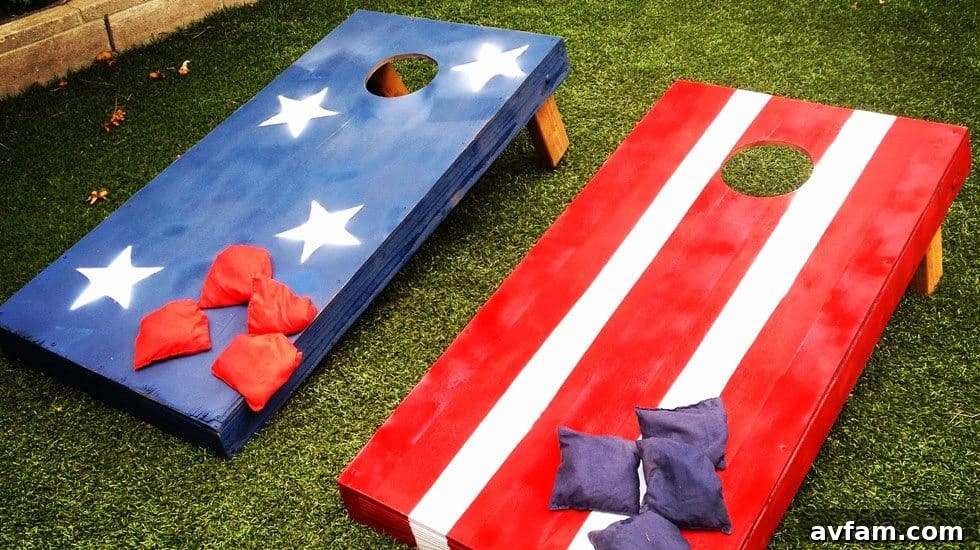
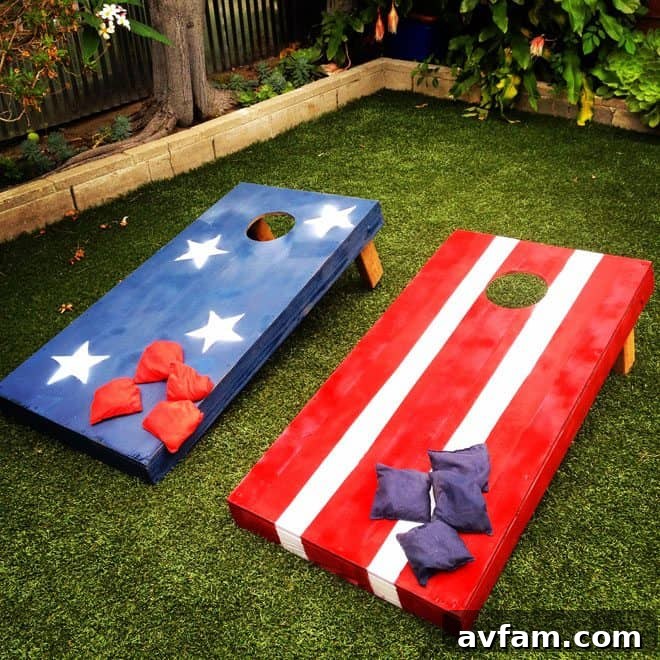
Imagine the satisfaction of creating your very own cornhole boards, not just any boards, but a custom set that proudly displays your patriotism. In honor of national holidays like the Fourth of July, Memorial Day, or Labor Day, we’ve designed a special project to help you build stunning “Stars and Stripes” themed cornhole boards. This detailed guide will walk you through every step, ensuring you construct a durable, beautiful, and fully functional set ready for years of enjoyment.
Why Choose to DIY Your Cornhole Boards?
While you can certainly purchase pre-made cornhole sets, building your own offers a wealth of advantages:
- Cost-Effectiveness: Crafting your own boards is often significantly cheaper than buying a high-quality set, especially when you factor in customization.
- Unmatched Customization: From dimensions to finishes, a DIY approach allows you to tailor every aspect. Our “Stars and Stripes” theme is just one example; you could personalize with team logos, family names, or unique artistic designs.
- Superior Quality and Durability: By selecting your own materials, you control the quality. Opting for weather-resistant wood and hardware ensures your boards will withstand the elements and countless games for years to come.
- Personal Satisfaction: There’s immense pride in stepping back and admiring a game set you built with your own hands. It transforms a simple lawn game into a cherished item.
- A Rewarding Learning Experience: This project is an excellent opportunity to hone your woodworking skills, learn about measurements, cuts, and assembly, and gain confidence for future DIY endeavors.
Estimated Project Time
This cornhole board project is designed to be an enjoyable and manageable undertaking, perfect for a dedicated weekend afternoon. The construction phase, including cutting, sanding, and assembly, typically takes about 3 to 4 hours for a pair of boards. However, the total project time will extend to allow for adequate paint drying. We recommend starting this project at least a few days before your planned game day, especially if you want them ready for a specific event like the Fourth of July, to ensure all paint layers are fully cured and ready for play.
Essential Tools & Supplies for Your Cornhole Project
Gathering all your materials and tools before you begin is crucial for a smooth and efficient building process. Here’s a comprehensive list of what you’ll need, along with some brief considerations for selection:
Wood Components:
- 4 – 48” 2×4 pieces: These will form the longer sides of your cornhole board frames. Look for straight pieces without significant knots or warps.
- 4 – 21” 2×4 pieces: These will serve as the shorter ends of your frames. Again, straightness is key for a square frame.
- 4 – 12” 2×4 pieces: These are for the legs of your cornhole boards.
- 2 – 48”x24” birch covered ½” plywood sheets: Birch plywood is an excellent choice for the playing surface due to its smooth finish, which is ideal for painting and provides a consistent surface for bean bags. Ensure the sheets are flat and free from major defects.
Hardware & Fasteners:
- Box of 2” deck screws: Deck screws are preferred for outdoor projects as they are designed to resist rust and corrosion, ensuring the longevity of your boards.
- 4 – 3/8” carriage bolts with washers and wingnuts: These will be used for attaching the legs. The wingnuts allow for easy loosening and tightening, making the legs collapsible for storage.
Tools & Abrasives:
- Sandpaper (180, 220 grit): 180-grit is good for initial smoothing and removing imperfections, while 220-grit provides a finer finish, essential for a professional paint job.
- Drill/Driver with Phillips bit or screwdriver: Essential for pre-drilling holes and driving screws.
- ¼” drill bit: For pre-drilling screw holes.
- 3/8” drill bit: For drilling the holes for the carriage bolts that attach the legs.
- Circular Saw or Jig Saw: A circular saw is excellent for straight, fast cuts on the plywood and 2x4s. A jigsaw is indispensable for cutting the 6-inch diameter holes in the board and rounding the leg ends.
- Measuring Tape: Accuracy is paramount in woodworking; a reliable measuring tape is a must.
- Pencil: For marking all your cuts and drill points.
- Compass or string and pin: To accurately draw the 6-inch diameter circles for the cornhole.
Painting & Finishing Supplies:
- Red, White, and Blue Paint: Choose exterior-grade acrylic or latex paints for durability and vibrant colors that will last outdoors.
- Stencil Kit (or materials to make one): For creating crisp stars and stripes. You can buy pre-made stencils or create your own using stencil film or cardboard.
- Painter’s Tape: Essential for masking off areas to create clean lines for your stripes.
- Paint brushes or rollers: Depending on your preference for application.
- Optional: Clear Protective Sealant/Polyurethane: A clear coat will protect your paint job from wear, moisture, and UV rays, significantly extending the life and appearance of your boards.
Safety First: Important Precautions
Working with power tools and paints requires attention to safety. Always:
- Wear appropriate personal protective equipment (PPE), including safety glasses or goggles, hearing protection, and work gloves.
- Ensure your work area is clean, well-lit, and free of obstructions.
- Read and understand the operating manuals for all your power tools before use.
- Keep hands clear of moving blades and bits.
- Work in a well-ventilated area when painting and sanding to avoid inhaling dust or fumes.
Step-by-Step Guide to Building Your Cornhole Boards
Let’s get started on building your very own “Stars and Stripes” cornhole set!
Phase 1: Preparation and Cutting
- Organize Your Workspace: Begin by assembling all your tools and materials in a clean, well-lit, and clear work area. This ensures efficiency and safety throughout the project.
- Measure and Cut All Wood Pieces: Precision is key here. Carefully measure each 2×4 piece according to the dimensions provided in the supplies list (48″, 21″, 12″). Use your circular saw for cleaner, straighter cuts on the 2x4s and plywood. If using a jigsaw for the 2x4s, ensure your lines are straight and steady. Double-check all measurements before cutting to avoid waste.
- Sand the Wood Edges and Plywood Sheets: After cutting, use 180-grit sandpaper to smooth out any rough edges or splinters on all cut 2×4 pieces. Then, give both sides of your birch plywood sheets a thorough sanding. Start with 180-grit to smooth any imperfections, then finish with 220-grit for a super-smooth surface. This fine sanding is critical for proper paint adhesion and a professional finish.
Phase 2: Creating the Cornhole and Assembling the Frame
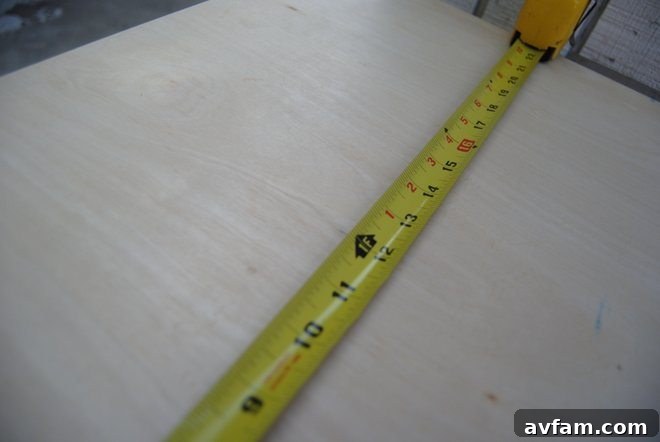
- Measure and Cut the Cornhole Holes: With the sanding of your plywood and 2x4s complete, it’s time to cut the central holes. The standard cornhole opening is six inches in diameter. To position it correctly, find the center point nine inches from the top edge of the 48”x24” plywood sheet and 12 inches from each side.
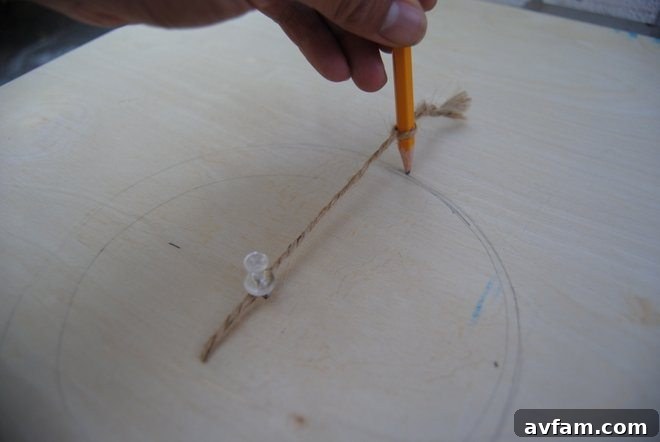
- Draw Your Circle: Finding your center point accurately is vital. Once marked, use a compass set to a 3-inch radius to draw your perfect 6-inch diameter circle. A simple DIY compass can be made by taking a string measured at 3 inches, pinning one end to the center mark, and tying a pencil to the other end to carefully draw the circle.
- Cut the Hole with a Jigsaw: Drill a small pilot hole (large enough for your jigsaw blade) just inside the drawn circle. Carefully insert your jigsaw blade and slowly cut along the circular line. Take your time to ensure a smooth, clean cut.
- Sand the Hole Edges: Once the hole is cut, thoroughly sand both the inside and outside edges. This removes any rough spots, prevents splinters, and ensures a clean, finished appearance for the bean bags to slide through smoothly.
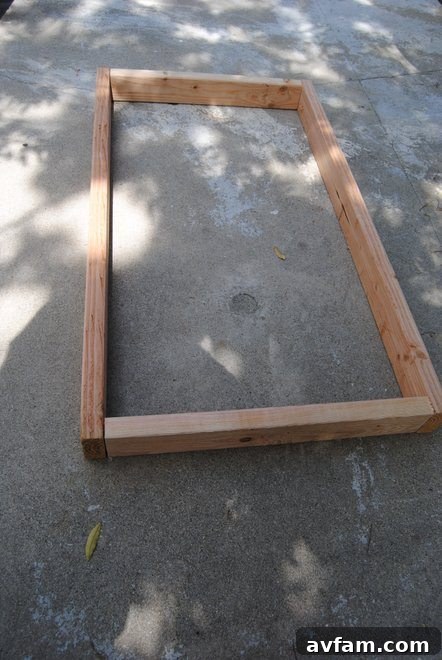
- Build the Cornhole Board Frames: Take two 48” 2x4s and two 21” 2x4s for one board. Align the longer sides with the shorter ends to form a rectangular frame. It’s crucial that your corners are perfectly square to ensure the plywood platform fits exactly over the frame without overhangs or gaps. Use a carpenter’s square to check each corner.
- Pre-Drill and Attach Frame Sides: Before driving screws, always pre-drill pilot holes using your ¼” drill bit. This prevents the wood from splitting, especially at the ends of the 2x4s. Drive 2-inch deck screws through the pre-drilled holes to securely attach the frame pieces. Use at least two screws at each corner joint for strength.
- Ensure Square Corners: Re-emphasize the importance of perfectly square corners (90-degree angles). This will make attaching the platform much easier and result in a professional-looking board.
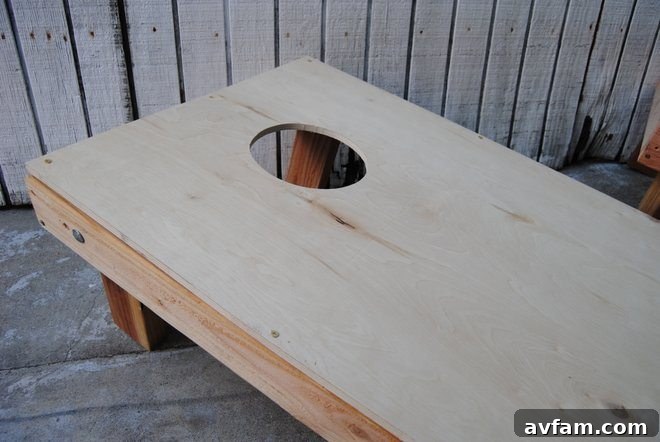
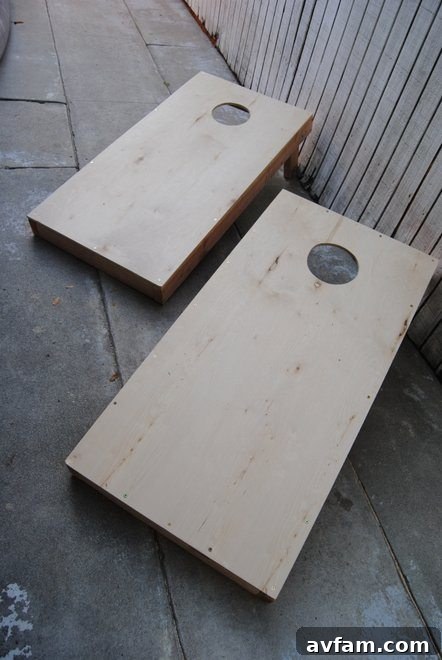
- Attach the Platform to the Frame: Carefully place one of your prepared 48”x24” plywood sheets onto the assembled 2×4 frame. Align each edge precisely so it sits evenly and flush over the frame.
- Pre-Drill Platform Holes: Starting at each corner, pre-drill pilot holes through the plywood into the 2×4 frame. This again prevents splitting and ensures the screws go in straight.
- Secure the Platform: Drive 2-inch deck screws into each corner. Then, add additional screws spaced every 8-10 inches along all four sides of the platform. This ensures the platform is firmly and securely attached to the frame, preventing any wobbling or lifting during gameplay.
Phase 3: Attaching the Collapsible Legs
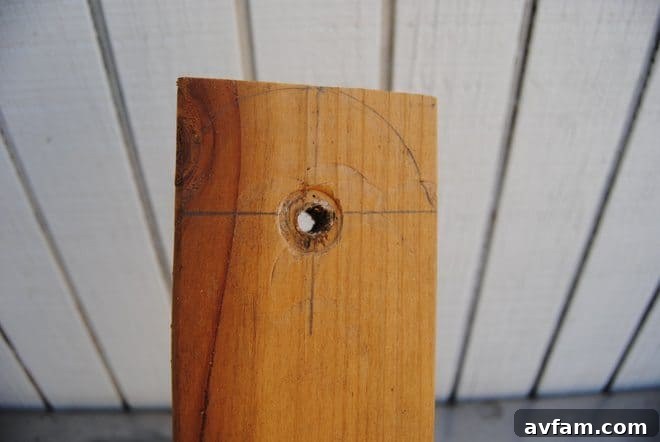
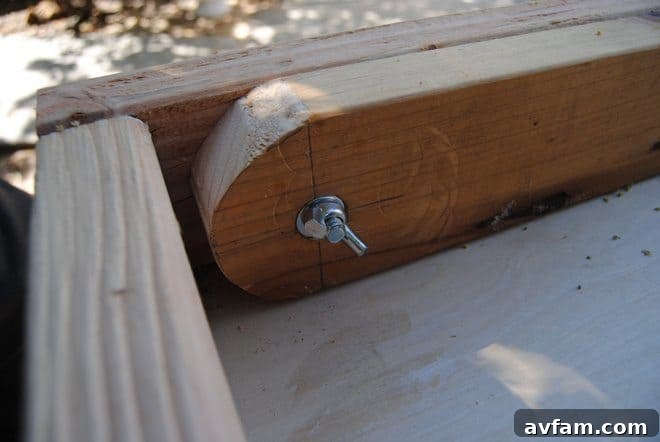
- Round One End of the Legs: To allow the legs to pivot and fold flat for storage, you need to round one end of each 12” 2×4 leg. Measure and mark the center point of one end of a 12″ leg. From that mark, use a compass (or even trace around a small can/bottle) to draw a half-circle on that end.
- Cut and Sand the Rounded Ends: Use your jigsaw to carefully cut along the half-circle line you just drew. After cutting, thoroughly sand the newly rounded end smooth.
- Drill Leg Pivot Holes: Find the exact center of the rounded end of each leg. Using your 3/8” drill bit, drill a hole straight through this center point. This will be the pivot point for your carriage bolt.
- Mark and Drill Frame Holes for Legs: Hold one rounded leg against the outside of the top 2×4 frame piece (the end with the cornhole opening). Position it so the top edge of the rounded leg is flush with the top edge of the frame. Using a pencil, mark the center point of the leg’s pivot hole onto the 2×4 frame. Then, using your 3/8” drill bit, drill a hole straight through the frame at this marked point. Repeat for all four legs.
- Attach the Legs to the Frame: Insert a 3/8” carriage bolt through the drilled hole in the frame from the outside, and then through the pivot hole in the leg (positioned on the inside of the frame). Secure it with a washer and a wingnut on the inside. The wingnut is crucial here, as it allows you to easily loosen the leg to fold it down for storage or tighten it securely when the board is set up for play. Ensure the legs swing freely but can be tightened firmly.
Phase 4: Painting Your Patriotic Masterpiece
Now for the fun part – bringing your “Stars and Stripes” theme to life! Ensure all dust from sanding has been thoroughly wiped away before painting. For best results, you might consider applying a coat of wood primer first, especially on the plywood, as this helps the paint adhere better and provides a more even finish.
- Prepare Your Stencils: If you’re using a stencil kit, follow its instructions. If making your own, print a star pattern of your desired size, transfer it to stencil material (like cardstock or plastic stencil film), and carefully cut it out. For the stripes, painter’s tape will be your primary tool.
- Paint Your Base Colors: Choose one board to be primarily red and the other primarily blue. Apply an even coat of your chosen base color to each board. Allow sufficient drying time between coats (refer to your paint manufacturer’s instructions) and apply a second coat if needed for full, opaque coverage.
- Create the White Stripes on the Red Board: Once the red base coat is completely dry, use painter’s tape to mark out your white stripes. For a classic flag look, you’ll typically have white stripes running vertically or horizontally. Press the tape down firmly to prevent paint bleed. Paint the exposed areas white. Remove the tape carefully while the paint is still slightly wet (but not dripping) for crisp lines.
- Add White Stars to the Blue Board: After the blue base coat is fully dry, position your star stencils on the designated area for the “union” (the top left corner, typically). Secure the stencils with a light adhesive spray or tape. Using a stencil brush or sponge, dab white paint lightly over the stencil. Be careful not to use too much paint, as this can cause bleed-through under the stencil. Lift the stencil carefully to reveal your clean white stars. Repeat until you have the desired number of stars.
- Allow Paint to Fully Dry and Seal: This is arguably the most important step for durability. Allow all paint layers to dry completely, ideally for at least 24-48 hours, depending on humidity and paint type. For long-lasting boards, we highly recommend applying 2-3 coats of a clear, exterior-grade polyurethane or spar varnish. This will protect your patriotic artwork from moisture, sun fading, and wear and tear during gameplay. Lightly sand with 220-grit sandpaper between clear coats for a smoother finish.
Maintenance and Care for Your Custom Cornhole Boards
To ensure your beautiful “Stars and Stripes” cornhole boards last for many seasons of fun, follow these simple care tips:
- Store Indoors: Always store your boards in a dry, covered area when not in use. Prolonged exposure to rain, sun, or extreme temperatures can cause warping, paint peeling, or wood damage. The collapsible legs make indoor storage much easier.
- Clean Gently: If your boards get dirty, wipe them down with a damp cloth and mild soap. Avoid abrasive cleaners or harsh scrubbing, which can damage the paint and sealant.
- Inspect Regularly: Periodically check for any loose screws, damaged paint, or wear on the playing surface. Address minor issues promptly to prevent them from becoming larger problems.
- Re-seal if Needed: If you notice the clear protective coat wearing thin or losing its luster after a few seasons, consider applying a fresh coat of polyurethane or spar varnish to restore protection.
Beyond the Fourth: Customizing Your Cornhole Boards
While the “Stars and Stripes” theme is perfect for patriotic celebrations, the beauty of DIY is endless customization. Consider these ideas for future projects or personalizing other sets:
- Team Spirit: Paint your favorite sports team’s colors and logo.
- Family Fun: Incorporate family crests, names, or inside jokes.
- Holiday Themes: Think Halloween, Christmas, or even unique birthday themes.
- Artistic Expression: Unleash your inner artist with abstract designs, landscapes, or geometric patterns.
- Company Branding: Create custom sets for corporate events or business promotions.
Conclusion: Enjoy Your Hand-Built Masterpiece!
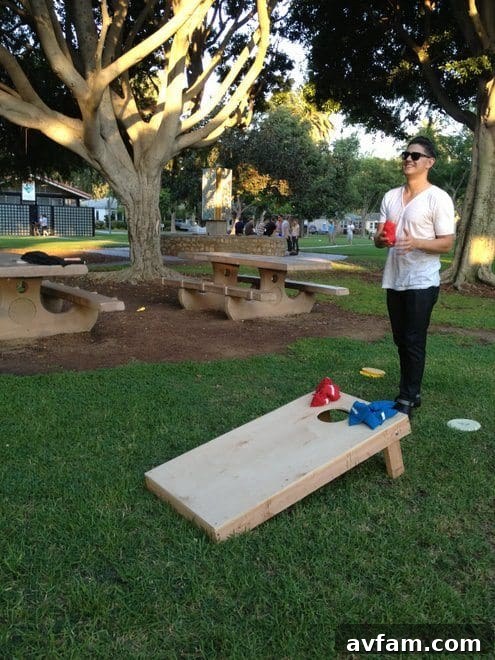
Congratulations! You’ve successfully navigated the exciting process of building your very own custom “Stars and Stripes” cornhole boards. From selecting materials and making precise cuts to assembling the sturdy frames and meticulously painting your patriotic design, you’ve invested time and effort into creating something truly special. The satisfaction of playing on a set you built yourself is unparalleled, adding an extra layer of enjoyment to every toss.
Now, grab your bean bags, invite your friends and family, and get ready for countless hours of outdoor fun. Your custom-made cornhole boards are not just a game; they’re a testament to your DIY spirit and a vibrant symbol of American festivity. Have fun, play safe, and make lasting memories with your new, personalized game set!