
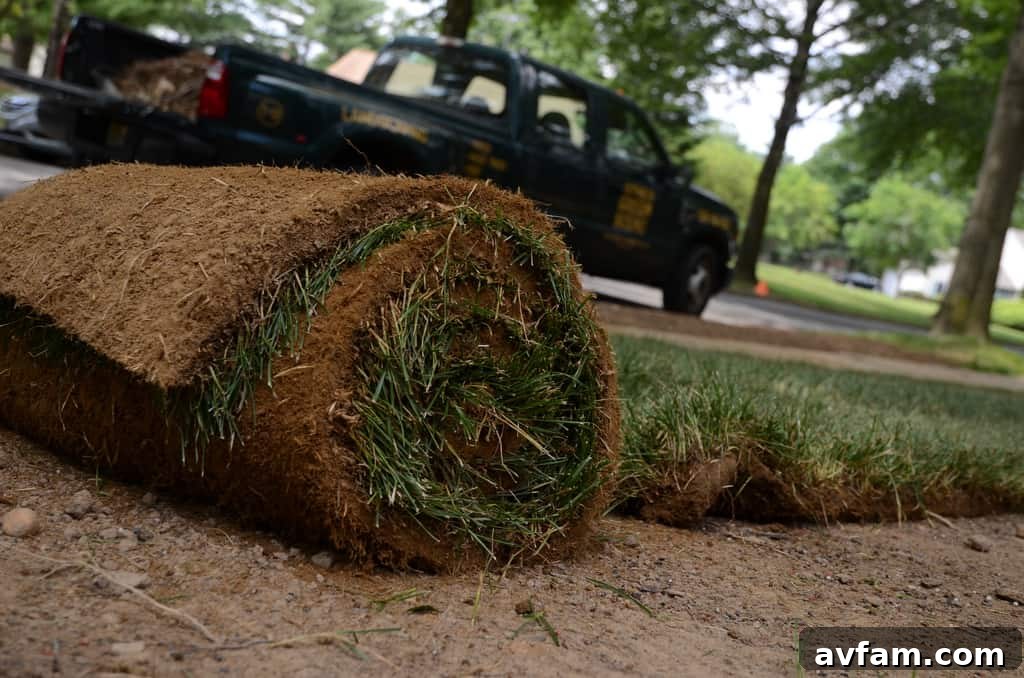
Transforming Our Backyard: A DIY Guide to Laying New Sod for a Lush Green Lawn
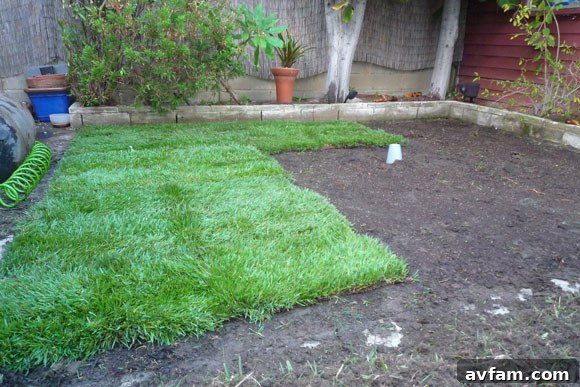
Every homeowner desires a vibrant, healthy lawn that significantly enhances their outdoor living space. For us, our modest backyard lawn, approximately 10 by 12 feet, had regrettably fallen into disrepair. While the majority of our yard featured a comfortable concrete surface adorned with an outdoor rug and furniture, this particular green section was crying out for a complete overhaul. Years of neglect from previous tenants, coupled with persistent issues like unsightly dog urine burns, had left it looking patchy, discolored, and a stark contrast to the lush greenery we envisioned.
The deteriorating condition of our lawn wasn’t merely an aesthetic concern; it profoundly impacted the overall ambiance and appeal of our backyard. We yearned for a pristine green accent that would harmoniously complement our outdoor setup, providing a soft, natural contrast to the surrounding hardscape. This deep-seated desire for a beautiful, inviting outdoor environment ultimately galvanized us into action, leading to a highly rewarding DIY project that not only significantly upgraded our home’s curb appeal but also enriched our personal enjoyment of the space.
The Condition of Our Lawn: Before the Transformation
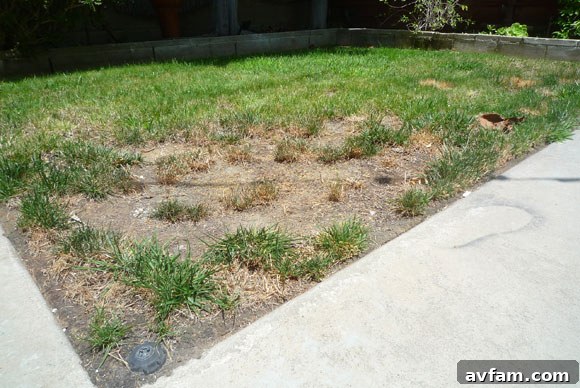
Prior to embarking on this ambitious project, our lawn eloquently narrated a story of extensive neglect. Its surface was marred by numerous bare spots, while yellowish-brown patches, undeniable evidence of persistent dog urine, dotted the remaining blades of grass. The turf was thin, infested with weeds, and utterly lacked the vigor and density characteristic of a healthy lawn. The previous tenants had, understandably, not prioritized its meticulous upkeep, leaving us with a formidable landscaping challenge. We diligently considered various revitalization options, ranging from simple reseeding to engaging professional landscapers. However, the pressing need for an immediate, impactful transformation, combined with a fortuitous stroke of luck, decisively steered us towards the rapid and effective solution of laying new sod.
Why Choose Sod? The Ultimate Instant Lawn Solution
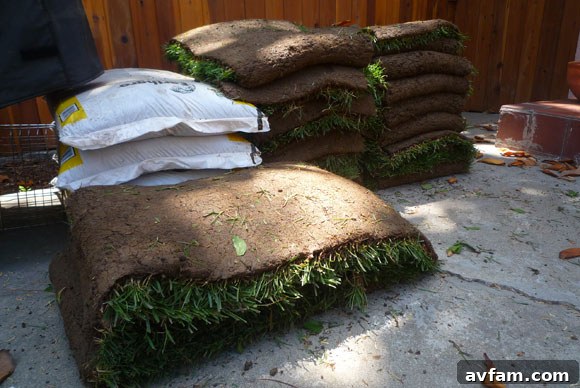
When confronted with a severely damaged or barren lawn, homeowners frequently find themselves weighing the distinct advantages and disadvantages of seeding versus sodding. While traditional seeding is generally more cost-effective, it demands significant patience and meticulous care over several weeks, or even months, to successfully establish a dense, healthy turf. Sod, conversely, offers an unparalleled instant lawn solution. It delivers immediate, dramatic results, effortlessly transforming a barren or severely damaged area into a lush, vibrant green space within a single day. This rapid and gratifying transformation was precisely what our backyard desperately needed, especially given the relatively compact area we were working to revitalize.
The fortunate opportunity for this DIY sod installation presented itself quite serendipitously. A kind neighbor, who was concurrently undertaking a much larger landscaping project, had a considerable quantity of high-quality leftover sod that he was eager to give away. This remarkably generous offer proved to be an absolute game-changer, providing us with almost the exact amount of sod required for our 10×12 foot patch. The timing, however, was critically important. Sod is a living, perishable product, and for optimal establishment and survival, it must be laid within a strict 24-hour window from the moment it is cut. This incredibly tight deadline meant that once we acquired the sod, there was absolutely no time to waste in ensuring its correct and prompt installation.
Essential Tools and Materials for Your Successful Sod Project
Before meticulously diving into the physical labor of sod installation, it is absolutely vital to gather all the necessary tools and materials. A thoroughly prepared workspace and the right equipment will undoubtedly make the entire process considerably smoother, more efficient, and ultimately more successful. For our particular project, we strategically relied on a practical combination of rented specialized equipment and readily available, everyday gardening tools:
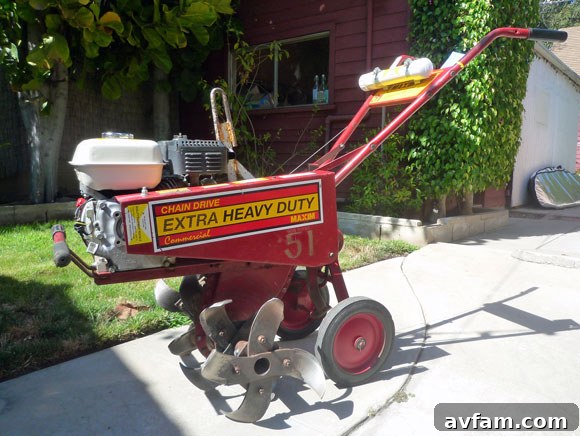
- Rototiller: This powerful tool is absolutely essential for effectively breaking up compacted soil and thoroughly mixing in various amendments. We opted to rent a compact, easy-to-handle model that was perfectly suited for the confined dimensions of our small lawn area.
- Lawn Roller: Crucial for meticulously smoothing the meticulously prepared soil surface and ensuring exceptional contact between the freshly laid sod and the underlying soil. This also plays a vital role in eliminating any troublesome air pockets that could hinder root development.
- Shovel and Rake: These fundamental tools are indispensable for efficiently removing old grass, uniformly spreading soil amendments, and precisely fine-tuning the leveling of the ground. A robust garden rake, in particular, proved to be an indispensable asset throughout the project.
- Utility Knife or Sod Cutter: Employed for cleanly and precisely cutting sod rolls to perfectly fit edges, corners, and any irregular shapes within the lawn area.
- Wheelbarrow: An invaluable aid for effortlessly transporting soil, compost, sod rolls, and other essential materials across the worksite.
- Gardening Gloves: Absolutely necessary for protecting hands during the rigorous tasks of digging, raking, and handling the sod.
- Watering Hose with Sprinkler: Critical for both the immediate, post-installation irrigation and the ongoing, subsequent watering regimen.
- Manure and Compost Sodding Mix: This specialized mix was a cornerstone component for profoundly enriching our soil, providing a wealth of vital nutrients, and significantly improving both drainage capabilities and water retention properties – all of which are absolutely crucial for the thriving success of new sod.
Step-by-Step Guide to Laying Sod for a Perfect Lawn
The ultimate success of any sod installation project hinges entirely on meticulous preparation and flawless execution. By diligently following these detailed steps, you can confidently ensure that your new lawn will not only establish successfully but will also thrive beautifully for many years to come:
1. Preparing the Soil: The Indispensable Foundation of a Healthy Lawn
The most profoundly critical phase of any sod project is, without a doubt, comprehensive soil preparation. Neglecting this foundational step can lead to weak root establishment and a perpetually struggling lawn, irrespective of the quality of your sod. Our initial task was to meticulously remove every single trace of the old, unhealthy grass and any intrusive weeds. For our relatively small area, this was efficiently accomplished manually, though for larger expanses, a specialized sod cutter can prove invaluable. Once the old, undesirable turf was completely gone, our focus shifted entirely to the paramount task of improving the underlying soil structure.
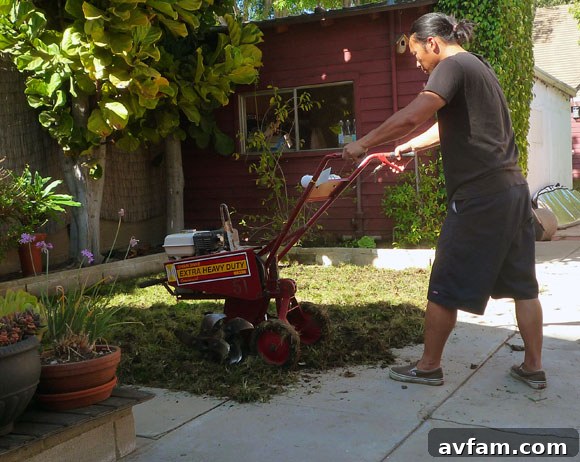
Utilizing a robust rototiller, we methodically loosened the top 6 inches of soil. Achieving this precise depth is absolutely vital as it provides an optimal environment for the new sod roots to penetrate deeply and rapidly establish themselves. A rototiller excels at effectively breaking up compacted earth, thereby creating a porous, hospitable bed for vigorous root growth. Following the tilling process, we generously spread the high-quality manure and compost sodding mix uniformly across the entire designated area. This rich organic material is an absolute powerhouse for enhancing soil health, delivering a bounty of essential nutrients, significantly improving the overall soil structure, and crucially enhancing both water retention and drainage capabilities – all of which are indispensable for the successful establishment of new sod. We then employed the rototiller once more to thoroughly and evenly mix these vital amendments into the topsoil. This meticulous mixing ensures a consistent distribution of nutrients and a uniform soil texture throughout the root zone.
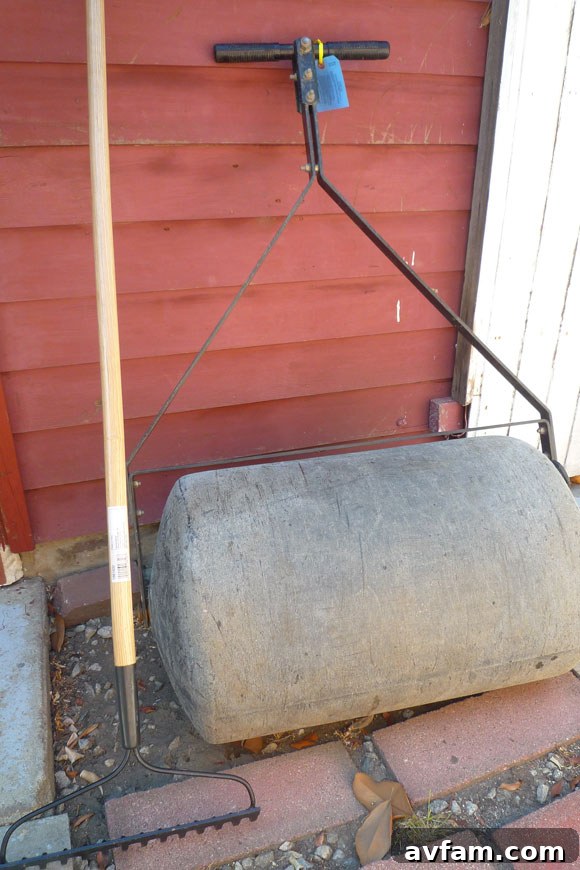
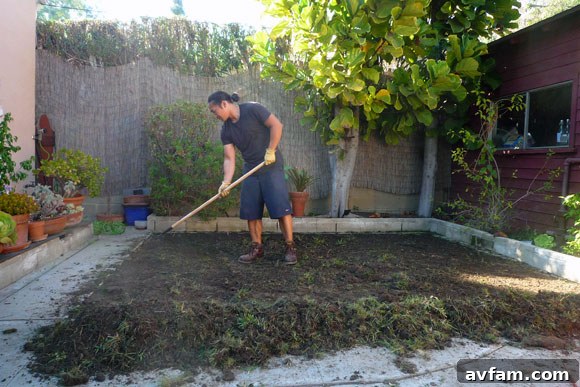
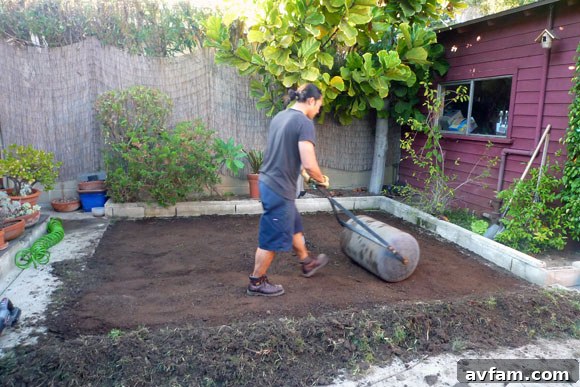
Once the amendments were thoroughly incorporated, the subsequent crucial step involved meticulously leveling the surface. Employing a sturdy garden rake, we carefully smoothed out any remaining lumps and meticulously filled in any depressions, thereby creating a uniformly flat and even surface. This often-underestimated step is absolutely crucial for achieving both aesthetic appeal and consistent, even growth of the new lawn. An uneven lawn can regrettably lead to patchy watering, inconsistent turf density, and an overall unprofessional appearance. Finally, we utilized the lawn roller to gently but firmly compact the freshly loosened soil, ensuring it was stable and firm, yet not overly dense. This critical compaction provides a stable, impeccably even bed for the sod to rest upon and significantly promotes excellent soil-to-sod contact, which is fundamentally paramount for robust root growth and establishment.
2. Laying the Sod: A Meticulous Piece-by-Piece Process
With the soil perfectly prepared and primed, the exciting moment arrived to lay the sod. This is the stage where all your careful planning and diligent preparation truly come to fruition. We began by selecting a distinct, straight edge as our starting point, then meticulously unrolling the first piece of sod and pressing it firmly and evenly against the thoroughly prepared soil. The absolute key at this juncture is to ensure complete and intimate contact between the entire sod piece and the underlying soil, thereby completely eliminating any potential air pockets that could unfortunately cause the sod to prematurely dry out and fail to root.
We systematically continued laying the sod in a strategic brick-like pattern, deliberately staggering the seams between each roll. This ingenious technique significantly helps to prevent potential erosion, minimizes the visibility of individual sod lines, and ultimately creates a more seamless, professional, and visually appealing appearance for the finished lawn. Each subsequent piece of sod was laid snugly against the previous one, meticulously avoiding any undesirable overlaps or noticeable gaps. For precisely cutting pieces to perfectly fit edges, navigate around existing obstacles, or achieve a perfectly straight line, a sharp utility knife or a specialized sod cutter proves to be an indispensable tool, allowing for clean, accurate, and effortless cuts. It is also an excellent best practice to strategically place planks or sheets of plywood over recently laid sod sections to walk on, which effectively prevents the creation of uneven depressions or any other damage to the freshly installed turf, allowing it to settle undisturbed.
3. Initial Watering: Providing the Essential First Drink of Life
Immediately following the completion of sod installation, a comprehensive and exceptionally deep watering is of paramount importance. This initial, thorough watering is critically important for a multitude of reasons: it firmly settles the sod onto the meticulously prepared soil bed, effectively eliminates any lingering air pockets beneath the turf, and most importantly, provides the much-needed surge of moisture that is absolutely essential for the roots to commence their vital establishment process. The overarching goal of this initial watering is to ensure that the water penetrates deeply into the soil, ideally reaching a depth of 4 to 6 inches.
When it comes to efficiently watering newly laid sod, the quality and depth of watering invariably triumph over mere quantity or frequency. Rather than resorting to frequent, superficial sprinklings, which unfortunately only wet the very surface and actively encourage shallow, weak root growth, the objective should always be to conduct deep, less frequent watering sessions. We diligently adopted a rigorous schedule of 2-3 deep waterings per day during the critical initial establishment phase, meticulously ensuring that the water truly soaked deep into the ground. This deliberate approach actively encourages the nascent roots to grow downwards, aggressively seeking out moisture deep within the soil, thereby establishing a robust, extensive, and healthy root system. A highly effective method to verify sufficient watering depth is to gently lift a small corner of the sod after a watering session and visually observe the moisture level and penetration within the underlying soil.
Post-Installation Care: Nurturing Your New Lawn for Lasting Health
Successfully laying sod is merely the initial step; comprehensive and proper post-installation care is absolutely essential for ensuring that your new lawn not only establishes successfully but also remains vibrantly healthy and beautiful for many years to come. The first few weeks following installation are exceptionally critical, demanding careful and consistent attention to crucial aspects such as watering, mowing, and limiting traffic.
Strategic Watering Schedule for New Sod
The watering regimen is arguably the single most important aspect of new sod care. For the critical first 7-14 days, the sod must be kept consistently and thoroughly moist. This translates to watering 2-3 times a day, always prioritizing deep saturation over superficial sprinkles. Your aim is to maintain moisture in the top 4-6 inches of soil, but it’s crucial to avoid waterlogging the area, which can lead to fungal issues. As the sod gradually begins to root (you can gently lift a corner to check for firm root attachment), you can progressively reduce the frequency of watering while simultaneously increasing the duration of each session. After approximately two weeks, you might transition to watering once a day, and by the third or fourth week, consider watering every other day, consistently aiming for deep water penetration. Always adjust this schedule pragmatically based on your specific climate conditions, the type of soil you have, and the visual appearance and health of the grass.
When to Mow Your New Sod
It’s crucial to resist the temptation to mow your new lawn too soon! Typically, newly laid sod can be mowed for the very first time approximately 10-14 days after its installation, or once it has demonstrably and firmly rooted to the underlying soil. To accurately check if it’s ready, gently tug on a small corner of a sod piece. If it resists your pull and you cannot lift it easily, then it has successfully rooted. When you do proceed with the first mow, ensure your mower is set to the highest possible blade setting to prevent unnecessary stress on the tender new grass. Always use a freshly sharpened blade to ensure clean cuts, which actively promote healthier growth and reduce the risk of disease. Never remove more than one-third of the grass blade height at any single mowing session.
Limiting Traffic on New Turf
Newly laid sod is inherently fragile. For the initial two to three weeks, it is absolutely imperative to significantly limit all forms of foot traffic, pet activity, and the use of heavy equipment on your newly installed lawn. Walking on unrooted sod can inadvertently create depressions, dislodge the sod from its vital contact with the soil, and severely impede the critical process of root establishment. This caution is particularly pertinent in our situation, where dog urine burns were a previous issue; keeping pets off the new sod initially is crucial to prevent recurrence and allow the grass to establish without additional stress or damage.
Fertilization and Proactive Weed Control
While the initial sodding mix provides an excellent foundational start, a light application of a specialized starter fertilizer (typically low in nitrogen and high in phosphorus) can be highly beneficial once the sod has firmly rooted, generally around 3-4 weeks post-installation. Always adhere strictly to the product’s instructions for application rates and timing. Regarding weeds, it is generally most effective and safest to address them manually during the early stages of your new lawn’s life. New sod is delicate and sensitive, and chemical herbicides can potentially damage the developing grass. Hand-pulling any weeds that emerge is the safest and most recommended option until the lawn is fully established and mature, which usually takes several months.
Climate Considerations for Optimal Sod Installation
The ideal timeframe for successfully laying sod varies considerably depending on your specific regional climate. In geographical regions characterized by cold winters, it is generally advisable to postpone sod installation until after the last frost of the season, typically occurring in late spring or, alternatively, in early fall. These periods offer consistently moderate temperatures and often sufficient natural rainfall, conditions that are absolutely perfect for robust root establishment without the undue stress of extreme heat or debilitating cold. Attempting to lay sod during the peak of summer in extremely hot climates can prove to be exceptionally challenging due to exorbitant water demands and severe heat stress on the new turf.
However, here in Southern California, where we are fortunate to enjoy a predominantly mild climate throughout the year, the optimal window for sod installation is significantly wider. One can realistically lay sod almost year-round, although spring and fall are still frequently considered the most ideal seasons due to their more consistent and moderate temperature ranges. Our successful late fall/early winter installation worked out perfectly thanks to these forgiving climatic conditions, combined with the immediate availability of the sod and our diligent, consistent watering efforts.
The Enduring Reward: A Lush, Green Backyard Oasis Achieved
The profound transformation of our backyard was truly nothing short of remarkable. What was once a neglected, unsightly, and patchy eyesore has been magnificently reborn as a vibrant, healthy patch of verdant green, perfectly complementing and enhancing our entire outdoor living space. The dedicated effort meticulously invested in thorough soil preparation and careful, precise installation paid off immensely, yielding results that far exceeded our expectations. This hands-on DIY project not only resulted in significant cost savings but also instilled in us a profound sense of accomplishment and a much deeper appreciation for the inherent beauty and tranquility of a meticulously well-maintained lawn.
A thriving, healthy lawn offers a myriad of benefits that extend far beyond mere aesthetics. It actively contributes to cooling the immediate environment, significantly improves local air quality, and provides a wonderfully pleasant, soft, and inviting surface for both relaxation and various recreational activities. Our relatively small patch of new sod has undeniably made a substantial difference, successfully transforming a previously neglected corner into a truly welcoming and integral part of our beloved home.
Have you embarked on a similar backyard transformation project involving sod? We are genuinely eager to hear about your unique experiences with laying sod, the specific challenges you encountered, and the successes you proudly celebrated. Please feel free to share your invaluable tips, personal anecdotes, and insightful stories in the comments section below!