
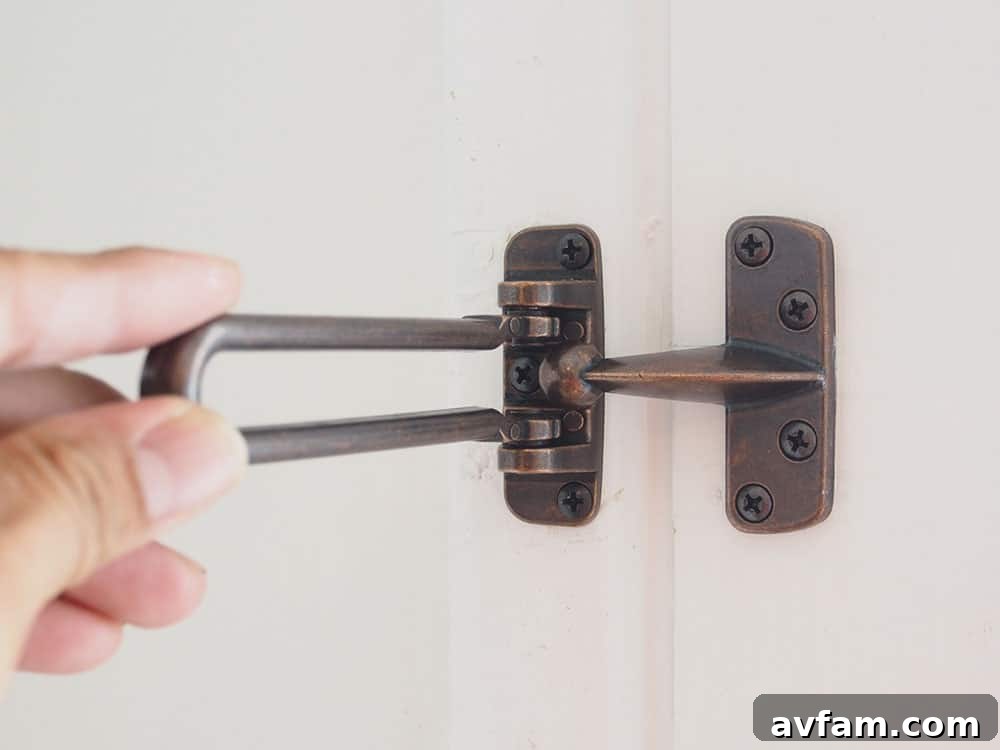
Upgrade Your Home Security: Easy DIY Swing Bar Lock Installation
In today’s world, the peace of mind that comes with a secure home is invaluable. We understand that feeling, which is why bolstering our front door’s defenses was a top priority. While our existing deadbolt offered a baseline of protection, we sought an additional layer of security. Our decision led us to replace an outdated, flimsy chain lock with a robust swing bar lock from National Hardware. The transformation has been remarkable, providing not only enhanced safety but also incredible ease of installation. We’re thrilled to share how simple it is to elevate your door security with this practical upgrade.
The Undeniable Advantage of Added Security
Modern home security solutions, like our beloved Nest Hello video doorbell, offer excellent surveillance and smart features. However, physical barriers remain the cornerstone of effective security. A swing bar lock functions similarly to a traditional door chain, but its superior design and construction make it exponentially more secure. This vital piece of hardware isn’t just a deterrent; it’s a formidable obstacle against forced entry. Unlike thin chains that can be easily snapped or broken, swing bar locks are typically crafted from strong, die-cast metal, providing substantial resistance.
One of the key features contributing to its enhanced security is the use of extra-long screws, specifically designed to anchor the lock deep into the sturdy door frame. This firm attachment significantly reduces the chance of the door being kicked or pushed open, a common vulnerability with standard chain locks that often rely on shorter, weaker screws. The sheer strength of the die-cast metal construction is a game-changer, offering a level of durability and resilience that flimsy chains simply cannot match.
Beyond deterring external threats like burglaries and home invasions, a swing bar lock offers another layer of security: child safety. When installed at an appropriate height, it effectively prevents young children from inadvertently opening the front door and wandering outside. Our own boys, for instance, can manage to open the deadbolt, but reaching high enough to disengage the swing bar lock requires a level of dexterity and height that keeps them safely inside. This dual benefit—protecting against both outside intrusions and accidental exits—makes the swing bar lock an indispensable addition to any family home.
Choosing the Right Swing Bar Lock
While the installation process is straightforward, selecting the right swing bar lock can make a difference in aesthetics and long-term durability. Consider the material and finish to match your existing door hardware. Most are made from durable metals like zinc alloy or brass, ensuring longevity and resistance to wear and tear. Brands like National Hardware are known for their reliable and sturdy products, often providing all necessary hardware for installation. Look for locks that come with longer screws for maximum security, as these are crucial for anchoring the device firmly into the door frame.
Tools and Materials for Installation
Before you begin the installation, gather all the necessary tools and materials. Having everything ready will streamline the process and ensure a smooth, efficient upgrade to your home security.
Materials:
- New swing bar lock (e.g., National Hardware Door Security Guard lock)
- Wood filler (if replacing an old lock)
- Touch-up paint (to match your door, if using wood filler)
Tools:
- Cordless drill or screwdriver
- Drill bits (specifically a 3/32″ bit for pilot holes)
- Pencil
- Measuring tape (optional, but helpful for precise placement)
- Safety glasses (recommended for drilling)
Step-by-Step Installation Guide
Installing a swing bar lock is a fantastic DIY project that requires minimal tools and time. It can be added to virtually any door, complementing your existing locks, provided there’s sufficient space. Our guide focuses on replacing an old chain lock, but the principles apply to a fresh installation as well.
Step 1: Removing the Old Lock (If Applicable)
If you’re upgrading from an old chain lock, your first task is to carefully remove it. Use a screwdriver to unscrew the existing components from both the door and the door frame. Once removed, clean the area thoroughly. This not only prepares the surface for your new lock but also gives you a clean slate to assess the optimal placement for the swing bar.
Step 2: Optimal Placement and Marking
This is a critical step for ensuring proper functionality and maximum security. Hold both pieces of the swing bar lock – the bar mechanism and the catch – in position on the door and door frame, respectively. Close the door to ensure the two pieces align perfectly. The goal is for the ball on the bar to smoothly engage and catch within the receiver when the door is slightly ajar. Experiment with different heights and positions, making sure the lock doesn’t interfere with your existing deadbolt or door handle. Once you’ve found the ideal, secure, and easily accessible spot, use your pencil to precisely mark the screw holes on both the door and the door frame. Double-check your alignment before moving on; precision here saves headaches later.
Step 3: Pre-Drilling Pilot Holes
Using a 3/32″ drill bit (or the size recommended by your lock manufacturer), carefully pre-drill the marked holes. This step is crucial for several reasons: it prevents the wood from splitting, especially in older or softer door frames; it ensures the screws drive in straight and securely; and it makes the actual screwing process much easier. Always wear safety glasses when drilling. Drill just deep enough to accommodate the length of the screws provided with your lock.
Step 4: Attaching the Hardware to the Door and Frame
With your pilot holes drilled, it’s time to secure the lock components. Begin by attaching the smaller, stationary catch piece to the door frame first, using the provided screws and your drill/driver. Do not fully tighten the screws yet. Then, attach the main bar mechanism to the door, again inserting screws but leaving them slightly loose. This allows for minor adjustments. Once both pieces are mounted, gently close the door and test the swing bar lock. Ensure it engages smoothly and securely. Make any necessary micro-adjustments to the placement before proceeding to the next step.
Step 5: Final Tightening and Testing
Once you’ve confirmed perfect alignment and smooth operation of the swing bar lock, use your drill/driver to fully tighten all the screws on both components. Ensure they are snug and secure, but avoid over-tightening, which could strip the screw heads or damage the wood. After tightening, perform a final test: open the door slightly, engage the lock, and try to push the door open. It should hold firm, providing that satisfying sense of added security.
Step 6: Finishing Touches (If Applicable)
If you removed an old lock, you likely have screw holes or imperfections left behind. Use wood filler to patch these holes, ensuring a smooth, seamless finish. Once the wood filler dries, gently sand it smooth and apply touch-up paint that matches your door’s existing color. This final step gives your door a professional, refreshed look, making it seem as if the new swing bar lock was always meant to be there.
Maintenance for Lasting Security
A swing bar lock requires minimal maintenance. Periodically check the screws to ensure they remain tight, as normal door usage can sometimes cause them to loosen over time. A small dab of silicone-based lubricant on the moving parts every couple of years can help keep the mechanism smooth and prevent any stiffness, especially in varying weather conditions.
The Ultimate Cost-Effective Security Upgrade
The entire installation process, from removing the old lock to the final paint touch-up, took us less than 20 minutes. For a modest investment—the National Hardware Door Security Guard lock is available on Amazon for less than $7—you can dramatically enhance the security of your front door. This makes it one of the most cost-effective home security improvements you can undertake. It’s a small price to pay for the significant peace of mind and protection it provides to your family and property.
Empower yourself with DIY home security projects like this. The ease of installation, combined with the robust protection offered by a swing bar lock, makes it an undeniable upgrade for any homeowner looking to fortify their first line of defense.
This post is sponsored by National Hardware. All opinions are 100% those of Timothy Dahl of Charles & Hudson.