

Transform Your Tap: Why a Plumbed-In Water Filter is a Game Changer
In an age where environmental consciousness and personal health are paramount, many households are reconsidering their drinking water habits. The days of relying solely on bottled water are rapidly becoming a thing of the past, and for good reason. Not only does it contribute significantly to plastic waste and carry a substantial financial burden over time, but numerous studies have also revealed that much of it is simply filtered tap water repackaged.
While bottled water has fallen out of favor, the desire for clean, great-tasting water remains strong. Standard tap water, though generally safe, often comes with an undesirable chlorine taste and odor, along with visible sediment and other potential impurities. For years, like many others, we relied on a filtered pitcher to provide a cleaner, fresher alternative. It served its purpose admirably, reducing basic contaminants and improving flavor. However, the constant need to refill, the limited capacity, and the slow filtration rate eventually became a minor inconvenience. This is precisely why, when the opportunity arose to install a plumbed-in Filtrete High Performance Drinking Water System directly into our kitchen, we embraced it without hesitation. This decision promised a significant upgrade in convenience, performance, and overall water quality.
Introducing the Filtrete High Performance Drinking Water System: A Smart Home Upgrade
The Filtrete High Performance Drinking Water System represents an excellent investment for any home seeking superior water quality without the hassle. Priced at approximately $100, this compact system is designed to be discreetly mounted under your kitchen sink, freeing up valuable counter and refrigerator space. Its installation process is remarkably straightforward, making it an ideal DIY project for many homeowners.
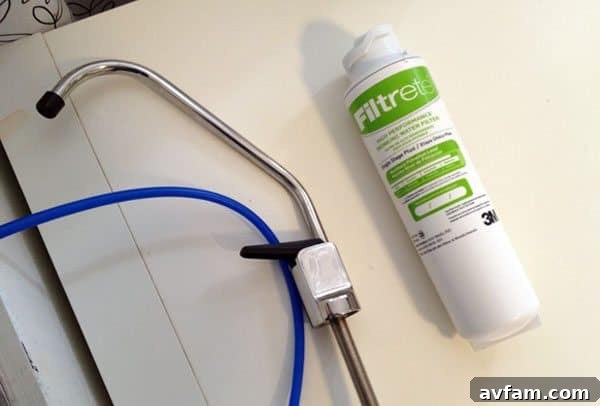
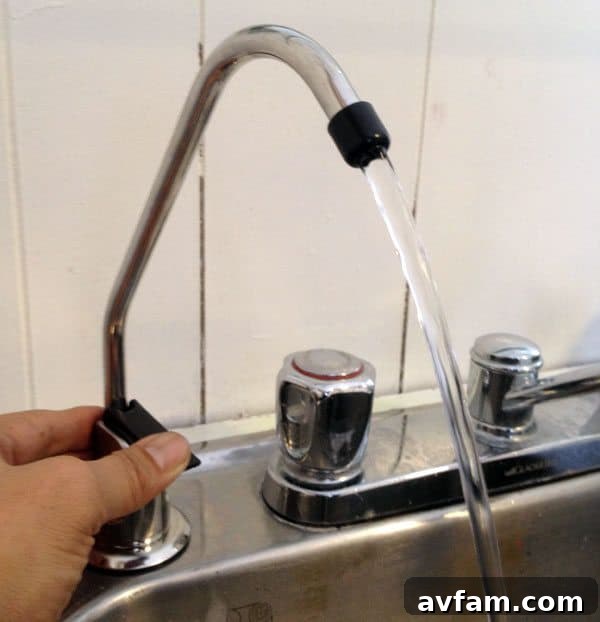
This advanced filtration system connects directly to your cold water line, providing an endless supply of filtered water through a dedicated, sleek faucet installed on your countertop. This faucet can often utilize an existing hole from a discarded soap dispenser or sprayer, though drilling a new one is also a manageable task for those without an available opening. The real power of the Filtrete system lies in its ability to significantly reduce a wide range of contaminants that can affect the taste, odor, and safety of your drinking water. It actively filters out select Volatile Organic Compounds (VOCs), certain pharmaceuticals, microbial cysts, and even lead – all of which can unfortunately be present in municipal water supplies.
Maintenance is another area where the Filtrete system excels. Its high-capacity filters are designed to last up to six months under normal use, ensuring consistent water quality without frequent replacements. When it is time for a change, the process is incredibly quick and tool-free, requiring just a simple twist and pull to remove the old filter and insert a new one. This user-friendly design makes maintaining a supply of fresh, clean water effortless.
DIY Installation Guide: Setting Up Your Filtrete Water Filter System
Installing the Filtrete High Performance Drinking Water System is a rewarding DIY project that can be completed with basic tools and a bit of patience. Below is a detailed, step-by-step guide to help you achieve pure, filtered water directly from your tap.
1. Locating and Preparing the Faucet Hole
The first critical step is to determine the ideal location for your dedicated filtered water faucet. Many modern sinks, especially stainless steel or porcelain models, come with pre-drilled holes, often covered by rubber grommets, that were originally intended for soap dispensers, sprayers, or air gaps. These are perfect candidates for your new faucet, saving you the effort of drilling.
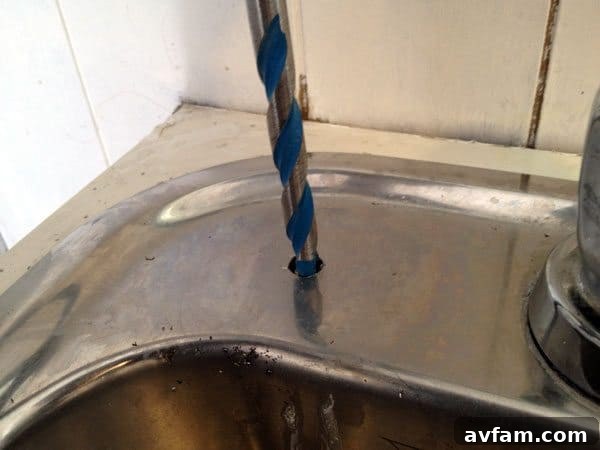
If your sink lacks a suitable existing hole, don’t fret – drilling into a stainless steel sink is a straightforward process when approached correctly. You will need a center punch to mark your spot, a pilot drill bit, and then a step drill bit or a specialized hole saw designed for metal to create a 7/8-inch diameter hole. Always use cutting fluid or oil to lubricate the drill bit and reduce friction, which helps prevent overheating and preserves the life of your tools. Drill slowly and apply steady pressure. For porcelain or cast iron sinks, the process is considerably more delicate and often requires specialized diamond-tipped bits and extreme caution to prevent chipping or cracking. Regardless of your sink material, always wear appropriate safety gear, including eye protection and gloves. A properly drilled 7/8-inch hole will ensure a snug and secure fit for the Filtrete faucet.
2. Installing the Dedicated Faucet
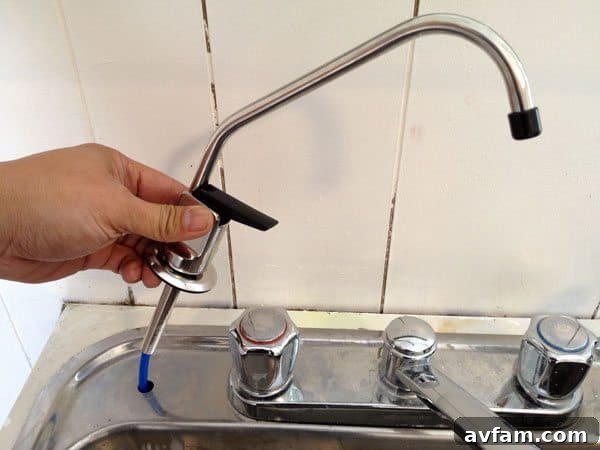
Once your faucet hole is prepared, the installation of the faucet itself is quite simple. Begin by guiding the blue hose attached to the faucet down through the newly created or chosen hole. On the countertop side, place the decorative stainless steel escutcheon (trim ring) over the hole, followed by the rubber washer, which provides a watertight seal against the sink surface. From underneath the sink, carefully place the second washer and then hand-tighten the plastic locking nut onto the faucet shank. Ensure the faucet is oriented correctly, facing forward, before giving the nut a final snug tighten with a wrench. Avoid overtightening, especially on porcelain sinks, to prevent damage.
3. Preparing Your Water Line: Turning Off the Cold Water Supply
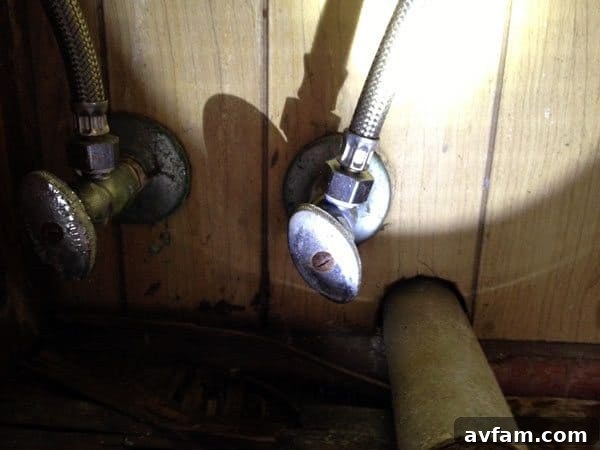
Before making any plumbing connections, it is absolutely essential to turn off your cold water supply. Locate the cold water shut-off valve, typically found under the sink, connected to the cold water line leading to your existing kitchen faucet. Turn the handle clockwise until the water flow completely stops. If individual shut-off valves are not present or functional, you may need to turn off the main water supply to your house. Once the water is off, briefly open your kitchen faucet to relieve any residual pressure in the lines. Have a towel or small bucket handy to catch any drips when disconnecting pipes.
4. Tapping Into Your Home’s Water System
Now, you will integrate the Filtrete system into your existing cold water line. The Filtrete kit typically includes standard 1/4-inch fittings for its tubing. However, many household cold water lines are either 3/8-inch or 1/2-inch in diameter. This disparity means you might need a quick trip to your local hardware store to purchase the appropriate adapters and a T-splitter. These adapters will allow you to connect the smaller 1/4-inch tubing from the filter system to your larger existing cold water line.
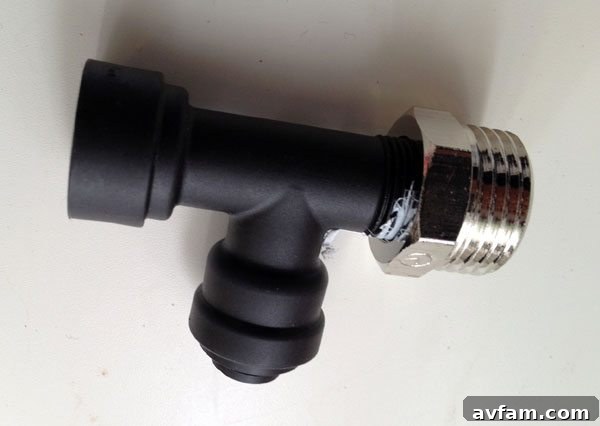
Disconnect the existing cold water hose from the wall’s angle stop valve or the bottom of your kitchen faucet. Install the T-splitter by connecting one end to the angle stop valve and re-attaching your kitchen faucet’s cold water hose to another port. The remaining port on the T-splitter is where you will connect the white plastic tubing from your Filtrete system, usually via a push-to-connect fitting or a compression fitting with the necessary adapters. Ensure all connections are tightened securely to prevent any leaks.
5. Installing the Filter Housing Under the Sink
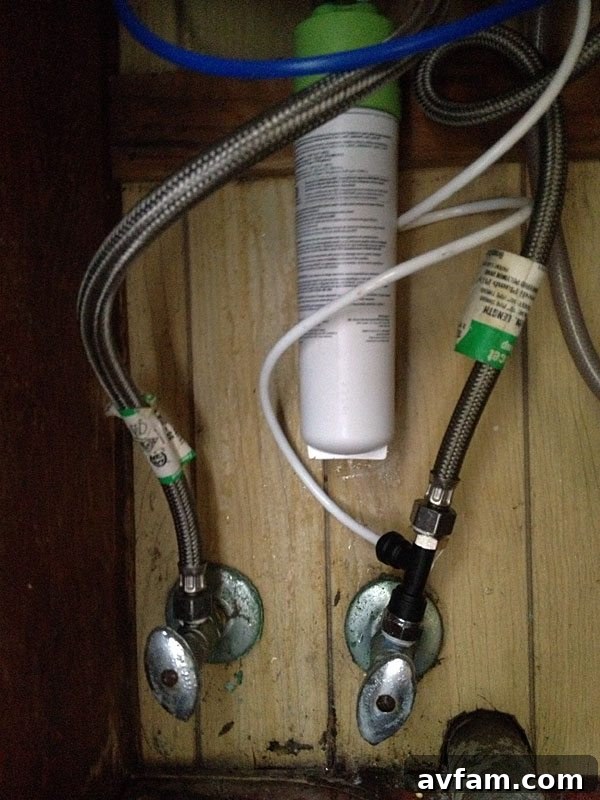
Choosing the right spot for your filter housing under the sink is key for both convenience and functionality. It should be easily accessible for future filter changes and mounted in a location that doesn’t interfere with other under-sink items. The filter housing attaches to a mounting bracket, which is then secured to the cabinet wall with two screws. Before drilling pilot holes for the screws, hold the filter in its intended position and ensure there’s at least two inches of clearance directly below it. This vertical space is crucial for allowing the filter to twist off and on easily when it’s time for replacement every six months. Using a level can help ensure a straight and professional-looking installation.
6. Making the Final Tubing Connections
With the filter housing mounted and the water line tapped, it’s time to connect the tubing. The Filtrete system uses clearly marked “IN” and “OUT” ports on the filter housing. Take the white plastic tubing that you connected to your cold water line splitter in Step 4 and securely insert it into the “IN” port of the filter holder. Next, take the blue plastic tubing extending from your dedicated countertop faucet (installed in Step 2) and firmly insert it into the “OUT” port of the filter holder. Ensure both tubes are fully seated into their respective quick-connect fittings for a leak-free seal. Give each tube a gentle tug to confirm they are locked in place.
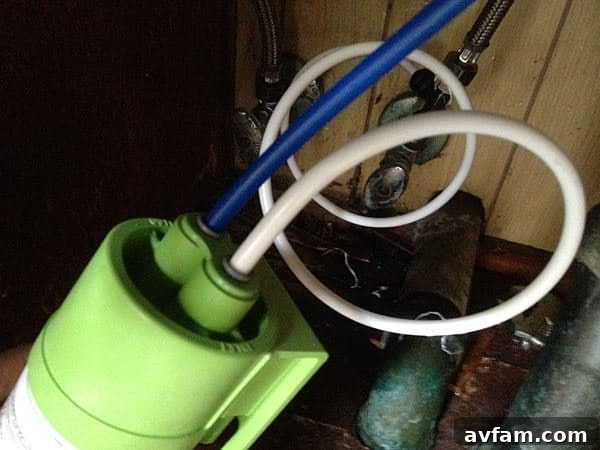
7. Activating Your System and Checking for Leaks
This is the moment of truth! Slowly turn the cold water supply back on (either at the under-sink valve or your main house valve). As the water flows back into the lines and through the filter system, you should hear the sound of it filling up. Immediately, and thoroughly, inspect all connections you’ve made: around the dedicated faucet, the T-splitter connection to the cold water line, and both inlet/outlet connections at the filter housing. Look and feel for any signs of dripping or moisture. If you notice any leaks, turn off the water supply immediately and gently tighten the problematic connection, then re-check.
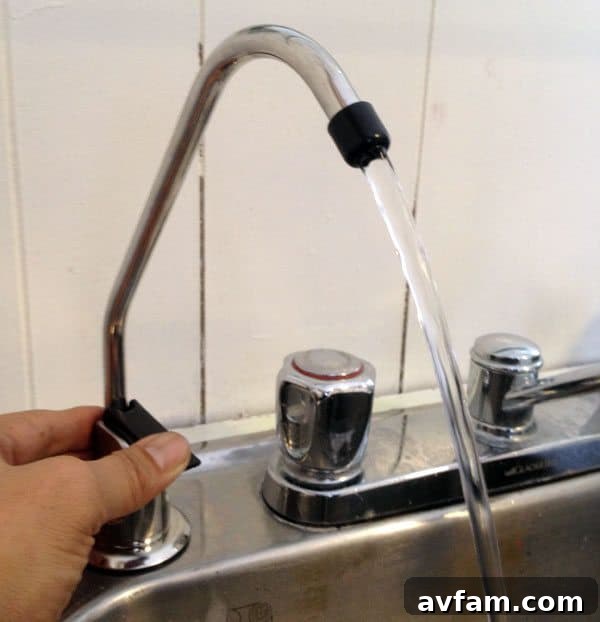
Once you’ve confirmed there are no leaks, open the dedicated filtered water faucet. Filtrete recommends running at least two gallons of water through the filter before consuming it. This flushing process helps to clear any air from the system and remove harmless carbon fines that may be present in a new filter. After flushing, your new Filtrete High Performance Drinking Water System is ready for use!
Enjoy the Purity: Long-Term Benefits and Maintenance
We’ve been enjoying the crystal-clear, great-tasting water from our Filtrete system for several days now, and the difference is truly remarkable. The convenience of having an instant supply of filtered water directly at the sink is unparalleled, eliminating the need for constant pitcher refills or expensive bottled water runs. This system not only enhances the flavor of our beverages and cooking but also provides peace of mind, knowing that harmful contaminants are significantly reduced.
Remember to mark your calendar for filter replacements every six months to ensure continuous peak performance. The simple twist-on, twist-off design makes this task virtually effortless.
For more detailed product specifications, purchasing options, and to explore the full range of Filtrete solutions, please visit their official website. You can also find the Filtrete High Performance Drinking Water System at your local Walmart and other major retailers, making it easily accessible for your home improvement needs.