
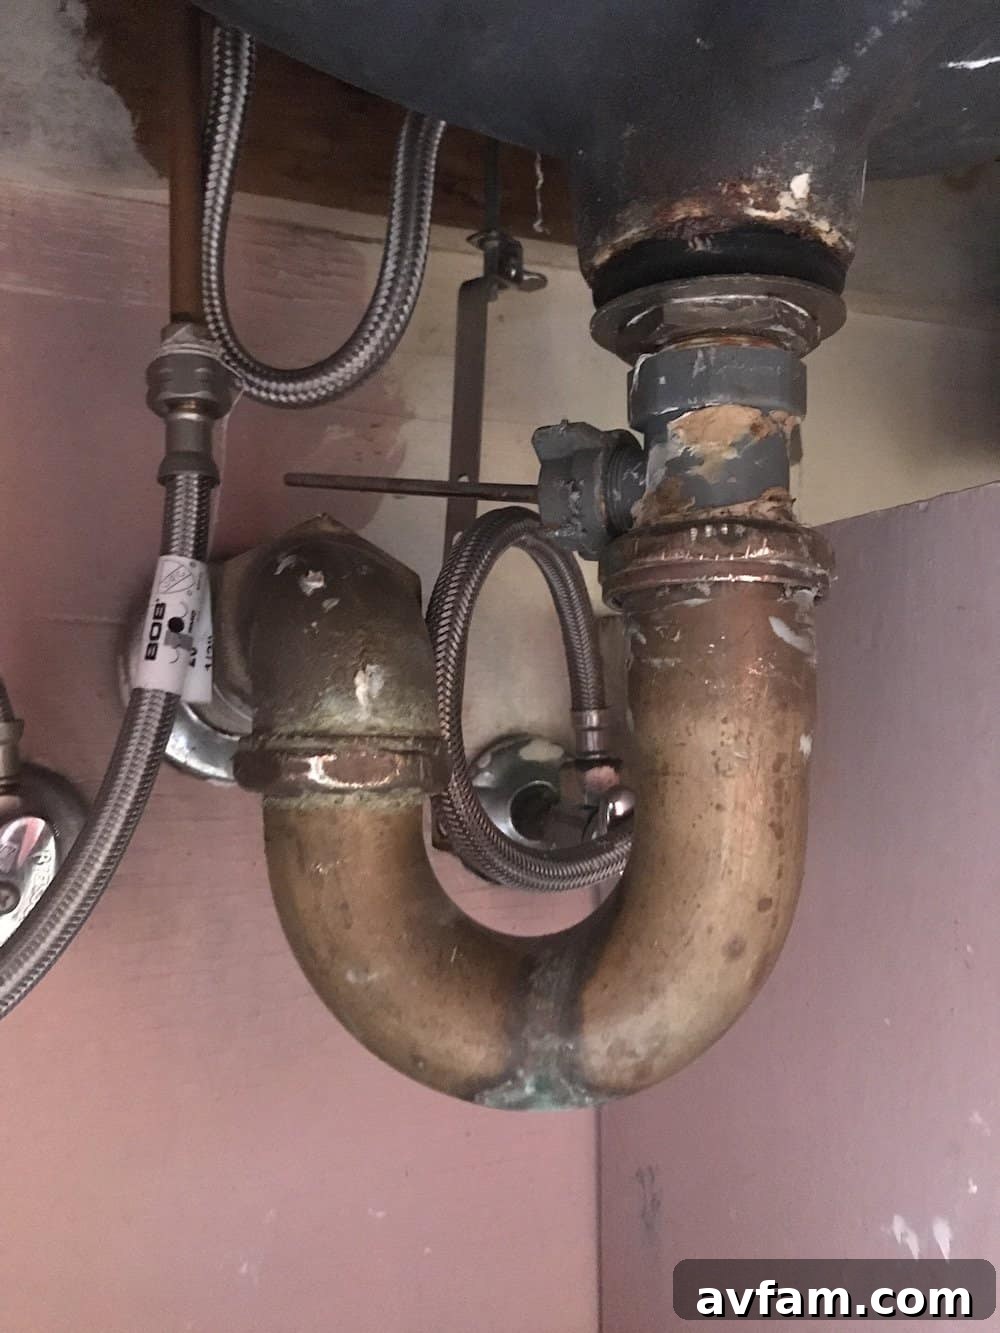
Mastering Your Under-Sink Plumbing: A Comprehensive Guide to P-Traps
The U-shaped curve of pipe nestled beneath your sink isn’t just a quirky design; it’s a vital component of your home’s plumbing system known as a P-trap. While often overlooked, this unassuming fixture plays a critical role in maintaining a healthy and functional household. However, like any hardworking part, P-traps are prone to issues, most commonly clogs, which can disrupt your daily routine and lead to unpleasant odors or slow drains.
When faced with a stubborn clog, many homeowners immediately reach for chemical drain cleaners or a plunger. While these might offer a temporary fix, understanding the P-trap’s function and learning how to properly clean or replace it offers a more effective and long-term solution. Moreover, if you find yourself needing to access or replace your P-trap, it presents an ideal opportunity to upgrade to a “no-clog” P-trap, potentially eliminating future worries and maintenance headaches.
What is a P-Trap and Why is it Essential?
At its core, a P-trap is a section of curved pipe designed to trap a small amount of water, creating a barrier that serves two primary, indispensable functions:
- Blocking Noxious Gases: This is arguably the P-trap’s most crucial role. The standing water in the curve forms a seal that prevents harmful and foul-smelling sewer gases from rising up through your drain and entering your home. Without this water seal, your living space would be exposed to methane and other unpleasant odors, posing both an annoyance and a potential health risk.
- Catching Valuables and Debris: Beyond gas prevention, the P-trap acts as a safety net. Its U-shape is strategically designed to catch small, heavy items like wedding rings, jewelry, or contact lenses that might accidentally fall down the drain. Instead of being swept away into the main sewer lines, these items settle in the trap, allowing for easy retrieval. Similarly, it catches larger debris like hair, food particles, and soap scum, preventing them from traveling deeper into your plumbing system where they could cause more severe and harder-to-reach blockages.
Over time, the very function of catching debris means that P-traps are susceptible to accumulation. Hair, grease, soap scum, dirt, and other foreign objects gradually build up, narrowing the pipe’s internal diameter. This insidious process inevitably leads to slow drainage, gurgling noises, and eventually, a complete blockage, bringing your sink to a standstill.
The Innovative Solution: Introducing the PermaFLOW P-Trap
While traditional P-traps effectively perform their duties, they require occasional cleaning due to their inherent design. However, innovations in plumbing technology are changing the game. We recently discovered an exciting product at this year’s International Builders Show: the PermaFLOW P-trap. This ingenious device promises to revolutionize sink maintenance by significantly reducing, if not entirely eliminating, the hassle of clogs.
The PermaFLOW P-trap distinguishes itself with two key features:
- Integrated Clearing Mechanism: Unlike conventional P-traps that require disassembly to clear a clog, the PermaFLOW incorporates an external dial. A simple turn of this dial activates an internal paddle or auger. This mechanism effectively dislodges and breaks up accumulated debris, pushing it through the trap and down the drain without needing to open the plumbing. This not only saves time but also prevents the mess often associated with manual trap cleaning.
- Transparent Design: The PermaFLOW is constructed from clear, durable plastic. This transparency offers a significant advantage: you can visually inspect the trap at any time. If you suspect a clog, you can see its location and severity. More importantly, if a valuable item like a ring or earring falls down the drain, you can immediately spot it within the clear trap, confirming its presence before attempting retrieval. This eliminates the anxiety and guesswork, making recovery far simpler and quicker.
Upgrading to a PermaFLOW P-trap is a proactive step towards a maintenance-free plumbing experience, offering peace of mind and saving valuable time and effort in the long run.
Addressing P-Trap Clogs: Cleaning vs. Replacement
If you don’t have a PermaFLOW, or if you prefer to maintain your existing setup, you still have several effective options for dealing with a clogged P-trap. The approach you choose depends on the severity and nature of the blockage.
Initial Troubleshooting: Less Invasive Methods
Before diving into disassembling your P-trap, it’s worth trying less invasive methods for minor clogs:
- Hot Water Flush: For grease-related clogs, a slow pour of very hot (but not boiling) water can sometimes help to melt and dislodge the blockage.
- Baking Soda and Vinegar: This natural remedy can sometimes break down minor organic clogs. Pour half a cup of baking soda down the drain, followed by half a cup of white vinegar. Let it sit for 30 minutes to an hour (or even overnight), then flush with hot water. The fizzing action helps to loosen debris.
- Chemical Drain Cleaners (Use with Caution): Products like Draino or liquid plumber can sometimes dissolve small organic blockages. However, we generally advise against frequent use. These harsh chemicals can be corrosive to pipes, especially older ones, and are dangerous to handle. They can also harden certain types of clogs, making them even more difficult for plumbers to remove. If they don’t work, you’re left with a pipe full of caustic chemicals, posing a risk during manual cleaning.
- Drain Snake or Zip-It Tool: A flexible drain snake (also known as a plumber’s snake or auger) or a specialized barbed tool like a Zip-it can be highly effective. These tools are inserted into the drain to physically grab onto hair and other debris, allowing you to pull the clog out. They are a much better option than chemical cleaners for hair clogs.
- Avoid Plungers for Severe Clogs: While plungers are useful for minor sink clogs, we generally don’t recommend them for persistent P-trap blockages. A plunger can inadvertently push the clog deeper into the plumbing system, making it much harder to reach and remove later, potentially turning a simple P-trap issue into a more complex drain line problem.
When these initial options prove insufficient, or if you suspect a significant blockage or wish to retrieve a fallen item, it’s time to physically access the P-trap. The good news is that with a few basic tools and a little confidence, you can typically remove, clean, and re-install a standard P-trap in less than an hour.
Step-by-Step Guide: Cleaning and Reinstalling a Standard P-Trap
Cleaning your P-trap manually is a straightforward DIY task. Here’s how to do it effectively:
Tools and Materials You’ll Need:
- Bucket
- Adjustable wrench or channel lock pliers (for slip nuts, though often hand-tightened)
- Old rag or towel
- Stiff brush (a bottle brush or old toothbrush works well)
- Gloves (optional, but recommended for hygiene)
- Eye protection (optional, good practice)
Detailed Steps:
- Prepare Your Workspace and Shut Off Water: Before you begin, clear everything out from under your sink to provide ample working space. Place a large bucket directly underneath the P-trap to catch any residual water and debris that will spill out. This step is crucial to prevent a mess. While not strictly necessary to turn off the main water supply for P-trap cleaning if you don’t intend to disassemble anything upstream, it’s good practice to turn off the hot and cold water shut-off valves for the sink faucet, just in case.
- Loosen the Slip Nuts: The P-trap is typically connected to the sink tailpiece (the vertical pipe coming down from the drain) and the waste arm (the horizontal pipe leading into the wall) by large, threaded plastic or metal slip nuts. Carefully loosen these slip nuts at both ends of the P-trap. You can usually do this by hand; if they’re too tight, use an adjustable wrench or channel lock pliers, turning counter-clockwise. Be gentle but firm. As you loosen them, be ready for water to drip into your bucket.
- Remove the P-Trap: Once both slip nuts are loosened, carefully lower the P-trap. It might contain a significant amount of water and gunk, so hold it upright as you remove it from the pipes and empty its contents into the bucket. Be careful not to twist or put excessive stress on the pipe arm that runs from the wall into the drain system, as this could damage the connection point.
- Clean the P-Trap: Take the removed P-trap to a utility sink or outside. Use your stiff brush, hot water, and perhaps a little soap to thoroughly scrub the inside of the trap. Remove all visible hair, grease, and debris. Make sure the interior is completely clear. Also, quickly inspect the tailpiece and the waste arm connections for any residual clogs.
- Inspect and Reinstall: Before reinstalling, check the washers (usually plastic or rubber compression washers) inside the slip nuts. If they are cracked, brittle, or heavily worn, replace them to ensure a good seal. Place the cleaned P-trap back into position, aligning it with the tailpiece and the waste arm. Hand-tighten the slip nuts firmly. Avoid over-tightening, as this can crack plastic nuts or strip threads. A snug fit is usually sufficient.
- Check for Leaks: Once reinstalled, turn the sink’s shut-off valves back on (if you turned them off). Turn on the faucet and let the water run for a few minutes, filling the sink and allowing it to drain. Carefully inspect all connections of the P-trap for any drips or leaks. If you notice a leak, tighten the slip nut slightly more, ensuring the washers are properly seated. If the leak persists, you might need to disassemble and check the washers again.
Following these steps ensures your P-trap is clean and ready to function optimally, preventing future slow drains and odors.
Step-by-Step Guide: Replacing Your P-Trap (Upgrade or Damage)
Sometimes cleaning isn’t enough, or you might be upgrading to a no-clog model like the PermaFLOW. Replacing a P-trap follows many of the same steps as cleaning, but with a few extra considerations.
Tools and Materials You’ll Need:
- New P-trap (ensure it matches your pipe diameter, typically 1 1/2″ or 1 1/4″ for sinks)
- Bucket
- Adjustable wrench or channel lock pliers
- Old rag or towel
- Plumber’s tape or pipe sealant (optional, but can provide extra leak prevention for threaded connections)
- Gloves and eye protection
Detailed Steps:
- Prepare and Shut Off Water: First, clear the cabinet under your sink. Place a bucket directly beneath the P-trap to catch any water that will drain out. Crucially, turn off the hot and cold water shut-off valves located underneath your sink. This prevents any accidental water flow during the replacement process.
- Remove the Old P-Trap: Using an adjustable wrench or channel lock pliers (or by hand if loose enough), carefully loosen the slip nuts at both ends of the P-trap – where it connects to the sink’s tailpiece and where it connects to the waste arm entering the wall. Once loosened, gently remove the old P-trap, allowing any remaining water to drain into your bucket. Inspect the existing connections and pipes for any damage or excessive corrosion that might also need addressing.
- Prepare the New P-Trap: If your new P-trap comes with adjustable components, assemble it loosely according to the manufacturer’s instructions. Ensure all washers and gaskets are correctly placed. If using plumber’s tape, apply it clockwise around the male threads of the tailpiece and waste arm for an extra layer of leak protection, though many plastic P-traps rely solely on compression washers.
- Install the New P-Trap: Carefully position the new P-trap, connecting it first to the sink’s tailpiece and then aligning it with the waste arm leading into the wall. Hand-tighten the slip nuts at both ends. Ensure the connections are snug and that the P-trap is properly seated and aligned. If your new P-trap is adjustable, make any necessary adjustments to ensure a straight and tight fit.
- Tighten Connections: Once hand-tightened, use your adjustable wrench or channel lock pliers to give each slip nut an additional quarter to half-turn. Be firm but avoid over-tightening, especially with plastic fittings, as this can cause them to crack. The goal is a secure, watertight seal without excessive force.
- Restore Water and Check for Leaks: Slowly turn the hot and cold water shut-off valves back on. Turn on your faucet and let the water run into the sink for several minutes, allowing it to drain fully. While the water is running and draining, meticulously inspect all connection points of your newly installed P-trap for any signs of leaks or drips. Pay close attention to the slip nuts. If you observe any leaking, try gently tightening the corresponding nut a little further. If the leak persists, you may need to disassemble, check the washers, ensure they are correctly seated, and reassemble.
With a new P-trap in place, you can enjoy a fresh, clog-free start to your sink’s plumbing.
Preventative Maintenance: Keeping Your Drains Clear and Healthy
While cleaning and replacing P-traps are essential skills, proactive maintenance can significantly reduce the frequency of clogs and prolong the life of your plumbing. Here are some simple, yet effective, preventative measures:
- Use Drain Screens or Strainers: This is arguably the simplest and most effective preventative step. Place mesh drain screens in all your sinks (kitchen and bathroom) to catch hair, food particles, and other debris before they ever reach the P-trap. Empty these screens regularly into the trash.
- Proper Disposal of Grease and Food Waste: Never pour cooking grease, oils, or fat down your kitchen sink. These substances solidify as they cool, clinging to pipe walls and acting as magnets for other debris, quickly forming stubborn clogs. Instead, collect grease in an old can or jar and dispose of it in the trash once cooled. Scrape food scraps into the trash or compost, even if you have a garbage disposal.
- Regular Hot Water Flushes: Periodically flush your drains with very hot water for a few minutes. This can help to melt away minor grease buildup and wash away soap scum before it accumulates into a problem. For kitchen sinks, a monthly flush with a solution of baking soda and vinegar, followed by hot water, can also be beneficial.
- Avoid Harsh Chemical Drain Cleaners: As mentioned, these can damage pipes over time, are hazardous to handle, and can create more challenging clogs. Opt for enzymatic drain cleaners if you prefer a non-manual solution, as they use bacteria to break down organic matter naturally, or stick to physical removal methods.
- Be Mindful of What Goes Down the Drain: Educate household members about what should and shouldn’t go down the sink. Hair is a major culprit in bathroom drains; minimize it by brushing hair before showering or bathing. Avoid flushing non-biodegradable items like cotton balls, dental floss, or feminine hygiene products down toilets, as these can contribute to larger system blockages that impact P-traps.
By integrating these preventative habits into your routine, you can significantly extend the periods between P-trap cleanings or replacements, ensuring your plumbing runs smoothly and efficiently.
Conclusion: Empowering Your Plumbing Knowledge
The humble P-trap, though often hidden from view, is a cornerstone of a healthy and odor-free home. Understanding its vital functions, recognizing the signs of a clog, and knowing how to properly clean or replace it empowers you as a homeowner. Whether you opt for the innovative, maintenance-free design of a PermaFLOW P-trap or prefer to master the traditional cleaning methods, taking control of your under-sink plumbing will save you time, money, and frustration in the long run.
Armed with this comprehensive guide, you’re now equipped to tackle P-trap issues with confidence. Remember, regular maintenance and quick action at the first sign of a slow drain are your best defenses against inconvenient and costly plumbing problems. If you ever encounter a situation beyond your comfort level or a clog that persists despite your best efforts, don’t hesitate to consult a professional plumber. Your home’s plumbing system is an investment worth protecting.