
The Ultimate Guide to Changing a Flat Tire: Be Prepared for Roadside Emergencies
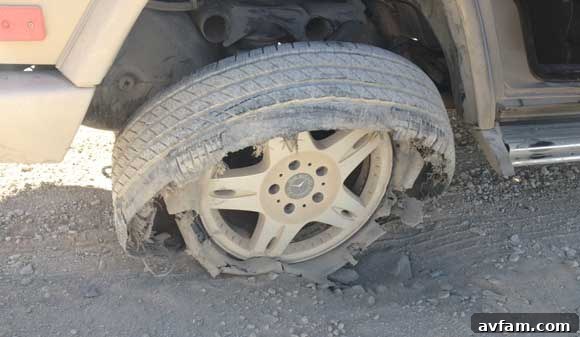
There’s nothing quite like the freedom of the open road, especially when exploring less-traveled paths. Yet, with adventure comes the potential for unforeseen challenges. This past weekend, our journey took us deep into the vast Nevada desert. Perhaps we were enjoying the thrill of the dirt roads a little too much, venturing a bit faster than prudence dictated. And as fate would have it, all it takes is one sharp rock to turn a smooth ride into a sudden inconvenience – a jarring “BOOM” followed by the unmistakable thud of a tire going flat. That’s precisely what unfolded during our desert escapade.
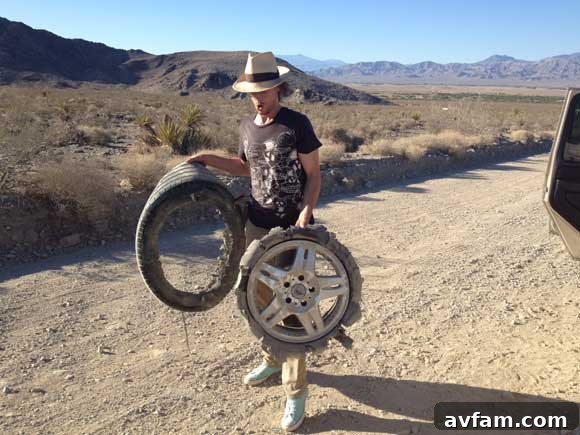
Fortunately, the incident involved a rear tire, allowing us to bring the vehicle to a controlled and relatively swift stop after the blowout. However, the force of the impact was enough to dent the rim in a couple of places. The good news? We were equipped with a full-size spare tire. After a quick assessment of the damage and our surroundings, we knew roadside assistance like AAA wasn’t an option in the middle of nowhere. It was up to us to get back on track. This experience underscored a crucial lesson: knowing how to change a flat tire isn’t just a useful skill; it’s a vital one, especially when you’re far from civilization.
Changing a flat tire might seem daunting, but it’s a straightforward process that every driver should be familiar with. While specific instructions might vary slightly depending on your vehicle model, the type of jack you have, and where your spare tire is stored, the fundamental steps remain consistent. This comprehensive guide will walk you through everything you need to know to safely and efficiently change a flat tire, turning a potential roadside disaster into a minor setback.
1. Assess the Situation and Prioritize Safety
The very first and most critical step when you experience a flat tire is to ensure your safety and the safety of others. As soon as you realize you have a flat, take control of your vehicle, activate your hazard lights immediately, and steer towards the safest possible location. Aim to pull over as far off the road as you can, preferably onto a level, solid surface away from moving traffic. If you’re on a highway or a busy road, consider pulling into a parking lot or a less congested side street if safe to do so.
Once stopped, engage your parking brake firmly. If you have safety triangles, flares, or cones, place them behind your vehicle to alert oncoming motorists. Raising your hood is another effective signal that your vehicle has broken down, encouraging other drivers to slow down and exercise caution as they approach. Always be aware of your surroundings; keep an eye on traffic, especially if you’re working on the side of the road. Your personal safety is paramount throughout this entire process.
2. Gather Your Tools and Prepare for the Change
Before you even think about touching the wheel, you need to locate and prepare all the necessary tools. Most vehicles come equipped with a standard tire changing kit, but it’s always wise to periodically check its contents and condition. Typically, your spare tire, jack, and lug wrench are stored in a well beneath the carpet in the trunk. In some SUVs or trucks, the spare might be found in a rear storage compartment, mounted on the back door, or even underneath the vehicle. Consult your owner’s manual if you’re unsure of their location.
Beyond the basics, it’s highly recommended to have a few extra items on hand for a smoother and safer tire change:
- Spare Tire: Ensure it’s properly inflated and free of damage (check for dry rot or cracks). Don’t wait until an emergency to discover your spare is flat!
- Vehicle Jack: This could be a scissor jack, bottle jack, or hydraulic jack. Understand how yours operates.
- Lug Wrench: Used to loosen and tighten the lug nuts. Some vehicles have a telescopic wrench for extra leverage.
- Owner’s Manual: Crucial for specific jacking points and torque specifications.
- Wheel Chocks: These are placed under the tires diagonally opposite the flat to prevent the vehicle from rolling.
- Gloves: Protect your hands from dirt, grease, and potential cuts.
- Flashlight or Headlamp: Indispensable for nighttime changes or in dimly lit conditions.
- Warning Triangle/Flares/Reflective Vest: For enhanced visibility, especially in low light.
3. Loosen the Lug Nuts on the Flat Tire
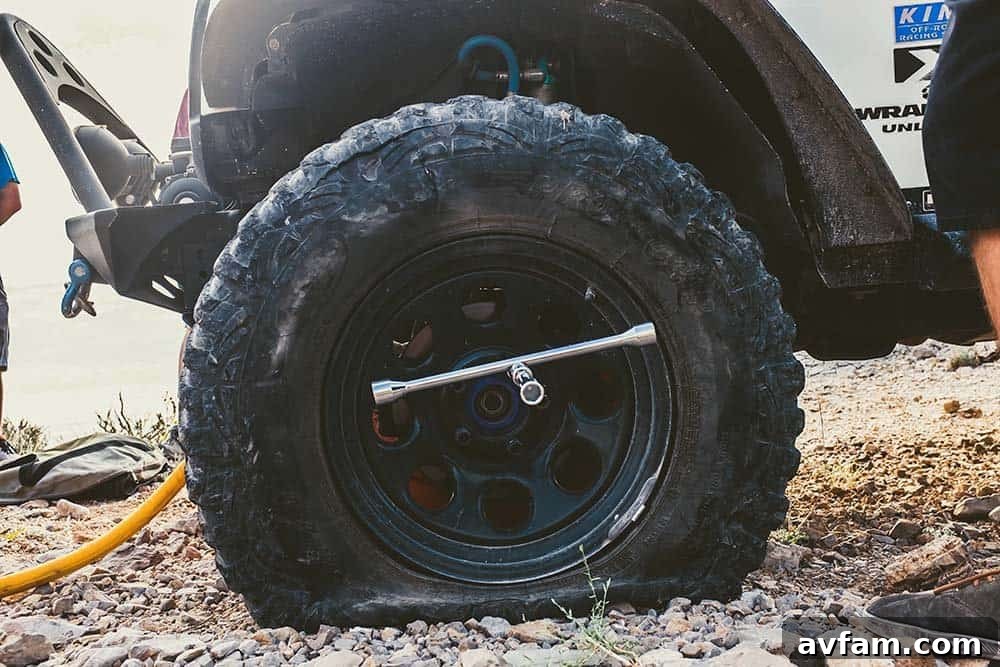
Before lifting your vehicle, it’s much easier and safer to loosen the lug nuts while the tire is still on the ground. This prevents the wheel from spinning as you apply force and reduces the risk of the vehicle falling off the jack. Using your lug wrench, turn the nuts counter-clockwise. You may need to apply considerable force. If they’re particularly stubborn, you can stand on the lug wrench for extra leverage (but be careful not to slip or damage the wrench). Only loosen them about a quarter to half a turn; do not remove them completely at this stage. Just break their initial tightness.
4. Safely Raise Your Vehicle
With the lug nuts loosened, it’s time to elevate your vehicle. Consult your owner’s manual to identify the correct jack points. These are reinforced areas on your vehicle’s frame designed to safely support its weight. Placing the jack on an incorrect point can cause serious damage to your car or lead to the jack slipping. Ensure the ground beneath the jack is solid, flat, and stable. Never place the jack on uneven terrain, soft dirt, or an incline.
Once the jack is correctly positioned, begin to raise the vehicle. If you have a scissor jack, you’ll typically turn a crank handle. For hydraulic jacks, you’ll pump a lever. Raise the vehicle just enough so that the flat tire is fully off the ground and there’s adequate clearance to mount the spare. Crucially, before lifting, ensure you’ve placed wheel chocks in front and behind the tire diagonally opposite the one being changed. This further prevents any accidental rolling of the vehicle while it’s elevated.
5. Remove the Flat Tire
Once the vehicle is sufficiently lifted and stable, you can now fully remove the loosened lug nuts. Place them in a safe spot where they won’t roll away or get lost. With all the lug nuts off, carefully grip the flat tire and pull it straight off the wheel studs. It might be heavy, so be prepared to support its weight. Place the removed flat tire aside, ideally in a location where it won’t impede traffic or roll away.
6. Install the Spare Tire
Now, carefully lift your spare tire and align its bolt holes with the wheel studs on your vehicle. This might require a bit of maneuvering. Once aligned, slide the spare tire onto the studs until it rests flush against the hub. Next, hand-tighten the lug nuts back onto the studs. It’s crucial to tighten them in a star or cross-pattern (e.g., tighten one, then the one directly opposite it, then the next one, and so on). This ensures the wheel is mounted evenly and prevents it from wobbling or becoming loose. Do not overtighten them with the wrench at this stage, just get them snug by hand.
7. Lower the Vehicle and Final Tightening
Once the spare tire is securely hand-tightened, it’s time to gently lower your vehicle. If using a hydraulic jack, slowly turn the release valve counter-clockwise. For a scissor jack, crank it in the opposite direction. Lower the vehicle until the spare tire is just touching the ground, but the full weight of the car isn’t yet resting on it. At this point, use your lug wrench to give the lug nuts a final, firm tightening, again using the star or cross-pattern. This ensures they are properly secured. Once tightened, fully lower the vehicle and remove the jack and wheel chocks.
8. Post-Change Procedures and Driving on a Spare
With the spare tire installed, don’t forget about your flat. If the rim is reusable, you’ll want to get the tire repaired. Place the damaged tire in the same location where your spare was stored, ensuring it’s secure and won’t shift during transit. Neatly stow away all your tools – the jack, lug wrench, and wheel chocks – back in their designated spots.
It’s important to understand the limitations of your spare tire. If you have a full-size spare, you’re in better shape and can generally maintain normal driving speeds, although it’s still advisable to get your original tire repaired or replaced soon. However, if you have a “donut” or temporary spare, these are designed for short-term, low-speed use only. They typically come with strict speed and mileage restrictions (often no more than 50 mph and a distance limit of 50-70 miles). Driving too fast or too far on a temporary spare can be dangerous and lead to further damage to your vehicle’s drivetrain components. Prioritize getting to a garage or tire shop as soon as possible to have your original tire repaired or replaced with a full-size, road-worthy tire.
9. When to Call for Professional Help
While knowing how to change a tire is invaluable, there are situations where it’s safer and wiser to call for professional roadside assistance. These include:
- Unsafe Location: If you’re on a busy highway shoulder, in a dangerous curve, or in an area with poor visibility where you cannot safely pull over.
- Lack of Tools: If your spare is missing, flat, or your tools are damaged or unavailable.
- Extreme Weather Conditions: Changing a tire in heavy rain, snow, or extreme heat/cold can be hazardous.
- Physical Limitations: If you’re unable to perform the physical tasks required to change a tire due to injury, age, or strength.
- Severe Damage: If the tire blowout caused significant damage to your wheel hub, brakes, or suspension, making a simple tire change insufficient.
- Multiple Flat Tires: A single spare won’t help if you have more than one flat.
Services like AAA, your vehicle manufacturer’s roadside assistance, or your insurance provider can offer help in these situations, ensuring you and your vehicle are safely taken care of.
Conclusion: Drive Confidently with Preparation
Experiencing a flat tire can be an unwelcome interruption to any journey, whether you’re navigating urban streets or exploring remote desert landscapes. Our recent desert adventure served as a powerful reminder that being prepared and knowing how to change a flat tire is an essential skill for every driver. By following these detailed steps, you can approach a flat tire situation with confidence, ensuring your safety and minimizing downtime. Regularly check your spare tire’s condition and pressure, keep your tools organized, and perhaps even practice changing a tire in your driveway. With proper preparation, you’ll be well-equipped to handle whatever the road throws your way, transforming a potential roadside crisis into a manageable bump in the road.