
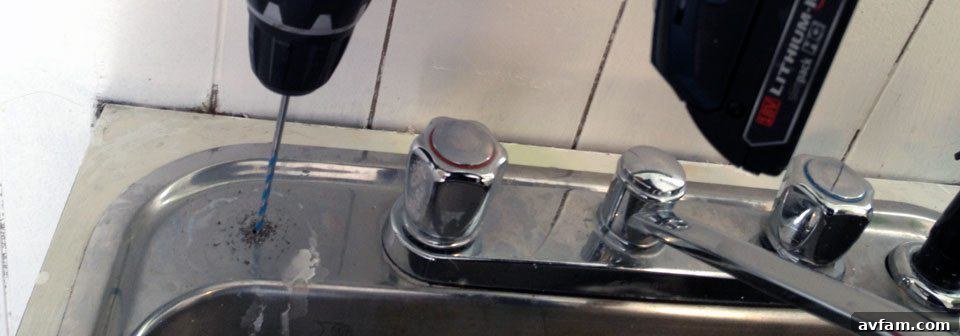
Mastering the Art of Drilling Through Stainless Steel: A DIY Guide for Homeowners
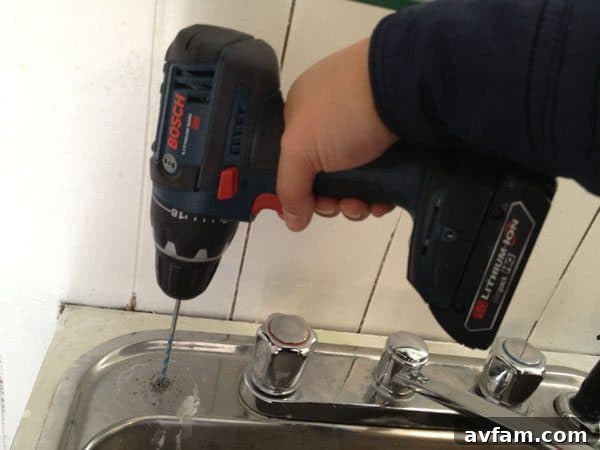
Stainless steel, a staple in modern homes and industries alike, is renowned for its durability, corrosion resistance, and sleek appearance. From kitchen sinks to appliances and various fixtures, its presence is undeniable. However, these very qualities that make stainless steel so desirable can also make working with it a challenging endeavor, especially when it comes to drilling. Many DIY enthusiasts, myself included, have discovered this firsthand when tackling projects like installing an under-sink water filtration system, which often requires drilling a new hole in a stainless steel sink.
Initially, I approached the task of drilling into my stainless steel sink with the naive assumption that it would be a straightforward process. After all, I’ve drilled countless holes in wood, plastic, and even softer metals without much fuss. However, my initial attempts quickly led to a burnt-out, dull drill bit and minimal progress. This experience is common, as stainless steel’s unique properties, such as its propensity for work hardening and its high heat retention, make it far more demanding than other materials. Realizing I needed more than just a powerful drill, I turned to the vast resources of the internet, much like many others facing this common DIY hurdle.
The online world offered a plethora of advice, ranging from professional techniques involving drill presses and specialized tooling to more home-friendly methods. While a dedicated drill press and industrial-grade equipment might be ideal for certain applications, my goal was to accomplish this task efficiently using the tools I already had readily available in my workshop. This guide distills that experience, providing a practical, step-by-step approach that worked for me and can help you successfully drill through stainless steel without unnecessary frustration or excessive equipment.
Understanding the “why” behind stainless steel’s difficulty is the first step to conquering it. Stainless steel contains chromium, which provides its rust-resistant properties, but it also has alloys that contribute to its hardness. Crucially, stainless steel exhibits “work hardening” – meaning it becomes even harder when subjected to friction and heat without proper cutting. This is why blunt drill bits or insufficient pressure often lead to frustration, as the steel becomes tougher with each failed attempt. By employing the right tools and techniques, you can overcome this inherent challenge and achieve clean, precise holes.
Essential Tools and Materials for Drilling Stainless Steel
Before you embark on your drilling journey, ensure you have the correct arsenal. Using the wrong tools is often the primary reason for failure when working with stainless steel. Here’s a rundown of what you’ll need:
- Cordless or Corded Drill: A variable-speed drill is crucial. While a powerful corded drill offers consistent torque, a modern cordless drill with good battery life can also suffice for most home projects. The key is precise speed control.
- High-Quality Drill Bits: This is arguably the most critical component. Forget your standard High-Speed Steel (HSS) bits; they simply won’t stand up to stainless steel. You’ll need either:
- Cobalt Drill Bits: These are HSS bits with a percentage of cobalt alloy, making them much harder and more heat-resistant. They are an excellent choice for stainless steel.
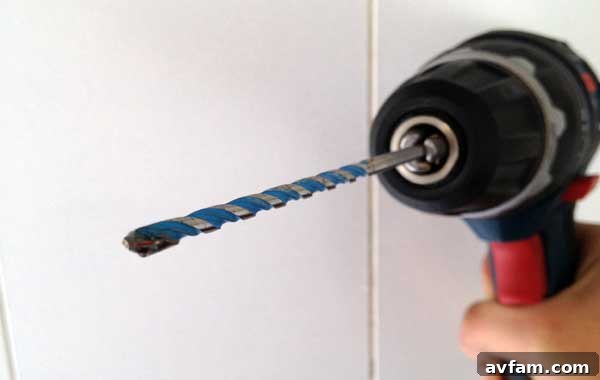
- Carbide-Tipped Drill Bits: While often more expensive, carbide-tipped bits are incredibly hard and ideal for demanding applications. My experience found carbide-tipped bits to be exceptionally effective. Ensure they are sharp and designed for metal drilling.
Start with a smaller pilot bit (e.g., 1/8 inch) and then progressively move to larger sizes if your final hole requires it.
- Lubricant/Cutting Oil: This is non-negotiable. Lubricants reduce friction, dissipate heat, and help flush out chips, thereby extending the life of your drill bit and preventing work hardening. Specialized cutting oils are best, but even something like a quality chainsaw lubricant or even motor oil can work in a pinch.
- Center Punch and Hammer: A center punch creates a precise starting dimple for your drill bit, preventing it from “walking” across the surface. While I initially used a nail for a small dent, a proper center punch offers superior accuracy.
- Safety Glasses and Gloves: Always prioritize safety. Metal shavings can fly, and the drill bit can get very hot.
- File or Deburring Tool: For smoothing out the edges of the drilled hole after completion.
- Shop Rag or Cleaning Cloth: To wipe away lubricant and metal shavings.
Step-by-Step Guide to Successfully Drill Through Stainless Steel
Patience and precision are your best allies when drilling stainless steel. Follow these steps meticulously for the best results.
1. Prepare Your Workspace and Prioritize Safety
Before you even pick up your drill, ensure your work area is clean and well-lit. If you’re drilling a removable piece of stainless steel, secure it firmly with clamps to prevent movement during drilling. For a fixed object like a sink, ensure nothing is directly underneath the drilling point that could be damaged. Always wear your safety glasses and protective gloves to shield your eyes from flying debris and your hands from sharp edges or hot metal.
2. Mark Your Spot and Create a Starter Dent
Accuracy is key. Use a marker or pencil to precisely indicate where you want your hole. Then, take your center punch and hammer. Place the tip of the punch directly on your mark and strike it firmly with the hammer. This will create a small, distinct indentation. This starter dent is critical because it gives your drill bit a precise point of entry, preventing it from skittering or “walking” across the smooth, hard surface of the stainless steel, which can scratch the material and make an inaccurate hole. Even if you don’t have a dedicated center punch, a sharp nail and hammer can create a sufficient starter dent, as I discovered.
3. Apply Generous Lubrication to the Surface
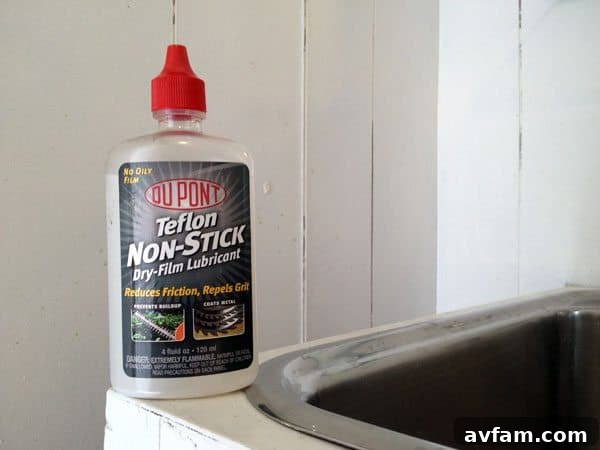
Once your spot is marked, liberally apply your chosen lubricant or cutting oil to the area you intend to drill. The lubricant serves multiple vital functions: it reduces friction between the drill bit and the stainless steel, which in turn minimizes heat buildup; it helps cool both the bit and the workpiece; and it aids in clearing away metal chips, ensuring a cleaner cut. For my project, a reliable Dupont chainsaw lubricant proved to be quite effective in keeping things cool and slick, but a dedicated cutting oil will always be superior. Don’t be shy with the lubricant – reapply it frequently throughout the drilling process.
4. Choose the Right Bit and Start Drilling Slowly
Insert your smallest carbide-tipped or cobalt drill bit into your drill chuck, ensuring it’s securely tightened. Begin drilling at a very slow speed. Stainless steel should be drilled at a much lower RPM (revolutions per minute) than softer materials. For most household drills, this means setting your drill to its lowest speed setting and engaging the trigger only partially. A good rule of thumb is about 1/3 back from wide open, but experiment slightly to find the optimal slow speed for your specific drill. The goal is to generate cutting action, not just friction and heat. Heat is your biggest enemy when drilling stainless steel, as it causes the material to work harden and dull your bit rapidly. You should see small, curled metal chips being produced, indicating that the bit is cutting effectively.
5. Maintain Consistent, Firm Pressure
Apply steady, firm downward pressure on the drill. It’s a common misconception that light pressure is best for drilling hard materials; with stainless steel, insufficient pressure causes the bit to rub rather than cut, leading to excessive heat, work hardening, and a dull bit. Let the drill and the bit do the work, but guide them with unwavering force, keeping the drill perpendicular to the surface. You’re not trying to push through with brute force, but rather maintain constant engagement so the bit continually shaves off material. Avoid jerky motions or varying pressure too much.
6. Take Frequent Breaks and Re-lubricate
This step is crucial for success and often overlooked. Due to stainless steel’s tendency to work harden when heated, you must manage the temperature carefully. After drilling for 10-15 seconds (or sooner if you see smoke or feel significant heat), pull the bit out of the hole. Apply more lubricant to the bit and the hole. Allow both the drill bit and the stainless steel to cool down. You can sometimes speed this up by lightly blowing on the area or applying a little more coolant. Be patient! Rushing this step will only lead to a dull bit, a hardened workpiece, and ultimately, failure. Repeat this cycle of drilling, cooling, and re-lubricating until you’ve successfully drilled through the material. You should observe consistent metal chips being ejected, not merely fine dust.
7. Finishing Touches for a Clean Result
Once you’ve drilled completely through the stainless steel, remove the drill. You’ll likely notice a burr, which is a raised, sharp edge of metal around the newly drilled hole. This needs to be removed for safety and aesthetics. Use a metal file or a specialized deburring tool to smooth out these edges carefully. Wipe down the entire area with a rag to remove any remaining metal shavings and lubricant. Metal shavings can be sharp and can also scratch the stainless steel surface if not properly cleaned. A clean hole, free of burrs, is the mark of a well-executed job.
Troubleshooting Common Drilling Problems
- Bit Getting Dull or Smoking: This indicates excessive heat. You’re likely drilling too fast, not using enough lubricant, or not applying enough pressure. Slow down, add more lubricant, and apply firmer pressure. If the bit is already dull, replace it.
- No Chips, Only Dust: If you’re seeing fine metal dust instead of curled chips, your drill bit is probably rubbing, not cutting. This usually means the bit is dull, or you’re not applying enough pressure. Increase pressure or replace the bit.
- Work Hardening: If the stainless steel becomes incredibly hard and resistant to drilling, you’ve likely caused work hardening by excessive heat or insufficient cutting. The best approach is to sharpen your bit (if possible), apply more pressure, reduce speed further, and use plenty of lubricant. Sometimes, trying a slightly larger, very sharp bit can help break through the hardened layer.
Drilling into stainless steel might seem daunting at first, but with the right tools, a clear understanding of the material’s properties, and a methodical approach, it becomes a manageable task for any DIY enthusiast. The key takeaways are simple: invest in high-quality carbide or cobalt drill bits, use plenty of lubricant, maintain slow speeds, apply consistent firm pressure, and take frequent breaks to allow for cooling. By adhering to these principles, you can achieve clean, precise holes without damaging your tools or your workpiece.
The satisfaction of successfully completing a task that initially seemed challenging is immense. So, gather your tools, follow these steps, and tackle your stainless steel drilling projects with confidence. Do you have any additional tips or techniques that have worked well for you when drilling into stainless steel? Share your experiences in the comments below!