
Transform Your Home: A Comprehensive Guide to DIY Floor Tiling
Embarking on a DIY floor tiling project can seem daunting, but with the right guidance and tools, it’s an incredibly rewarding experience that dramatically enhances the aesthetic and value of your home. Imagine a space brought to life with the rich textures, vibrant colors, and intricate patterns of a perfectly tiled floor. From classic ceramic to elegant porcelain or durable natural stone, the possibilities for customization are virtually endless. This comprehensive guide will walk you through every step of the process, proving that achieving a high-end look doesn’t require a high-end budget or professional installation. With expert insights from the TEC® Skill Set™ team and invaluable support from Lowe’s design consultants, you’ll gain the confidence and knowledge to transform your living spaces with a beautiful, lasting tiled floor.
Tiled floors are not just about beauty; they offer unparalleled durability, ease of maintenance, and an opportunity to express your unique style. They are ideal for high-traffic areas, kitchens, bathrooms, and even main living spaces, providing a robust surface that stands the test of time. By choosing to install your tiles yourself, you not only save significantly on labor costs but also gain immense satisfaction from seeing your vision come to life through your own efforts. Let’s dive into the essential stages of creating the floor of your dreams, making a once-complex task accessible and enjoyable.
Strategic Planning: The Foundation of a Perfect Tiled Floor
Every successful tiling project begins with meticulous planning. This initial phase is crucial not just for the aesthetics of your floor but for the overall ease and success of the installation. A well-thought-out plan minimizes waste, prevents headaches, and ensures a stunning final result.
Selecting Your Tiles and Grout: A Harmonious Duo
The first and perhaps most exciting step is choosing the perfect tile and grout combination that reflects your personal style and complements your home’s décor. Consider the function of the room: high-traffic areas might benefit from more durable porcelain, while a bathroom might call for tiles with excellent slip resistance. The vast array of options, including ceramic, porcelain, natural stone, and even glass tiles, offers unique characteristics in terms of hardness, water absorption, and aesthetic appeal. Your choice of tile sets the tone, but it’s the grout that truly brings the design together. Grout color can either blend seamlessly with your tiles for a cohesive, understated look or create a striking contrast that defines each tile, adding a dynamic visual element to your floor.
To help navigate this exciting selection process, utilize our innovative Color Selector Tool. This interactive resource guides you through various design styles, helping you pinpoint your preferences and visualize how different tile, grout, and accessory combinations will look in your space. For personalized advice and expert insights, don’t hesitate to schedule a free appointment with a Lowe’s design consultant. Their professional guidance can be invaluable in refining your vision, helping you choose the right materials, and even offering tips for a smooth installation.
Developing Your Shopping List and Layout Strategy
Once your design vision is clear, it’s time to compile a comprehensive shopping list. Beyond the tiles and grout, you’ll need mortar, spacers, a notched trowel, a beating block and mallet, buckets for mixing, sponges for cleanup, and appropriate safety gear. Having all your materials on hand before you begin ensures a continuous and efficient workflow.
The next critical step in planning is developing a strategic layout for your tiles. This involves dry-laying a section of your chosen pattern to understand how the tiles will fit within your room. The goal is to maximize the number of whole tiles and ensure any cut tiles are as large and inconspicuous as possible, ideally tucked away in less visible areas or along walls. Remember to account for grout lines by including spacers in your layout calculations. Begin your layout from the most visible wall or the center of the room, working outwards, to create a balanced and professional appearance.
For detailed guidance on how to measure, mark, and execute your tile layout effectively, our comprehensive installation guide offers invaluable tips and techniques. This step is where you transform your design concept into a tangible blueprint, ensuring that when it comes time to lay the first tile, you proceed with confidence and precision.
Mastering Mortar Application: The Art of Adhesion
With your planning complete and materials ready, the next phase involves preparing and applying the mortar, the essential adhesive that binds your tiles securely to the subfloor. Proper mortar mixing and application are paramount for a durable and long-lasting tiled floor.
Mixing and Preparing Your Mortar
Before mixing, ensure your subfloor is clean, dry, level, and structurally sound. Any imperfections in the subfloor can transfer to your tiled surface, compromising both appearance and longevity. Always follow the specific instructions provided with your TEC® Skill Set™ mortar. The correct water-to-powder ratio is crucial for achieving the ideal consistency—thick enough to hold ridges but pliable enough to spread smoothly. Improperly mixed mortar can lead to weak adhesion or difficulty in leveling tiles, so take your time to get this right.
The Installation Journey Begins
Once your mortar is perfectly mixed, you’re ready to begin installation. A widely recommended technique is to start tiling in the farthest quarter of the room from the exit and work your way towards it. This strategy prevents you from having to walk over freshly laid tiles, ensuring they remain undisturbed during the critical initial setting period. Working in small, manageable sections, apply the mortar to the subfloor using the flat edge of your trowel. This initial spread creates a uniform base layer.
Immediately after spreading, use the notched section of the trowel to “comb” the mortar. This creates straight, even ridges that serve several vital purposes: they allow air to escape when the tile is set, ensuring a stronger bond, and they help you apply a consistent amount of mortar for even tile height. A common practice is to comb the mortar in one direction (e.g., north-to-south) for optimal tile adhesion.
Setting and Leveling Your Tiles
With the mortar bed ready, carefully place your tile into position. Apply firm, even pressure and use a slight twisting motion. If your mortar ridges were combed north-to-south, press the tile in an east-to-west direction, perpendicular to the ridges. This technique helps collapse the ridges, distributing the mortar evenly across the entire back of the tile and ensuring maximum coverage and a strong bond. After placing a few tiles, step back and assess their alignment and levelness. If you’re satisfied with their appearance, use a beating block and mallet to gently tap down the tiles, ensuring they are perfectly level with each other and firmly embedded in the mortar. Check for any “lippage” – uneven tile edges – and make adjustments while the mortar is still wet.
Immediate Cleanup and Curing
As you work, it’s essential to remove any excess adhesive that squeezes up between the tiles or onto the tile surface. A damp sponge and warm, soapy water are effective for this. Cleaning immediately prevents the mortar from hardening, which would make removal much more difficult later. Finally, patience is key. Refer to the mortar packaging for specific drying and curing times. It’s crucial to allow the mortar to fully set before proceeding to the grouting stage. Rushing this step can compromise the stability and longevity of your newly tiled floor, so resist the urge to move too quickly.
The Art of Grouting: Finishing Your Masterpiece
Once your mortar has cured completely, it’s time for the final, transformative step: grouting. Grout not only fills the spaces between your tiles, creating a uniform and finished look, but also adds structural integrity and protects against moisture and dirt. The right grout can dramatically enhance your floor’s overall appeal.
Introducing TEC® Skill Set™ DesignColor™ Grout
For a truly professional finish that matches your design vision, we highly recommend TEC® Skill Set™ DesignColor™ grout, available at select Lowe’s stores. This innovative product simplifies the grouting process, eliminating common DIY frustrations. DesignColor™ Grout removes the guesswork of measuring, which is often a significant hurdle for new installers. Each 12.5 lb. plastic bag of universal grout base is precisely formulated to pair with two individually packaged color mix cups, allowing you to create the perfect, consistent grout color every time.
To further enhance performance, mix the grout components with Grout Boost® grout additive. Grout Boost® requires no additional measuring and provides an unparalleled benefit: it creates a stain-proof grout*. This means your beautiful new floor will resist stains from spills, making cleanup a breeze and ensuring its pristine appearance for years to come. Furthermore, mixing with Grout Boost® eliminates the need for post-installation sealing, saving you valuable time, money, and ongoing maintenance effort. It’s a true game-changer for durability and ease of care.
Flawless Grout Application Technique
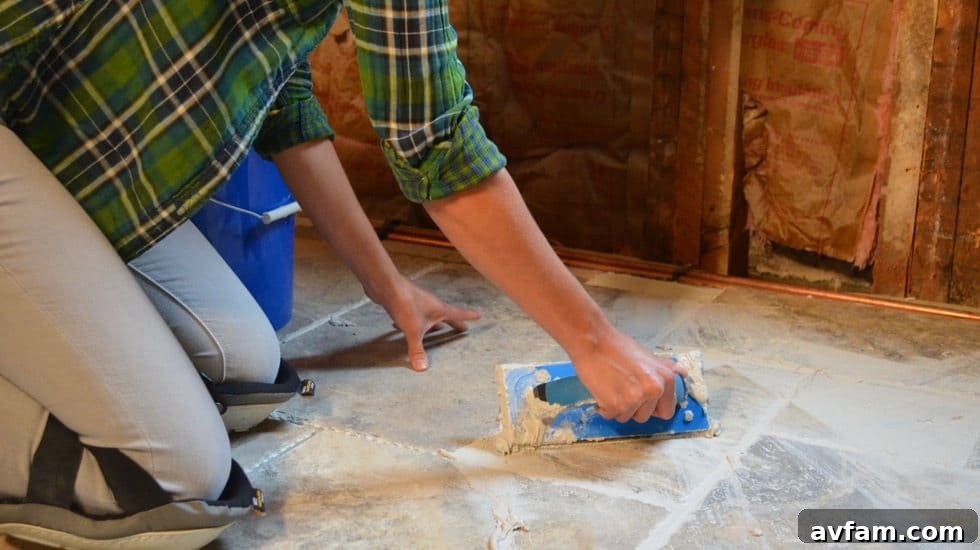
Once your grout is perfectly mixed, apply it generously to the tiled surface using a grout float. Hold the float at a 45-degree angle and firmly spread the grout, working it diagonally across the tile joints to ensure every narrow space is completely filled. Don’t be afraid to really pack the grout into the joints; thorough filling is crucial for a durable and uniform finish. Many find it easier to initially pack the grout using the small end of the grout float, pushing it deeply into the joints. Once the joints are filled, switch to the long edge of the float, holding it almost perpendicular to the tiles, and scrape off the excess grout from the tile surface, again working diagonally across the joints.
The Critical Grout Set and Cleanup Phase
Allow the grout to set according to the instructions on the packaging. The setting time can vary, so perform a simple “finger test”: lightly touch the grout with your finger. If no grout comes away, it’s ready for the next phase—cleanup. This step is crucial for removing the unsightly grout haze that can otherwise dull your new floor.
To clean away the grout haze effectively, dampen a large, small-pore synthetic sponge and wring out most of the water until it’s just damp, not dripping. Lightly wipe the sponge across the tile surface, moving diagonally to avoid pulling grout out of the joints. Use the sponge to gently smooth out the grout joints, creating a clean, consistent look. Rinse your sponge frequently in a bucket of clean water, and change the cleanup water often to prevent simply spreading the haze around. Continue wiping until all remaining grout residue and haze are removed from the tile surface. Once cleaned, let the grout cure for the required time, typically 24 hours for DesignColor™ Grout, during which heavy traffic and moisture should be avoided to ensure proper hardening.
Here’s a helpful video to guide you through the process:
Your Transformed Home Awaits: Conclusion and Next Steps
Congratulations! By following these steps, you’ve successfully transformed your space with a beautiful, durable, and expertly tiled floor. You’ve not only saved money but also gained the immense satisfaction of enhancing your home with your own hands. This DIY journey, supported by TEC® Skill Set™ and Lowe’s, empowers you to achieve professional-quality results.
To further explore our full range of innovative products and access even more in-depth installation guides and troubleshooting tips, visit www.tecskillset.com. Whether you’re planning your next tiling project or seeking specialized tools, TEC® Skill Set™ offers everything you need for success. Don’t forget to utilize our intuitive Color Selector Tool to find endless inspiration for future design projects and discover the perfect tile-grout combinations for any room. Remember, all TEC® Skill Set™ products are conveniently available at select Lowe’s stores, making it easy to access the quality materials you need for your home improvement endeavors. Embrace the satisfaction of DIY and enjoy your stunning new tiled floor!