
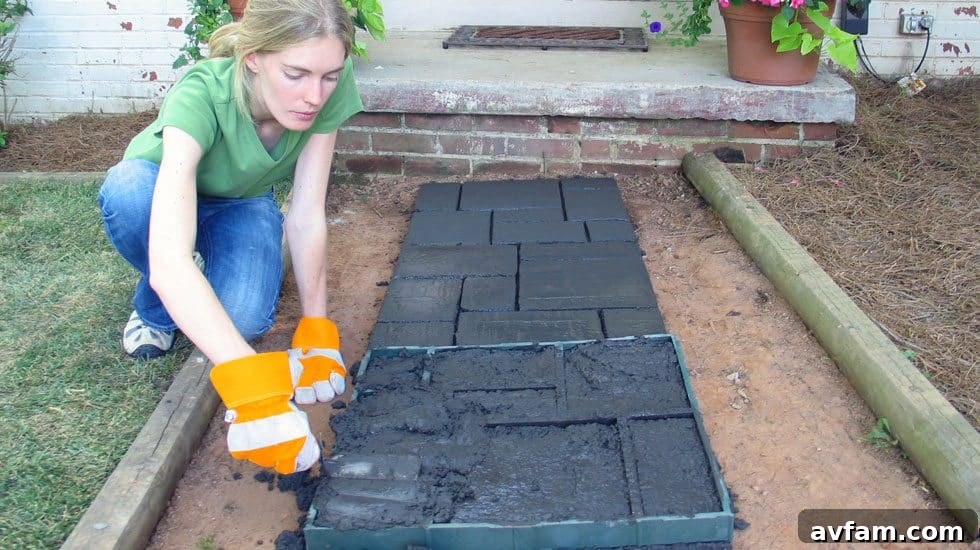
DIY Dream Walkways: A Comprehensive Guide to the Quikrete Walk Maker
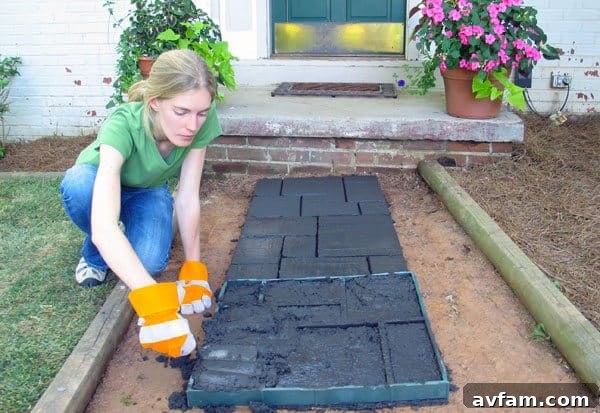
Envisioning charming and durable walkways, inviting patios, or winding garden paths for your outdoor space often conjures images of complex construction, heavy labor, and significant expense. Traditionally, the process of laying individual pavers is indeed an arduous task, demanding meticulous planning, precise measurements, and often extensive manual effort. From selecting the right flagstone to arranging pre-formed bricks, it can consume a considerable amount of time and energy, even for the smallest pathways.
However, the Quikrete Walk Maker revolutionizes this entire experience, transforming what was once a daunting endeavor into a remarkably simple and satisfying DIY project. This innovative tool takes the guesswork and grunt work out of paver installation, offering homeowners a cost-effective and efficient solution to craft stunning, custom concrete pathways that enhance their landscape’s beauty and functionality without the need for professional contractors.
Discover the Innovation Behind the Quikrete Walk Maker
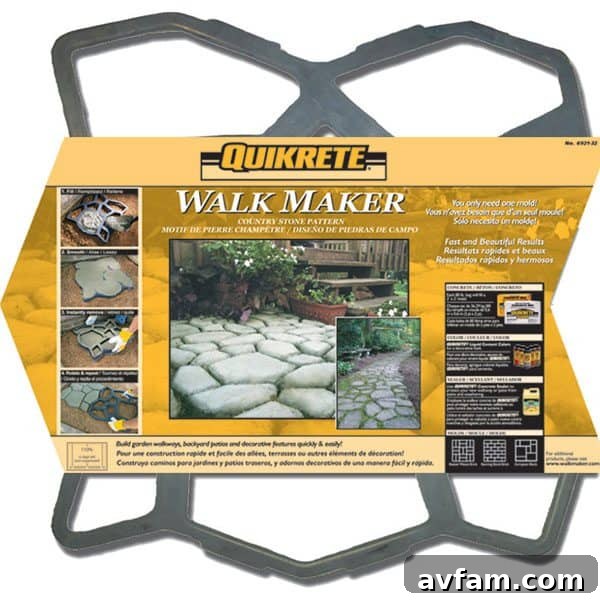
At its core, the Quikrete Walk Maker is an ingenious, reusable mold specifically engineered to streamline the creation of custom concrete pavers. Measuring a convenient 2 feet by 2 feet with a 2-inch depth, this robust mold is fabricated from recycled plastic, emphasizing both durability and environmental consciousness. Its design eliminates the complexities of traditional paver laying by allowing you to directly pour concrete into its pre-formed cavities, ensuring perfect spacing and alignment every time.
What truly sets the Walk Maker apart is its ability to replicate the authentic aesthetics of natural stone or classic brick. Each mold is intricately shaped to resemble four distinct and highly popular paver patterns: the organic charm of Country Stone, the classic appeal of Running Bond Brick, the sophisticated elegance of European Block, and the intricate design of Basket Weave Brick. This diverse selection provides homeowners with unparalleled flexibility to choose a style that perfectly complements their home’s architecture, garden theme, and personal taste, ensuring a truly bespoke finish.
Enhance Durability and Aesthetics with Quikrete Concrete
For optimal results and to guarantee the longevity and resilience of your DIY pathway, it is strongly recommended to use the Walk Maker with Quikrete Crack Resistant Concrete. This specialized concrete mix is formulated to provide superior strength and exceptional resistance against cracking, ensuring your beautiful pathway withstands the test of time and various environmental conditions. Beyond its structural integrity, the Quikrete system also invites creativity through customization. You can easily personalize your concrete pavers with Quikrete’s Liquid Cement Color, available in a palette of five rich, earthy tones: Charcoal, Buff, Red, Brown, and Terra Cotta. By adding these liquid colors to your concrete mix, you can transform ordinary gray concrete into vibrant, natural-looking stones that seamlessly blend with or accent your outdoor aesthetic, adding a touch of elegance and individual character to your project.
Why the Quikrete Walk Maker is Your Go-To DIY Paver Solution
Choosing the Quikrete Walk Maker for your next outdoor project offers a multitude of compelling advantages, making it an ideal choice for both novice and experienced DIY enthusiasts:
- Unmatched Simplicity & Ease of Use: The Walk Maker demystifies the paver installation process. Its straightforward design removes the need for complex calculations, tedious measuring, and repetitive leveling, making it accessible to anyone regardless of their construction experience.
- Significant Cost Savings: Eliminate the high costs associated with purchasing individual pavers from specialty stores and the considerable expense of hiring professional landscapers. With the Walk Maker, your primary investments are the concrete mix itself, water, and optional colorants, resulting in substantial savings.
- Remarkable Time Efficiency: Projects that might take days or even weeks with traditional paver methods can often be completed in a matter of hours or a single weekend with the Walk Maker. Its continuous pouring and immediate mold removal design drastically speeds up the entire process.
- Endless Customization Options: Beyond the four attractive mold patterns, the ability to integrate Quikrete Liquid Cement Colors allows for an unprecedented level of personalization. Create pathways that perfectly match your home’s exterior, garden palette, or design vision.
- Superior Durability & Longevity: When combined with Quikrete Crack Resistant Concrete Mix and proper curing, your DIY pavers will exhibit exceptional robustness and resilience. They are designed to endure heavy foot traffic, harsh weather conditions, and seasonal changes for many years.
- Eco-Conscious Choice: The mold itself is constructed from recycled plastic, offering an environmentally friendly option for homeowners who prioritize sustainable home improvement practices.
- Professional-Grade Aesthetic: The finely detailed patterns of the Walk Maker create a genuinely authentic stone or brick appearance, significantly elevating the visual appeal of your garden, patio, entryway, or any other outdoor area.
- Empowering DIY Experience: There’s immense satisfaction in completing a home improvement project yourself. The Walk Maker empowers you to achieve professional-looking results with your own hands, fostering a sense of accomplishment.
- How to Use the Quikrete Walk Maker: Step-by-Step Guide
- SAFETY FIRST
- SURFACE PREPARATION FOR A LASTING PATH
- MASTERING THE MIX
- FLAWLESS APPLICATION
- PROPER CURING FOR MAXIMUM STRENGTH
- Essential Shopping List
To provide you with a crystal-clear understanding of the effortless and highly effective process involved in using the Quikrete Walk Maker, please take a moment to watch this concise demonstration video:
How to Use the Quikrete Walk Maker: Step-by-Step Guide
Embark on your journey to create stunning, custom concrete walkways by following these detailed instructions. Each step is meticulously outlined to ensure you achieve professional-quality and exceptionally durable results with your Quikrete Walk Maker.
SAFETY FIRST
Working with cement-based products requires careful attention to safety to prevent injuries. Always equip yourself with appropriate personal protective equipment (PPE). This includes impact-resistant safety glasses or goggles to protect your eyes from splashes and airborne particles, and waterproof gloves to shield your skin from the alkaline concrete mix, which can cause irritation or chemical burns. Wearing long-sleeved shirts and long pants is also advisable to minimize skin exposure. Ensure you have good ventilation if working indoors or in an enclosed space.
SURFACE PREPARATION FOR A LASTING PATH
The foundation of any successful concrete project lies in thorough surface preparation. While the Walk Maker is remarkably adaptable to most relatively flat terrains, investing time in preparing a proper base will significantly enhance the stability, longevity, and overall appearance of your finished pathway, preventing issues like settling, cracking, or uneven surfaces over time.
Step 1: Clear, Level, and Establish Your Base
Begin by meticulously defining the exact path and dimensions of your intended walkway. You can use a garden hose, string line, or spray paint to visualize and mark the layout. Once marked, remove all existing sod, topsoil, weeds, or any other debris from the area. For typical foot traffic, excavate to a depth of approximately one inch. This initial removal creates a clean slate for your concrete. For pathways that anticipate heavier use, or in areas with poor drainage, consider excavating a deeper trench—typically 4 to 6 inches—and introducing a compacted sub-base layer of gravel or crushed stone. This provides superior drainage and structural support. After excavation, meticulously level the entire area using a rake, a straight edge, and a spirit level. A well-compacted and perfectly level base is paramount, as the Walk Maker will naturally conform to the existing ground. Set aside any removed topsoil; it can be repurposed later to fill in open spaces around the finished concrete sections or to create soft transitions along the pathway’s edges.
MASTERING THE MIX
Achieving the correct concrete consistency is a critical step that directly influences both the ease of application and the ultimate strength and durability of your finished pavers. An overly wet mix will compromise the concrete’s strength and may lead to excessive shrinkage, while a mix that is too dry will be difficult to work with and may result in voids or incomplete molds.
Step 2: Precisely Mix Your QUIKRETE Concrete
For an 80-lb. (36.3 kg) bag of QUIKRETE Concrete Mix or QUIKRETE Crack Resistant Concrete Mix, gradually add 2.5 quarts (2.4 L) of clean water. If you are using a 60-lb. (27.2 kg) bag, begin with 2 quarts (1.9 L) of water. Pour the dry mix into a large plastic mixing tub or a wheelbarrow. Slowly add the water while mixing thoroughly with a mixing hoe or shovel. Continue to blend the mixture until you achieve a uniform, plastic-like, and moldable consistency. The ideal texture should resemble thick oatmeal or peanut butter – not soupy or crumbly. If the mixture appears too stiff or dry, add very small increments of water (a tablespoon at a time), ensuring to mix thoroughly after each addition, until the desired workability is reached. The final water content should range between 2.5-4.5 qts. (2.4 – 4.3 L) for an 80 lb. bag, or 2-3.5 qts. (1.9 – 3.3 L) for a 60 lb. bag. If you choose to incorporate QUIKRETE Liquid Cement Color for aesthetic appeal, add it to your mixing water *before* combining it with the dry concrete mix. This technique ensures a homogeneous color distribution throughout your pavers, avoiding streaks or inconsistent shades. As a helpful guide, one 80-pound bag of QUIKRETE concrete mix is typically the perfect amount to fill one 2’x2’ Walk Maker form.
Expert Mixing Tip: Always err on the side of adding water slowly and cautiously. It is far simpler to add more water to a dry mix than to rectify an overly wet mix, which would require adding more dry concrete and potentially altering the intended strength ratio.
FLAWLESS APPLICATION
The core advantage of the Quikrete Walk Maker lies in its remarkably straightforward and efficient application process, which facilitates continuous work and consistently aesthetic results.
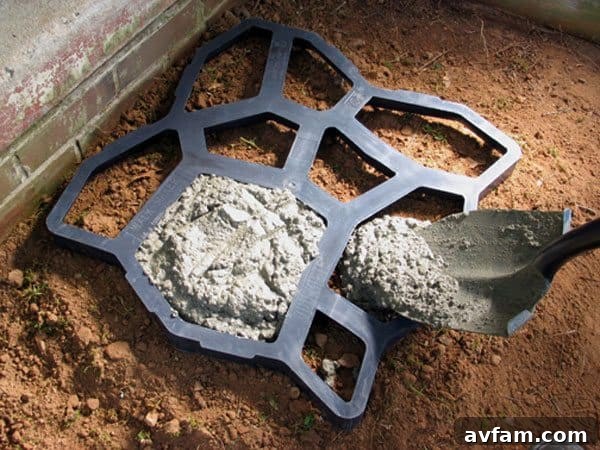
Step 3: Position the Mold and Begin Filling
Place the Quikrete Walk Maker form precisely onto your meticulously prepared and leveled ground. Using a sturdy bucket or a large trowel, begin to fill each individual mold cavity with your freshly mixed concrete. Ensure you fill each section completely, mounding the concrete slightly above the surface level of the mold. It’s important to work methodically, ensuring no areas are missed.
Step 4: Consolidate, Press, and Smooth
Once the cavities are filled, use a margin trowel or similar flat tool to press the concrete mix firmly into the form. Work from the corners and edges towards the center of each cavity. This crucial action serves two purposes: it consolidates the concrete, eliminating any trapped air voids that could weaken the pavers, and it ensures a dense, strong, and consistently shaped paver. While the concrete is still within the mold, gently pat and smooth the cavity surfaces with your trowel to achieve an even and uniform finish across each segment.
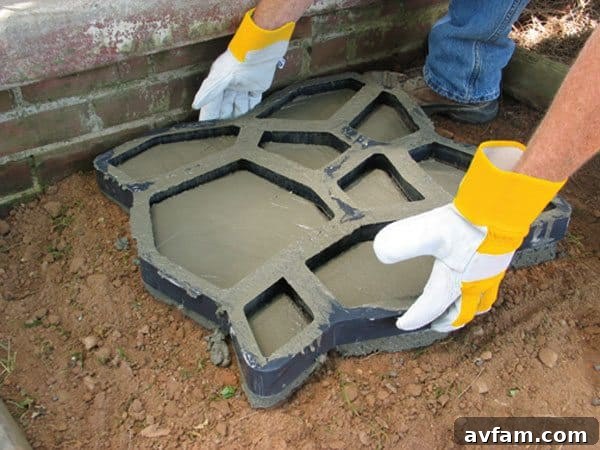
Step 5: Immediate and Gentle Mold Removal
One of the most appealing features of the Quikrete Walk Maker is its design for immediate mold removal. There is absolutely no need to wait for the concrete to begin setting or hardening. Once the cavities are filled and smoothed, carefully lift the mold straight up and away from the freshly formed concrete pavers. After the mold has been removed, take a moment to smooth any rough or uneven edges of the newly formed concrete with your trowel for a more refined appearance. Dipping your trowel in water periodically can significantly aid in achieving a cleaner and smoother finish, preventing the concrete from sticking to the tool.
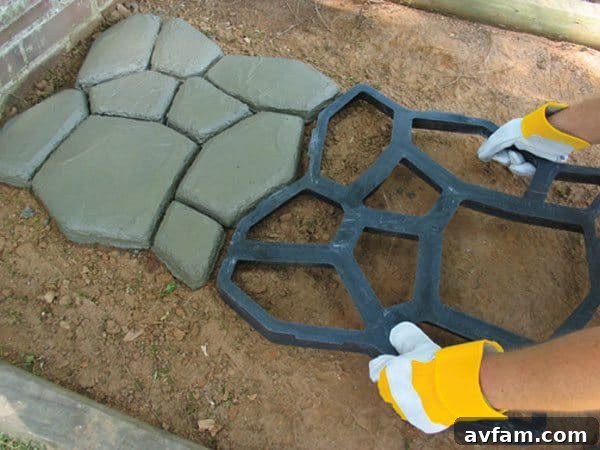
Step 6: Continue the Path and Vary the Pattern
To construct a continuous and seamless walkway, simply reposition the Walk Maker mold adjacent to the newly completed section of pavers. For an even more natural, random, and less repetitive aesthetic, incorporate a simple yet effective technique: rotate the form a quarter of a turn with each new placement. This subtle rotation varies the pattern sequence, giving your entire walkway a truly custom, organic, and sophisticated appearance that mimics natural stone layouts. Continue this efficient process until your entire project reaches its desired length and shape.
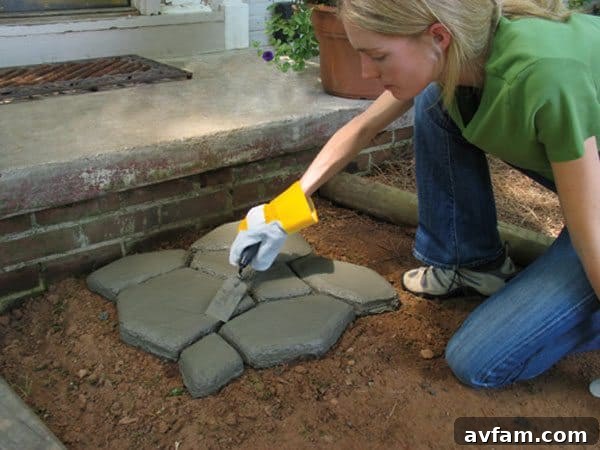
Step 7: Final Edge Refinement
Before the concrete begins to harden significantly—a stage often described as “thumbprint” hard, meaning you can gently press your thumb into the surface and leave an indentation without the concrete sticking—use your trowel to perform any final smoothing or shaping of the paver edges. This step is crucial for achieving a clean, professional finish and is much easier to accomplish while the concrete remains somewhat pliable.
Step 8: Initiate Curing Promptly
The curing process is vital for the strength and longevity of your concrete pavers. Begin curing immediately after the initial sheen (surface water) has visibly disappeared from the concrete surface. This usually indicates that the concrete has begun its initial set.
PROPER CURING FOR MAXIMUM STRENGTH
Curing is far more than simply allowing the concrete to dry; it is a meticulously controlled process essential for the concrete to achieve its maximum potential strength, hardness, and durability. Proper curing involves maintaining adequate moisture within the concrete for a specific period. Neglecting this crucial step can lead to weakened concrete, increased susceptibility to cracking, dusting, and a significantly shortened lifespan for your beautiful pathway.
Step 9: Implement Effective Curing Methods
For optimal strength development and crack resistance, fresh concrete should undergo a damp-curing process for a minimum of 3 to 5 days, with an ideal duration of 5 to 7 days. This involves consistently keeping the concrete surface moist. You can achieve this by applying a fine mist of water multiple times throughout the day, particularly during warm, dry, or windy weather conditions that can accelerate moisture evaporation. Alternatively, covering the entire pathway with plastic sheeting or wet burlap can effectively trap moisture, preventing the concrete from drying out too rapidly. This slow, controlled drying process is fundamental for the complete hydration of the cement particles, which directly contributes to the concrete’s ultimate hardness, impermeability, and overall structural integrity.
As an alternative or supplementary method, once the concrete has hardened sufficiently but is still damp, you can apply QUIKRETE® Acrylic Concrete Cure & Seal – Satin Finish #8730. This advanced product serves a dual purpose: it acts as an effective curing agent by forming a protective film that locks in vital moisture, and it also functions as a sealant, enhancing the concrete’s durability, resistance to staining, and aesthetic appeal. Always meticulously follow the specific application instructions provided on the product packaging to ensure optimal performance and safety.
Finishing Touches: Enhancing Your Pathway’s Appeal
After your concrete pathway has fully cured, you can further enhance its appearance and prevent unsightly weed growth by filling the separations between the individual concrete blocks. For this purpose, use QUIKRETE® Sand/Topping Mix. Carefully pour the dry Sand Mix into the cracks and then sweep it in thoroughly until you achieve the desired level within the gaps. Once the gaps are filled, dampen the Sand Mix with a fine mist of water. Be cautious not to over-wet it, as this could wash out the sand. Allow the Sand/Topping Mix to harden completely; this will securely lock your pavers in place and provide your project with a clean, polished, and finished look.
Customization Notes for Advanced Aesthetics:
- Liquid Cement Color: As highlighted earlier, integrating QUIKRETE® Liquid Cement Color into your mixing water (before adding to the dry concrete mix) offers a remarkable opportunity to dramatically enhance the visual appeal of your Walk Maker project, allowing for the creation of rich, custom-toned pavers that perfectly complement your landscape design.
- Achieving Varied Surface Textures: Don’t be afraid to experiment with different finishing techniques to achieve a variety of surface textures on your pavers. A metal trowel will typically yield a very smooth, dense, and even finish. In contrast, a wooden trowel can impart a slightly rougher, more organic, and natural texture, mimicking real stone. For an exposed aggregate look that also provides enhanced grip, you can lightly brush the surface with a stiff broom after the concrete has undergone its initial setting but is still somewhat pliable.
Tips for a Perfect DIY Concrete Walkway
To ensure your Quikrete Walk Maker project yields the best possible results, consider these additional expert tips:
- Thorough Planning is Key: Before you even think about mixing concrete, take the time to meticulously plan your path. Use a garden hose or spray paint to lay out the exact shape and length you desire. Visualize the curves, estimate the width, and consider how the path will interact with existing landscape features like flowerbeds or trees.
- Work in Manageable Sections: Concrete begins to set relatively quickly, especially in warmer weather. To avoid rushing or compromising the quality of your work, divide your project into manageable sections that you can comfortably complete within an hour or two. This approach ensures consistent quality and reduces stress.
- Keep the Mold Impeccably Clean: After each use, it is crucial to quickly rinse the Walk Maker mold with water. This prevents any concrete residue from hardening on its surface, which could lead to imperfections in subsequent pavers and make future cleaning more difficult. A clean mold guarantees crisp edges and patterns for every single block.
- Prioritize Proper Drainage: When planning your pathway, always ensure it incorporates a slight slope or crown that directs water runoff away from your house, garage, or any other structures. Adequate drainage prevents water from puddling on your path, which can lead to erosion, moss growth, and potential damage over time.
- Consider Decorative Edging: Once your concrete pathway is fully cured and complete, think about enhancing its visual integration into your landscape. Adding decorative elements like fine gravel, mulch, or low-growing groundcover plants along the edges can create a seamless and polished transition from your pathway to the surrounding garden.
- Monitor Weather Conditions: Avoid pouring concrete during extreme weather conditions. This includes excessively hot temperatures (which can cause the concrete to dry too quickly and crack), freezing temperatures (which can prevent proper curing), or heavy rain (which can wash out the mix). Ideal conditions are moderate temperatures (typically 50-80°F or 10-27°C) with low humidity.
- Protect Adjacent Areas: Before you start, lay down plastic sheeting or tarps around the immediate work area to protect existing lawns, plants, or structures from accidental concrete spills.
Essential Shopping List
To ensure a smooth, efficient, and successful concrete walkway project, gather all the necessary materials and tools before you begin mixing:
- QUIKRETE Walk Maker Form (select your preferred pattern)
- 80 lb. QUIKRETE Crack Resistant Concrete Mix (highly recommended for enhanced durability and crack prevention) OR 80 lb. QUIKRETE Concrete Mix (calculate the total number of bags based on your project’s estimated size – approximately one 80lb bag fills one mold)
- Optional: Gallon QUIKRETE Acrylic Concrete Cure & Seal – Satin Finish #8730 (for superior curing and long-term protection)
- Optional: 10 oz. QUIKRETE Liquid Cement Color (for custom-colored pavers)
- Large Plastic Mixing Tub or a sturdy Wheelbarrow
- Mixing Hoe or a robust Shovel (for blending concrete)
- Measuring Pail or a calibrated container for accurate water measurement
- Additional Shovel (for ground excavation and leveling)
- Margin Trowel (essential for filling molds, consolidating concrete, and smoothing surfaces)
- Sturdy Waterproof Gloves (for hand protection)
- Safety Glasses (for eye protection)
- Level and Rake (for precise ground preparation)
- Garden hose with a fine spray nozzle (for effective water curing)
- Optional: Wet Burlap or Plastic Sheeting (as alternative methods for maintaining moisture during curing)
- Optional: QUIKRETE Sand/Topping Mix (for filling gaps after curing)
Inspiring Walkway Designs with the Quikrete Walk Maker
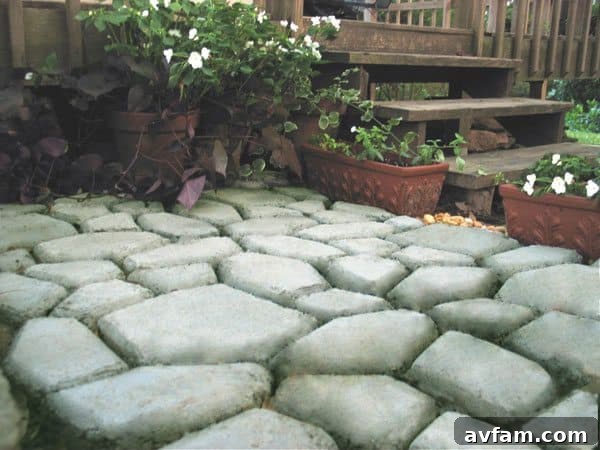
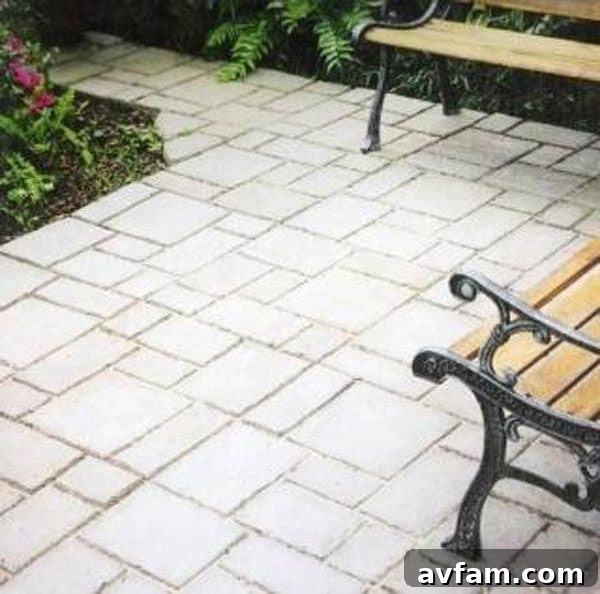
Witness the incredible versatility and aesthetic appeal that can be achieved with your DIY concrete walkways! Here are some inspiring examples of stunning paths that have been successfully created using the Quikrete Walk Maker, showcasing a range of patterns and beautiful finishes:
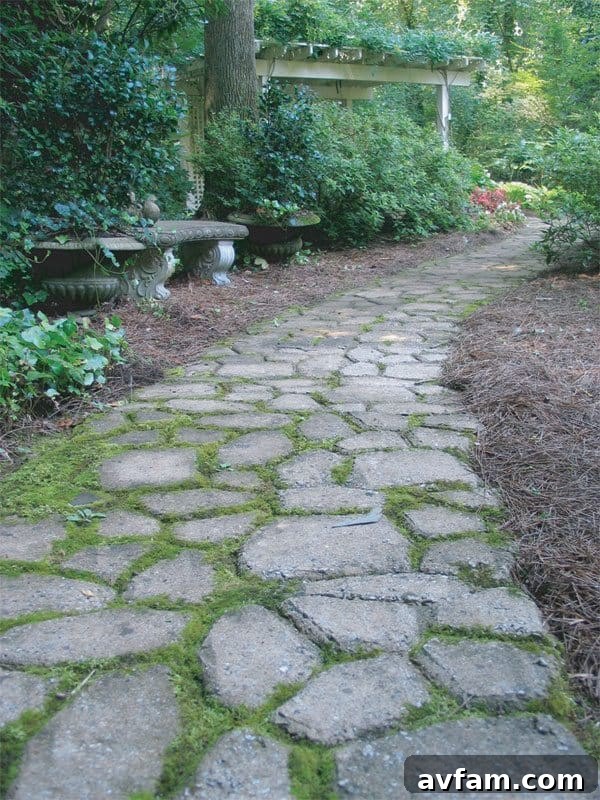
Conclusion: Your Path to a Beautiful Outdoor Space Starts Here
The Quikrete Walk Maker transcends being merely a tool; it represents an empowering solution for homeowners eager to transform and personalize their landscape design. By significantly simplifying the often-complex process of creating durable, attractive, and custom concrete pathways, it effectively removes the traditional barriers of high cost, daunting complexity, and extensive manual labor.
Whether your vision includes a rustic, winding garden path, a grand and formal entryway, a practical extension to your patio, or a unique stepping stone feature, the Quikrete Walk Maker provides the unparalleled flexibility, ease, and efficiency to bring your creative dreams to tangible life. Embrace the profound satisfaction that comes with completing a DIY project that not only looks professional but also stands the test of time. Take the first step towards a more beautiful and functional outdoor living space today – acquire your Quikrete Walk Maker and start paving the way to your ideal backyard!