
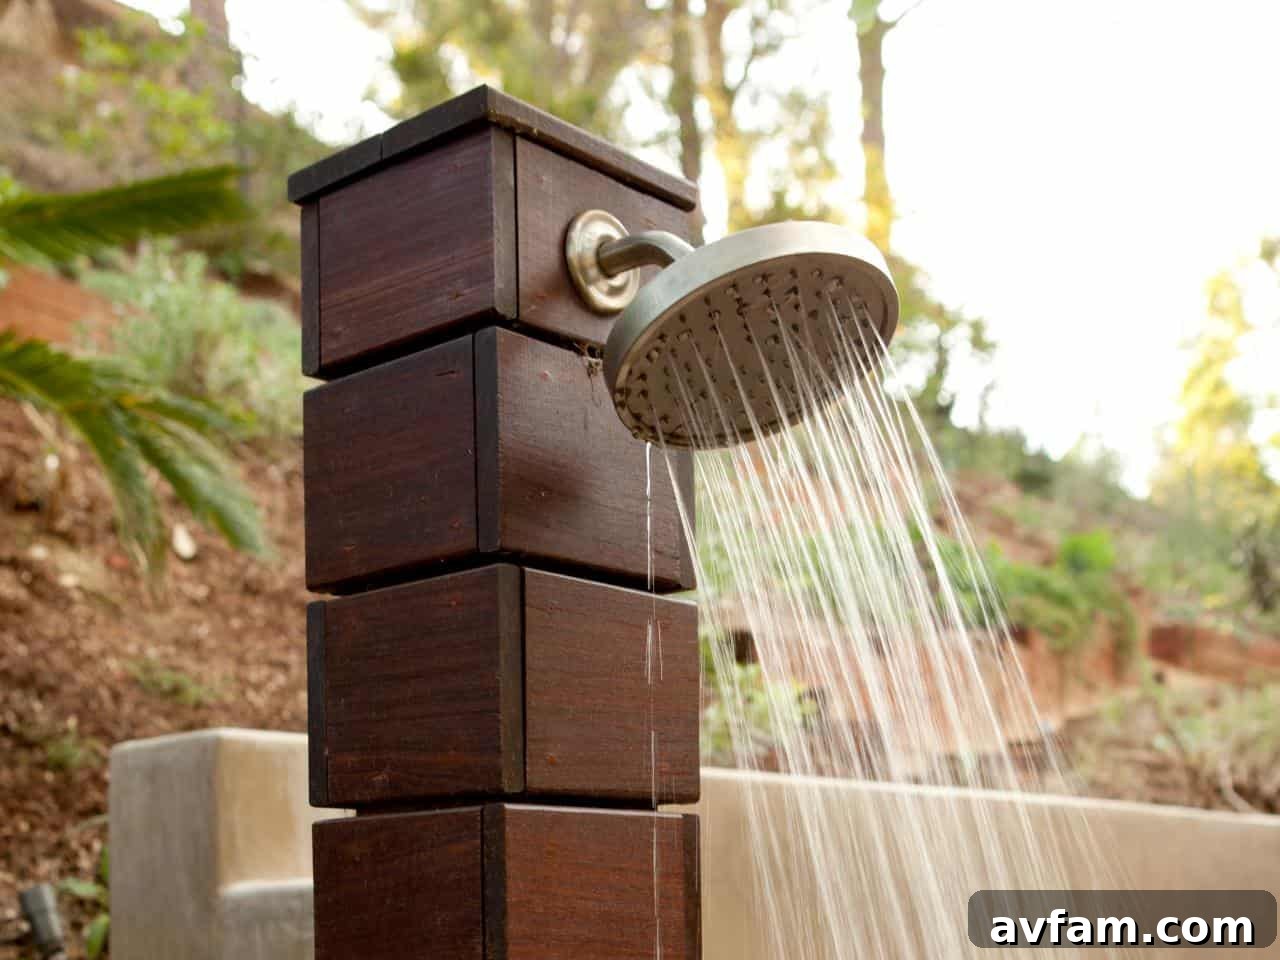
Elevate Your Outdoor Living: A Comprehensive Guide to Building a DIY Outdoor Shower
Imagine stepping out of your swimming pool, a refreshing dip under the summer sun, or after a long day tilling your garden, and rinsing off under a cool, invigorating stream. An outdoor shower isn’t just a luxurious addition to your home; it’s a practical, refreshing, and increasingly popular feature that enhances your outdoor living experience. Far from being a complex undertaking, building an outdoor shower is often more accessible than homeowners initially realize. Whether you want to complement a pool, offer a convenient rinse-off station to keep dirt and sand out of your home, or simply enjoy the unique pleasure of showering al fresco, this guide will walk you through everything you need to know.
From essential planning and design considerations to a detailed step-by-step construction process, we’ll help you create a functional and beautiful outdoor shower that perfectly suits your needs and style. Get ready to transform your backyard into a personal oasis!
Why Install an Outdoor Shower? Unveiling the Benefits
While the immediate appeal of an outdoor shower might be its novelty, its advantages extend far beyond a unique showering experience. Integrating a well-designed outdoor shower into your property offers a multitude of practical and aesthetic benefits:
- Unmatched Convenience: For homes with swimming pools, hot tubs, or situated near beaches, an outdoor shower is indispensable. It provides a quick and easy way for swimmers to rinse off chlorine or saltwater before entering the house, significantly reducing chemical residue and sand tracked indoors. Gardeners can wash off dirt and grime right after working, preventing muddy footprints throughout the home.
- Enhanced Home Hygiene: By providing a dedicated space to rinse off outdoors, you drastically minimize the amount of dirt, sand, mud, and even allergens that get carried into your interior living spaces. This means cleaner floors, fewer cleaning chores, and a more sanitary home environment.
- Refreshing Summer Escape: During hot summer months, an outdoor shower offers an instant cool-down. It’s an exhilarating way to beat the heat, providing a refreshing break that invigorates the senses and offers a unique connection with nature.
- Adds Property Value & Curb Appeal: A thoughtfully designed outdoor shower can be a significant selling point, appealing to potential buyers looking for enhanced outdoor amenities and luxury features. It demonstrates an investment in outdoor living spaces and contributes to the overall aesthetic charm of your backyard.
- A Unique Spa-like Experience: There’s something inherently liberating and peaceful about showering outdoors. Surrounded by fresh air, natural light, and perhaps the sounds of your garden, it transforms a mundane daily routine into a rejuvenating, spa-like ritual.
- Pet and Gear Cleaning: Outdoor showers aren’t just for people! They offer a perfect spot to rinse muddy pets after a walk or clean sporting equipment, garden tools, and beach gear without making a mess inside.
Planning Your Dream Outdoor Shower: Key Considerations
Before you even pick up a tool, careful planning is paramount. The type of outdoor shower you build will depend on several factors, including its intended use, your budget, local building codes, and your personal aesthetic preferences. Consider these crucial elements during the planning phase:
1. Location, Location, Location
Choosing the right spot for your outdoor shower is perhaps the most critical decision. Think about:
- Proximity to Plumbing: Ideally, position your shower on the exterior wall closest to existing interior plumbing lines (bathroom or kitchen) to minimize installation costs and complexity.
- Privacy: Consider natural privacy elements like fences, hedges, or the side of your house. Will you need a fully enclosed space, or is a more open design acceptable?
- Drainage: Where will the water go? A well-drained area is essential to prevent waterlogging, erosion, and mildew growth. More on this below.
- Sun Exposure: If you’re considering a cold-water-only shower or a solar-heated option, a sunny spot can naturally warm the water.
- Accessibility: Ensure easy access from your pool, garden, or back door, ideally with a clear, non-slip pathway.
- Building Codes: Always check with your local municipality for any specific regulations, permits, or setbacks required for outdoor plumbing structures.
2. Privacy Level: Open, Semi-Enclosed, or Fully Private?
Your desired level of privacy will significantly influence the design and materials. Some common approaches include:
- Open Design: A simple showerhead emerging from a wall, ideal for rinsing off in a swimsuit or in a very secluded spot.
- Semi-Enclosed: A one-, two-, or three-sided enclosure using screens, walls, or even dense foliage, offering a balance of openness and discretion.
- Fully Enclosed: A complete four-sided structure, often resembling a small changing room, for maximum privacy and comfort.
3. Water Source: Hot & Cold or Cold Only?
While a refreshing cold shower is invigorating, many prefer the comfort of warm water. Providing both hot and cold water will require professional plumbing installation and potentially more complex pipe insulation if you live in an area with freezing temperatures. A cold-only shower can be as simple as connecting to a garden hose, or a solar shower can provide warm water using sunlight.
4. Drainage Solutions: Essential for Longevity
Proper drainage is non-negotiable to prevent standing water, which can damage your home’s foundation, attract insects, and create slippery hazards. Options include:
- Simple Gravel Bed: The easiest and most common for open showers. Water percolates into the ground through a layer of gravel.
- French Drain: A trench filled with gravel and a perforated pipe redirects water away from the shower area.
- Plumbed Drain: Connecting your shower drain to your home’s wastewater system. This is the most complex option and usually requires professional installation and permits.
- Raised Deck with Drainage: A slatted deck can allow water to drain through, often into a gravel bed below.
5. Material Selection: Durability Meets Aesthetics
The materials you choose for your outdoor shower’s structure and base should be weather-resistant, durable, and complementary to your home’s exterior. Popular choices include:
- Wood: Cedar, redwood, and teak are naturally resistant to rot and insects, offering a warm, organic look.
- Composite Materials: Low-maintenance, durable, and available in various finishes.
- Stone or Tile: Can create a sophisticated, spa-like feel but may be more challenging to install.
- Metal: Stainless steel or marine-grade aluminum for a modern, industrial aesthetic.
Step-by-Step Guide to Building Your Outdoor Shower
Step 1: Marking the Location and Installing Plumbing
This foundational step involves meticulous planning and, for hot water, usually professional assistance.
A. Determine & Mark the Shower Footprint: Begin by precisely determining the size and exact location of your outdoor shower. Use a measuring tape, pencil, and level to mark the back wall of the shower directly on the side of your house. This initial layout ensures proper alignment and helps visualize the final structure.
B. Prepare the Wall for Plumbing: If you’re connecting to existing interior plumbing lines, you’ll need to access your home’s interior walls. Carefully use a circular or reciprocating saw to remove a section of the exterior siding or shingles, exposing the underlying wall structure. Be cautious not to damage any electrical lines or existing pipes. This opening will provide access for the new plumbing lines.
C. Professional Plumbing Installation: For homeowners desiring both hot and cold water, it is highly recommended to hire a licensed plumber. Running hot and cold water lines from your home’s existing system to the outdoor shower site involves complex connections, proper pipe sizing, insulation (especially in colder climates), and adherence to local codes. A professional ensures safety, efficiency, and leak-free operation. They will tap into your main water supply, run the necessary PEX or copper lines through the wall, and install shut-off valves for seasonal use.
D. Install Showerhead and Controls: Once the plumbing lines are in place, the plumber or a skilled DIYer can install the showerhead and temperature control valves. Choose a showerhead designed for outdoor use, often made of durable materials like stainless steel or brass. Position it at a comfortable height and ensure the controls are easily accessible.
Optional: If you’re content with a simple, open-air rinse station or a cold-water-only setup, you might consider connecting a specialized outdoor shower fixture directly to a garden hose bib. This is a much simpler DIY solution, but it typically only provides cold water and requires draining in freezing weather.
Step 2: Designing and Building Privacy Screens
Once your plumbing is roughed in, the next step is to establish the privacy and structure of your shower. The design possibilities for privacy screens are vast, limited only by your imagination, budget, and skill level.
A. Choose Your Enclosure Style:
- Basic Rollout Screens: For a quick and affordable solution, consider a bamboo rollout screen or a weather-resistant fabric screen. These can be supported by simple 2×4 wooden posts anchored into the ground or attached to the house.
- Wooden Slat Walls: A popular and aesthetically pleasing option involves constructing walls from pressure-treated lumber, cedar, or redwood slats. These slats can be spaced to allow for some airflow and natural light while still offering ample privacy. You’ll build a sturdy frame (e.g., using 4×4 posts set in concrete or attached to the house) and then horizontally or vertically attach the slats.
- Solid Walls: For maximum privacy, you can opt for solid walls made from tongue-and-groove cedar, composite panels, corrugated metal, or even stone veneers. These provide a complete enclosure, often creating a more room-like feel.
- Natural Elements: Integrate tall, dense shrubs or climbing vines on trellises for a living, green privacy screen that blends seamlessly with your garden.
B. Construction Considerations:
- Framing: Ensure your privacy screens are built on a solid, level foundation. Use pressure-treated lumber for any components that will be in contact with the ground. Secure posts firmly to prevent wobbling, either by digging post holes and setting them in concrete or by attaching them to the house structure with appropriate hardware.
- Height and Width: Design your screens to be tall enough for full privacy (typically 7-8 feet) and wide enough to provide comfortable showering space.
- Ventilation: If building a fully enclosed shower, ensure adequate gaps or vents for airflow to prevent mildew and keep the space fresh.
- Gates/Doors: If a full enclosure is desired, plan for a simple gate or door that is easy to open and close, using weather-resistant hinges and latches.
Step 3: Creating a Solid and Functional Base (The Shower Pad)
A stable, durable, and well-draining base is crucial for the longevity and cleanliness of your outdoor shower. While the original content suggests a concrete pad, let’s explore this and other robust options.
A. Concrete Pad (Detailed Process):
- Plot Dimensions: Using stakes and string, accurately mark out the precise dimensions of your desired concrete pad.
- Excavate the Area: Dig out the marked area to a depth of approximately 8 inches. Ensure the base of the excavation is level.
- Build Formwork: Construct a sturdy form to hold the wet concrete using 1″ x 4″ or 2″ x 4″ boards. Secure these boards with stakes driven into the ground, ensuring the top edges of the forms are perfectly level.
- Lay Gravel Base: Pour a layer of compacted gravel (approximately 4 inches deep) within the formwork. This gravel base provides excellent drainage and helps prevent cracking. Tamp it down thoroughly to create a firm, level surface using a hand tamper or plate compactor.
- Prepare and Pour Concrete: Prepare pre-mixed concrete according to the manufacturer’s instructions. Consistency is key – it should be workable but not too wet. Pour the concrete into the form, filling it completely.
- Work and Finish the Concrete: Use a straight edge (screed board) to level the concrete across the top of the forms. Then, work the concrete with a trowel or float until it is smooth and uniform. Crucially, create a slight pitch or slope (1/4 inch per foot) towards your intended drainage area to ensure water runs off efficiently.
- Curing: Allow the concrete to cure for several hours, or even a few days, as per manufacturer recommendations. Keeping the concrete damp during the initial curing phase can improve its strength. Cover it with plastic sheeting to slow down evaporation.
B. Alternative Bases:
- Slatted Wood Deck: Construct a small, raised deck using rot-resistant wood (cedar, redwood, composite). The slats should be spaced to allow water to drain through to a gravel bed below. This offers a warm, natural feel underfoot.
- Gravel or Pea Stone: For a very simple and natural drainage solution, a deep bed of permeable gravel or pea stone can serve as the shower floor. Ensure sufficient depth (at least 6-8 inches) and a proper underlayer of landscape fabric to prevent weeds.
- Paver Patio: Interlocking pavers laid over a compacted gravel and sand base can also provide an attractive and functional shower floor. Ensure a slight slope for drainage.
Step 4: Adding Finishing Touches and Embracing the Outdoor Shower Experience
With the structure and base complete, it’s time to personalize your outdoor shower with thoughtful accessories and ensure a seamless experience.
- Convenient Towel Rods and Hooks: Install a weather-resistant towel rod or a series of hooks within easy reach of the shower. Consider placing them just outside the shower entrance if privacy is a concern inside.
- Shelving and Soap Dishes: Add a small shelf or a dedicated soap dish for toiletries. These should also be weather-resistant and positioned to avoid direct water spray.
- Comfortable Seating: A small, sturdy bench or stool made from teak, cedar, or composite material can enhance comfort, providing a place to sit, store items, or simply relax.
- Ambiance Lighting: If you plan to use your shower at night, consider installing low-voltage outdoor lighting or solar-powered lanterns. Ensure any electrical components are rated for outdoor wet conditions and installed safely.
- Outdoor Music Station: For added fun, a weather-resistant Bluetooth speaker can provide a soundtrack to your outdoor showering experience. Secure it in a place where it won’t be exposed to direct water.
- Essential Walkway: To prevent tracking dirt, mud, or wet grass into your home after your refreshing shower, establish a clear and clean walkway leading from the shower to your house. Materials like pavers, stepping stones, gravel, or a simple wooden path are excellent choices. This ensures your feet remain clean after washing and your indoor floors stay pristine.
- Landscaping: Enhance the area around your shower with appropriate landscaping. Choose moisture-loving plants that can thrive in the shower’s runoff or drought-tolerant species if water conservation is a priority. This can also add to the privacy and aesthetic appeal.
Maintaining Your Outdoor Shower
To ensure your outdoor shower remains a pristine and functional oasis for years, regular maintenance is key:
- Cleaning: Regularly clean the shower walls, floor, and fixtures to prevent the build-up of mildew, algae, and hard water stains. Use non-abrasive, eco-friendly cleaners.
- Wood Care: If your shower features wood components, apply a weather-resistant sealant or stain annually to protect against rot, UV damage, and weathering.
- Drainage Check: Periodically inspect your drainage system to ensure it’s free of clogs from leaves, hair, or debris.
- Winterizing (for Cold Climates): Before the first freeze, thoroughly drain all water lines to prevent pipes from bursting. This typically involves shutting off the main water supply to the shower, opening all faucets to release pressure, and potentially using compressed air to blow out any residual water. Consider insulating exposed pipes for added protection.
Safety First: Important Considerations
While an outdoor shower is a delight, prioritize safety in its design and use:
- Non-Slip Surfaces: Ensure your shower base and any adjacent walkways are made from non-slip materials to prevent falls.
- Electrical Safety: If you incorporate lighting or other electrical features, always use outdoor-rated, waterproof fixtures and have them installed by a qualified electrician.
- Water Temperature: If you have a hot water supply, ensure the mixing valve functions correctly to prevent scalding, especially if children will be using the shower.
- Privacy: Reconfirm that your chosen privacy measures are adequate for your comfort and location.
Conclusion: Your Backyard Transformation Awaits!
Building an outdoor shower is a rewarding home improvement project that combines practicality with luxury. It’s an investment in comfort, convenience, and a unique way to enjoy your outdoor space. By carefully planning, choosing appropriate materials, and following these detailed steps, you can create a beautiful and functional outdoor shower that will be a cherished addition to your home for years to come. So, embrace the fresh air, the natural light, and the simple joy of showering under the open sky. Your personal outdoor oasis is within reach!