
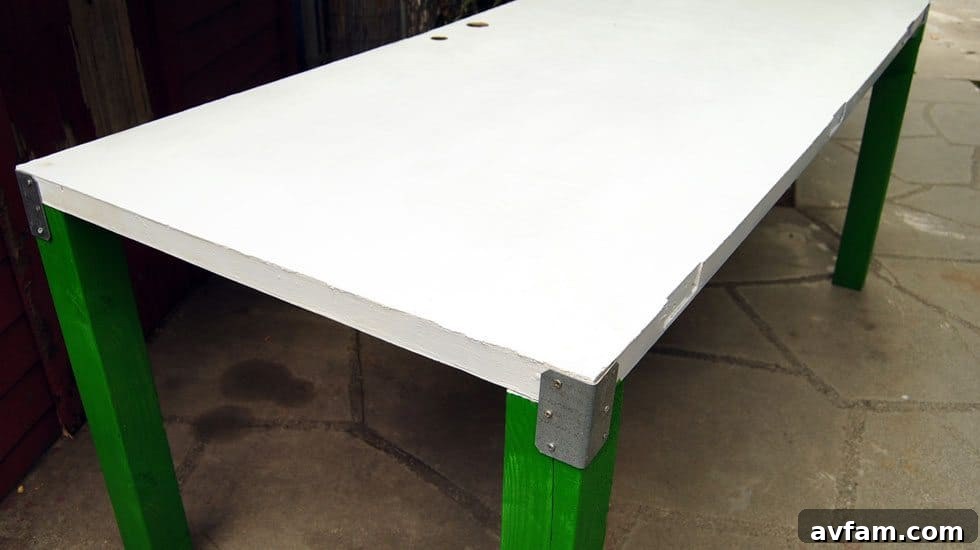
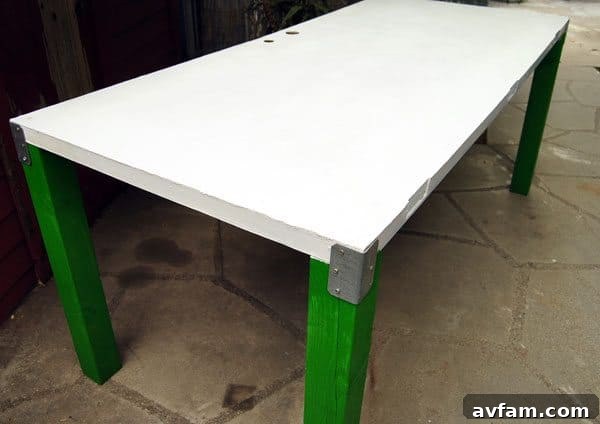
Transform an Old Door into a Sturdy and Versatile Workbench: A Comprehensive DIY Guide
Are you looking for an incredibly strong, spacious, and budget-friendly workbench or utility table? Look no further than a solid core wood door! Repurposing a door not only gives it a new lease on life but also provides an exceptionally stable and flat surface for a variety of tasks, from woodworking and crafts to home office use. This detailed guide will walk you through every step of transforming a humble door into a functional piece of furniture that rivals expensive store-bought options.
The beauty of this project lies in its simplicity and the inherent strength of a solid core door. Unlike hollow core doors, which are too flimsy for heavy-duty use, a solid core door offers substantial weight and rigidity, making it an ideal foundation for a robust work surface. With a few basic tools and materials, you can create a custom table perfectly suited to your needs, all while embracing sustainable practices by upcycling.
Why Choose a Solid Core Door for Your Workbench?
Solid core doors are engineered for durability and sound dampening, making them significantly heavier and more stable than their hollow counterparts. This inherent strength translates directly into a superior workbench surface. Here’s why a solid core door is the perfect choice for your DIY table project:
- Exceptional Durability: Solid wood or composite core construction can withstand heavy loads, impacts, and the rigors of a busy workshop.
- Perfectly Flat Surface: Doors are manufactured to be perfectly flat, providing an ideal work surface for precision tasks like assembly, layout, or crafting.
- Cost-Effective: Used solid core doors can often be found at architectural salvage yards, demolition sites, or even online marketplaces for a fraction of the cost of new lumber or a purpose-built workbench.
- Eco-Friendly: Repurposing an old door is an excellent way to reduce waste and contribute to sustainable living.
- Generous Size: Most doors offer a substantial work area, typically around 30-36 inches wide and 80 inches long, providing ample space for large projects.
When selecting your door, aim for one with a smooth surface and no decorative moldings. Minor imperfections like chipped paint or shallow scratches can be easily addressed during the preparation phase. However, significant damage, rot, or warping might require more extensive repair work, so choose wisely.
Project Overview: Build a Door Table
Estimated Project Time: 3-5 Hours (Depending on drying times and experience)
Challenge Level: Medium (Basic carpentry skills are helpful)
Approximate Cost: $50-$150 (Varies based on door cost and materials)
Tools & Supplies You’ll Need:
To ensure a smooth and successful build, gather all your tools and materials before you begin. Quality tools not only make the job easier but also contribute to a better finish and safer working conditions.
- 1 gently used or new solid core wood door: The star of your project. Ensure it’s straight and solid.
- Sandpaper grits: 180, 220: Essential for smoothing surfaces and preparing for finish. Consider a sanding block or an orbital sander for efficiency.
- Box of 2” deck screws: These offer excellent grip and corrosion resistance, ideal for securing the legs.
- 4 pieces of 4×4 lumber cut to 32” (or desired height): These will form your sturdy table legs. You can adjust the height based on your comfort and intended use (e.g., taller for standing, shorter for sitting).
- 4 heavy-duty corner braces (L-brackets, often 3-4 inches per side): These reinforce the leg-to-tabletop connection for maximum stability.
- 4 L braces (smaller, for secondary support, optional but recommended): Provides additional lateral stability.
- Drop cloth or old sheets: To protect your work area from dust, paint, or finish.
- Tack cloth: Crucial for removing fine dust particles after sanding, ensuring a smooth finish.
- Safety glasses: Non-negotiable for eye protection, especially when cutting, drilling, or sanding.
- Dust mask or respirator: Protects your lungs from wood dust and fumes from finishes.
- Drill/Driver: For pre-drilling holes and driving screws. A cordless drill offers greater flexibility.
- Circular saw or hand saw: For accurately cutting the 4×4 lumber to length. A miter saw offers even greater precision.
- ¼” drill bit: For pre-drilling pilot holes for your screws. Always match the bit size to the screw shank to prevent wood splitting.
- Measuring tape and pencil: For accurate measurements and marking cuts.
- Square (e.g., speed square or framing square): Ensures precise, straight cuts and accurate leg placement.
- Polyurethane Finish, paint, or stain: Your choice for protecting and beautifying the table.
- Paintbrushes or rollers: For applying your chosen finish.
Step-by-Step Guide to Building Your Door Table
Follow these detailed steps to construct your durable and versatile door table.
1. Select and Prepare Your Solid Core Wood Door
The foundation of your table is the door itself. Begin by finding a solid core wood door, either new or gently used. New doors offer a pristine surface, while used doors are more economical and environmentally friendly. Inspect the door thoroughly: ensure it’s not warped, water-damaged, or heavily cracked. If there are minor imperfections like chipped paint, small dents, or shallow scratches, these can typically be repaired with wood filler and sanding. Prioritize a door with a flat surface, free from decorative paneling or intricate moldings, as these can make for an uneven work surface. Clean any heavy grime or loose debris from the door before proceeding.
2. Gather Materials and Cut Table Legs
Lay out all your assembled tools and materials in a well-ventilated workspace. This ensures you have everything at hand, minimizing interruptions. Next, precisely cut your four pieces of 4×4 lumber to your desired table leg length. A common height for a workbench is 32 inches, allowing comfortable standing work for most individuals. However, you might adjust this for specific uses, such as a lower craft table or a taller assembly bench. Use a circular saw or hand saw for accurate, straight cuts. A miter saw will provide the most precise and square cuts, which are crucial for a stable table. Use a square to mark your cut lines carefully before sawing to prevent errors.
3. Set Up Your Workspace and Position the Door
Establish a stable and well-ventilated work area. Lay down a drop cloth or old sheets to protect your floor or existing surfaces from dust, paint, or polyurethane drips. Place your door on a pair of sturdy sawhorses or across a robust, stable table. This elevated position will allow you to work comfortably on all surfaces of the door and its future legs without excessive bending or crouching. Ensure the door is level and securely supported to prevent accidental movement during sanding and finishing.
4. Smooth All Surfaces with Sanding
Sanding is a critical step for both aesthetics and finish adhesion. Using sanding blocks or an orbital sander, begin by smoothing all surfaces of your door (top, bottom, and edges) and the cut 4×4 legs. Start with 180-grit sandpaper to remove any rough spots, old finish, or minor imperfections. Apply even pressure and sand with the grain of the wood. Once you’ve achieved a uniformly smooth surface with the 180-grit, progress to 220-grit sandpaper for a finer, silker finish. This two-stage sanding process ensures optimal smoothness and prepares the wood perfectly for the subsequent finish application. Always wear safety glasses and a dust mask during sanding.
5. Thoroughly Clean Dust and Debris
After sanding, your surfaces will be covered in fine wood dust. It is paramount to remove every trace of this dust before applying any finish. Begin by wiping down the door and legs with a dry cloth or using compressed air to blow off loose particles. Then, use a tack cloth – a specialized, slightly sticky cloth – to meticulously wipe all surfaces. The tack cloth will pick up even the finest dust particles that a regular cloth might miss. A clean surface ensures that your finish adheres properly and results in a smooth, flawless appearance, free from embedded dust specs.
6. Apply Your Chosen Finish to Door and Legs
Now it’s time to protect and beautify your table. Apply your chosen finish – polyurethane, paint, or stain – to all surfaces of the door and the 4×4 legs. Polyurethane offers excellent durability and water resistance, ideal for a workbench. Paint provides a durable, customizable color, while stain enhances the natural wood grain. Apply the finish in a well-ventilated area, following the manufacturer’s instructions for application. Use a high-quality brush or roller for even coverage. Avoid applying too thickly, as this can lead to drips and uneven drying.
7. Allow Finish to Dry and Apply Second Coat if Needed
Allow the first coat of finish to dry completely. Drying times can vary significantly (typically 2-4 hours per side, or longer) depending on the type of finish, humidity, and temperature. Refer to your product’s instructions. Once dry, lightly sand the surfaces with 220-grit sandpaper (or finer, as recommended by the finish manufacturer) to de-nib any raised wood fibers and create a perfectly smooth base for the next coat. Wipe clean with a tack cloth, then apply a second coat if desired or recommended. Multiple thin coats generally provide a more durable and aesthetically pleasing finish than one thick coat.
8. Mark and Pre-Drill Holes for Braces
With the finish cured, it’s time to attach the legs. Carefully position one of the 4×4 legs in a corner of the underside of the door tabletop. Ensure it’s flush with the edges of the door. Place a heavy-duty corner brace on the inside corner where the leg meets the tabletop, and an L-brace along one of the adjacent sides of the leg, if using. Using a pencil, mark the exact locations for the screw holes through the brace’s openings onto both the leg and the door. It’s crucial to pre-drill pilot holes using your ¼” drill bit at each marked spot. Pre-drilling prevents the wood from splitting, especially in the door’s core, and ensures screws drive in smoothly and securely.
9. Mount Legs to Door Using Screws and Drill/Driver
Once all pilot holes are pre-drilled, it’s time for assembly. Align the first leg with its respective corner and position the corner brace. Drive the 2” deck screws through the pre-drilled holes in the brace and into the door and leg using your drill/driver. Do not overtighten, as this can strip the wood. Repeat this process for all four legs, ensuring each leg is firmly secured with both the corner brace and any additional L-braces. Work methodically, securing one leg completely before moving to the next. For best results, consider having a helper to hold the legs steady while you drive the screws.
10. Verify All Table Legs are Secure and Stable
After attaching all legs, perform a thorough stability check. Gently (and then more firmly) try to wiggle each leg individually and then the entire table assembly. Ensure there is no excessive wobble or movement. All screws should be tight, and the braces should be holding the legs firmly in place against the door. If you notice any instability, re-check the screw tightness and brace placement. If necessary, add additional screws or smaller L-brackets for extra reinforcement, especially if you plan to place heavy items on the table or use it for tasks involving significant force.
11. Turn Table Over and Enjoy Your New Work Area
With all legs securely attached and verified for stability, carefully turn your newly constructed table right-side up. It’s advisable to have a helper for this step, as a solid core door table can be quite heavy. Position your new workbench in its intended location. Take a moment to admire your handiwork and the transformation you’ve achieved! Your robust, custom-built door table is now ready to serve as an indispensable work surface for all your projects.
Enhancing Your Door Workbench: Customization and Add-ons
The basic door table is a fantastic starting point, but its versatility can be further enhanced with various customizations:
- Casters: Add heavy-duty locking casters to the legs for a mobile workbench that can be moved around your garage or workshop with ease.
- Vise Mount: Bolt a woodworking vise directly to the edge of the tabletop for secure clamping during woodworking tasks.
- Storage Solutions: Mount a pegboard to the wall behind the table for tool organization, or build a simple shelf underneath the table for material storage.
- Drawer Unit: Construct or purchase a small drawer unit that fits beneath the table, providing enclosed storage for smaller tools and accessories.
- Surface Protection: For tasks involving paints, glues, or chemicals, consider adding a sacrificial layer of hardboard or melamine to the tabletop that can be easily replaced.
- Lighting: Install an overhead LED shop light above your workbench for ample, shadow-free illumination.
- Power Strip: Attach a power strip with multiple outlets to the side of the table for convenient access to electricity for your tools.
Safety Considerations During Construction
Safety should always be your top priority when undertaking any DIY project. Here are key safety tips for building your door table:
- Personal Protective Equipment (PPE): Always wear safety glasses to protect your eyes from flying debris and dust. A dust mask is essential when sanding to prevent inhaling fine particles.
- Ventilation: Work in a well-ventilated area, especially when applying finishes like paint or polyurethane, to avoid inhaling fumes.
- Tool Safety: Read and understand the operating manuals for all power tools (circular saw, drill) before use. Ensure blades are sharp and guards are in place.
- Secure Workpiece: Always secure your door or lumber firmly with clamps before cutting or drilling to prevent movement and potential injury.
- Lift with Legs: When moving or flipping the heavy door table, lift with your legs, not your back, or enlist the help of another person to prevent strain or injury.
- Clear Workspace: Keep your work area tidy and free of clutter to prevent trips and falls.
Maintenance and Care for Your Door Table
To ensure your new door table lasts for years, a little maintenance goes a long way:
- Regular Cleaning: Wipe down the tabletop regularly with a damp cloth to remove dust and debris. For tougher grime, a mild soap and water solution can be used.
- Protect the Finish: Avoid placing extremely hot items directly on the table. Use coasters or mats when necessary.
- Inspect for Wear: Periodically check all screws and braces for tightness. Retighten any loose hardware to maintain stability.
- Repair Damage: Address any dents, scratches, or chips in the finish promptly. Small repairs can prevent further damage and keep your table looking great.
- Re-apply Finish: Depending on usage, you may want to lightly sand and re-apply a fresh coat of polyurethane or paint every few years to restore its protective layer and appearance.
Conclusion: A DIY Triumph
Building a workbench or utility table from a solid core door is a highly rewarding project that delivers incredible value. You’ll not only save money but also gain a custom-built, exceptionally durable, and perfectly flat work surface that can handle almost anything you throw at it. This project embodies the spirit of DIY – taking an overlooked item and transforming it into something immensely practical and long-lasting. So, gather your materials, put on your safety glasses, and get ready to enjoy the satisfaction of creating a robust and versatile addition to your home or workshop!