
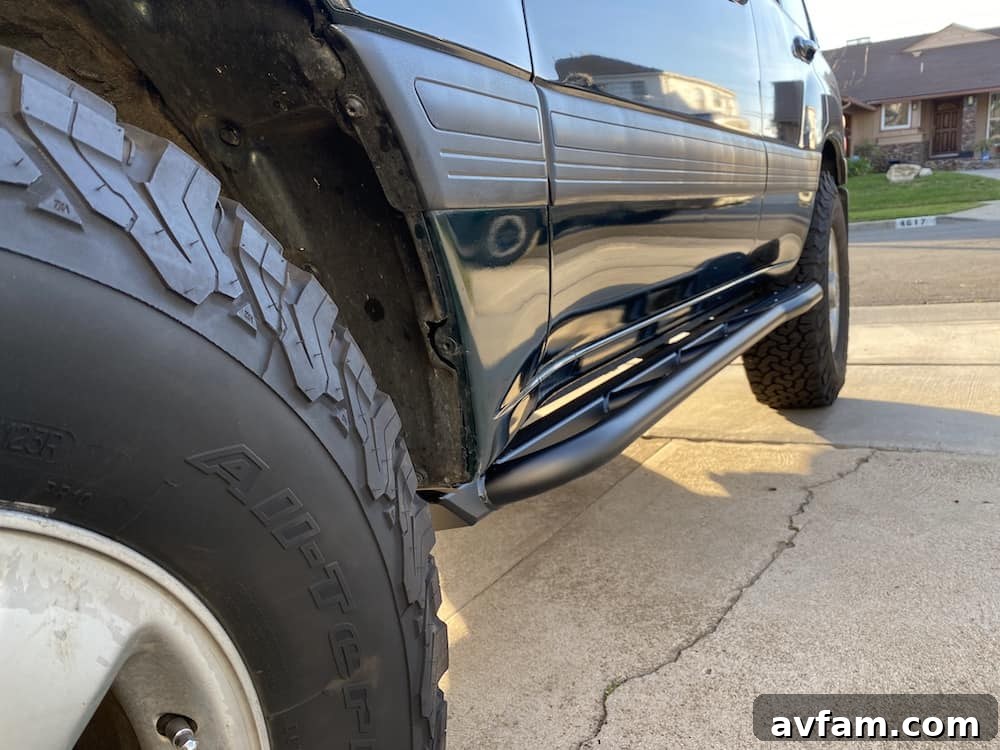
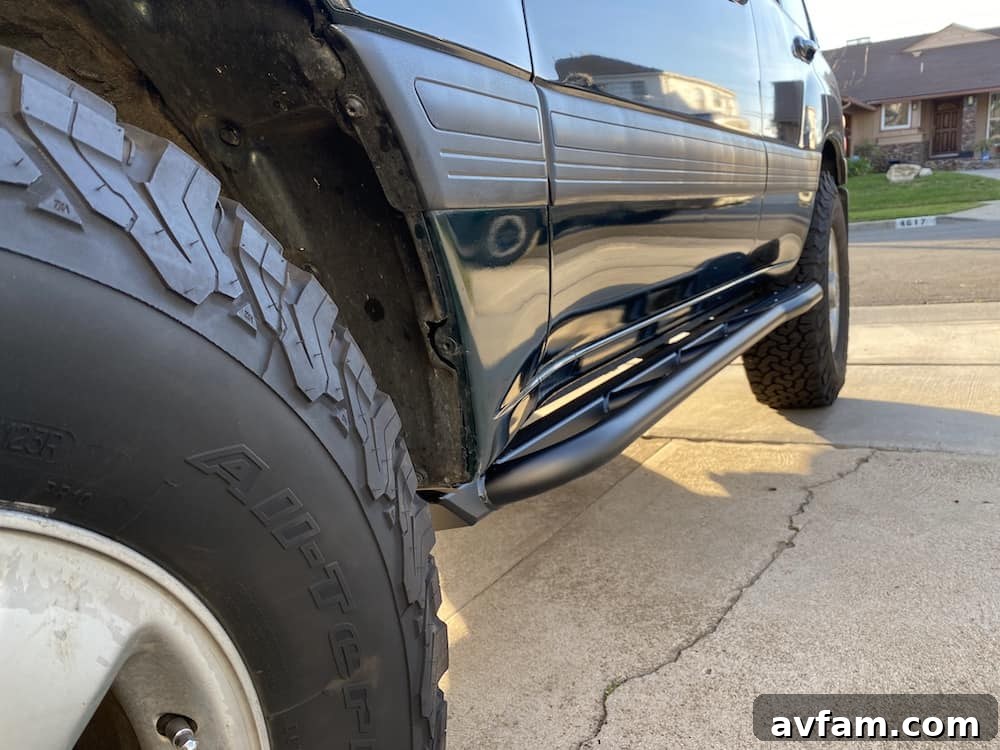
Rock sliders are often considered the most critical initial modification for any off-road or overland vehicle. They offer essential protection against trail hazards and significantly enhance your vehicle’s capability and longevity. This comprehensive guide will walk you through the importance of rock sliders, their distinct advantages over conventional side steps, how they are constructed, a detailed step-by-step installation process, and effective techniques for using them on challenging terrain.
- Why Rock Sliders Are Essential for Your Off-Road Vehicle
- Side Steps vs. Rock Sliders: Understanding the Crucial Differences
- The Anatomy of a Robust Rock Slider: Materials and Construction
- Comprehensive Guide: Installing Rock Sliders on Your Vehicle
- Step 1: Positioning the Slider Under Your Vehicle
- Step 2: Securing U-Bolts Around the Frame and Through Tabs
- Step 3: Attaching Washers, Lock Washers, and Nuts
- Step 4: Final Adjustments for Optimal Slider Placement
- Step 5: Safely Tightening All Nuts
- Step 6: Post-Installation Testing and Accuracy Check
- Mastering the Trail: Effective Techniques for Using Rock Sliders
Why Rock Sliders Are Essential for Your Off-Road Vehicle
While imposing front bumpers adorned with powerful winches and bright light bars, or rear bumpers boasting tire carriers and jerry can holders, often capture the most attention on social media, it is the humble rock slider that delivers unparalleled practical protection for your rig. These less conspicuous pieces of armor are indispensable for serious off-road enthusiasts.
Steel bumpers serve vital functions: they guard the front of your vehicle against animal strikes and unforeseen obstacles, securely mount a winch for recovery operations, provide robust tow points, and offer convenient mounting locations for auxiliary lights. Similarly, rear steel bumpers act as essential tow points, protect the vehicle’s body, and provide dedicated storage for overland gear. These are undoubtedly coveted features for any off-roader.
However, the reality is that high-quality steel bumpers can be a significant financial investment and add substantial weight to your vehicle, even before considering the winch or spare tire they might carry. Furthermore, oversized front and rear bumpers can complicate urban parking and restrict rear access, especially with swing-out designs.

This is where rock sliders shine, offering the most significant return on investment in terms of both value and utility. Rock sliders are specifically engineered to safeguard the vulnerable lower sections of your vehicle, including the rocker panels and door sills. They shield these areas from gravel and debris kicked up during driving, but most critically, they protect against severe damage from large rocks and trail obstacles encountered during off-road excursions.
Imagine your vehicle descending from a challenging rock obstacle, only for its delicate underbelly to violently scrape against the terrain, resulting in potentially thousands of dollars in body damage. With robust rock sliders installed, this catastrophic scenario is averted. Instead, the slider absorbs the impact, allowing your vehicle to “slide” gracefully over the impediment, leaving your bodywork unscathed. This direct protection capability makes them an absolute necessity for anyone venturing beyond paved roads. Their ability to withstand such punishment is precisely why their design and construction must be incredibly robust, capable of supporting the full weight of your vehicle repeatedly impacting obstacles. This leads us to a common question.
Side Steps vs. Rock Sliders: Understanding the Crucial Differences
If you already have side steps, you might wonder if rock sliders are truly necessary. The unequivocal answer is yes! While side steps are indeed convenient for ingress and egress, their utility stops there. They are primarily designed for passenger comfort and are typically constructed from lighter materials, such as fiberglass or thin aluminum, that lack the structural integrity required for off-road impacts. Should your vehicle’s weight come crashing down on a side step, it will likely crumple, tear away, and inflict significant damage to your vehicle’s body mounting points.
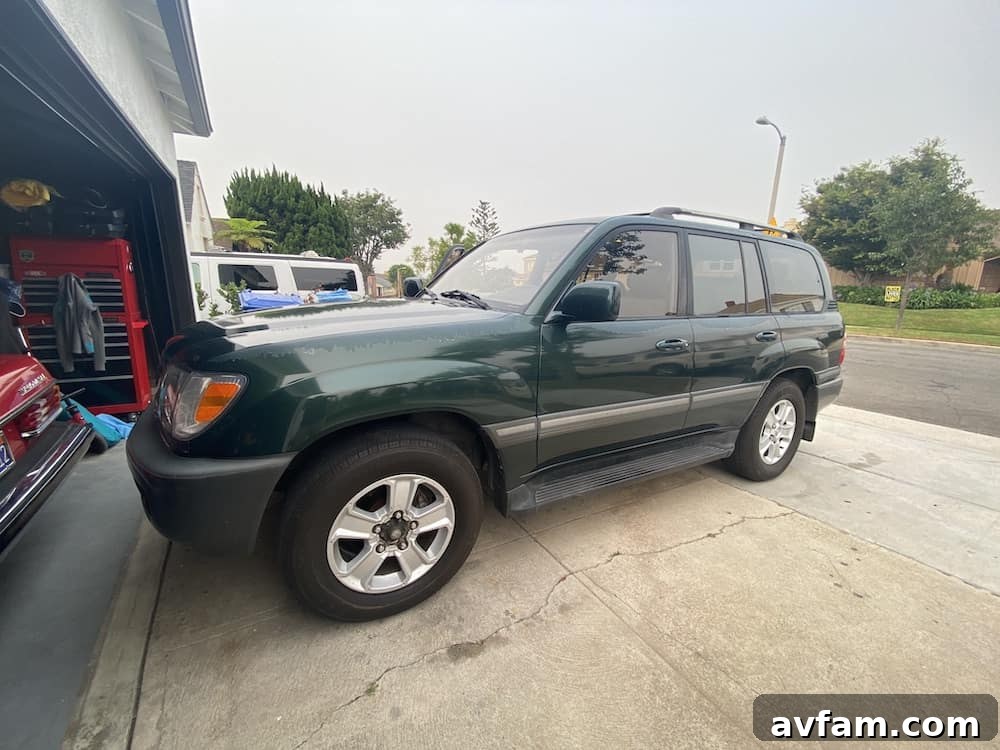
Nerf bars represent another common type of step, often made from steel and sometimes bearing a superficial resemblance to rock sliders. However, despite their steel construction, nerf bars are fundamentally different. I once had a set of Westin nerf bars on my 2000 F-150. While they bolted into the factory step mounts on the truck’s body, they were never engineered to bear the vehicle’s full weight during an impact. Crucially, they typically protrude laterally from the side of the vehicle rather than offering protection along the bottom and side, leaving the critical rocker panels exposed.
To easily distinguish between true rock sliders and mere side steps, inspect their attachment points beneath the vehicle. Genuine rock sliders will be robustly bolted directly to the vehicle’s main frame using heavy-duty hardware, or even permanently welded to the frame for maximum strength. This frame-mounted connection is what allows them to withstand the enormous forces of impact.
Conversely, most side steps or nerf bars will be bolted into threaded inserts or light brackets mounted on the underside of the vehicle’s body. Structurally, they are far less rigid and are made from thinner gauge materials, making them wholly inadequate for serious off-road protection. Understanding this fundamental difference is crucial for anyone considering venturing onto challenging trails.
The Anatomy of a Robust Rock Slider: Materials and Construction
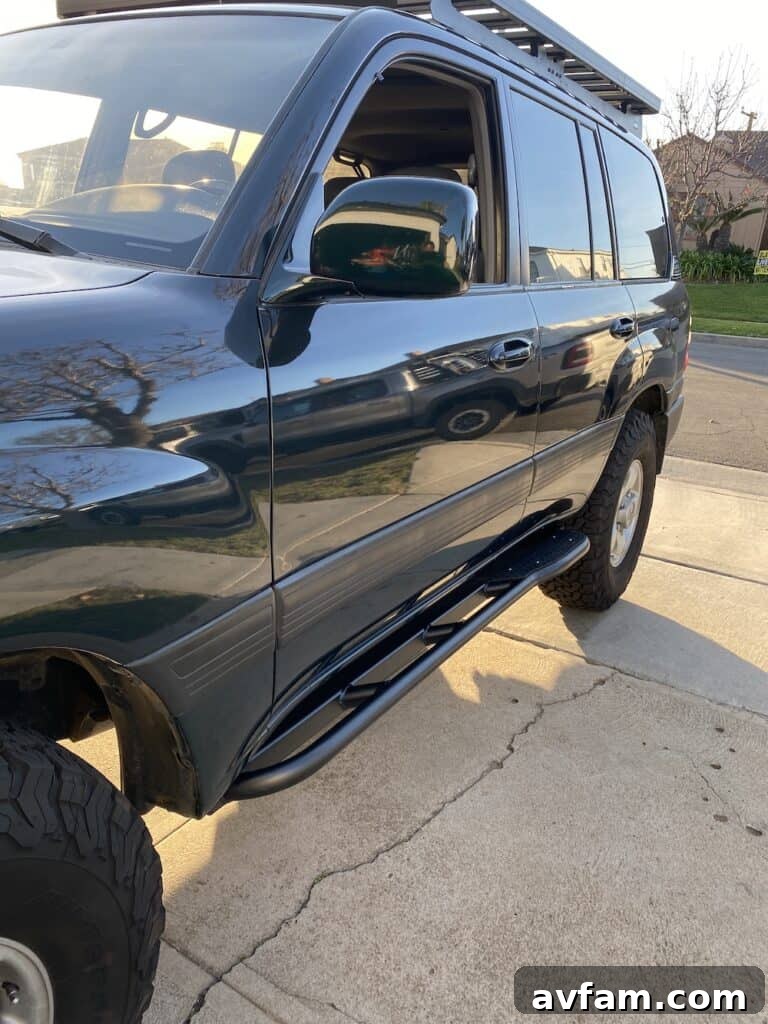
Rock sliders are purpose-built pieces of equipment, meticulously fabricated from high-strength metal tubing, often combining both round and square profiles for optimal rigidity and protection. Skilled DIY enthusiasts with welding expertise can construct their own rock sliders using various gauges of steel. However, for maximum confidence and performance, many opt for professionally manufactured sliders. I personally chose a set of White Knuckle Rock Sliders, which are renowned for their exceptional build quality and specific specifications:
- Main Rub Rail: Constructed from 3/16″ thick x 2″ x 3″ rectangular tube, providing superior foundational strength to absorb direct impacts.
- Support Legs: Utilizes 3/16″ thick x 1-1/2″ square tube, strategically designed to minimize flex and movement when traversing challenging obstacles.
- Outer Rub Rail: Features a .120″ thick x 1-3/4″ round tube, incorporating a rear kick-out. This design helps to push the vehicle away from obstacles, preventing potential hang-ups and body damage.
- Mounting Plates: Heavy-duty 3/8″ thick mounting plates ensure a secure and unyielding connection to the vehicle’s frame.
- Gussets: Reinforced with 1/4″ thick gussets, adding critical strength to key stress points and preventing deformation.
These White Knuckle sliders exemplify robust engineering. Despite their sturdy construction, weighing approximately 60 pounds each, they are not excessively heavy. Crucially, their placement in the middle of the vehicle ensures that the added weight is evenly distributed across both the front and rear suspension systems, maintaining vehicle balance and handling characteristics.
Beyond the specific steel gauge and tube shapes, slider manufacturers also offer different grades of steel strength. The two primary options are HREW (Hot Rolled Electric Welded) and DOM (Drawn Over Mandrel). The significant differences in their inherent strength stem directly from their manufacturing processes:
HREW (Hot Rolled Electric Welded): This is a standard, mild steel widely used in numerous everyday industrial and automotive applications. It’s produced by rolling steel at high temperatures and then welding the seam. HREW typically has a yield strength of approximately 40ksi (kilopounds per square inch), making it suitable for general fabrication but less ideal for extreme impact applications.
DOM (Drawn Over Mandrel): DOM steel represents a premium choice for high-stress applications like rock sliders. It begins as HREW tubing, but then undergoes a secondary, specialized cold-drawing process. During this process, the tube is drawn over a mandrel, which refines its dimensions, removes the internal weld seam, and significantly increases its structural integrity and consistency. This results in a tube with a superior, more consistent wall thickness and vastly improved strength, often boasting a yield strength of around 70ksi.
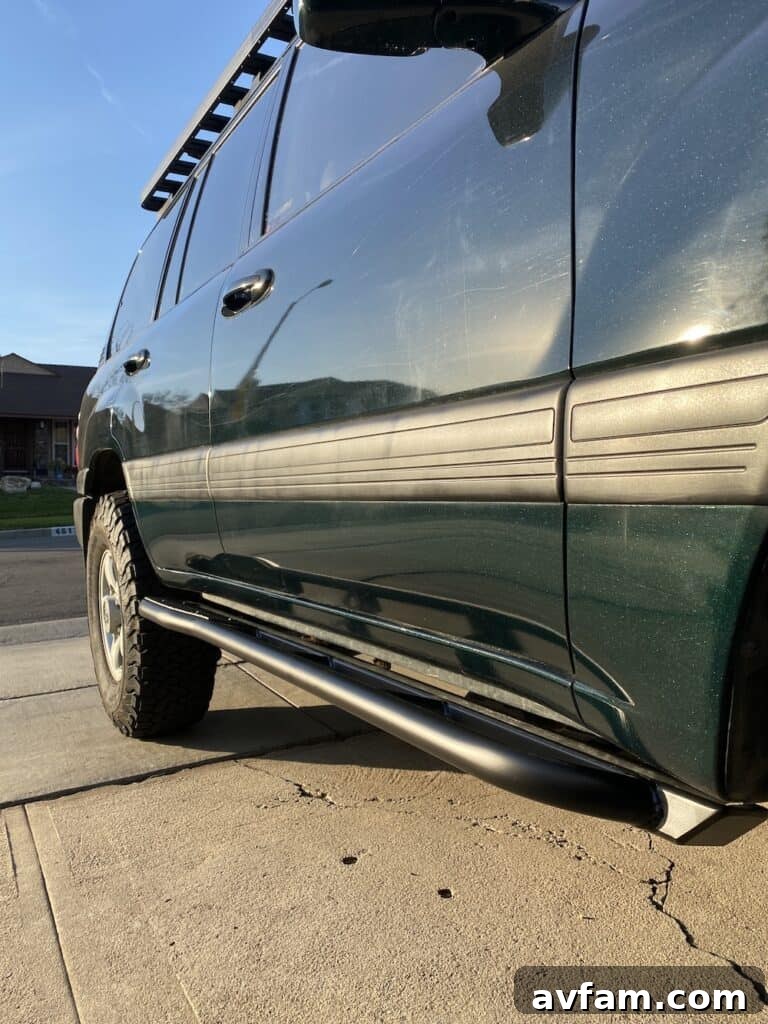
I personally opted for rock sliders constructed from DOM steel due to its superior strength and resilience. The main drawbacks of DOM are its higher cost and potentially longer lead times, as many manufacturers stock HREW sliders but produce DOM versions only upon request. For serious off-road use where maximum protection is paramount, the investment in DOM steel is highly justified.
Comprehensive Guide: Installing Rock Sliders on Your Vehicle
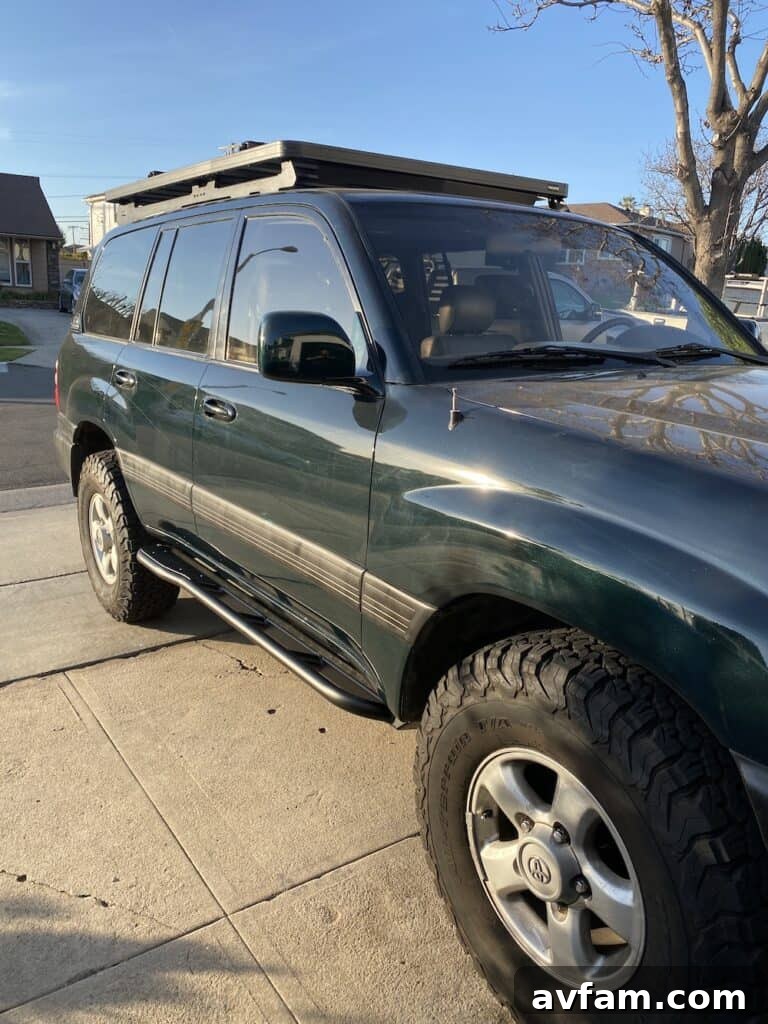
Rock sliders can be installed using one of two primary methods: bolting them directly to the vehicle’s frame with large U-bolts that pass through mounting tabs on the slider, or by welding these tabs permanently onto the vehicle’s frame. Each method has its advantages and considerations.
Welded-on sliders are generally considered the strongest and most permanent option, providing an unyielding connection to the frame. However, this method requires specialized welding skills or the expense of hiring a professional welder. Furthermore, once welded, there is no room for adjustment, and removal can be a complex process. This permanence makes welded sliders a less flexible choice for some owners.
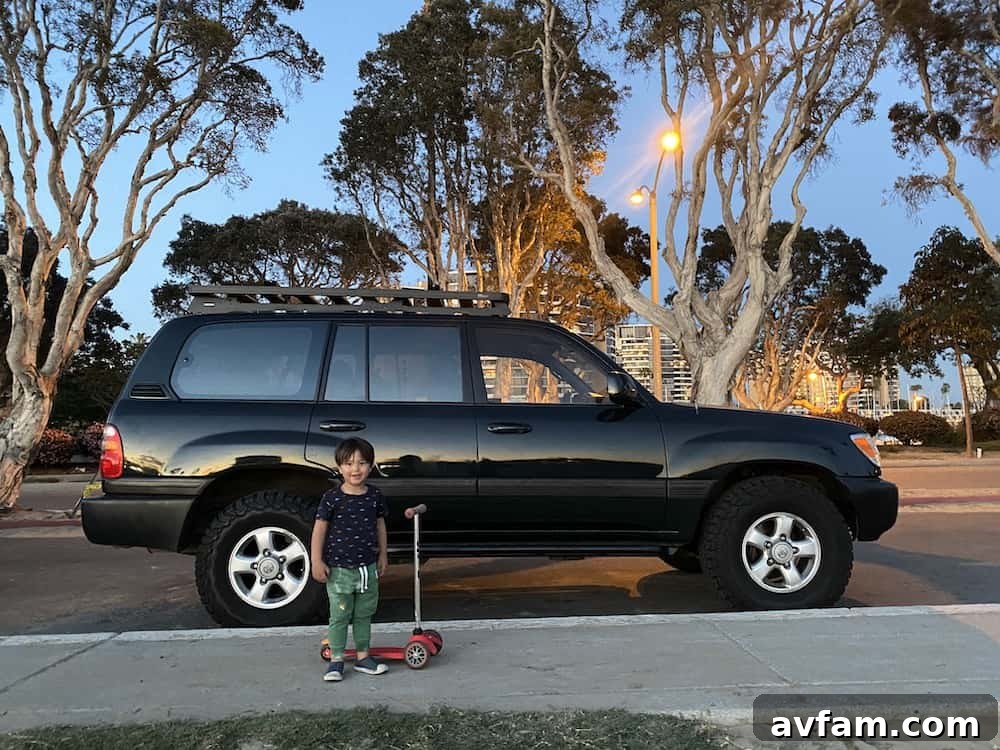
Bolt-on sliders, on the other hand, have become exceptionally popular and are widely available. Their performance is highly regarded, with very few complaints regarding their effectiveness compared to welded alternatives. Bolt-on systems offer greater flexibility, easier installation for the average DIY mechanic, and the ability to adjust or remove them if needed. For my Land Cruiser 100-series, several manufacturers produce high-quality sliders, but I have consistently been impressed by the design and features offered by White Knuckle Off-Road.
White Knuckle also offers customizable features, such as adding a diamond plate top. This can be extended across the entire slider for a full step surface or, as I opted for, just on the rear kick-out section. This diamond plate surface dramatically improves grip, making it much easier to access a roof rack or for children to climb into the back seat. This thoughtful addition combines protection with practical utility.
Here’s a detailed breakdown of the steps required to install bolt-on rock sliders:
- Lift the slider into its approximate position under the vehicle.
- Carefully position the U-bolts around the vehicle’s frame and through the slider’s mounting tabs.
- Attach a flat washer, locking washer, and nut to each U-bolt.
- Make final adjustments to move the slider into its precise final position.
- Systematically tighten all nuts to specification.
- Perform a final step test and measure for accuracy.
Before you begin, gather the necessary tools: a sturdy hydraulic floor jack, reliable jack stands (safety first!), a 3/4″ ratcheting wrench, and a 3-foot section of sturdy board (e.g., a 2×4). Ensure you have ample space to work safely under your vehicle.
Step 1: Positioning the Slider Under Your Vehicle
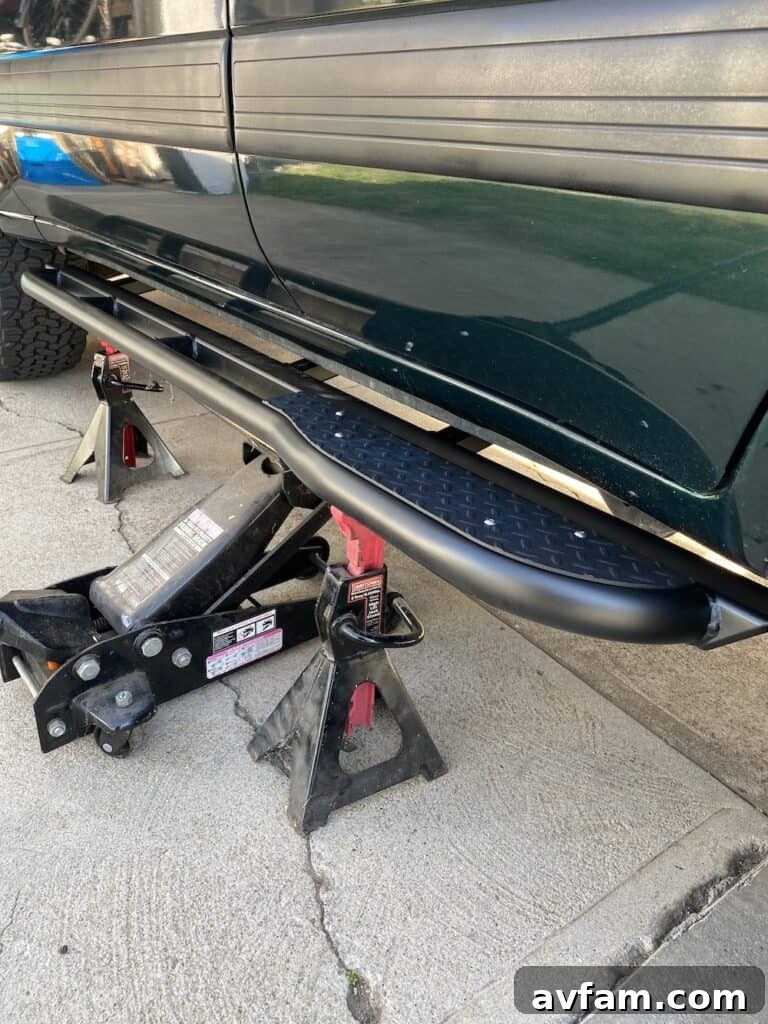
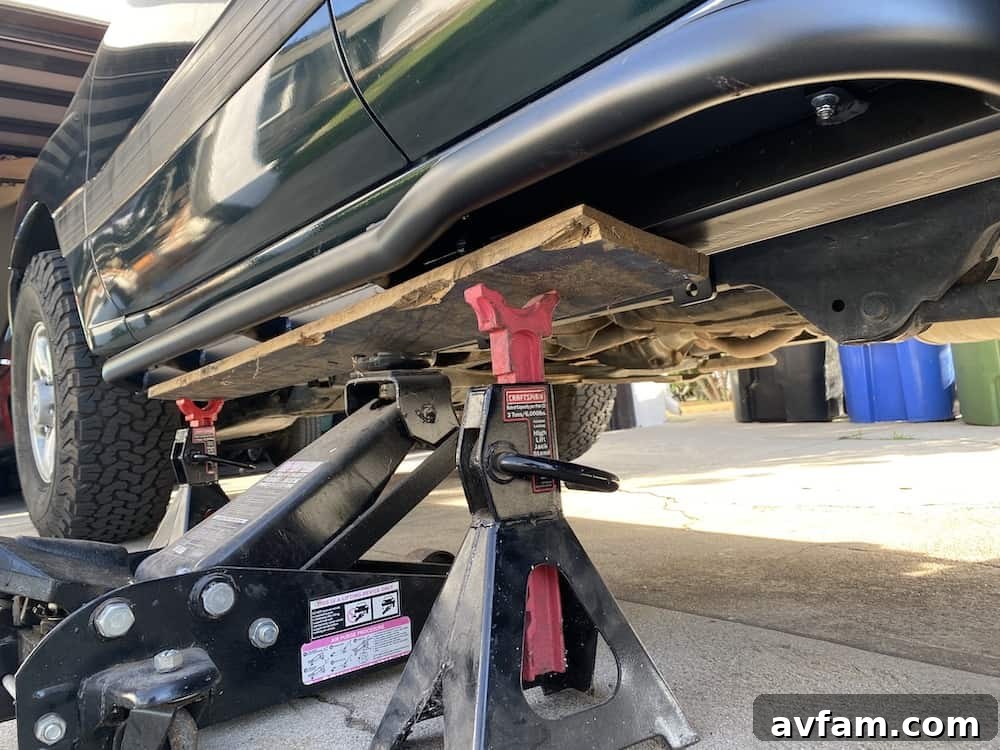
Begin by placing your 3-foot board securely on the lifting pad of your hydraulic floor jack. Gently set one of your rock sliders on top of this board. The board will provide a stable, level platform, making it significantly easier to balance and manipulate the slider during the lifting process.
Carefully pump the jack to slowly raise the slider into place underneath your vehicle. Position it approximately where it will be mounted. Once lifted, immediately use a jack stand on each end of the slider to help balance and support its weight. This is crucial for safety and stability, allowing you to release pressure from the hydraulic jack.
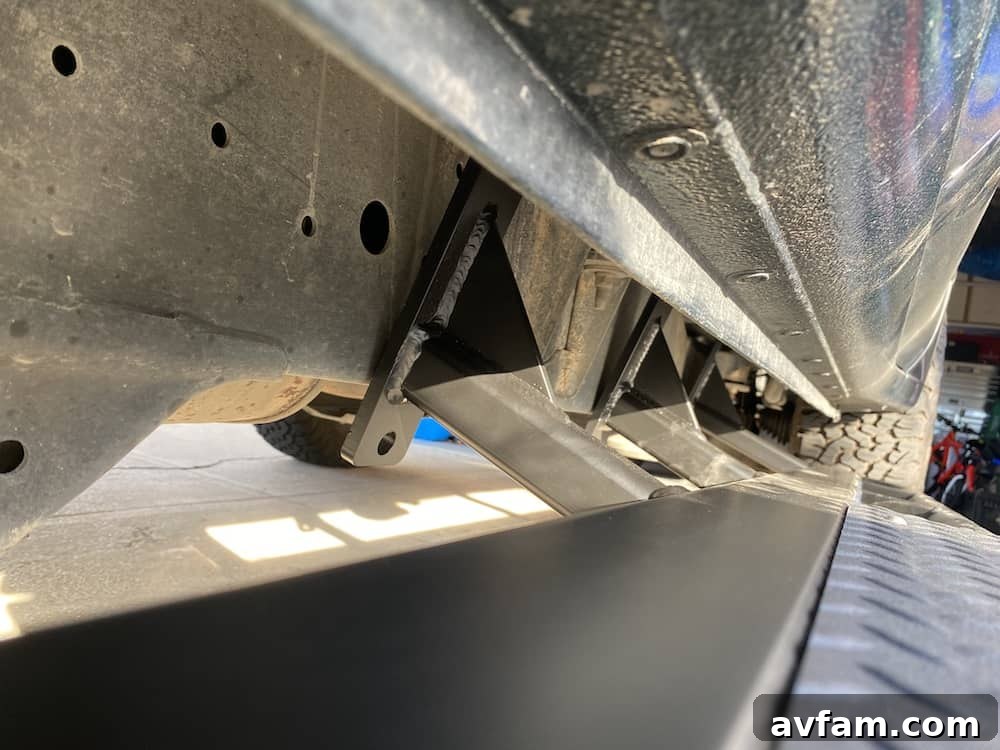
Your goal is to align the mounting tabs on the slider perfectly against the vehicle’s frame, ensuring that the pre-drilled holes in the tabs line up cleanly with the desired path for the U-bolts. Take your time during this initial positioning. It is far simpler to precisely manipulate the slider now than once even a single bolt has been loosely attached, which can restrict movement.
Step 2: Securing U-Bolts Around the Frame and Through Tabs
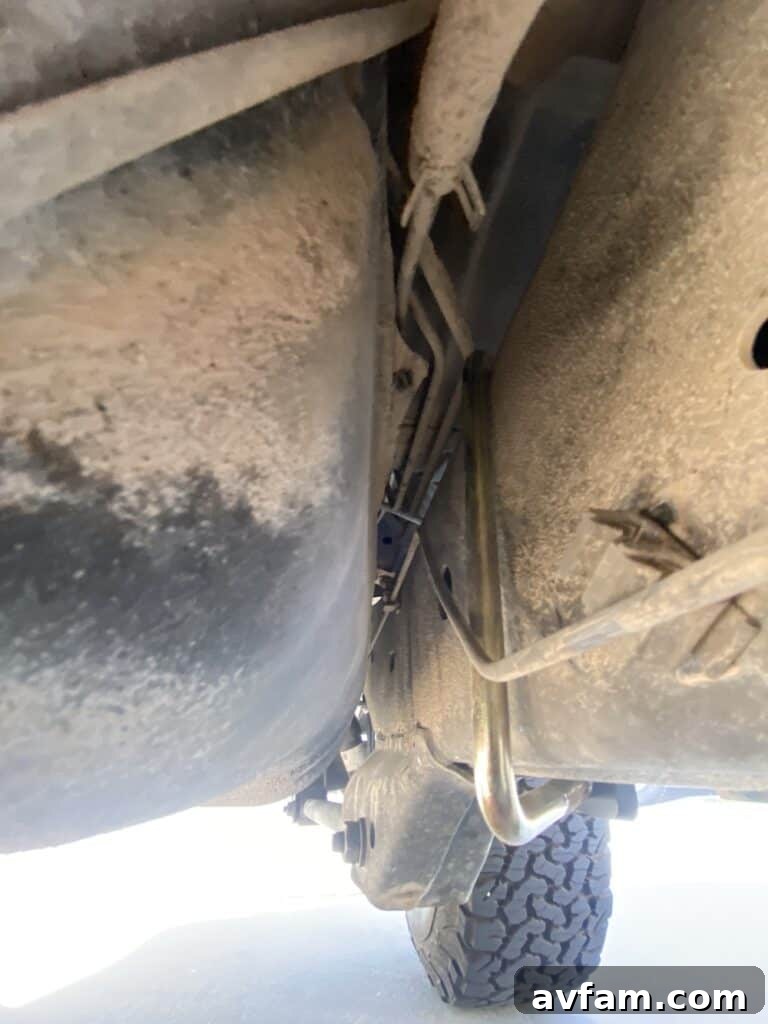
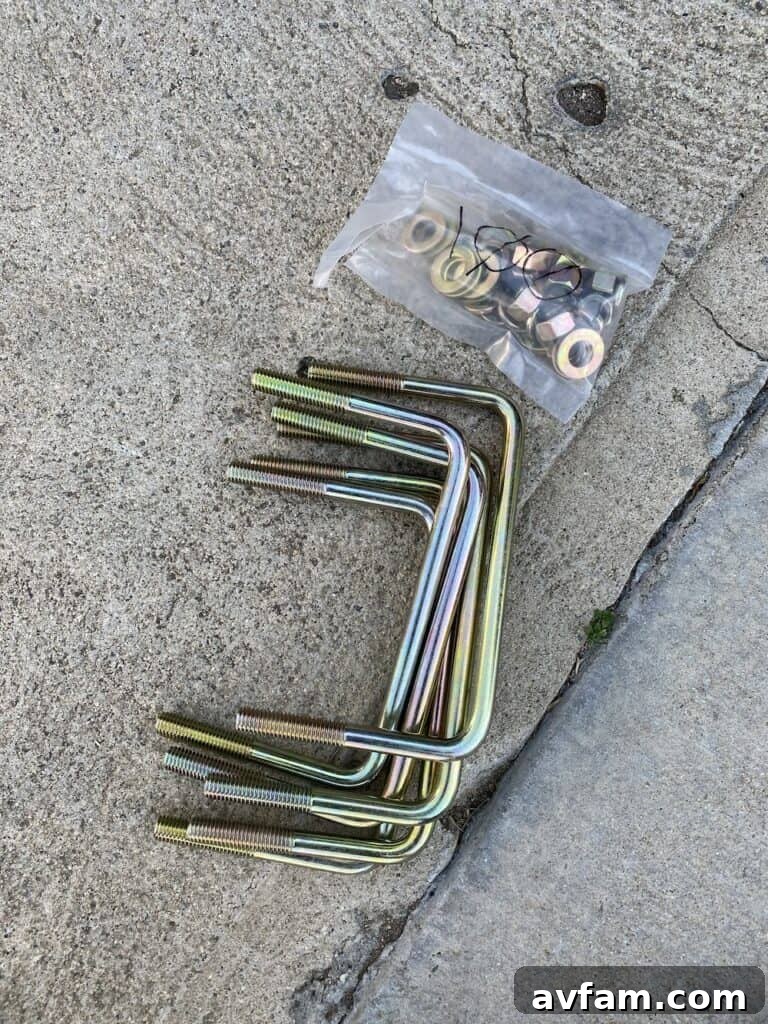
With the slider safely supported by the jack stands and roughly in position, you can now begin installing the U-bolts. Carefully slide each U-bolt around the vehicle’s frame and push its threaded ends through the corresponding holes on the slider’s mounting tabs. The White Knuckle sliders typically feature three robust mounting tabs per side, with one U-bolt designated for each tab.
Crucial Safety Note for Land Cruiser 100-series owners: On the driver’s side of the 100-series Land Cruiser, you will encounter the brake line secured to the inside of the frame. It is absolutely imperative that you exercise extreme caution here. Gently pull the brake line away from its retaining guides or clips and carefully slide the U-bolt *underneath* it. Under no circumstances should you place a U-bolt over the brake lines, as tightening it will crush them, leading to a catastrophic loss of braking capability. Always double-check this critical step.
Step 3: Attaching Washers, Lock Washers, and Nuts
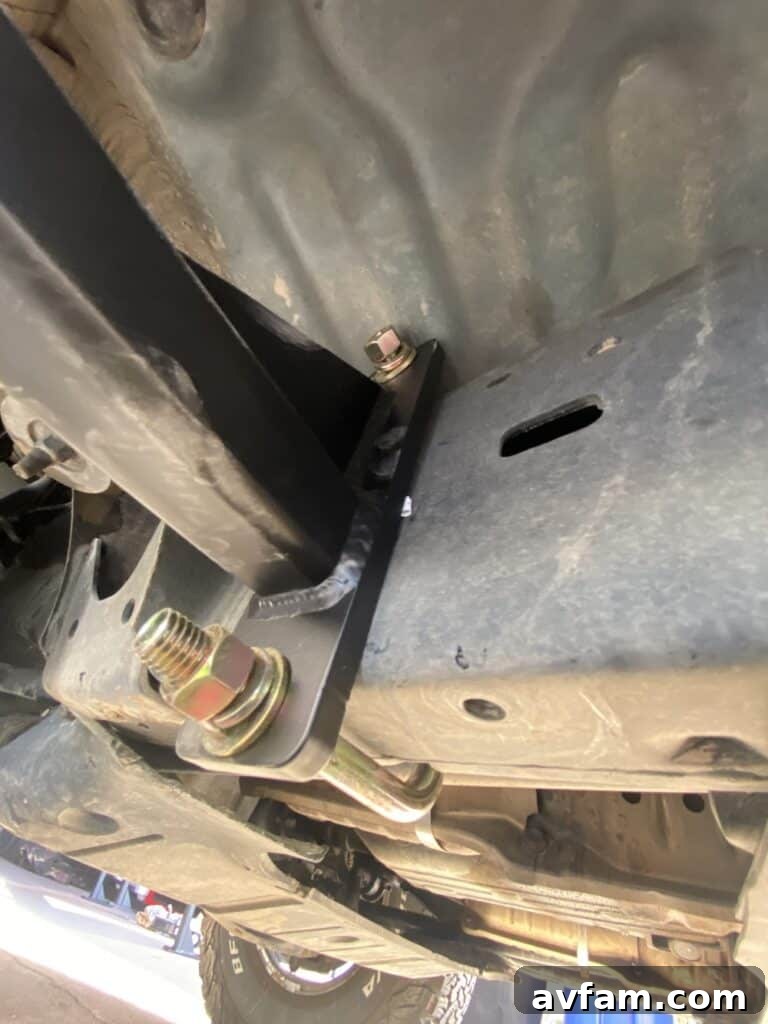
Once all U-bolts have been passed through their respective mounting tabs, you can begin to loosely secure them. For each U-bolt, place a flat washer onto the threaded end, followed by a locking washer (typically a split or crush washer), and finally, thread on the nut. For my installation, the U-bolts used 3/4″ nuts, which I initially secured by hand and then gently snugged with a ratcheting wrench. The goal at this stage is to hold everything in place without fully tightening.
With all nuts loosely attached, take a moment to confirm the slider’s initial positioning. Ensure it is correctly aligned beneath your vehicle’s rocker panel. For the White Knuckle sliders, the design is intended to be flush with the front edge of the rear wheel well, providing comprehensive protection along the entire side.
Step 4: Final Adjustments for Optimal Slider Placement
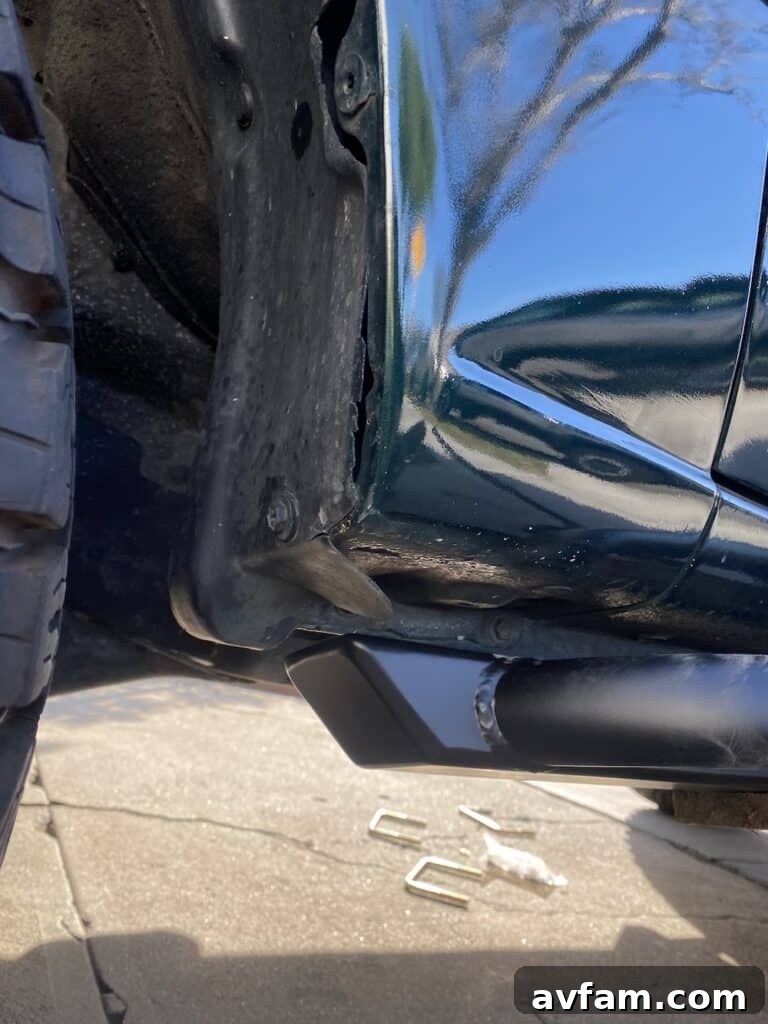
A crucial aspect of correct rock slider installation is maintaining an appropriate gap between the slider and the vehicle’s rocker panel. Aim for a gap of approximately 3/4″ to 1 inch. This clearance is vital; if the sliders are positioned too close to the body, you will experience annoying squeaks and potential rubbing as the vehicle’s body flexes during off-road articulation, which can lead to paint damage.
Even with the nuts lightly bolted, you can still make minor adjustments to the slider’s position. The easiest way to fine-tune the placement is by gently tugging on one end of the slider to shift it horizontally. For vertical adjustments, you can carefully use your floor jack to slightly push the slider up and into its ideal spot. Take your time to achieve the perfect alignment and the recommended gap.
Step 5: Safely Tightening All Nuts
The tightening process requires patience and a systematic approach to ensure even pressure and proper seating. Begin by slightly tightening the top nut of a U-bolt, then move to the bottom nut, and alternate between them. This prevents uneven tension which could warp the mounting tabs or pull the slider out of alignment. Do not fully tighten any single nut at this stage.
Instead, work your way around all the U-bolts, tightening each nut a little bit at a time, moving from one U-bolt assembly to the next. This gradual, progressive tightening distributes the force evenly across all mounting points. Once you are absolutely certain that the slider is in its final, desired position, and the gap is correct, you can proceed to hand-tighten every nut as firmly as you possibly can. For critical components like these, it is highly recommended to consult your slider manufacturer’s specifications for torque values and use a torque wrench to ensure proper fastening, preventing loosening on the trail.
Step 6: Post-Installation Testing and Accuracy Check
With all nuts securely tightened, it’s time to perform a crucial functional test. Step onto the newly installed slider and bounce up and down with your full weight. You should feel your entire vehicle move and flex with your body, but the slider itself should remain absolutely rigid and show no independent movement or flex relative to the vehicle’s frame. Any perceived movement in the slider indicates an issue with the tightening or installation, which needs immediate attention.
Finally, take precise measurements to confirm that the slider has not shifted out of its ideal position during the tightening process. Check the front-to-back alignment and the gap between the slider and the rocker panel once more. If any significant shift occurred, you will need to slightly loosen all the nuts, reposition the slider, and repeat the tightening process until perfect alignment is achieved. A thorough final inspection ensures both optimal performance and long-term protection for your vehicle.
Mastering the Trail: Effective Techniques for Using Rock Sliders
While the step test in your driveway offers a preliminary assessment, the true ultimate test of a rock slider’s performance and value comes when tackling challenging rocks and uneven terrain on the trail! This is where their engineering truly shines, preventing costly damage and expanding your vehicle’s capabilities.
Observe this excellent example of RSG sliders actively protecting a 4Runner on the renowned Cleghorn trail in the Los Angeles area. The video clearly illustrates how the sliders bear the vehicle’s weight and absorb impacts that would otherwise devastate the bodywork.
Without the robust protection of these sliders, the 4Runner’s body panels and doors would undoubtedly have sustained severe damage, leading to repair bills amounting to thousands of dollars. The spotters in this scenario did their utmost to guide the driver and minimize potential harm. While the sliders were invaluable, this situation also highlights the benefits of other modifications: larger tires and a suspension lift would significantly improve approach and departure angles, reducing the likelihood of such direct impacts. Additionally, high-clearance front and rear bumpers, along with comprehensive skid plates, would further enhance protection against impacts to other vulnerable components.
Experienced rock crawlers adeptly use their sliders as a primary tool for maneuvering around and over obstacles. They understand how to strategically pivot their vehicles on the sliders, using them as a fulcrum to navigate tight squeezes or reposition their tires for better traction and clearance. This advanced technique transforms the slider from a passive protector into an active aid in off-road navigation.
Here’s a great demonstration of a Tacoma utilizing RCI bolt-on sliders to incredible effect, showcasing their ability to handle significant impacts and allow the vehicle to “slide” past obstacles:
And finally, witness a 100-series Land Cruiser putting its White Knuckle Off-Road sliders through a rigorous test, demonstrating their unyielding strength and the peace of mind they provide when pushing the limits on demanding trails:
While most bolt-on rock sliders from reputable manufacturers offer comparable performance, it’s always advisable to seek out real-world examples on platforms like YouTube to see them in action. Additionally, engaging with off-road forums and local 4×4 clubs can provide invaluable first-hand knowledge and recommendations from experienced users. Prioritize rock sliders as the first essential piece of armor for your off-road vehicle, and you will undoubtedly appreciate the confidence and protection they provide on every adventure.