
The Enduring Value of a DIY Oil Change: Why I Still Do It Myself
In an era where quick oil change shops seem to dot every street corner, offering speed and convenience, one might wonder why anyone would still bother changing their own engine oil. While the allure of saving a few minutes by letting a professional handle it is strong, I continue to find immense value in performing this routine maintenance myself. It’s more than just a task; it’s an investment in my vehicle’s health, my peace of mind, and a connection to automotive basics that often gets lost in our fast-paced world.
My decision isn’t just about saving a few dollars; it’s deeply rooted in personal experience and a desire for quality control. I’ve heard countless stories, and personally encountered situations, where quick-lube services have led to unfortunate outcomes. From overtightened drain plugs to using incorrect oil viscosity, or even worse, mechanics “accidentally” bumping components that cause significant and costly damage, the risks can sometimes outweigh the perceived convenience. There’s a certain assurance that comes with knowing exactly what type of oil is going into your engine, how meticulously the job is done, and verifying that all components are correctly reinstalled. Furthermore, there’s an undeniable sense of accomplishment and satisfaction derived from getting under my truck, getting my hands dirty, and successfully completing a crucial maintenance task. It’s a small, tangible way to care for an asset that I rely on daily, extending its lifespan and maintaining its performance.
Understanding Your Vehicle: The Simple Science of an Oil Change
The process of changing your own engine oil is remarkably straightforward, regardless of the make or model of your vehicle. While the fundamental steps remain consistent, there are a few critical variables that require attention to ensure you’re giving your engine the best possible care. These include selecting the correct oil weight, choosing the appropriate oil type (conventional, synthetic blend, or full synthetic), and identifying the right oil filter for your specific vehicle. Always consult your vehicle manufacturer’s recommendations found in your owner’s manual – it’s your definitive guide to optimal engine care and preventing costly mistakes.
Choosing the Right Engine Oil: More Than Just a Viscosity Number
For my truck, a sturdy workhorse with over 100,000 miles on the odometer, I rely on 6 quarts of 5W-20 full synthetic oil. Since transitioning to full synthetic, I’ve (knock on wood) experienced no issues with leaks or oil consumption, a testament to its superior protective qualities for higher mileage engines. While premium brands like Royal Purple might be a few cents more expensive, the enhanced protection, performance stability, and extended interval capabilities they offer are, in my opinion, well worth the investment in your engine’s longevity. When choosing your engine oil, understanding these key factors will empower you to make the best decision:
- Oil Weight (Viscosity): Indicated by numbers like “5W-20” or “10W-30.” The “W” stands for winter, reflecting the oil’s flowability in cold temperatures, while the second number denotes its viscosity at the engine’s normal operating temperature. Using the manufacturer’s specified viscosity is crucial for proper lubrication and engine efficiency.
- Oil Type: This classification refers to the base oil used and additives.
- Conventional Oil: Derived from crude oil, it’s the least expensive option and suitable for older cars with simpler engine designs and regular, undemanding driving conditions.
- Synthetic Blend Oil: A mix of conventional and synthetic base oils, offering better protection against wear and thermal breakdown than conventional oil at a moderate price point, making it a good upgrade.
- Full Synthetic Oil: Engineered from highly refined base oils and advanced additives, it provides superior performance, exceptional resistance to extreme temperatures, and often allows for extended drain intervals. It’s ideal for modern engines, high-performance vehicles, and those seeking maximum engine longevity and protection.
- API Certification: Always look for the “starburst” symbol on the oil container. This indicates that the oil meets the latest American Petroleum Institute (API) standards for quality and performance, ensuring it’s suitable for your engine.
The Unsung Hero: Selecting the Right Oil Filter
Just as important as the oil itself is the oil filter, which should always be replaced with every oil change. A high-quality oil filter acts as your engine’s first line of defense, trapping contaminants such as dirt, metal particles, and sludge, ensuring that only clean oil circulates through vital engine components. This prevents premature wear and keeps your engine running smoothly. For full synthetic oils, I highly recommend Purolator PureOne oil filters. These filters are renowned for their exceptional filtration efficiency and protective capabilities, often rated for up to 5,000 miles. However, I personally advocate for changing your oil and filter more frequently than the maximum recommended interval, especially if you engage in demanding driving conditions like heavy towing, frequent short trips, or driving in dusty environments. Purolator’s legacy is impressive; they’ve been manufacturing, marketing, and distributing filters since 1923, stemming from Ernest Sweetland and George H. Greenhalgh’s invention of the first automotive oil filtration system, aptly named “Purolator” – short for “pure oil later.” Their commitment to innovation and quality makes them a trusted choice for DIY enthusiasts and professionals alike, providing a critical component for safeguarding your engine’s health.
Visual Guide: A Quick Look at the Process
While a comprehensive tutorial might take up an entire series, I created a quick video on Instagram demonstrating some key aspects of the oil change process. It offers a visual complement to the steps outlined below, helping to demystify the process for those new to DIY car maintenance and providing a quick overview before you dive into the details.
Step-by-Step Guide to Changing Your Engine Oil and Filter
Before you begin your DIY oil change, ensure you have all the necessary tools and materials readily available: new engine oil (correct type and viscosity), a new oil filter, an oil filter wrench (the cap or strap type), an appropriately sized oil drain pan, a clean funnel, a ratchet with the correct socket for your drain plug, sturdy jack stands, a reliable car jack, wheel chocks, plenty of clean rags or shop towels, and safety glasses. Always work on a level surface with the parking brake engaged and your vehicle in park or neutral.
1. Ensure Safety with Jack Stands
Safety is paramount when working under any vehicle. While some cars or trucks may offer sufficient ground clearance, using jack stands provides crucial extra room to maneuver and, more importantly, ensures your safety. Never, under any circumstances, rely solely on a hydraulic jack to support your vehicle; they can fail without warning. After safely lifting your car with a jack, position the jack stands securely under designated points on your vehicle’s frame or subframe (consult your owner’s manual for these points) and gently lower the car onto them. Give the vehicle a slight nudge to confirm stability before proceeding. Chocking the wheels that remain on the ground (typically the rear wheels if lifting the front) is also a wise and recommended safety measure to prevent any unexpected movement.
2. Efficiently Drain the Old Engine Oil
To facilitate a more thorough and efficient drain, it’s often recommended to drive your car for a few minutes beforehand to warm up the engine oil slightly. Warmer oil flows more easily, carrying more contaminants and sludge out with it. Once the engine is warm (but not excessively hot to prevent burns), turn it off. Position your oil drain pan directly beneath the oil drain plug, which is usually located on the lowest point of your engine’s oil pan. Using the correct size wrench or socket, carefully loosen and remove the drain plug. Be mindful that the oil will likely be hot, so avoid direct skin contact. Allow the oil to drain completely, which can take several minutes. Once the flow dwindles to a slow drip, clean around the drain plug opening, inspect the drain plug and its crush washer for wear (always replace the crush washer to ensure a leak-free seal), and then securely reinstall the drain plug. Do not overtighten, but ensure it’s snug enough to prevent leaks.
3. Remove the Old Oil Filter
Next, locate your oil filter, which is typically a cylindrical canister attached to the engine block. You will almost certainly need an oil filter wrench or clamp to loosen it, as they are often tightened securely at the factory or last service. Once loosened, unscrew the filter by hand. Be prepared for a small amount of oil to escape as you remove it, so keep your drain pan positioned underneath to catch any drips. Hold the old filter upright as you remove it to prevent spillage, then empty any remaining oil from the filter into your drain pan. It’s a critical step to take a moment and visually inspect the old filter’s rubber gasket to ensure it didn’t stick to the engine block. A forgotten, stuck gasket will lead to a double gasket situation with the new filter, causing severe oil leaks and potentially significant engine damage.
4. Install the New Oil Filter Correctly
Before installing your new oil filter, apply a thin film of fresh, new engine oil around the rubber gasket on the filter’s rim. This small but crucial step ensures a proper seal, preventing leaks, and also makes it significantly easier to remove the filter during your next oil change. Hand-tighten the new filter until it makes firm contact with the engine block, then give it an additional quarter to half-turn. Many high-quality filters, including the Purolator PureOne, feature a textured grip which is incredibly helpful for DIY installers, making hand-tightening more secure without the need for excessive force. Remember, overtightening can damage the filter, strip threads, or deform its housing, leading to stubborn removal or potential leaks.
5. Replenish with Fresh Engine Oil
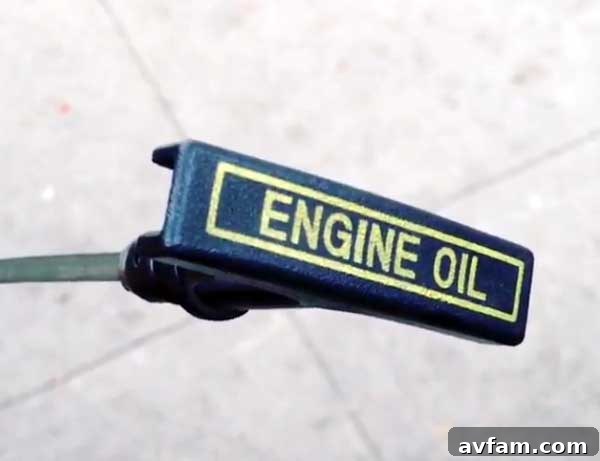
With the drain plug and new oil filter securely in place, it’s time to add the fresh engine oil. Remove the oil filler cap, typically located on top of the engine and clearly marked with an oil can symbol or “ENGINE OIL.” Insert a clean funnel into the filler neck to prevent spills and ensure the oil goes exactly where it needs to. Slowly pour the recommended amount and type of new engine oil into the engine. Consult your owner’s manual for the exact oil capacity of your vehicle. It’s often wise to pour slightly less than the full capacity initially and then check the level. Once all the oil is added, securely replace the oil filler cap.
6. Perform a Final Oil Level Check and Leak Inspection
After adding the new oil, start your engine and let it run for about 30 seconds to a minute. This allows the oil to circulate throughout the system and fill the new oil filter. Then, shut off the engine and wait a few minutes (typically 5-10 minutes) for the oil to settle back into the oil pan. Carefully pull out the dipstick, wipe it clean with a rag, reinsert it completely, and then pull it out again to check the oil level. It should fall within the “full” or “max” marks on the dipstick. Add a small amount of oil if needed. While the engine is off, also take a moment to look under your vehicle for any signs of leaks around the drain plug or the new oil filter. If everything looks good, remove the jack stands, carefully lower your vehicle, and you’re all set! You’ve successfully completed your DIY oil change.
Beyond the Change: Tracking and Proper Disposal
Congratulations! You’ve successfully changed your own engine oil and filter. Take pride in knowing you’ve provided meticulous care for your vehicle. Mark down the current mileage in your service log or on a sticker near your windshield to keep track of your next maintenance interval. This practice not only provides immense personal satisfaction but also contributes significantly to the longevity, reliability, and performance of your vehicle. You’ve ensured quality, potentially saved money, and gained valuable insight into your car’s workings, building confidence for future DIY projects.
Finally, remember your environmental responsibility. Never dispose of used engine oil down drains, into the ground, or in regular household trash. Used oil is a hazardous waste but is also highly recyclable. Most auto parts stores, quick oil change facilities, and municipal recycling centers offer free used oil recycling services. Simply pour your old oil from the drain pan into an empty, sealed container (like the old oil bottles) and take it to a designated recycling facility. This simple act protects our environment from contamination and ensures that this valuable resource can be re-refined and reused, contributing to a sustainable future.
disclosure: I was paid by Purolator to review their PureOne oil filter. All thoughts and opinions expressed in this article are my own and reflect my genuine experience. All products were provided by Purolator; however, they are items I genuinely enjoy using and feel are appropriate for my site and audience.