
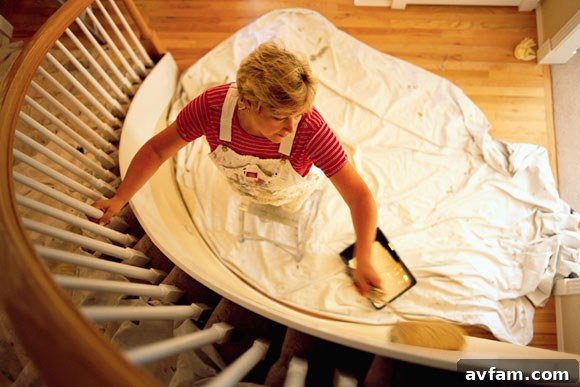
Transform Your Space: A Professional Guide to DIY Painting Success
Painting stands as one of the most beloved and rewarding DIY projects, renowned for its incredible ability to revitalize any space with minimal investment in cost, effort, and supplies. A fresh coat of paint can dramatically alter the mood, perceived size, and overall aesthetic of a room, breathing new life into tired interiors or setting the stage for an entirely new design vision. Whether you’re aiming for a subtle refresh or a bold transformation, the power of paint is undeniable.
While the concept of painting might seem straightforward, the difference between a passable weekend job and a truly professional finish often lies in understanding and applying a few key techniques. With the right knowledge and a handful of expert tips, you can elevate your painting skills from amateur to accomplished, ensuring results that you’ll be proud to showcase. This comprehensive guide will walk you through the essential steps, from meticulous preparation to flawless application and the benefits of choosing healthier paint options.
 Mastering the Art of Preparation: The Foundation of a Flawless Finish
 Mastering the Art of Preparation: The Foundation of a Flawless Finish
The secret to a stunning, long-lasting paint job doesn’t begin with the first brushstroke; it starts long before, with meticulous preparation. Skipping essential prep steps is the most common reason for uneven finishes, poor adhesion, and ultimately, dissatisfaction with the results. YOLO Colorhouse, a leader in healthy paint solutions, shares invaluable insights into preparing your space, and you might be surprised by how simple yet effective these steps can be.
Cleaning Your Walls: A Crucial First Step
Many DIY painters wonder if washing walls before painting is truly necessary. The simple answer is: yes, unless your walls are pristine. Dust, grime, grease, and general household buildup can create a barrier between the paint and the wall surface, preventing proper adhesion and leading to an uneven, patchy finish that peels or flakes over time. While heavily soiled walls certainly demand a thorough cleaning, even seemingly clean surfaces can harbor invisible residues that compromise your paint job.
For most rooms, a simple mixture of warm water and a mild, non-residue soap (like dish soap or a specialized wall cleaner) will do the trick. Use a soft sponge or cloth to wipe down all surfaces, paying extra attention to high-traffic areas, kitchens, and bathrooms where grease and moisture are prevalent. For stubborn grease or stains, consider using a TSP (trisodium phosphate) substitute, which is a stronger degreaser. Always rinse the walls thoroughly with clean water to remove any soap residue and allow them to dry completely before moving on. This drying time is critical; painting over damp walls can lead to blistering and peeling.
Dulling Shiny Surfaces for Optimal Adhesion
If the surface you intend to paint possesses a super shiny finish – common with old oil-based paints, glossy enamels, or certain types of trim – you absolutely must dull it down before applying new paint. Painting directly over a high-gloss surface without proper preparation is like trying to make tape stick to glass; the new paint will struggle to adhere, resulting in poor coverage, streaks, and premature peeling. The goal here is to create a slightly textured surface that provides “tooth” for the new paint to grip onto.
Achieve this by performing a light sanding with a fine-grit sandpaper (around 180-220 grit). You don’t need to sand down to the bare material; simply scuff the surface enough to remove the sheen. After sanding, use a tack cloth or a damp cloth to meticulously wipe away all dust particles. Any residual dust will mix with your paint, creating an undesirable gritty texture. This seemingly small step dramatically improves paint adhesion and ensures a smooth, professional-looking finish.
Patching Imperfections and Sealing Gaps
A smooth, uniform surface is key to a professional paint job. Before you even think about primer or paint, take the time to inspect your walls for any imperfections. Fill any nail holes, small cracks, dents, or divots with spackle or lightweight joint compound. For deeper holes or larger repairs, multiple thin coats may be necessary to prevent shrinkage. Once the spackle is completely dry, sand it smooth with fine-grit sandpaper until it’s flush with the surrounding wall. Always prime patched areas before painting, even if you skip full-wall priming, to ensure the patch doesn’t “flash” or show through the final topcoat due to different absorption rates.
Additionally, examine all seams and corners where walls meet trim, ceilings, or other architectural elements. Any gaps, no matter how small, should be sealed with paintable caulk. Caulking creates a seamless transition, preventing dust and dirt accumulation and providing a crisp, finished line. Apply a thin, even bead of caulk and smooth it with a wet finger or a caulking tool for a professional look. Allow the caulk to fully cure according to manufacturer instructions before painting.
Protecting Your Space: Taping and Drop Cloths
Beyond preparing the walls themselves, protecting adjacent surfaces is paramount. Use high-quality painter’s tape to mask off all trim, baseboards, window frames, doorframes, and ceiling lines you don’t intend to paint. Press the tape down firmly to create a tight seal, preventing paint bleed. For delicate surfaces or if you plan to leave the tape on for an extended period, opt for tapes designed for gentle removal. Furthermore, lay down drop cloths or plastic sheeting to protect your floors and furniture from accidental drips and spills. Canvas drop cloths are often preferred over plastic for floors as they are less slippery and more absorbent, making them safer and more effective.
Understanding Primer: When and Why it Matters
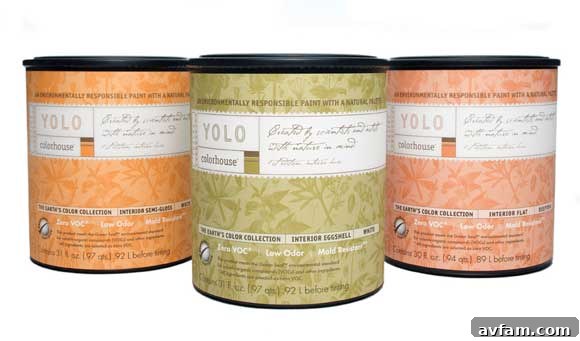
One of the most frequently asked questions in DIY painting is, “Do I really need to prime?” We understand the desire to skip an extra step, and the good news is that, more often than not, you don’t need to prime every single surface every single time. However, there are specific scenarios where primer is not just recommended, but absolutely essential for achieving professional results and ensuring the longevity of your paint job. Primer acts as a foundational layer, creating an ideal surface for the topcoat to adhere to, blocking stains, and ensuring uniform color.
Key Scenarios Where Priming is Non-Negotiable:
- On Bare Wood: Unfinished or bare wood surfaces are highly porous and will absorb paint unevenly, leading to a splotchy finish. More importantly, wood often contains tannins (natural compounds) that can bleed through light-colored paints, causing yellow or brown stains. A quality primer seals the wood, blocks tannin bleed, and provides a uniform surface for the topcoat, ensuring a consistent color and finish.
- When Going Over a Surface Previously Painted with Oil Paint: Modern paints are predominantly latex (water-based), which struggles to adhere to older, hard, glossy oil-based paints. Without an appropriate bonding primer, your new latex paint will likely peel or chip over time. A specialized bonding primer creates a strong adhesive layer, allowing the new latex paint to stick securely to the oil-based surface.
- When Going from a Super Dark Color to a Super Light Color: While it might seem like just another coat of paint would suffice, primer is significantly cheaper than quality paint. Applying a coat of primer when making a drastic color change (e.g., from deep burgundy to pale white) will help to neutralize the dark underlying color, reducing the number of topcoats required. This saves you money and ensures the new light color appears true to its swatch, without any influence from the old dark color.
- On New Drywall or Unpainted Plaster: These surfaces are very porous and will absorb paint unevenly, leading to a patchy appearance. Primer seals these surfaces, creating a consistent absorption rate and a smooth base for the topcoat.
- When Painting Over Stains: Water stains, smoke damage, crayon marks, or grease stains can bleed through multiple coats of regular paint. A stain-blocking primer is specifically formulated to seal these imperfections, preventing them from reappearing on your freshly painted walls.
- For Drastic Sheen Changes: If you’re painting a matte finish over a high-gloss finish (or vice versa), a primer can help smooth the transition and improve adhesion.
Beyond these specific instances, primer can also enhance the durability of your paint, provide better coverage, and ultimately result in a more professional and satisfying finish. For more detailed information on primers and their applications, you can consult resources like YOLO Colorhouse’s FAQ on Primers.
Choosing Your Color: The Heart of Your Transformation
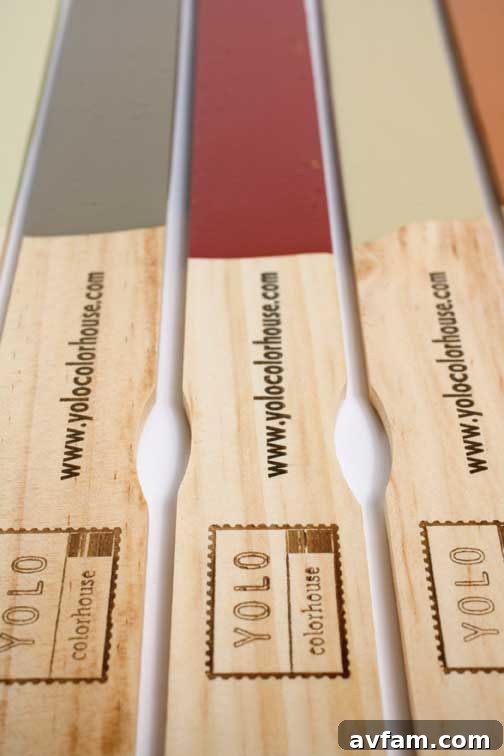
Choosing the perfect paint color is, by far, the most inspiring and often the most challenging part of the painting process. Color has a profound impact on the mood, atmosphere, and perceived size of a room. It can evoke feelings of warmth, tranquility, energy, or sophistication. With an endless spectrum of hues available, narrowing down your choices can feel overwhelming, but don’t worry – there are strategies and resources to help you find your ideal palette.
Tips for Selecting the Perfect Paint Color:
- Consider Existing Elements: Look at your furniture, flooring, artwork, and textiles. Your paint color should complement or enhance these existing elements, creating a cohesive design.
- Understand Lighting: Natural and artificial light drastically affect how colors appear. A color might look vibrant in a well-lit room but muted in a dimly lit space. Observe how colors change throughout the day and under different light sources (warm LED, cool fluorescent).
- Use Samples Generously: Never judge a color by a small swatch on a card. Purchase small sample pots and paint large swatches (at least 2×2 feet) directly onto your walls in several areas of the room. Live with these samples for a few days, observing them in various lighting conditions.
- Explore Color Psychology: Warm colors (reds, oranges, yellows) tend to create a cozy, energetic atmosphere, while cool colors (blues, greens, purples) often promote a sense of calm and spaciousness. Consider the intended function and mood of the room when making your selection.
- Think About Sheen: Paint sheen affects both appearance and durability.
- Matte/Flat: Offers a soft, non-reflective finish, excellent for hiding imperfections. Best for low-traffic areas like ceilings and formal dining rooms.
- Eggshell/Satin: A low-sheen finish with a slight luster, more durable and easier to clean than flat. Ideal for living rooms, bedrooms, and hallways.
- Semi-Gloss: A radiant finish that is very durable and easy to clean. Perfect for kitchens, bathrooms, trim, and doors.
- High-Gloss: The most reflective and durable finish, often used for furniture, cabinets, and high-impact accent areas.
- Seek Expert Advice: If you’re truly stuck, don’t hesitate to leverage professional resources. Companies like YOLO Colorhouse offer FREE online color help, where experts can provide personalized recommendations based on your preferences and space.
The Fun Part: Applying Your Paint Like a Pro
With your space meticulously prepared, primed (if necessary), and your color confidently chosen, you’ve reached the most exciting stage: painting! This is where all your hard work comes to fruition. While painting is relatively straightforward, applying the paint correctly ensures a smooth, even, and durable finish.
Essential Tools and Techniques:
- Gather Your Tools: You’ll need high-quality brushes (angled brushes for cutting in, straight brushes for larger trim), rollers (with appropriate nap sizes for your wall texture – generally 3/8″ for smooth walls, 1/2″ for slightly textured), a paint tray, an extension pole for your roller, and clean cloths.
- Stir Your Paint: Before opening the can, shake it well, then stir the paint thoroughly with a paint stick. This ensures that the pigments and binders are evenly distributed for consistent color and performance.
- Cutting In: Use an angled brush to “cut in” along edges where walls meet ceilings, trim, and corners. Apply a steady, even line of paint about 2-3 inches wide. Aim for precision here, as this defines the edges of your painted area.
- Rolling Large Surfaces: Load your roller evenly with paint, avoiding drips. Apply paint in “W” or “M” patterns over a 2×3 foot section, then fill in the pattern without lifting the roller. Maintain a “wet edge” – always roll into the previously painted, still-wet area to prevent lap marks and create a seamless finish. Work from top to bottom, applying even pressure.
- Apply Multiple Thin Coats: Most paint jobs require at least two coats, especially when changing colors significantly. Thin, even coats are always better than one thick coat, which can lead to drips, uneven drying, and a less durable finish.
- Allow Adequate Drying Time: Always follow the manufacturer’s recommendations for drying and recoat times between coats. Rushing this step can lead to poor adhesion and a compromised finish.
- Remove Tape While Paint is Still Wet (or scoring when dry): For the cleanest lines, remove painter’s tape while the final coat of paint is still slightly wet. If the paint is completely dry, score the edge of the tape with a utility knife before removing it to prevent the paint from peeling off with the tape.
Feeling confident and ready to tackle your project? High-quality paints are crucial for a professional finish. You can shop for excellent paint options, including those from YOLO Colorhouse, at major retailers like Home Depot.
Breathe Easy: The Advantages of Zero VOC Paint
One of the most significant innovations in the paint industry addresses a concern many people have: “Where are the fumes?” Traditional paints often contain high levels of Volatile Organic Compounds (VOCs), hazardous air pollutants (HAPs), and other toxic chemicals that contribute to that strong “paint smell.” These fumes aren’t just unpleasant; they can be harmful to your health and contribute to poor indoor air quality. Exposure to VOCs can cause headaches, dizziness, respiratory issues, and other adverse effects, particularly for children, pets, and individuals with sensitivities or respiratory conditions.
This is where revolutionary products like YOLO Colorhouse 0 VOC paint come into play. By using paints formulated without these “stinky stuff” – no VOCs, no carcinogens, and no hazardous air pollutants – you can paint your room in the morning and comfortably sleep in it at night! This dramatic reduction in harmful emissions means a safer painting experience for you and your family, creating a healthier living environment from the moment the paint dries.
The beauty of modern zero VOC paints is that you don’t have to compromise on quality or performance. YOLO Colorhouse paints, for instance, are designed to perform just like the conventional paints you’re used to using, offering excellent coverage, durability, and a beautiful finish. Their innovative formulation utilizes a special technology that creates strong bonding between the paint molecules without the need for toxic chemical solvents. This means that when your paint is drying, it’s primarily just water evaporating, leaving behind a hard, durable, and most importantly, healthy finish.
Choosing a zero VOC paint is a conscious decision to prioritize the well-being of your household and the environment. It allows you to transform your home with color without introducing unnecessary health risks. So, breathe easy knowing that a healthier paint option exists that doesn’t sacrifice performance or aesthetic appeal. To learn more about selecting paint that is safer for your home, explore resources on zero VOC paint.
With these comprehensive tips and insights, you’re well-equipped to embark on your next painting project with confidence. From meticulous preparation to understanding the nuances of primer, choosing the perfect color, applying paint with precision, and selecting healthy zero VOC options, every step contributes to a stunning and lasting result. Enjoy the transformative power of paint and create a space you truly love.