
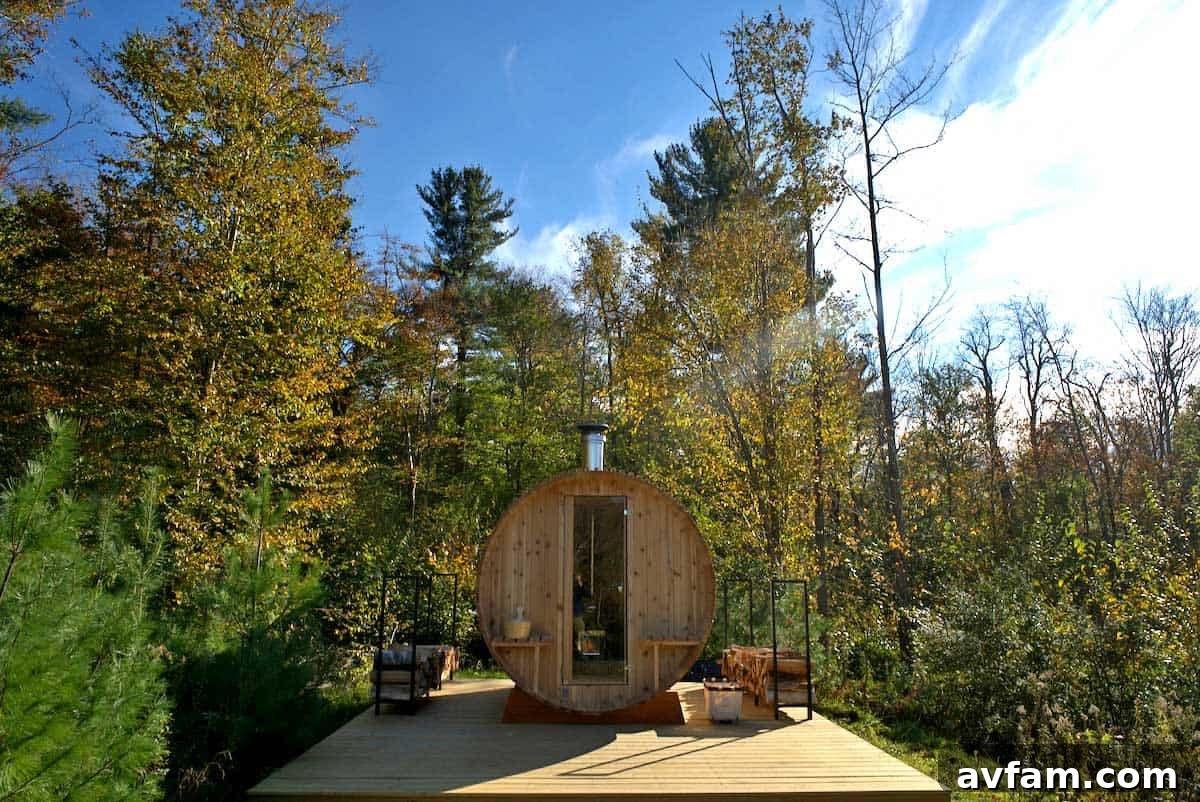
There’s an undeniable charm and robust warmth that only a wood-burning sauna can deliver, transforming a winter indulgence into a year-round wellness ritual. While the joy and health benefits of a hot tub are well-recognized, its traditional cousin, the sauna, offers a distinctly different, yet equally rewarding, experience. Especially when fueled by natural wood, a sauna provides a deeply immersive and therapeutic escape.
For many, the allure of saunas began early, often with family members who cherished the tradition so much they integrated these havens into their homes. However, the concept of a wood-burning barrel sauna, particularly one situated amidst the serene beauty of the Berkshires, elevates this age-old practice to an entirely new dimension. This traditional and visually appealing choice harmonizes perfectly with the rustic tranquility of a cabin retreat, offering an authentic wellness sanctuary.
Mark Bollman, the visionary founder of Ball and Buck, has meticulously crafted an exceptional escape in the Berkshires known as Partridge Hill Lodge. A mere three hours from the bustling cities of Boston or New York, this retreat feels a world away, offering unparalleled serenity. Beyond the custom-built log home sprawling across 40 acres, Bollman has enriched this dream getaway with a wood-burning hot tub and, most recently, a magnificent wood-burning sauna. This addition not only enhances the guest experience but also serves as an inspiring blueprint for those dreaming of their own backyard oasis.
For those inspired by this ultimate retreat addition, let’s delve into the detailed process of how such a stunning wood-burning sauna can be built, step by step.
Planning Your Wood-Burning Barrel Sauna: Size, Type, and Location
Embarking on a DIY sauna project begins with careful planning. The choice of a wood-burning sauna aligns perfectly with a desire for a rustic, traditional aesthetic, offering a unique blend of visual appeal and deep, penetrating heat. Mark Bollman chose a barrel design from Almost Heaven Saunas, which are renowned for their quality and ease of assembly. These kits are designed for the dedicated DIY enthusiast, often allowing for completion within a day or two with the right tools and a partner.
When selecting your sauna, consider its size based on how many people will use it regularly. Barrel saunas are popular for their efficient heating and charming appearance. The choice of wood is also crucial; Western Red Cedar is a common and excellent option due to its natural resistance to rot and insects, pleasant aroma, and low thermal conductivity, which keeps the exterior cooler. Spruce and pine are also used, often requiring treatment to prolong their lifespan.
Choosing the Optimal Location for Your Outdoor Sauna
Once your sauna is built, moving it is a significant undertaking, making location scouting paramount. Take ample time to determine the ideal spot, considering several key factors:
- Privacy and Views: Position your sauna to maximize privacy while enjoying any scenic views the location offers.
- Proximity to Home/Water: Consider the distance from your main residence for convenience, especially during colder months. Access to a cold plunge or outdoor shower for post-sauna cooling is also a luxurious addition.
- Ground Level and Drainage: Ensure the ground is level and allows for proper water runoff to prevent pooling around the foundation.
- Sunlight and Wind Exposure: While direct sunlight can help dry the exterior, too much exposure might affect the wood over time. Consider wind direction, especially for the stove’s chimney.
- Fire Safety: If using a wood-burning stove, ensure adequate clearance from flammable structures or dry vegetation. Local fire codes and regulations must be strictly followed.
- Accessibility: Plan for easy access, especially when carrying firewood to the stove.
Essential Tools for a Seamless Sauna Construction
A successful DIY sauna build relies on having the right tools and knowing how to use them safely and effectively. For a barrel sauna kit assembly, the following tools are generally indispensable:
- Impact Driver: For quickly driving screws and bolts.
- Drill Driver: Essential for pre-drilling pilot holes to prevent wood splitting.
- Jigsaw: Crucial for cutting curved or intricate shapes, particularly for the stove vent opening.
- Rubber Mallet: Used for gently tapping staves and components into place without damaging the wood.
- Box Wrenches: For tightening nuts and bolts on bands and other hardware.
- Level (Standard & Laser): Absolutely critical for ensuring the foundation is perfectly level and that the barrel components are aligned correctly, preventing structural issues and maintaining heat retention.
- Tape Measure: For precise measurements throughout the build.
- Safety Gear: Don’t forget safety glasses, gloves, and hearing protection.
Building a Robust Foundation for Lasting Enjoyment
The longevity and stability of your wood-burning sauna depend significantly on its foundation. An ideal choice is a level concrete slab, allowed ample time to fully cure, providing an unyielding and moisture-resistant base. Alternatively, a sturdy wood deck with robust support can serve as a suitable platform. If opting for a wood deck, it’s imperative to ensure it is adequately raised above the ground to prevent moisture damage, rot, and pest infestation. A deck constructed from composite materials offers superior resistance to rot, warping, and requires less maintenance, making it an excellent long-term solution for an outdoor sauna foundation. Proper ventilation beneath the deck is also vital to prevent moisture build-up.
Assembling the Barrel: Stave by Stave Construction
Building the barrel itself is a methodical and satisfying process. Begin by securely setting up the base cradles and attaching them firmly to your prepared foundation. These cradles will support the barrel structure. The staves, which are the curved wooden planks forming the barrel’s body, are then added one at a time. Each stave typically features a tongue-and-groove joint, ensuring a tight, interlocking fit as you build upwards. A rubber mallet is useful here to gently tap each stave into place, ensuring a snug seal and structural integrity. This step-by-step assembly gradually reveals the iconic barrel shape.
Crafting the Sauna Ends and Exterior Features
With the main barrel body assembled, the next critical step is to build and install the end panels. These panels form the front and back walls of the sauna, sealing the structure and providing mounting points for the door. They are typically constructed from fitted wood sections that slot into the curved staves. Once the ends are securely attached, tension bands are often wrapped around the barrel and tightened to compress the staves, creating a robust and airtight seal essential for retaining heat.
Many barrel sauna models, like the one featured, also include charming exterior features such as a small bench and porch area at the front. These elements provide a functional space for cooling down, storing towels, or simply enjoying the outdoor environment before or after a sauna session. Assembly of these features typically involves straightforward carpentry, enhancing both the utility and aesthetic appeal of your outdoor sauna.
The Heart of the Heat: Installing the Wood-Burning Stove
While electric stoves offer convenience and easy maintenance, there’s a primal satisfaction and an incomparable intensity of heat that only a wood-burning stove can provide in a sauna. The crackle of burning wood, the earthy aroma, and the deeply penetrating, radiant heat create an authentic and traditional sauna experience that many enthusiasts cherish. This tactile engagement with the elements truly sets a wood-fired sauna apart.
Installing a wood-burning stove requires careful attention to detail and adherence to safety standards. A key step involves precisely cutting a hole in the sauna’s ceiling or wall for the vent pipe. This is typically achieved using a provided template and a jigsaw, ensuring a snug fit for the chimney flue system. It’s crucial to use double-wall stove pipe where it passes through any combustible materials and to maintain required clearances, often specified by the stove manufacturer and local building codes. Fire-resistant materials should surround the stove and line the vent opening. Always ensure the stove is placed on a non-combustible base, and safety rocks are properly stacked around the heating element to absorb and radiate heat effectively.
Interior Comfort: Installing Benches and Essential Accessories
With the main structure and heating element in place, the final touches involve installing the interior benches and various accessories that enhance both comfort and functionality. Sauna benches are typically constructed from smooth, splinter-free wood like cedar or aspen, designed to withstand high temperatures and humidity while remaining comfortable for sitting or reclining. Ensure they are securely mounted and can support users safely.
Beyond the benches, essential sauna accessories include:
- Sand Timer: To track session duration, typically 15-minute intervals.
- Thermometer/Hygrometer: To monitor the temperature and humidity levels inside the sauna, allowing you to tailor the experience.
- Wooden Bucket and Ladle: For pouring water over the hot sauna rocks, creating bursts of steam (loyly) that increase humidity and perceived heat.
- Robe Hooks: Convenient for hanging towels and robes outside or just inside the sauna door.
- Fire Extinguisher: A critical safety item to keep within easy reach, especially with a wood-burning stove.
- Essential Oils (optional): For an aromatic experience, diluted in water and poured over rocks.
Pre-First Use: Testing and Safety Checks
Before you invite friends for your inaugural sauna session, a crucial step is to thoroughly test the functionality of your new wood-burning stove and ensure all exhaust and venting systems are properly sealed and operating efficiently. Conduct an initial “burn-in” fire, gradually increasing the heat, and carefully monitor for any smoke leaks from the stove or chimney joints. Check that the chimney has a good draw, expelling smoke effectively. Verify that all fire safety clearances around the stove and flue pipe are maintained and that no combustible materials are too close. This testing phase allows the wood and components to acclimate to heat and helps identify any potential issues before full use. Safety should always be your top priority.
Embracing the Ultimate Sauna Experience
Once all checks are complete and you’re confident in your build, it’s time for the most rewarding step: inviting friends, firing up the sauna, and immersing yourselves in the intense, therapeutic heat. A wood-burning sauna offers more than just heat; it’s a sensory journey. The warmth envelops you, the scent of woodsmoke and cedar fills the air, and the crackling fire provides a meditative soundtrack. Embrace the cycles of heat and cool, perhaps with a refreshing outdoor shower or a quick dip if available, to maximize the health benefits and invigorating sensation.
Regular sauna use has been linked to numerous health benefits, including improved cardiovascular health, muscle relaxation, stress reduction, and detoxification. The ritual of preparing the fire, stoking the coals, and finally relaxing in the embrace of natural heat becomes a cherished part of a holistic wellness routine.
Our sincere thanks go to Mark Bollman for generously sharing the details of his inspiring sauna build at Partridge Hill. This project not only showcases the beauty and functionality of a DIY wood-burning barrel sauna but also solidifies the dream of creating a personal oasis. We eagerly anticipate the opportunity to visit Partridge Hill Lodge someday and experience its serene charm firsthand.