
Transform Your Outdoor Space: Quickly Refreshing Your Shed with a Wagner FLEXiO 590 Paint Sprayer
Embarking on a DIY painting project is a common endeavor for many homeowners. Often, these projects involve interior rooms or walls, tackled with the familiar brush and roller. However, the thought of exterior painting can sometimes feel more daunting. Rest assured, it doesn’t have to be. With the right tools and a clear plan, transforming your outdoor spaces can be incredibly rewarding and surprisingly straightforward. The secret weapon for exterior projects, especially for sheds, fences, or even small studios, is a high-quality paint sprayer. We recently put the versatile Wagner FLEXiO 590 handheld paint sprayer to the test, using it to rapidly revitalize the exterior of our small studio, achieving stunning results in record time.
Why Choose a Paint Sprayer for Exterior Projects?
Traditional painting methods, while effective for certain tasks, can be time-consuming and labor-intensive when it comes to larger exterior surfaces or those with intricate details. Paint sprayers offer numerous advantages that make them the ideal choice for such projects:
- Speed and Efficiency: A sprayer can cover large areas significantly faster than a brush or roller, drastically cutting down project time. This is especially true for textured surfaces or siding where brushes struggle.
- Superior Finish: Paint sprayers deliver a smooth, even, and consistent coat of paint, free from brush strokes or roller marks. This results in a professional-grade finish that’s difficult to achieve by hand.
- Reduced Effort: Spraying requires less physical exertion compared to repetitive brushing or rolling, minimizing fatigue, especially on bigger projects.
- Versatility: Modern paint sprayers, like the Wagner FLEXiO 590, are designed to handle a wide range of paint types and materials, from latex and oil-based paints to stains and sealers, often without the need for thinning.
- Reaching Tricky Spots: Corners, crevices, and textured surfaces that are challenging to paint with brushes become easily accessible with the directed mist of a paint sprayer.
Our Project: Revitalizing a Tired Studio Exterior
Our 100-square-foot studio space, clad in wood siding, was the perfect candidate for a much-needed refresh. The existing paint was severely faded, showing its age, and peeling in several spots, making the building look tired and neglected. Before we could even think about applying a fresh coat, essential preparation was required. This initial stage is crucial for ensuring proper paint adhesion and a long-lasting finish.
Step 1: Thorough Surface Preparation – The Foundation of a Great Paint Job
Surface preparation is arguably the most critical step in any exterior painting project. Skipping or rushing this stage can lead to premature peeling, blistering, and a significantly diminished lifespan for your new paint job. Here’s how we tackled it:
- Scraping Loose Paint: The first and most labor-intensive part was meticulously scraping off all the old, peeling paint and loose wood fibers. We used a sturdy paint scraper, working carefully to remove as much compromised material as possible. This creates a clean, sound surface for the new paint to adhere to.
- Cleaning the Surface: After scraping, we thoroughly cleaned the entire exterior. For a shed, a power washer can be highly effective, but a good scrub with a stiff brush and a cleaning solution (like a mix of bleach and water for mildew, or a dedicated exterior house cleaner) followed by a thorough rinse, will also work. Ensure the surface is completely dry before proceeding.
- Removing Fixtures: To ensure an uninterrupted paint application and prevent accidental overspray, we carefully removed any exterior lighting fixtures, door handles, and other non-paintable hardware.
- Masking and Taping: Protecting areas you don’t want to paint is essential. We carefully taped off the door frame, windows, and any trim using painter’s tape. For larger areas like windows, plastic sheeting or drop cloths can be taped in place. This step is critical for achieving clean lines and avoiding unsightly overspray.
- Priming (Optional but Recommended): For bare wood spots or areas with significant repairs, applying an exterior primer is highly recommended. Primer helps seal the surface, blocks stains, and provides an excellent base for the topcoat, improving paint adhesion and durability.
Step 2: Loading Up and Choosing Your Color
Once our studio was prepped and ready, it was time for the exciting part: loading the paint. We opted for a vibrant “firehouse red” color. Our goal was to make the studio truly pop and create a dramatic visual transformation from its previously faded dark red hue. This bold choice immediately injected personality and curb appeal into the space.
Step 3: Mastering the Wagner FLEXiO 590 Paint Sprayer
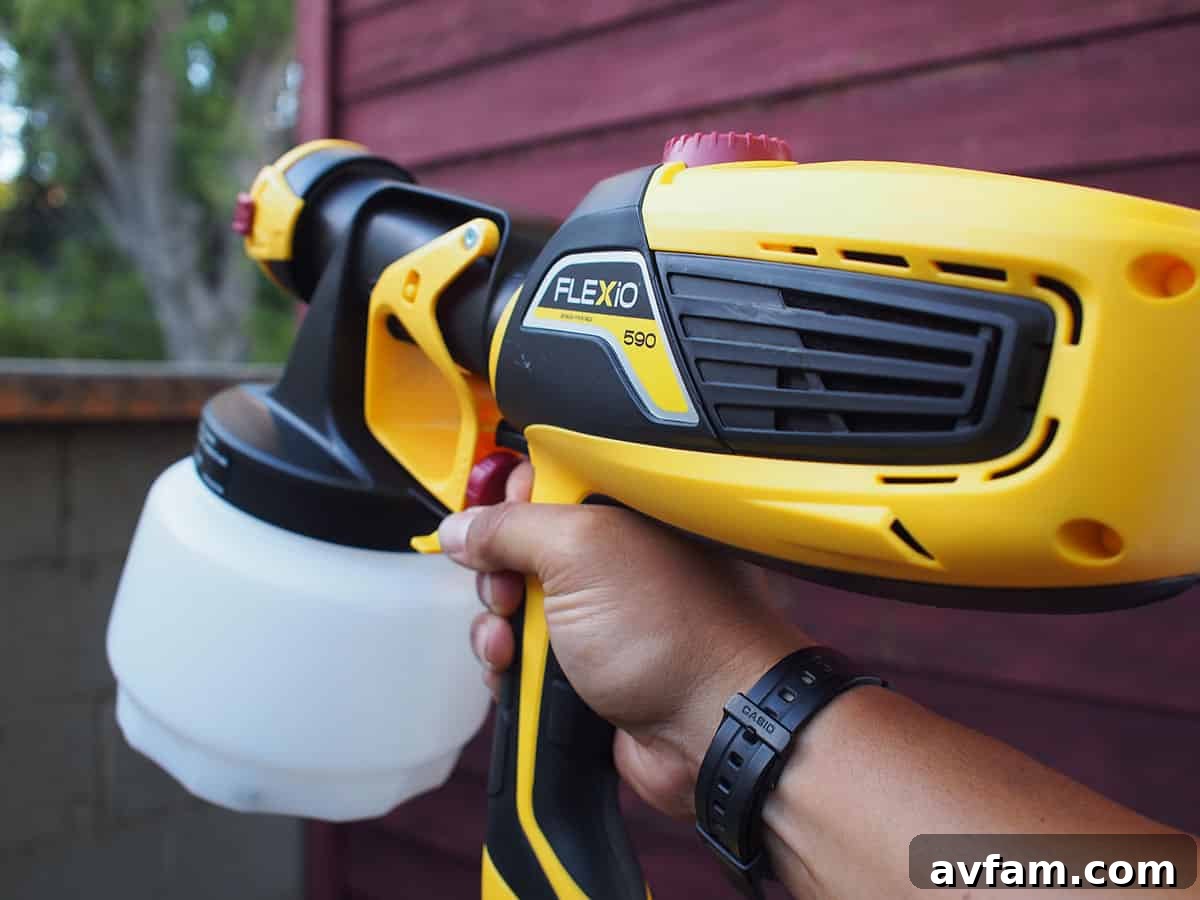
The Wagner FLEXiO 590 is incredibly user-friendly, even for those new to paint sprayers. It’s designed to simplify the painting process, offering robust performance in a compact, hand-held unit. Its versatility extends to both indoor and outdoor applications, making it suitable for a diverse range of projects, from furniture to entire exterior walls.
- Ease of Operation: The sprayer features an intuitive design. There’s a clearly marked knob on top that allows for easy adjustment of paint flow and spray pattern. These settings are crucial for adapting to different project types and paint consistencies.
- Practice Makes Perfect: Wagner thoughtfully includes a practice template and comprehensive instructions with the FLEXiO 590. We highly recommend using this template on a scrap piece of cardboard or wood before tackling your actual project. This allows you to get a feel for the sprayer’s weight, balance, and how adjustments affect the spray pattern, helping you build confidence.
- Proper Technique: Achieving an even and professional finish hinges on proper technique.
- Distance: Always keep the sprayer at a consistent distance (typically 6-10 inches) from the paint surface.
- Motion: Use a smooth, consistent arm motion, keeping the sprayer aligned with the surface and spraying directly at it. Avoid tilting the sprayer, which can lead to uneven coverage.
- Overlap: Overlap each pass by about 50% to ensure full coverage and prevent streaking.
- Trigger Control: Engage the trigger before starting your pass and release it after finishing, off the painting surface, to prevent paint buildup at the start and end of each stroke.
- Dual Nozzles for Versatility: The FLEXiO 590 comes equipped with two distinct nozzles. One is designed for general painting, ideal for covering large surfaces quickly, which was our primary choice for the shed. The other is a detail nozzle, perfect for fine finishing work, smaller projects, or intricate areas that require more precision.
- Lightweight and Quiet Operation: One of the stand-out features of this unit is its remarkably quiet operation and surprisingly light weight. Unlike larger, bulkier sprayers that can cause significant arm fatigue after extended use, the FLEXiO 590 remained comfortable to handle throughout our entire project, allowing us to work efficiently without discomfort.
Step 4: The Stunning Results
We were absolutely thrilled with the transformation. In under two hours, our faded, tired studio was reborn with a vibrant, even coat of firehouse red. The new color drastically improved its appearance, making it a focal point in our outdoor space. The speed of the Wagner FLEXiO 590 meant that the actual painting process was the quickest part of the entire project, with prep work and cleanup taking considerably longer.
Post-Painting Care: Essential Cleanup for Your Paint Sprayer
Just as crucial as preparation is the post-painting cleanup. Proper cleaning of your paint sprayer is paramount for its longevity and ensuring it performs optimally for future projects. Any residual paint left to harden within the unit can clog nozzles, impede pump function, and ultimately render the sprayer unusable. Here’s a detailed guide to cleaning your Wagner FLEXiO 590:
- Empty Remaining Paint: First, remove the paint cup and pour any unused paint back into its original can.
- Initial Rinse: Fill the paint cup with warm soapy water (for latex paint) or mineral spirits/appropriate solvent (for oil-based paints/stains). Reattach the cup and spray the cleaning solution into a waste bucket or onto an old rag until the spray runs clear.
- Disassemble Components: Carefully disassemble the spray gun, separating the nozzle, air cap, and any other removable parts.
- Thorough Cleaning of Parts:
- Wash all components (paint cup, suction tube, nozzle, air cap, seals) in warm, soapy water using the included cleaning brush. For stubborn paint, a soft bristle brush or a Wagner cleaning kit can be very helpful.
- Pay special attention to the small holes in the nozzle and air cap, ensuring they are free from any paint residue. A thin wire (like a paperclip straightened out) can carefully clear clogged orifices if the brush isn’t enough.
- Clean the Motor Housing: Wipe down the exterior of the motor housing with a damp cloth, ensuring no paint has dried on it. Avoid getting water inside the motor.
- Dry All Parts: Allow all cleaned components to air dry completely or wipe them dry with a lint-free cloth.
- Reassemble and Store: Once thoroughly dry, reassemble the sprayer. Store it safely in its included carry case or a designated clean, dry place to protect it from dust and damage.
By following these cleaning steps carefully, you ensure your Wagner FLEXiO 590 remains in excellent working condition, ready for your next DIY adventure.
Final Thoughts: A Worthwhile Investment for DIY Enthusiasts
The Wagner FLEXiO 590 paint sprayer proved to be an invaluable tool for this project, delivering professional-grade results with remarkable speed and ease. It’s a fantastic investment for anyone who regularly undertakes painting projects, whether indoors or out. Its robust design, user-friendly features, and consistent performance make it a top contender for the best paint sprayer for home use.
If you’re considering refreshing your shed, deck, fence, or any exterior surface, don’t shy away from using a paint sprayer. With a little preparation and proper technique, you’ll be amazed at how quickly and beautifully you can transform your outdoor spaces. We wholeheartedly recommend the Wagner FLEXiO 590 for its efficiency, versatility, and the impressive finish it helps you achieve.
For more detailed product information and a full range of specifications, visit the official Wagner website.