
The holiday season is rapidly approaching, and with it comes the joy of gathering with loved ones. If you’re planning to host family and friends, now is the perfect time to roll up your sleeves and tackle those home improvement projects you’ve been putting off. Imagine the delight on your guests’ faces as they step into a refreshed and beautifully updated home, all thanks to your handiwork. Preparing your space doesn’t have to be overwhelming or break the bank; many impactful transformations can be achieved with a little creativity and a weekend’s worth of effort.
Whether you’re aiming for a complete refresh or just a few strategic updates, we’ve compiled a list of popular, budget-friendly DIY projects that are easy to tackle over a weekend or a few dedicated days. Not only will these projects enhance your home’s appeal, but they’ll also leave you with plenty of extra funds for holiday shopping and festivities.
Transform Your Home: Easy DIY Projects to Impress Guests This Holiday Season
Welcoming guests into a clean, organized, and aesthetically pleasing home is a wonderful feeling. These simple yet effective DIY projects are designed to maximize impact with minimal investment, ensuring your home is guest-ready and radiating warmth this holiday season.
1. Revitalize Your Carpets: A Foundation for Freshness
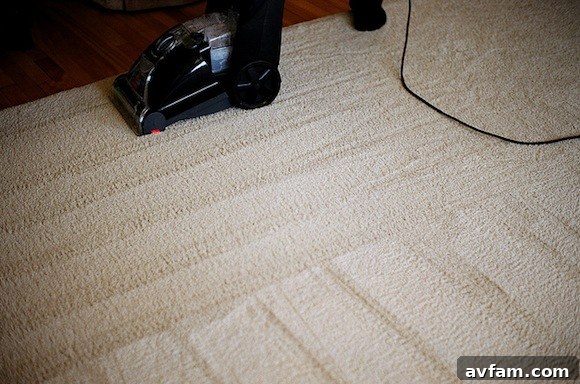
One of the quickest ways to give your home an instant refresh is to address your carpets. Over time, carpets can accumulate dirt, allergens, and odors, making a room feel less inviting. Scheduling a carpet cleaning in the weeks leading up to Thanksgiving is an excellent strategy to ensure a pristine environment for your guests.
Professional vs. DIY Carpet Cleaning
You have two main options for tackling this task: hiring a professional cleaning company or doing it yourself. Professional services offer convenience and often have industrial-grade equipment that can deliver deep cleaning results. However, if you’re working on a tighter budget or enjoy a hands-on approach, renting a steam cleaner from your local hardware or grocery store is a viable and cost-effective alternative.
DIY Carpet Cleaning Steps:
- Pre-Vacuum Thoroughly: Before introducing any moisture, vacuum your carpets extensively to remove loose dirt, dust, and debris. This step is crucial for preventing mudding once the cleaning solution is applied.
- Treat Stains: Identify any prominent stains and pre-treat them with an appropriate carpet stain remover. Allow the solution to sit for the recommended time before proceeding.
- Prepare the Machine: Follow the instructions for your rented steam cleaner carefully. This typically involves filling one reservoir with hot water and the recommended carpet cleaning solution, and ensuring the recovery tank is empty.
- Clean in Sections: Work on small sections at a time, making slow, overlapping passes with the machine. Avoid over-wetting the carpet, as this can lead to longer drying times and potential mold issues.
- Rinse (Optional but Recommended): Some machines allow for a rinse cycle using only hot water, which helps remove any leftover cleaning solution residue, leaving your carpets softer and cleaner.
- Ensure Adequate Drying: Proper drying is key. Open windows, use fans, and avoid walking on the carpets until they are completely dry (usually 6-12 hours). This prevents re-soiling and mildew growth.
A freshly cleaned carpet not only looks and smells better but also contributes to a healthier indoor environment, making your home a more pleasant space for everyone.
2. Refinish Wood Furniture: Breathing New Life into Cherished Pieces
Take a moment to inventory your wooden furniture. Do you have a dining table, coffee table, or a chest of drawers that looks tired, scratched, or simply dated? Refinishing wood furniture is a highly rewarding DIY project that can transform a worn-out piece into a like-new treasure, all for a fraction of the cost of buying new furniture.
Why Refinish?
Refinishing allows you to restore the natural beauty of the wood, cover imperfections, and even change the color to better suit your current decor. It’s an environmentally friendly option that prevents usable items from ending up in landfills.
Tools and Materials You’ll Need:
- Sandpaper (various grits: coarse, medium, fine)
- Wood stripper (if needed for heavy finishes)
- Protective gloves and eyewear
- Tack cloth or lint-free rags
- Wood stain or paint
- Clear protective sealant (polyurethane, lacquer, or varnish)
- Brushes or foam applicators
- Drop cloths
Step-by-Step Furniture Refinishing:
Pick a weekend with pleasant weather so you can take your project outdoors or work in a well-ventilated garage. This minimizes dust and fumes indoors.
- Clean and Inspect: Begin by thoroughly cleaning the furniture piece to remove any dust, grime, or old polish. Inspect it for any loose joints or repairs that might need addressing.
- Strip (if necessary): If the existing finish is thick, peeling, or you want a complete color change, apply a wood stripper following product instructions. Scrape off the softened finish carefully.
- Sand for Smoothness: This is the most critical step. Start with a coarser grit sandpaper (e.g., 80-100 grit) to remove remaining finish and smooth out significant imperfections. Progress to medium (120-150 grit) and then fine (180-220 grit) sandpaper to achieve a silky smooth surface. Always sand in the direction of the wood grain.
- Remove Dust: After sanding, use a tack cloth or a damp (not wet) lint-free rag to remove all sanding dust. Ensure the surface is completely clean and dry before the next step.
- Apply Stain or Paint: If staining, apply a wood conditioner first for even absorption, especially on softwoods. Then, apply your chosen wood stain, wiping off excess as directed. If painting, apply a primer first, especially if changing color drastically or painting over a dark finish. Follow with two thin, even coats of your chosen paint, allowing adequate drying time between coats. This is your chance to experiment with lighter or darker hues to create a truly personalized piece.
- Seal for Protection: Once the stain or paint is completely dry, apply several thin coats of a clear protective sealant. Polyurethane is a popular choice for durability. Sand lightly with very fine sandpaper (e.g., 320-400 grit) between coats for a super smooth finish, wiping away dust before the next application.
The result will be a stunning, “new” piece of furniture that reflects your style and adds character to your home, all while saving you considerable expense.
3. Kitchen Cabinet Facelift: A Budget-Friendly Kitchen Transformation
Speaking of staining or painting furniture, your kitchen cabinets are another prime candidate for a dramatic, yet budget-conscious, transformation. Replacing kitchen cabinets can be one of the most expensive home renovation projects. However, by giving your existing cabinets a fresh coat of paint or stain and updating the hardware, you can achieve a “new kitchen” look for a fraction of the cost.
The Impact of a Cabinet Facelift:
Kitchen cabinets are a dominant feature in any kitchen. A change in their color or finish can instantly brighten a space, make it feel more modern, or introduce a touch of classic elegance. This DIY project significantly impacts the overall aesthetic and feel of your entire kitchen.
Materials and Steps:
- Preparation is Key: Begin by removing all cabinet doors, drawer fronts, and hardware. Label everything as you go to ensure easy reassembly.
- Thorough Cleaning: Kitchen cabinets accumulate grease and grime. Clean all surfaces meticulously with a degreaser solution. Any residual grease will prevent paint or stain from adhering properly.
- Sanding for Adhesion: Lightly sand all surfaces (doors, drawer fronts, and cabinet boxes) with fine-grit sandpaper (180-220 grit). This provides a “tooth” for the new finish to grip onto. Wipe away all sanding dust.
- Prime (if painting): If you’re painting your cabinets, apply one or two coats of a high-quality primer. Primer helps block stains, improves paint adhesion, and ensures a more even final color, especially when going from dark to light or vice versa.
- Paint or Stain Application:
- For Painting: Apply two to three thin, even coats of durable cabinet paint, using a high-quality brush for corners and edges, and a foam roller for smooth, streak-free surfaces. Allow ample drying time between coats and light-sand between coats for optimal smoothness.
- For Staining: Apply wood conditioner if staining bare wood, then apply your chosen stain, wiping off excess. Follow with several coats of a clear protective sealant.
- New Hardware: This small detail makes a huge difference. Replace old knobs and pulls with new ones that complement your chosen cabinet color and kitchen style. This step alone can instantly modernize the look.
- Reassembly: Once all components are completely dry and cured, reattach the doors, drawer fronts, and hardware.
A cabinet facelift can truly transform your kitchen, making it a more inviting and stylish hub for holiday entertaining.
4. Tackle the Odd Jobs: Small Changes, Big Impact
Every home has a list of small, lingering tasks that seem to accumulate over time. Maybe it’s a stack of beautiful artwork waiting to be hung, shelves that need assembling and displaying, a room yearning for decluttering, or a pantry crying out for organization. Now is the perfect time to address these “odd jobs.”
The Power of Incremental Improvements:
It’s amazing how much difference a few small changes can make. A bare wall transformed into a gallery, a cluttered corner turned into a functional space, or an organized linen closet can dramatically improve the flow and aesthetics of your home. Nothing beats the satisfaction of expending a bit of time and effort to make your home look better and feel more inviting.
How to Approach Your Odd Jobs List:
- Create a Master List: Walk through each room of your home and jot down every small task you’ve been meaning to do. Be specific (e.g., “hang three pictures in the living room,” “organize spice rack,” “assemble new bookshelf”).
- Prioritize: Identify which tasks will have the biggest impact, especially in areas where guests will spend time.
- Schedule Your Time: Instead of feeling overwhelmed by the entire list, plan to tackle one or two small projects each week leading up to the holidays. Dedicate a specific block of time – even just an hour or two – to make steady progress.
- Gather Tools: Before starting, make sure you have all the necessary tools and supplies for each task (hammer, nails, drill, level, storage bins, labels, etc.).
Completing these seemingly minor tasks will not only make your home more functional and aesthetically pleasing but will also provide a huge sense of accomplishment, relieving that underlying stress of an unfinished to-do list.
5. Refresh a Room with a Coat of Paint: Instant Ambiance
If you’re looking for one of the most dramatic and cost-effective ways to change the entire feel of a room, a fresh coat of paint is your answer. Paint has an incredible power to transform spaces, making them feel brighter, cozier, larger, or more sophisticated.
Choosing Your Colors:
Consider the mood you want to create. Light, neutral colors can make a room feel more spacious and serene, while deeper, richer tones can add warmth and intimacy. Don’t be afraid to experiment with accent walls to introduce a pop of color without committing to an entire room.
Painting Tips for a Professional Finish:
- Preparation is Paramount: Clear the room, cover furniture with drop cloths, tape off trim and baseboards with painter’s tape, and patch any holes or imperfections in the walls. Sand patched areas smooth.
- Clean Walls: Wipe down walls to remove dust and grime, ensuring a clean surface for paint adhesion.
- Use Primer: If you’re painting over a dark color with a lighter one, or if your walls have never been painted, use a good quality primer. It saves paint and ensures an even finish.
- Two Thin Coats are Better Than One Thick: Apply paint in thin, even coats, allowing sufficient drying time between each. This prevents drips and provides a more durable, professional-looking finish.
- Cut In Properly: Use an angled brush to “cut in” along edges, trim, and ceilings before rolling the main walls.
A freshly painted room will not only look stunning but will also smell clean and new, providing a truly welcoming atmosphere for your holiday guests.
6. Update Lighting and Hardware: Small Details, Big Difference
Sometimes, the biggest impact comes from the smallest details. Updating light fixtures, cabinet pulls (as mentioned earlier), door handles, or even switch plates can dramatically modernize and elevate the look of a room without requiring extensive renovation.
Why Update Hardware and Lighting?
Outdated fixtures can really date a home. Swapping out old, tarnished brass fixtures for modern brushed nickel, matte black, or classic bronze can instantly change the character of a space. Similarly, a stylish new ceiling light or sconce can become a focal point, improving both aesthetics and illumination.
Quick Update Ideas:
- Light Fixtures: Replace an old ceiling fan with a sleek new fixture, or swap out a builder-grade vanity light in the bathroom for something more elegant. Ensure you turn off the power at the breaker box before beginning any electrical work.
- Door Handles: Changing all interior door handles to a cohesive, modern style can subtly unify your home’s aesthetic.
- Switch Plates and Outlet Covers: These small, often overlooked details can make a big difference when updated to a cleaner, more contemporary design.
These minor changes are quick, relatively inexpensive, and yield impressive results, making your home feel more polished and thoughtfully designed for your holiday visitors.
Get Ready to Impress This Holiday Season
There you have it – a comprehensive list of actionable, budget-friendly DIY projects to get your home sparkling and ready for the holiday season. From deep cleaning carpets to transforming furniture and cabinets, each project offers a unique way to enhance your living space and create a welcoming environment for your cherished guests. By tackling these tasks now, you’ll not only enjoy a beautiful home but also the immense satisfaction of knowing you did it yourself.
So, what’s on your to-do list before the holidays? Start planning, get inspired, and make your home shine!
Photo: Flickr.com/flossyflotsam