
The Ultimate Guide to Winterizing Your Lawnmower: Prepare for a Flawless Spring Start
As the vibrant greens of summer fade and autumn leaves begin their descent, many homeowners start thinking about tucking away their garden tools for the colder months. Among these essential pieces of equipment, the lawnmower requires specific attention before its seasonal hibernation. Neglecting to properly winterize your lawnmower can lead to frustrating issues come springtime, including hard starts, engine problems, and costly repairs. By dedicating a little time now, you can ensure your machine remains in prime condition, ready to tackle the first cut of spring with robust efficiency and unwavering reliability.
Proper lawnmower winterization is far more than simply parking your mower in the shed. It’s about proactive, preventative maintenance that significantly extends the lifespan of your machine, saves you money on professional servicing, and guarantees a smooth, hassle-free restart when the warmer temperatures return. This comprehensive guide will walk you through the essential steps, ensuring your lawnmower is not just stored, but meticulously prepared for its period of dormancy, protecting your investment for years to come.
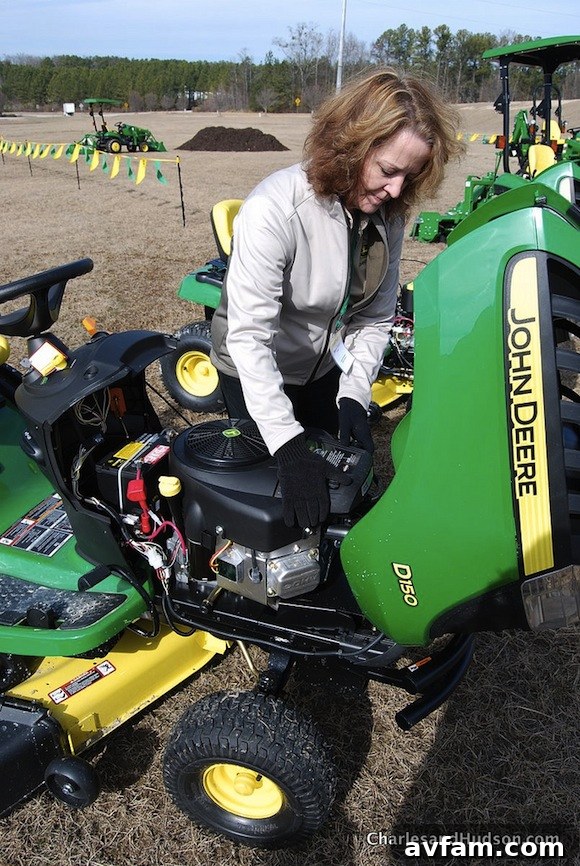
Key Steps for Lawnmower Winterization and Seasonal Storage
Industry experts, including Bob Markovich, Home and Yard editor at Consumer Reports, consistently emphasize the critical importance of a thorough winterization process. Follow these detailed steps to safeguard your equipment and ensure peak performance when spring arrives:
1. Address the Fuel System: Empty or Stabilize the Gas
This step is arguably one of the most crucial in preparing your lawnmower for winter storage. Gasoline, particularly modern ethanol-blended fuels, can degrade over time, forming gummy deposits that lead to clogged carburetors and fuel lines. Stale fuel is a primary culprit behind mowers that are hard to start or fail to start altogether in the spring. You have two primary approaches to manage the fuel:
- Run it Dry: The most straightforward method is to run the mower until it completely runs out of gas. This ensures there’s no fuel left in the tank or carburetor that could cause problems. After the engine sputters and dies, attempt to start it a few more times to clear any residual fuel from the lines.
- Use a Fuel Stabilizer: If you prefer to leave gas in the tank, add a high-quality fuel stabilizer according to the product’s instructions. After adding the stabilizer, start the engine and let it run for 10-15 minutes. This allows the treated fuel to circulate thoroughly throughout the entire fuel system, including the carburetor, protecting all components. Fuel stabilizers prevent oxidation and ethanol separation, effectively keeping the fuel fresh for up to 12 months. This option is particularly beneficial if you have a full tank, as it also helps reduce the risk of condensation forming inside an empty tank during storage.
Whichever method you choose, ensuring your fuel system is properly managed before winter will save you significant headaches, potential repairs, and the frustration of a non-starting mower in the spring.
2. Thoroughly Clean the Machine
Once the fuel system is addressed, a comprehensive cleaning is essential. Years of accumulated grass clippings, dirt, and debris can lead to rust, corrosion, and impede proper function. Before beginning any cleaning, always disconnect the spark plug wire to prevent accidental starting, a critical safety measure.
- Undercarriage (Deck) Cleaning: Tip the mower onto its side (ensuring the air filter and carburetor are facing upwards to prevent oil and fuel leaks) and scrape away caked-on grass and mud from the underside of the deck. A putty knife, wire brush, or even a pressure washer (used carefully, avoiding direct spray on engine components and bearings) can be highly effective. Removing this buildup not only prevents rust and corrosion but also ensures the blade spins freely and efficiently.
- Exterior Cleaning: Hose down the entire exterior of the mower, paying close attention to the engine housing, cooling fins, and wheels. Remove any leaves, dirt, or grass that might obstruct airflow, which is crucial for engine cooling. A stiff brush and a mild, environmentally-friendly detergent can help remove stubborn grime.
- Air Filter Inspection: Remove and inspect the air filter. If it’s a paper filter and appears heavily soiled or damaged, replace it immediately. Foam filters can often be washed with soapy water, thoroughly dried, and then lightly oiled (if recommended by the manufacturer) before reinstallation. A clean air filter is vital for efficient engine performance and fuel economy.
A clean mower not only looks better but also operates more efficiently, is less prone to corrosion, and avoids mechanical issues during its long period of storage.
3. Sharpen and Balance the Mower Blade
A sharp blade is fundamental for maintaining a healthy, vibrant lawn. A dull blade tears grass rather than cutting it cleanly, leading to ragged ends, brown tips, and making your lawn more susceptible to disease and pest infestation. Before storing your mower for the season, it’s the perfect time to address the blade’s condition.
- Safety First: Always wear heavy-duty work gloves when handling the blade. Reiterate the importance of disconnecting the spark plug wire.
- Blade Removal: Carefully remove the blade using a wrench to loosen the bolt that holds it in place. You might need to brace the blade with a block of wood to prevent it from turning while you loosen the bolt.
- Sharpening: You can sharpen the blade yourself using a metal file, an angle grinder, or a specialized blade sharpener, ensuring you maintain the original cutting angle. Alternatively, for the best results and convenience, take the blade to a professional for expert sharpening.
- Balancing: After sharpening, it’s absolutely crucial to balance the blade. An unbalanced blade causes excessive vibration, which can prematurely wear down engine bearings, crankshafts, and other vital components. Use a blade balancer tool; if one side is heavier, carefully remove a small amount of metal from the underside of the heavy side until it balances perfectly level.
- Reinstallation: Reinstall the sharpened and balanced blade, ensuring the cutting edge faces the correct direction for proper lift and cut. Tighten the bolt securely to the manufacturer’s torque specifications.
Starting spring with a perfectly sharp and balanced blade will give your lawn the best possible start to the growing season, promoting healthier grass and a cleaner cut.
4. Change the Oil and Replace the Oil Filter (If Applicable)
Just like your car, your lawnmower’s engine relies on clean oil for optimal lubrication and protection. During operation, engine oil accumulates microscopic metal particles, carbon deposits, and other contaminants, gradually losing its protective qualities. Changing the oil before winter storage is highly recommended, as old oil can be corrosive.
- Warm the Engine: Run the mower for a few minutes (about 5-10) to warm up the oil. Warm oil is less viscous, drains more easily, and carries more contaminants out with it, ensuring a more thorough drain.
- Drain the Oil: Disconnect the spark plug wire. Place an appropriate drain pan underneath the oil drain plug (usually located at the bottom of the engine or on the side, depending on your model). Remove the plug and allow all the old oil to drain completely. Once drained, reinstall the drain plug securely.
- Replace Oil Filter: If your mower has an oil filter, now is the ideal time to replace it. Follow your manufacturer’s instructions for removal and installation, typically involving unscrewing the old filter and hand-tightening a new one, ensuring the rubber gasket is lightly oiled for a good seal.
- Add New Oil: Consult your owner’s manual for the correct type, viscosity, and amount of oil specific to your mower model. Slowly pour in the new oil, checking the dipstick frequently to avoid overfilling, which can cause engine damage.
Fresh oil provides superior protection against internal engine corrosion during the long storage period and ensures proper lubrication from the very first start in spring, contributing to the engine’s longevity.
5. Replace Your Spark Plugs
A healthy spark plug is absolutely essential for reliable ignition, efficient fuel combustion, and smooth engine operation. Over time, spark plugs can become fouled with carbon deposits, develop excessive electrode wear, or even crack, leading to misfires, reduced fuel efficiency, and frustrating starting difficulties. Most lawnmower spark plugs have a recommended lifespan of approximately 100 hours of operation, making annual replacement a prudent preventative maintenance habit.
- Locate and Remove: Disconnect the spark plug wire from the old plug. Use a spark plug wrench (or deep socket) to carefully remove the old plug, turning counter-clockwise.
- Inspect the Old Plug: Take a moment to examine the old plug; its condition can provide valuable clues about your engine’s health (e.g., black, sooty deposits might indicate a rich fuel mixture, while light tan deposits are normal).
- Gap the New Plug: Before installing the new plug, check its electrode gap using a spark plug gapping tool. Refer to your owner’s manual for the precise gap specification for your mower model. Adjust if necessary by gently bending the outer electrode.
- Install the New Plug: Hand-thread the new spark plug into the engine to prevent cross-threading, which can severely damage the engine block. Once it’s finger-tight, use the spark plug wrench to tighten it an additional 1/8 to 1/4 turn, or as specified by the manufacturer (do not overtighten). Reconnect the spark plug wire securely.
A fresh, properly gapped spark plug guarantees strong ignition, ensuring your mower fires up reliably and runs smoothly and efficiently when spring arrives, avoiding frustrating starting issues.
Additional Winterization Tips for Comprehensive Care
6. Tend to the Battery (for Electric Start or Riding Mowers)
If your mower is equipped with an electric start mechanism or is a riding mower, proper battery care is paramount. Cold temperatures can significantly reduce battery life and capacity, potentially leaving you with a dead battery come spring.
- Remove the Battery: Disconnect the battery terminals (always disconnect the negative terminal first, then the positive) and carefully remove the battery from the mower.
- Clean and Inspect: Clean any corrosion from the battery terminals and cables with a wire brush and a mixture of baking soda and water. Inspect the battery casing for any cracks, leaks, or swelling.
- Store Properly: Store the battery in a cool, dry place, ideally above freezing temperatures. Avoid storing it directly on concrete floors, which, contrary to popular belief, doesn’t drain a modern battery but can accelerate temperature changes.
- Trickle Charge: Connect the battery to a trickle charger or a battery maintainer. These intelligent devices deliver a low, continuous charge to keep the battery at its optimal level without overcharging, ensuring it’s fully charged and ready for spring without any loss of capacity.
This simple but vital step prevents battery drain, extends its overall lifespan, and saves you the cost and inconvenience of replacing a dead battery.
7. Lubricate Moving Parts
Winter is an excellent time to lubricate all accessible moving parts on your mower. This critical step reduces friction, prevents rust and corrosion during storage, and ensures smooth, unimpeded operation when the machine is put back to work.
- Grease Fittings: Apply marine-grade grease to any grease fittings (often called zerk fittings) using a grease gun until you see a small amount of new grease appear.
- Cables and Pivots: Lightly oil control cables, pivot points, wheel axles, height adjustment mechanisms, and any other linkages that move. Use a silicone spray lubricant or a light machine oil (like 3-in-1 oil). This prevents them from seizing up over the winter.
Proper lubrication protects components from seizing up, minimizes wear and tear, and contributes significantly to the mower’s overall longevity and ease of use.
8. Inspect Belts and Cables
Take a few moments to thoroughly inspect all drive belts and control cables for any signs of wear, fraying, cracks, excessive stretching, or damage. Belts can become brittle in cold weather, and cables can fray. Replace any that appear worn or damaged now. Checking these components proactively can prevent unexpected breakdowns, costly repairs, and frustrating delays during the peak mowing season.
9. Prepare the Storage Location
Finally, carefully consider where your lawnmower will spend the winter months. Store it in a clean, dry, and protected area such as a garage, garden shed, or basement. It is crucial to avoid storing it outdoors or in damp, unventilated conditions, as this can lead to rapid rust formation, corrosion of electrical components, and general deterioration of the machine. Covering it with a breathable tarp or a purpose-made mower cover can further protect it from dust, moisture, and accidental damage.
Don’t Delay: Prepare Your Mower Now for a Pristine Spring Lawn!
Whether your mower is already tucked away or you’re holding out hope for one last turn around the yard before the temperatures plummet, remember that proactive maintenance pays significant dividends. Following these comprehensive winterization steps might seem like an extra chore now, but it’s a wise investment in your equipment’s longevity, reliability, and your ultimate peace of mind. Come spring, you’ll be immensely grateful you took the time to properly prepare your lawnmower, ensuring it springs back to life effortlessly, ready to keep your lawn pristine and beautiful from the very first cut.
Photo: Lawnmower Winterization Steps