

Transforming Outdoor Wood Decor: A Guide to Staining and Weatherproofing
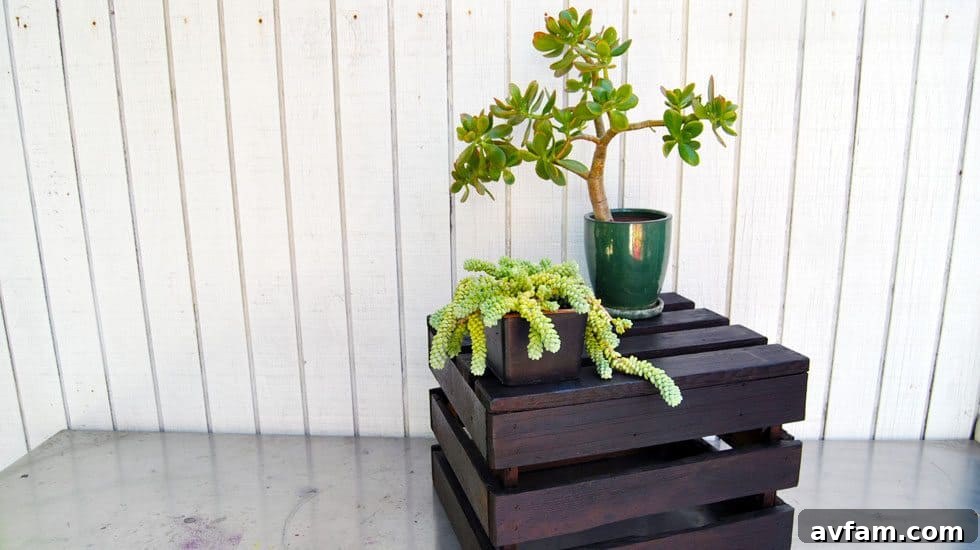
Outdoor living spaces are increasingly becoming extensions of our homes, filled with personal touches, vibrant flora, and unique decorative elements. Among these, vintage-style wood pieces, like the charming milk crates we use, add a rustic and timeless appeal. They serve as perfect platforms for showcasing lush succulents, vibrant flowers, and other garden treasures, effortlessly enhancing the ambiance of any yard or patio. However, the inherent beauty of natural wood, particularly when left untreated and exposed to the relentless elements, can quickly diminish. This was precisely the challenge we faced with our beloved wood milk crates.
Originally, these crates arrived in their raw, untreated state. While beautiful at first, the unprotected wood quickly fell victim to the harsh realities of outdoor exposure. The intense sun began to bleach their natural color, leading to noticeable fading, while constant changes in weather, from scorching heat to sudden downpours, caused the wood to dry out and splinter. What started as charming display pieces were rapidly deteriorating, threatening their longevity and aesthetic appeal. We realized that proactive wood protection was not just an option but a necessity to preserve their character and functionality for many seasons to come.
Why Outdoor Wood Needs Robust Protection: Understanding the Elements
Wood, in its natural state, is incredibly vulnerable to outdoor elements. Understanding these threats is the first step in effective protection:
- UV Radiation: The sun’s ultraviolet (UV) rays are a primary culprit in wood degradation. They break down lignin, the natural glue that binds wood fibers, leading to a grayish, faded appearance and weakening the wood’s surface. This process is commonly known as photodegradation.
- Moisture (Rain, Humidity, Snow): Water is wood’s worst enemy. It penetrates the wood fibers, causing them to swell and then shrink as they dry. This continuous cycle leads to cracking, warping, and checking. Persistent moisture creates an ideal environment for mold, mildew, and fungi, which not only discolor the wood but also cause rot, compromising its structural integrity.
- Temperature Fluctuations: Extreme shifts from hot to cold can stress wood, contributing to cracking and splitting as the material expands and contracts.
- Pests: While not directly combated by stain, healthy, protected wood is less susceptible to pest infestations that target weakened or rotting timber.
Without adequate protection, outdoor wood projects, no matter how well-crafted, are destined for a short lifespan and a prematurely weathered look. This is why investing in a high-quality stain and sealant is paramount for any exterior wood application, from garden decor and patio furniture to decks and fences.
Choosing the Right Solution: Olympic Elite Advanced Stain+Sealant
Our goal was twofold: to significantly extend the life of our wood milk crates and to refresh their appearance with a richer, darker tone. After researching various options, we carefully selected Olympic Elite Advanced Stain+Sealant. This product stood out for several key reasons that aligned perfectly with our project requirements.
Firstly, the color selection was crucial. We envisioned a more sophisticated and grounded aesthetic for our display pieces, and the rich “Mahogany” shade offered by Olympic Elite was exactly what we desired. It promised to deepen the wood’s natural grain while providing a vibrant, lasting hue that would complement our garden’s greenery beautifully. Beyond aesthetics, the technical specifications of the product were equally important.
Olympic Elite Advanced Stain+Sealant is an all-in-one solution, designed to both color and protect. Its advanced formulation delivers comprehensive waterproofing, creating a robust barrier against moisture penetration, which is essential for preventing rot, swelling, and fungal growth. Furthermore, it boasts superior UV resistance, actively shielding the wood from the sun’s damaging rays, thereby preventing the fading and graying that had plagued our untreated crates. This combination of deep color penetration and formidable environmental protection made it the ideal choice for ensuring our display pieces would remain beautiful and intact for many years.
Our DIY Wood Staining Project: A Step-by-Step Approach
Embarking on a DIY wood staining project can be incredibly rewarding, offering both creative satisfaction and significant cost savings. While our project focused on milk crates, the principles are universally applicable to most outdoor wood items. Here’s a detailed look at the process, emphasizing preparation and proper application for optimal results.
1. Preparation is Key: The Foundation of a Lasting Finish
- Cleaning: Before applying any stain or sealant, the wood must be immaculately clean. We began by thoroughly cleaning our milk crates to remove any accumulated dirt, dust, cobwebs, and surface grime. A stiff brush and a mild detergent solution can be effective for this. For heavily soiled or mildewed wood, a dedicated wood cleaner might be necessary.
- Sanding (If Necessary): Our crates had already started to splinter, making sanding an essential step. Using sandpaper (starting with a coarser grit like 80-100 for rough areas and finishing with 120-150 grit for smoothness), we meticulously sanded down all surfaces. Sanding not only smooths out imperfections and removes loose fibers but also opens up the wood grain, allowing the stain to penetrate more evenly and deeply. Always sand with the grain of the wood to avoid unsightly cross-grain scratches.
- Dust Removal: After sanding, it’s critical to remove all sanding dust. We used a shop vacuum followed by a tack cloth to ensure a completely dust-free surface. Any remaining dust can compromise stain adhesion and result in a splotchy finish.
- Protecting Your Workspace: Lay down drop cloths or old newspapers to protect your work surface from spills and drips. If working indoors, ensure adequate ventilation.
- Safety First: Always wear appropriate personal protective equipment (PPE). For staining, this includes chemical-resistant gloves to protect your hands, safety glasses to shield your eyes from splashes, and a respirator or mask to avoid inhaling fumes, especially in enclosed spaces.
2. Application: Achieving a Flawless Finish
- Stir, Don’t Shake: Before opening the can, gently stir the stain thoroughly with a stir stick. Shaking can introduce air bubbles, which can transfer to your project. Continue stirring periodically during application to ensure pigments remain evenly distributed.
- Choose Your Tool: For our crates, a high-quality synthetic bristle brush was ideal for reaching all crevices and applying the stain evenly. Rollers can be used for larger, flat surfaces, while staining pads offer a smooth, lint-free application.
- Even Coats, With the Grain: Apply the stain in thin, even coats, always working in the direction of the wood grain. Avoid applying too much product at once, as this can lead to drips, uneven absorption, and a tacky finish. It’s better to apply two thin coats than one thick, heavy coat.
- Wipe Off Excess (If Applicable): Some stains require wiping off excess product after a short penetration time. Always refer to the manufacturer’s instructions for specific guidance. For our Olympic Elite Advanced Stain+Sealant, even coats were key to achieving the desired color depth and protection.
- Multiple Coats: Depending on the desired depth of color and level of protection, multiple coats may be necessary. Allow the first coat to dry completely according to the manufacturer’s recommendations (usually 4-6 hours, but check the label) before applying subsequent coats. Lightly sanding with very fine-grit sandpaper (e.g., 220-grit) between coats can help with adhesion and smoothness, but always clean off the dust thoroughly.
3. Curing and Maintenance: Ensuring Long-Term Durability
Once all coats are applied, allow the stain and sealant to cure fully. While it may feel dry to the touch in hours, complete curing, where the product reaches its maximum hardness and protective qualities, can take several days to a week, or even longer depending on humidity and temperature. During this time, protect the stained items from heavy use and excessive moisture. For ongoing maintenance, periodically inspect your outdoor wood items. When you notice signs of fading or wear, typically every 2-5 years depending on exposure, a light cleaning and reapplication of stain and sealant will help maintain their beauty and protection.
To help you visualize the process and see the transformation firsthand, we captured our entire staining journey. We’ve utilized a GoPro Hero head cam to provide a unique, first-person point-of-view video. This immersive perspective allows you to truly see the intricacies of the application process as if you were doing it yourself. Take a look at the video below:
The Impact: Revitalized Decor and Lasting Beauty
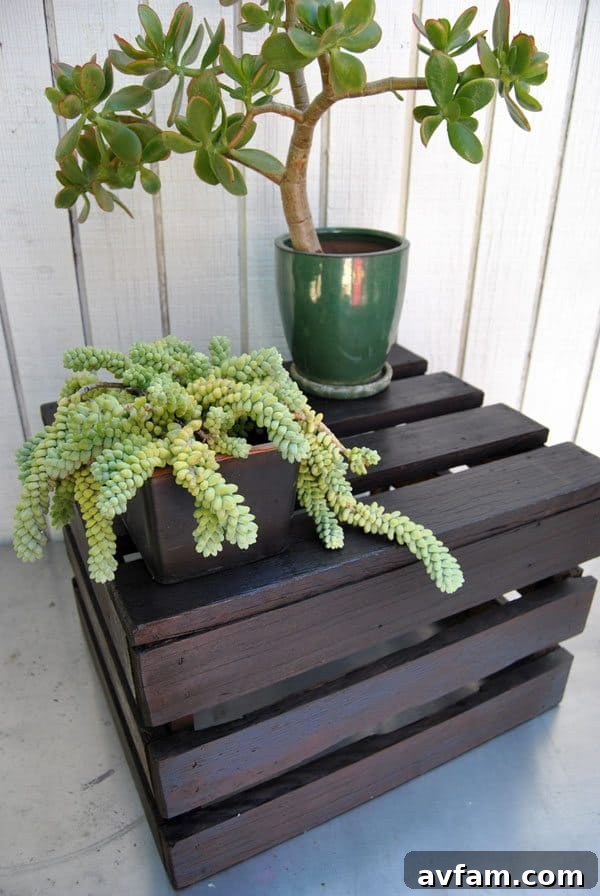
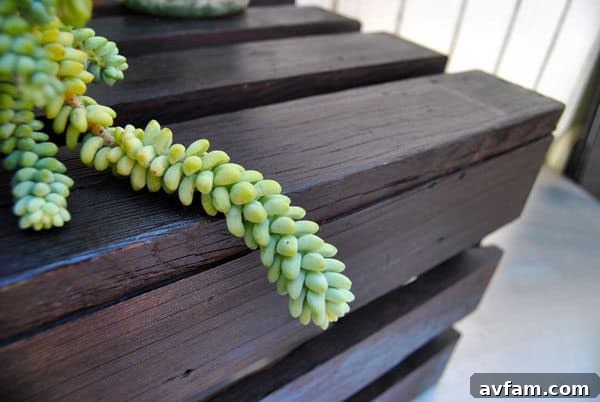
The transformation of our vintage wood milk crates is nothing short of remarkable. The rich Mahogany stain has not only restored their vitality but has also elevated their presence in our garden. They now exude a renewed sense of purpose and durability, standing proudly against the elements rather than succumbing to them. The deep, lustrous finish highlights the natural grain of the wood, adding a sophisticated touch that beautifully complements our vibrant succulents and flowers.
Beyond the immediate visual appeal, the long-term benefits of this project are immense. We now have peace of mind knowing that these cherished display pieces are thoroughly protected against the damaging effects of sun, rain, and temperature fluctuations. This project serves as a powerful reminder that with the right preparation and product, it’s entirely possible to extend the life and enhance the beauty of any outdoor wood item. From simple garden decor like our milk crates to more extensive projects such as decks, fences, or pergolas, the principles of proper wood staining and sealing remain consistent: protect your investment, and enjoy its beauty for years to come.
This initiative not only saved our vintage milk crates from further deterioration but also inspired us to consider other outdoor wood projects that could benefit from similar treatment. It’s a testament to the fact that a little DIY effort, combined with quality materials, can make a significant difference in maintaining and enhancing the beauty of our outdoor living spaces. We encourage you to embark on your own wood protection projects and experience the satisfying results firsthand!
I have been sponsored by PPG to create this video but the thoughts and opinions expressed are my own.