
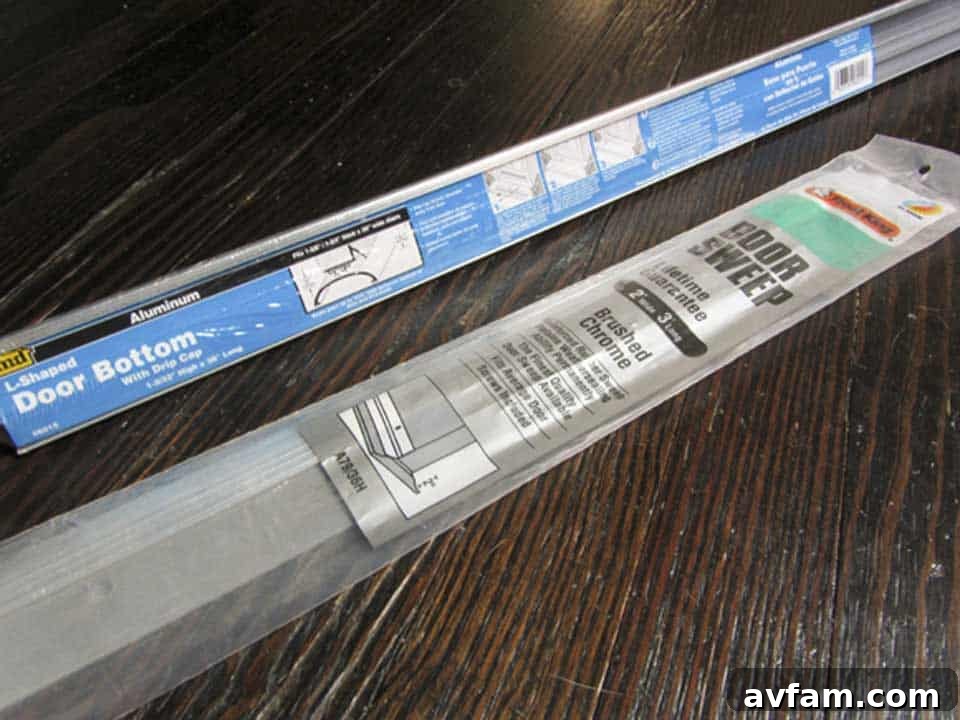
Ultimate Guide to Installing Heavy-Duty Weatherstripping on Metal Exterior Doors
As the vibrant colors of fall fade and the biting chill of winter approaches, ensuring your home is adequately protected from the elements becomes a top priority. One crucial yet often-overlooked aspect of home maintenance is your exterior doors’ weatherstripping. For me, the motivation to tackle this project became undeniable after discovering standing water at the bottom of my basement stairs multiple times during recent heavy rainfalls. It was a stark reminder that this essential barrier, long delayed, needed immediate attention.
This comprehensive guide is designed to empower you with the knowledge and steps required to install heavy-duty weatherstripping on a metal exterior in-swinging door. This simple DIY project can dramatically enhance your home’s comfort, significantly reduce energy costs, and provide robust protection against drafts, moisture, and pests. Prepare to transform a vulnerable entryway into a fortress against the coming cold and wet season.
Why Heavy-Duty Weatherstripping is Essential for Your Home
Upgrading your door’s weatherstripping offers a multitude of benefits that extend far beyond simply keeping the cold out. It’s an investment in your home’s longevity, efficiency, and comfort.
- Superior Energy Efficiency: Gaps around doors are notorious for allowing conditioned air (heated in winter, cooled in summer) to escape. This forces your heating and cooling systems to work harder, leading to higher energy bills. Heavy-duty weatherstripping creates a tight seal, minimizing air leakage and maintaining a more stable indoor temperature, directly translating to significant savings on your utility costs.
- Robust Protection Against Water Damage: Beyond drafts, unsealed doors are vulnerable entry points for rainwater. This can result in costly water damage to flooring, walls, and structural components, and can also lead to hazardous mold and mildew growth. Quality weatherstripping acts as a primary defense, diverting water away and keeping your home’s interior dry and safe.
- Enhanced Indoor Comfort: Eliminate those uncomfortable cold spots and drafts that make rooms feel chilly even when the thermostat is set high. A well-sealed door ensures a more consistent and comfortable living environment throughout your home, allowing you to truly relax and enjoy your space.
- Deters Pests and Insects: Small gaps and cracks around doors are an open invitation for insects and other unwanted critters to enter your home. A proper weatherstrip seal closes off these entry points, helping to keep your home pest-free.
- Reduces Outside Noise: While not its primary function, a tighter door seal can also contribute to a quieter indoor environment by dampening external noises, providing a more peaceful sanctuary from the outside world.
Gathering Your Tools and Materials for the Project
Before embarking on any DIY project, a thorough collection of all necessary tools and materials is paramount. This ensures a smooth, uninterrupted, and ultimately more successful installation. Having everything ready, as I did during my kids’ nap time with the weatherstripping my mom gave me last winter, will make the process much more efficient.
Essential Tools You’ll Need:
- Cordless Drill: Essential for drilling pilot holes and inserting screws quickly. Ensure it’s charged and equipped with appropriate drill bits (slightly smaller than your screws) and screwdriver bits.
- Tape Measure: For precise and accurate measurements of your door and the weatherstripping. Precision is crucial for a perfect fit.
- Hacksaw: Specifically for cutting the metal bracket of the heavy-duty weatherstripping cleanly and efficiently.
- Utility Knife: Used for carefully cutting the vinyl or rubber insert of the weatherstripping. A sharp blade is key for clean cuts.
- Work Gloves: Protect your hands from sharp edges, splinters, and potential injury, especially when handling tools and metal.
- Pencil or Marker: For marking cut lines on the weatherstripping and pilot hole locations on the door.
- Safety Glasses: Always protect your eyes when drilling, cutting, or working with tools.
- A Sturdy Prop or Helper: Exterior metal doors are heavy. A reliable prop (like sturdy wooden blocks) or another person is crucial for safely removing and reinstalling the door.
- Screwdriver (Manual): Useful for final adjustments or in tight spots where the drill might be cumbersome.
Materials You’ll Need:
- Heavy-Duty Weatherstripping Kit: Ensure the kit is specifically designed for exterior doors and compatible with your metal in-swinging door. It typically includes the metal bracket, a vinyl/rubber insert, and mounting screws.
- Wooden Shims or Blocks: These are invaluable for steadying and propping the door to the correct height during reinstallation, helping align the hinges.
- Old Weatherstripping: Be prepared to remove and discard any existing, worn-out weatherstripping.
Step-by-Step Installation Guide for Heavy-Duty Weatherstripping
Follow these detailed instructions carefully to ensure a secure and effective installation, guaranteeing your door offers maximum protection against the elements.
Step 1: Door Removal and Workspace Preparation
The initial phase involves safely detaching your door from its frame and setting up a suitable workspace. This allows for accurate measurements and precise installation.
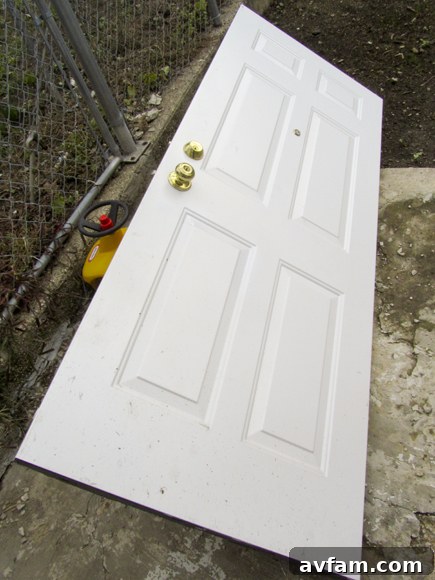
- Safely Remove Your Door: Begin by carefully removing the hinge pins. It’s often easiest to start with the bottom hinge pin and work your way upwards. Given the significant weight of exterior metal doors, it is highly recommended to have a helper for this step to prevent injury and damage to the door or frame. Once all pins are out, gently lift the door off its frame.
- Establish Your Workstation: Transport the removed door to a flat, stable surface where you can work comfortably. Sawhorses or a sturdy workbench are ideal. If working on the ground, ensure the surface is clean and protect the door by laying down blankets or cardboard. This elevated position will significantly ease the subsequent steps.
- Remove Any Existing Weatherstripping: Carefully inspect the bottom edge of your door for old or worn-out weatherstripping. This might be an existing sweep, a compression seal, or an older metal-bracketed strip. Pry it off, cleaning away any residual adhesive, dirt, or debris. A clean, smooth surface is essential for the new weatherstripping to adhere and seal properly. Discard the old material responsibly.
- Measure the Door’s Length Accurately: Using your tape measure, precisely measure the entire length of the door’s bottom edge, from one side to the other. This measurement is critical for determining how much of your new weatherstripping you’ll need. Double-check your measurement to ensure accuracy and prevent costly cutting errors.
Step 2: Customizing Your New Weatherstripping
Most heavy-duty weatherstripping kits come in standard lengths, meaning you’ll likely need to cut yours to achieve a perfect, snug fit for your specific door. This step demands careful attention to detail.
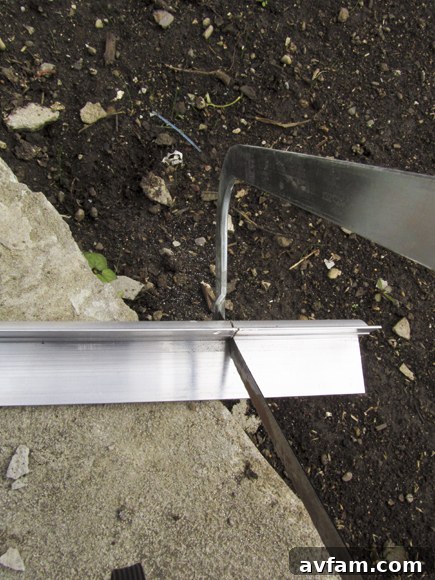
- Mark the Cut Points: Compare your door’s measured length to the length of your new weatherstripping. If the weatherstripping is too long, calculate the excess length. For proper aesthetics and to keep the pre-drilled screw holes symmetrical, divide this excess by two and mark off this amount from both ends of the weatherstripping. Clearly mark these cut lines on both the metal bracket and the flexible vinyl or rubber insert with your pencil or marker.
- Cut the Metal Bracket: Don your safety glasses and work gloves. Using your hacksaw, carefully cut along the marked lines on the metal bracket. Maintain a steady hand and take your time to ensure a clean, straight cut. Ragged edges can affect the fit and the overall appearance of the installation.
- Cut the Vinyl Insert: After the metal bracket is cut, use your utility knife to cut through the vinyl or rubber insert. Score the vinyl several times along the cut line with firm, consistent pressure until you can cleanly separate the pieces. A sharp utility knife blade will ensure a cleaner, more professional-looking edge.
- Optional Test Fit: Before proceeding, you might want to briefly place the cut weatherstripping against the bottom of your door to visually confirm the length and ensure the screw holes will align as expected.
Step 3: Reinstalling Your Door
With your weatherstripping custom-cut, the next step is to carefully rehang your door. This phase requires patience and potentially an extra set of hands to ensure proper alignment and safety.
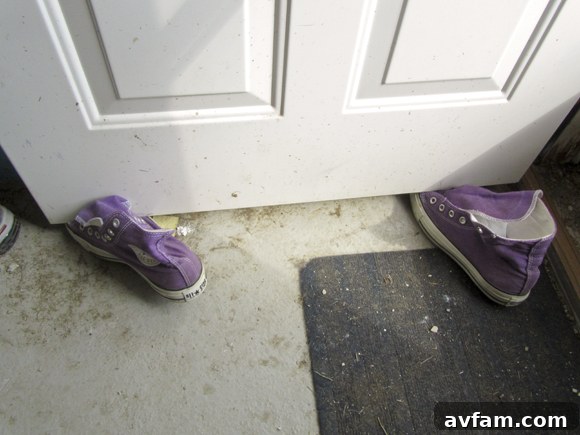
- Align the Hinges: Carefully lift the door and position it back into the door frame, aligning the hinge leaves on the door with those on the frame. This is often the most challenging part, especially if you’re working alone. Use sturdy wooden blocks, shims, or even a stack of books to prop the heavy door to the correct height, allowing you to accurately line up the hinge pin holes. Patience and careful adjustments are key here.
- Reinsert Hinge Pins: Once the hinge holes are perfectly aligned, reinsert the hinge pins. It’s usually easiest to start from the top hinge and work your way down. Gently tap them into place with a hammer if needed, but avoid excessive force, which could damage the hinges or pins.
- Test Door Operation: Before moving on to installing the weatherstripping, open and close the door a few times. Ensure it swings freely, latches securely, and doesn’t bind or rub against the frame. Make any necessary hinge adjustments if the door is sticking or misaligned.
Step 4: Installing the New Weatherstripping
Now that your door is securely back in its frame, it’s time to attach the new weatherstripping and create that vital seal against the elements.
- Position the Weatherstripping: Place the cut weatherstripping along the bottom edge of the door. Ensure the drip cap, if your weatherstripping features one, is oriented to face outwards. This design feature is crucial for shedding water away from the door. The flexible vinyl or rubber seal should make light contact with your door’s threshold when the door is closed, ready to compress and create a tight seal.
- Mark Pilot Hole Locations: Using the pre-drilled holes in the weatherstripping’s metal bracket as a template, use your pencil to mark the exact locations on the bottom edge of your door where you will drill pilot holes. Accuracy here ensures the weatherstripping is mounted straight and securely.
- Drill Pilot Holes: Select a drill bit that is slightly smaller in diameter than the screws provided with your weatherstripping kit. Carefully drill pilot holes at each marked location. Pilot holes are essential for preventing the door’s metal from splitting and making screw insertion much easier, resulting in a more secure and professional-looking installation.
- Secure with Screws: Realign the weatherstripping with the drilled pilot holes. Insert the screws into the holes and begin tightening them with your drill or screwdriver. Start by loosely securing the screws in the center and then work your way towards the ends. Avoid fully tightening any screw immediately, as you may need to make minor adjustments.
- Adjust and Test for Optimal Seal: With the screws loosely in place, open and shut the door several times. Observe the contact the weatherstripping makes with the threshold. It should create a firm, consistent seal along its entire length without making the door difficult to close or causing it to bind. Adjust the weatherstripping slightly up or down, or tighten/loosen screws as needed, until you achieve an optimal seal with no visible gaps when the door is closed. Once satisfied, fully tighten all screws.
Step 5: Final Inspection and Enjoyment of Your Hard Work
You’re almost at the finish line! A final check ensures everything is perfect, and then you can savor the satisfaction of a job well done.
- Perform a Final Seal Check: Close the door and meticulously examine the seal created by the weatherstripping. A useful trick is the “light test”: turn off the lights inside your home during the day (or vice versa at night) and look for any light peeking through around the door’s bottom edge. If you spot any light, minor adjustments to the weatherstripping or door threshold may still be necessary.
- Clean Up Your Workspace: Gather all your tools, dispose of any leftover scraps of weatherstripping, and ensure your work area is clean and tidy.
- Pat Yourself on the Back: You’ve successfully completed a valuable home improvement project! Take a moment to enjoy a well-deserved cup of coffee and relish the quiet satisfaction before your routine (or napping children) resumes. What might initially feel like an hour-long task (or a bit longer if, like me, you’re prone to dog-induced distractions and Pinterest detours) will ultimately translate into a more comfortable, energy-efficient, and protected home.
Additional Tips for a Seamless Installation
- Always Consult Manufacturer Instructions: While this guide is comprehensive, always refer to the specific instructions provided with your weatherstripping kit. There might be unique installation nuances for different brands or types.
- Consider a Helper: Especially when dealing with heavy exterior doors, an extra set of hands makes the removal and reinstallation process significantly safer and less strenuous.
- Patience is a Virtue: Rushing through measurements or cuts can lead to errors. Take your time, double-check your work, and approach each step methodically.
- Inspect Your Threshold: Ensure your door’s threshold is level and in good condition. A damaged or uneven threshold can compromise the effectiveness of even brand-new weatherstripping. Address any issues before installation.
- Seal Other Gaps: While focused on the bottom of the door, also check around the door frame for any other noticeable gaps or cracks. These can be sealed effectively with appropriate caulk or foam weatherstripping tape for comprehensive protection.
Conclusion: A Protected Home is a Happy Home
Installing heavy-duty weatherstripping on your exterior metal door is a straightforward yet profoundly impactful home improvement project. It’s a proactive measure that effectively shields your home from the harsh realities of the impending cold season – eliminating drafts, repelling intrusive water, and significantly reducing your overall energy consumption. By dedicating a small amount of time to this task, you’re not merely sealing a door; you’re making a tangible investment in your home’s comfort, longevity, and overall protection against detrimental elements like mold, rot, and unwanted pest intrusion.
Embrace the profound satisfaction of a job expertly executed and look forward to a warmer, drier, and more energy-efficient home this season and for many years to come. Your diligent efforts today will undeniably yield substantial dividends in enhanced comfort and considerable savings tomorrow.