
DIY Refrigerator Ice Maker Maintenance: A Comprehensive Guide to Cleaning and Troubleshooting
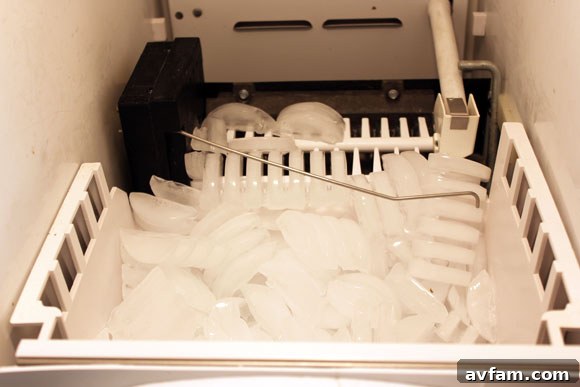
The modern refrigerator ice maker stands as a pinnacle of convenience, offering a steady supply of refreshing ice at your fingertips. It’s a luxury many of us have come to rely on, transforming daily hydration and entertaining. However, like any hardworking appliance, ice makers are not immune to issues. Over time, and particularly if not used regularly, the intricate delivery system can succumb to common problems, hindering its ability to produce or dispense ice effectively. Mineral deposits from tap water, infrequent use leading to stagnant conditions, or simply general wear and tear can cause the mechanism to falter.
While some issues might resolve with a bit of jostling, a more robust solution often involves a thorough cleaning and reassembly. Periodic maintenance, ideally about twice a year, is key to ensuring your ice maker continues to function flawlessly, saving you the hassle and expense of a professional service call. This guide will walk you through the essential steps for DIY ice maker maintenance, inspired by the practical experience of a loyal reader (my dad) who generously shared his insights and photos. His hands-on approach demystifies what might seem like a daunting task, proving that with a little patience, anyone can keep their ice maker in top condition.
Why Regular Ice Maker Maintenance is Crucial
Ignoring your ice maker can lead to a host of problems beyond just a lack of ice. Understanding the common culprits can motivate you to keep up with routine cleaning:
- Mineral Buildup: Hard water leaves behind calcium and magnesium deposits. These can clog water lines, coat ice molds, and obstruct ejector arms, making ice production inefficient or causing the machine to seize.
- Slime and Mold: The moist, dark environment inside an ice maker is an ideal breeding ground for mold, mildew, and slime, especially if water sits stagnant for extended periods. This can lead to unpleasant odors and tastes in your ice.
- Infrequent Usage: If your ice maker isn’t used frequently, the water in its lines and molds can become stale, and ice can freeze into a solid block, preventing proper ejection.
- Mechanical Wear: Accumulations of scale and grime can put extra stress on the moving parts, such as the ejector motor and auger, leading to premature wear and potential breakdowns.
Benefits of a Clean and Well-Maintained Ice Maker
Investing a little time in maintenance offers significant rewards:
- Pristine Ice Quality: Enjoy clear, odor-free, and great-tasting ice for all your beverages.
- Extended Appliance Lifespan: Regular cleaning prevents excessive wear and tear, prolonging the life of your ice maker and refrigerator.
- Avoid Costly Repairs: Proactive maintenance is far cheaper than reactive repairs or replacement of a damaged unit.
- Consistent Performance: A clean ice maker operates efficiently, ensuring a steady supply of ice whenever you need it.
- Improved Hygiene: Eliminate harmful bacteria, mold, and mildew, ensuring your ice is safe and sanitary for consumption.
Tools and Supplies You’ll Need
Before you begin, gather these simple items:
- Phillips head and flathead screwdrivers (the specific types may vary by model)
- A soft-bristled brush or old toothbrush
- Mild dish soap
- Clean cloths or sponges
- Warm water
- A towel for spills
- A bucket or sink for rinsing components
Step-by-Step Guide to Cleaning Your Refrigerator Ice Maker
While refrigerator ice makers can vary slightly in design depending on the manufacturer and model (ours is an older Amana unit, for instance), the fundamental steps for cleaning remain largely the same. The first time might present a slight challenge, especially in understanding how to lift the unit out, but once you discover the specific path or release mechanism, the process becomes quite straightforward. Similarly, reassembling can initially be tricky, which is why we’ve learned the importance of keeping all parts in sequence as you disassemble and clean.
Following these steps can save you a service call and the associated fees, providing a satisfying sense of accomplishment.
Step 1: Prioritize Safety – Disconnect Power
This is the most critical first step. Always unplug your refrigerator from the wall outlet or turn off the circuit breaker that supplies power to the appliance. This prevents any risk of electrical shock during the cleaning process.
Step 2: Empty the Ice Bin
Open your freezer door and remove the ice storage bin. Discard any remaining ice, especially if it appears discolored, smells off, or has been sitting for a long time. This old ice will only melt and create a mess during the cleaning process.
Step 3: Locate and Release the Ice Maker Unit
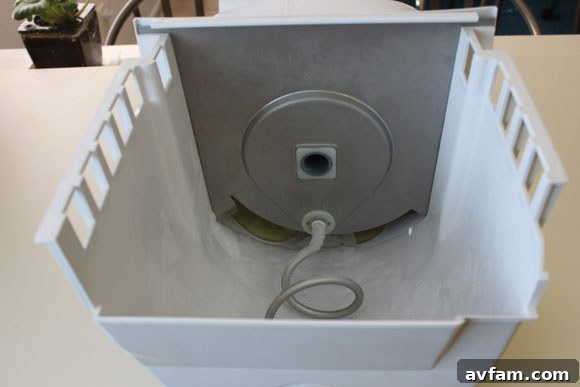
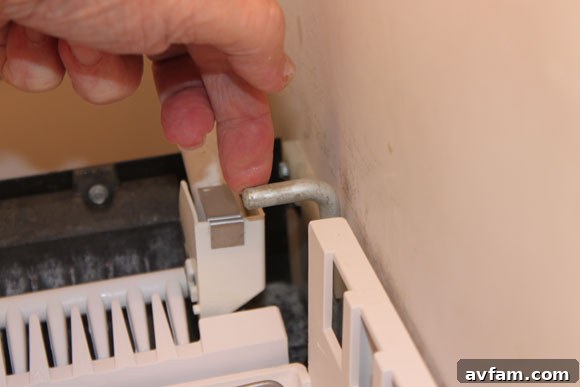
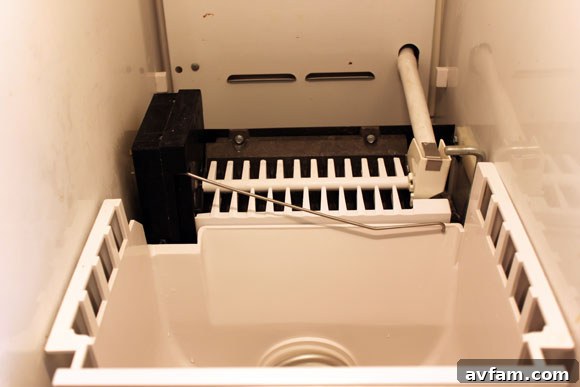
With the ice bin removed, you’ll see the ice maker unit itself mounted inside the freezer compartment. This unit is typically held in place by a combination of screws, clips, or latches. Carefully examine your model to identify these attachment points. For many units, you might need to depress a release tab or unscrew a couple of visible bolts. Take your time and avoid forcing anything, as plastic components can break easily.
Step 4: Disconnect Wiring
Once the unit is loose, you’ll usually find an electrical wiring harness connected to it. Gently unclip this connector. Most connectors have a tab that needs to be pressed or squeezed to release them. Be careful not to pull on the wires themselves, but rather on the connector housing.
Step 5: Remove the Ice Maker Unit
With the wiring disconnected and the fasteners removed, carefully lift and slide the ice maker unit out of its position. As mentioned, the first time can be a bit tricky to find the right angle or “path” to maneuver it out. Observe how it was seated so you can easily put it back later. Place the unit on a clean towel on a countertop.
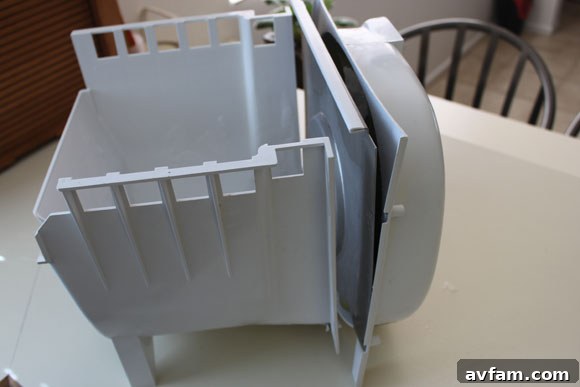
Step 6: Disassemble the Unit
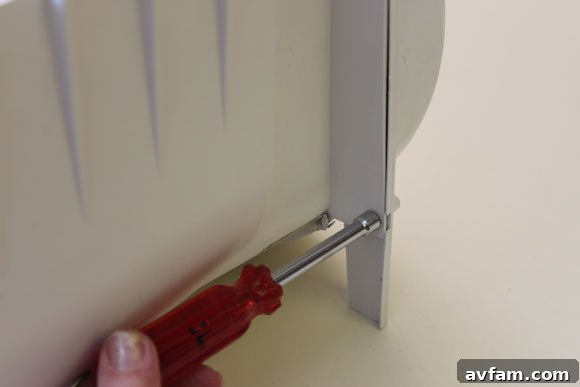
Now that the unit is out, you’ll need to take it apart further for a thorough cleaning. This typically involves removing the ice mold, ejector arms, and any covers. Some units might have a small fan or motor housing that also needs attention. Pay close attention to how each piece comes apart. This is where the advice of keeping everything in sequence becomes invaluable. Lay out the parts in the order you remove them to simplify reassembly.
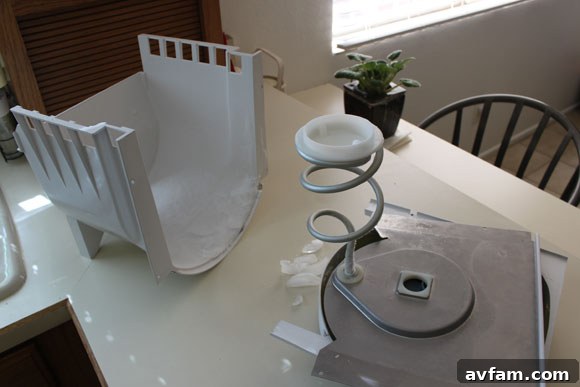
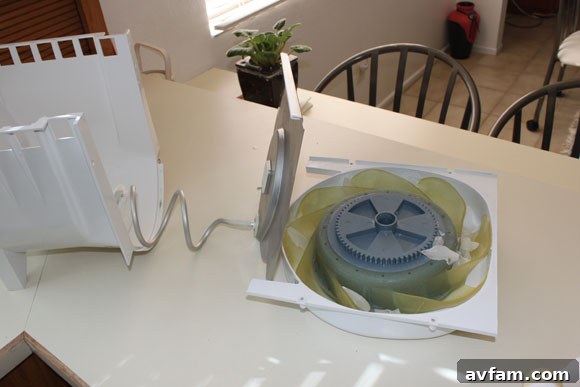
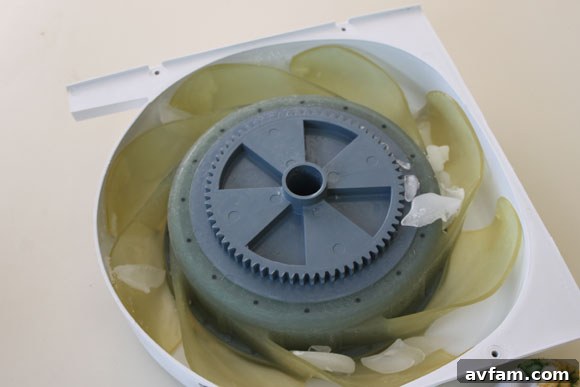
Step 7: Thorough Cleaning
Rinse all removable parts under warm running water to flush away loose ice and debris. For more stubborn grime, mineral deposits, or any visible mold/mildew, use a soft-bristled brush (an old toothbrush works wonders for crevices) and a solution of mild dish soap and warm water. Scrub all surfaces, paying extra attention to the ice mold cavities, the ejector arms, and any areas where water flows or ice accumulates. Don’t forget to thoroughly clean the empty ice bin itself, as it can also harbor bacteria and odors.
Step 8: Rinse and Dry Completely
After scrubbing, rinse all components thoroughly under clean, warm water to remove all traces of soap residue. Any leftover soap can affect the taste of your ice. It’s crucial that all parts are completely dry before reassembly. You can air dry them on a clean towel or gently wipe them down with a lint-free cloth. Ensure there is absolutely no moisture remaining, especially on electrical components.
Step 9: Reassemble the Ice Maker
Now, meticulously reassemble the ice maker unit by following your reverse order of disassembly. This step is where keeping parts in sequence will pay off immensely. Ensure all parts fit snugly, screws are tightened (but not overtightened), and clips are securely fastened. Double-check that all moving parts, like the ejector arms, can move freely.
Step 10: Reinstall and Reconnect
Carefully slide the reassembled ice maker unit back into its position in the freezer. Guide it along the “path” you discovered during removal. Once seated, reconnect the electrical wiring harness, ensuring it clicks firmly into place. Then, secure the unit with any screws, clips, or latches you removed earlier.
Step 11: Restore Power and Test
Plug your refrigerator back into the wall outlet or flip the circuit breaker back on. It will take several hours for the ice maker to refill with water, cool down, and produce its first batch of ice. The first one or two batches might be smaller, misshapen, or have a slightly odd taste due to air or residual water. It’s a good idea to discard these initial batches. Monitor the unit for any leaks or unusual noises during its first cycle.
How Often Should You Clean Your Ice Maker?
The frequency of cleaning largely depends on your usage and water quality. For most households, a thorough cleaning every six months to a year is sufficient. If you live in an area with hard water, use your ice maker frequently, or notice any changes in ice quality (taste, smell, clarity), consider increasing the frequency to quarterly. The recommendation from our loyal reader, “about twice a year or so,” serves as an excellent guideline for typical use.
Troubleshooting Common Ice Maker Problems
Even with regular maintenance, ice makers can sometimes act up. Here are a few common issues and potential solutions:
- No Ice Production:
- Check if the water supply line to the refrigerator is kinked or shut off.
- Ensure the water inlet valve (usually at the back of the fridge) is working.
- Inspect the fill tube for ice blockages.
- A faulty thermostat or ice maker motor could also be the culprit.
- Small or Misshapen Ice Cubes:
- This often indicates low water pressure or a partially clogged water filter.
- Mineral buildup in the ice mold can also restrict ice formation.
- Bad Tasting or Smelling Ice:
- A dirty ice maker unit or ice bin is the most common cause – hence the importance of this guide!
- A spent refrigerator water filter can also contribute.
- Food odors from the freezer can be absorbed by the ice.
- Ice Dispenser Not Working:
- A common issue is ice jamming in the chute or the auger mechanism.
- Ensure the ice maker is producing regular, separate cubes, not a solid block.
- Check for power to the dispenser motor.
Pro Tips for Optimal Ice Maker Performance
- Change Your Water Filter: If your refrigerator has a water filter, replace it every six months as recommended by the manufacturer. This significantly improves water quality and reduces mineral buildup.
- Use Your Ice Maker Regularly: Even if you don’t need ice, periodically dispense a few cups to keep the system moving and prevent water from stagnating.
- Avoid Overfilling the Bin: Don’t manually add extra ice to the bin, as this can interfere with the ice maker’s sensors and ejector mechanism.
- Keep Your Freezer Clean: Regularly wipe down the interior of your freezer to prevent food odors from permeating your ice.
- Monitor for Buildup: Take a quick peek at your ice maker every month or so. If you start to see mineral scale or discoloration, it might be time for a mini-cleaning session before it becomes a major problem.
Conclusion
Maintaining your refrigerator ice maker doesn’t have to be a daunting task. With a little guidance and a willingness to get hands-on, you can keep your appliance running smoothly, producing clean, fresh ice year-round. This DIY approach not only saves you money on service calls but also empowers you with a better understanding of your home appliances. Our loyal reader’s experience, detailed here with accompanying visuals, underscores the simplicity and effectiveness of regular maintenance.
So, the next time you notice your ice maker struggling or just want to ensure it’s operating at its best, remember these steps. We’d love to hear from you: how often do you clear out your ice maker, and what type of refrigerator do you have? Share your experiences and tips in the comments below!