
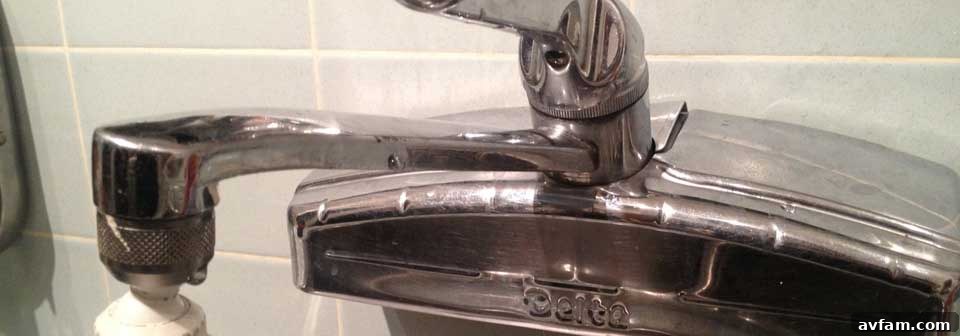
How to Fix a Dripping Delta Faucet: A Step-by-Step Guide for Pre-1976 Models
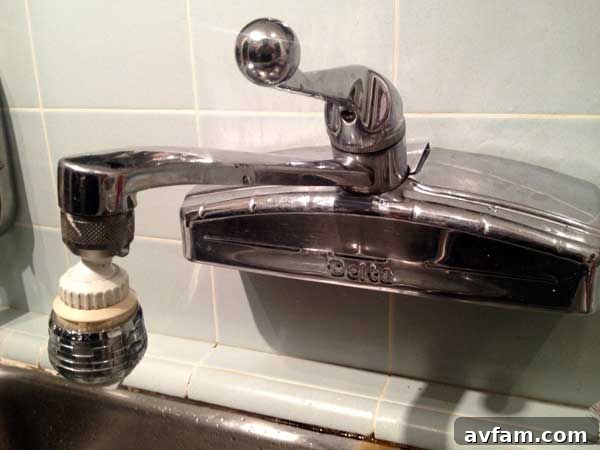
Few things are as persistently annoying and wasteful as a dripping faucet. The ceaseless plink, plink, plink of water hitting the sink can drive anyone to distraction, not to mention the significant amount of water wasted and the potential increase in your utility bills. If you own an older home, particularly one built in the 1950s or earlier, you might be dealing with a vintage Delta faucet that has finally decided to leak. Fortunately, many older Delta faucets, especially those manufactured before 1976, are surprisingly easy to repair with readily available parts. This comprehensive guide will walk you through the process of replacing the seats and springs in your wall-mounted Delta kitchen faucet, a common fix that can bring an end to that frustrating drip and restore peace to your kitchen.
Understanding Your Delta Faucet: Why it Drips and How Seats & Springs Help
Delta faucets from the pre-1976 era often utilize a single-handle design with a ball valve mechanism. This mechanism relies on small rubber seats and springs to create a tight seal, preventing water from escaping when the faucet is off. Over decades of use, these rubber components naturally wear down, harden, or become brittle. When they lose their elasticity and ability to form a perfect seal, water starts to seep past them, resulting in that dreaded drip. Replacing these inexpensive parts is a highly effective and straightforward solution that many homeowners can tackle themselves, saving money on plumber call-out fees and gaining a satisfying sense of accomplishment.
The beauty of these older Delta designs is their robustness and the continued availability of compatible replacement parts. Your local hardware store or even online retailers often stock repair kits specifically designed for pre-1976 Delta ball faucets, usually containing new seats, springs, and sometimes a cam and packing. This guide will focus on the core task of replacing the seats and springs, which are almost always the culprits behind a persistent drip.
Essential Tools and Materials You’ll Need
Before you begin, gathering all the necessary tools and replacement parts will ensure a smooth and efficient repair process. There’s nothing worse than getting halfway through a project only to realize you’re missing a crucial item!
- Replacement Seats and Springs Kit: Ensure you get the correct kit for pre-1976 Delta single-handle faucets. These are typically universal for that era.
- Allen Wrench Set: You’ll likely need a small Allen wrench (often 3/32″ or 1/8″) to remove the set screw on the faucet handle.
- Adjustable Wrench or Channel-Lock Pliers: For unscrewing the cap assembly from the faucet body.
- Flathead Screwdriver or Dental Pick: Useful for carefully prying out the old rubber seats and springs.
- Old Cloth or Towel: To protect the faucet’s finish when using pliers and for wiping up any spills.
- Bucket or Small Container: To catch any residual water when you open the faucet.
- Safety Glasses: Always a good idea when working with tools and water.
- Penetrating Oil (Optional): For stubborn, seized screws or caps.
Step-by-Step Guide: Replacing Seats and Springs in Your Delta Faucet
1. Turn Off the Hot and Cold Water Supply to the Faucet
This is the absolute first and most crucial step in any plumbing repair. Failure to turn off the water can result in a significant mess or even flooding. Locate the two shut-off valves typically found directly underneath your kitchen sink – one for the hot water line and one for the cold. Turn both valves clockwise until they are fully closed. Once the valves are off, open the faucet fully (both hot and cold) to relieve any residual water pressure and drain any remaining water from the lines. It’s a good idea to place a small bucket or towel under the faucet assembly to catch any drips during the repair.
2. Remove the Faucet Handle
Most older Delta single-handle faucets have a set screw located either on the side or the back of the handle. This screw secures the handle to the faucet stem. Use the appropriate size Allen wrench to partly unthread this set screw. You usually don’t need to remove it completely, just loosen it enough so the handle can slide off. Once loosened, gently pull the handle straight up and off the faucet body. If the handle is stubborn, try wiggling it slightly or applying a small amount of penetrating oil around the base, letting it sit for a few minutes before trying again. Avoid forcing it, as older plastic or metal can be brittle.
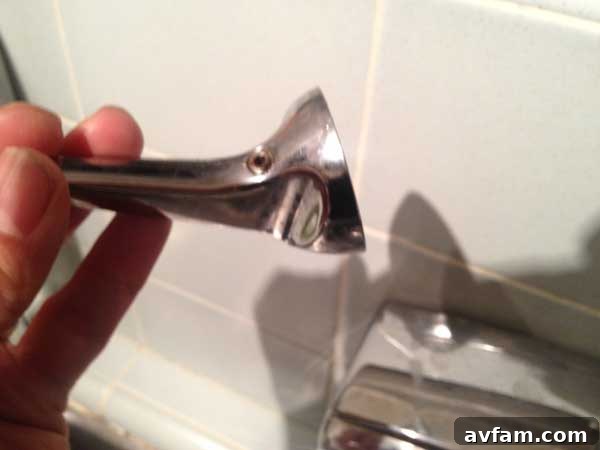
3. Unthread and Remove the Cap Assembly
After the handle is removed, you will see a larger, often dome-shaped, cap assembly sitting on top of the faucet body. This cap holds the internal components in place. Using an adjustable wrench or channel-lock pliers, carefully grip the cap assembly. To prevent scratching or damaging the faucet’s finish, wrap the jaws of your wrench or pliers with an old cloth or electrical tape. Turn the cap counter-clockwise to unthread it. It might be tight, especially if it hasn’t been removed in years. Once loosened, you should be able to finish unscrewing it by hand. Remove the cap assembly entirely and set it aside, making note of any rubber O-rings or seals that might come off with it.
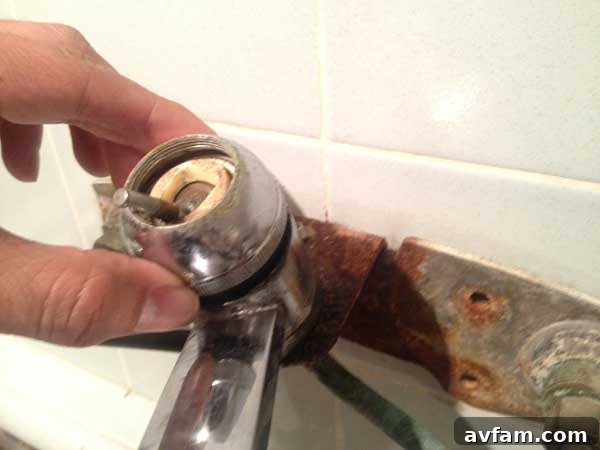
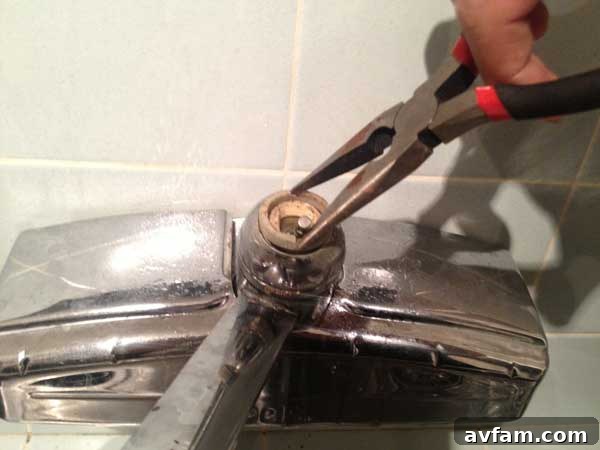
4. Remove the Ball and Cam Assembly
With the cap assembly off, you will now see the heart of the faucet’s mixing mechanism: the ball and cam assembly. This consists of a shiny metal or plastic ball (often referred to as the “mixing ball”) with a stem, and a plastic cam (often black) that fits over it. The ball has several holes or slots, and a small pin or stud typically protrudes from the faucet body that fits into a slot on the ball. Grasp the stem of the ball and pull the entire ball and cam assembly straight up and out of the faucet body. Take a moment to inspect the ball for any nicks, scratches, or mineral deposits. While the seats and springs are usually the cause of drips, a damaged ball can also contribute. If your kit includes a new cam, it’s a good idea to replace it as well, as the plastic can harden or crack over time.
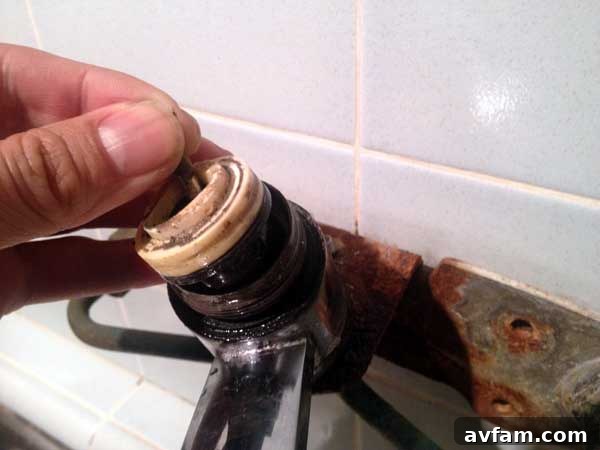
5. Remove Old Rubber Seats and Springs and Replace with New Ones
Now that the ball and cam are removed, look down into the faucet body. You will see two small rubber seats, each sitting on top of a tiny spring, at the bottom of the two water inlets (hot and cold). These are the components responsible for the drip. Use a small flathead screwdriver, a dental pick, or even needle-nose pliers to carefully pry out the old rubber seats and the springs underneath them. Be meticulous and ensure that both the rubber seat and its spring are fully removed from each opening. Sometimes the springs can stick to the bottom of the seats. Discard these old, worn-out parts.
Once the old parts are out, it’s time to install the new ones. Drop a new spring into each of the two openings first, ensuring it sits flat at the bottom. Then, place a new rubber seat on top of each spring. The seats should fit snugly. Make sure the concave (cupped) side of the rubber seat faces upwards, ready to receive the ball. These new, pliable rubber seats and fresh springs will restore the tight seal needed to stop the leak.
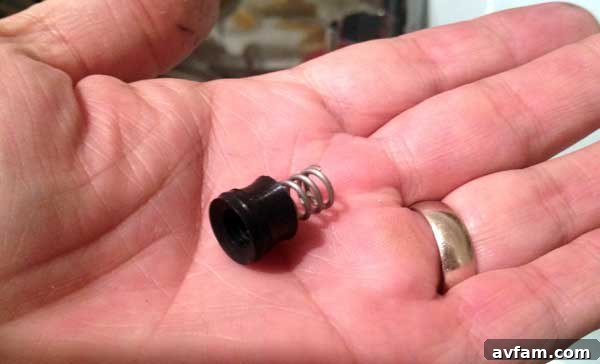
6. Reassemble the Faucet in Reverse Order
Now, carefully reverse the steps to put your faucet back together.
- Insert the Ball and Cam: First, ensure the plastic cam is properly seated over the mixing ball. There’s usually a small lug or tab on the cam that fits into a corresponding slot on the faucet body. Similarly, the slot on the side of the ball must align with the small pin or stud inside the faucet body. This alignment is critical for the faucet to operate correctly (controlling hot/cold water and flow). Gently push the ball and cam assembly back into place, ensuring it sits securely over the new seats and springs.
- Reattach the Cap Assembly: Place the cap assembly back onto the faucet body. Hand-thread it clockwise until it’s snug. Then, use your adjustable wrench or channel-lock pliers (still protected with a cloth) to tighten it securely, but do not overtighten. Over-tightening can damage the internal components or the O-rings. It should be firm, but not excessively so.
- Reinstall the Faucet Handle: Slide the handle back onto the faucet stem, aligning it correctly. Tighten the set screw with your Allen wrench.
7. Turn On Water Supply and Check for Leaks
With everything reassembled, it’s time for the moment of truth. Slowly turn the hot and cold water shut-off valves back on (counter-clockwise) underneath the sink. Do this gradually to allow pressure to build up without startling the system. Once the water is fully on, visually inspect the entire faucet assembly, especially around the base of the spout and where the cap assembly meets the body, for any signs of leaks. Run the faucet, opening it to full hot, full cold, and mixed temperatures. Watch for any drips from the spout when the faucet is closed. Listen carefully for any hissing sounds that might indicate a leak. If you notice any small leaks, try gently tightening the cap assembly a bit more. If the drip persists from the spout, you may need to re-check the alignment of the ball and cam or ensure the new seats and springs are correctly installed and seated.
Troubleshooting Common Issues
- Drip Persists: If the faucet still drips, carefully disassemble it and double-check that the new seats are correctly oriented (cupped side up) and seated firmly on their springs. Also, inspect the mixing ball itself for any significant wear or damage; sometimes a new ball is also needed.
- Handle is Stiff or Water Flow is Restricted: This can indicate that the ball and cam assembly isn’t perfectly aligned with the pin in the faucet body, or the cap is overtightened. Re-adjust and ensure smooth movement.
- Cap Won’t Budge: If the cap is seized due to mineral buildup or corrosion, apply penetrating oil around its base and let it sit for a few hours. Gentle tapping with a rubber mallet can also help break it loose.
Extend Your Faucet’s Life: Preventative Maintenance Tips
Now that your Delta faucet is drip-free, here are a few tips to help keep it in top condition:
- Avoid Harsh Cleaners: Use mild soap and water or a specialized faucet cleaner to clean your faucet. Abrasive cleaners can damage the finish and potentially the rubber seals.
- Address Drips Promptly: Don’t let a small drip turn into a major problem. The sooner you replace worn components, the less likely other parts will be affected.
- Regular Inspection: Every few years, or if you notice a slight change in how the handle operates, it might be worth a quick inspection of the seats and springs.
- Understand Your Water Quality: If you have hard water, mineral buildup can accelerate wear on internal faucet components. Consider a whole-house water softener if this is a recurring issue.
Conclusion: Empowering Your DIY Journey
Fixing a dripping Delta faucet, especially an older model, is a rewarding DIY project that empowers you to take control of your home maintenance. By following these clear, step-by-step instructions, you’ve not only saved money but also gained valuable experience and confidence in tackling plumbing issues. The satisfaction of a silent, drip-free faucet is truly unmatched. Remember, many common household repairs are within the reach of a determined homeowner, and this simple fix is a perfect example of how a little effort can go a long way in maintaining your home.