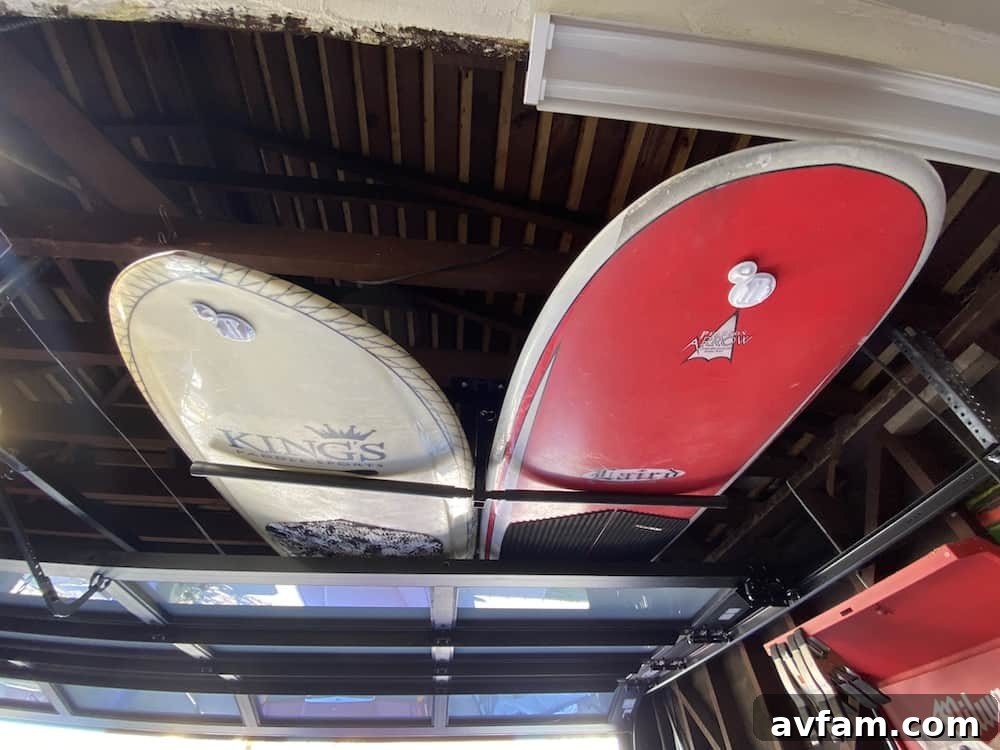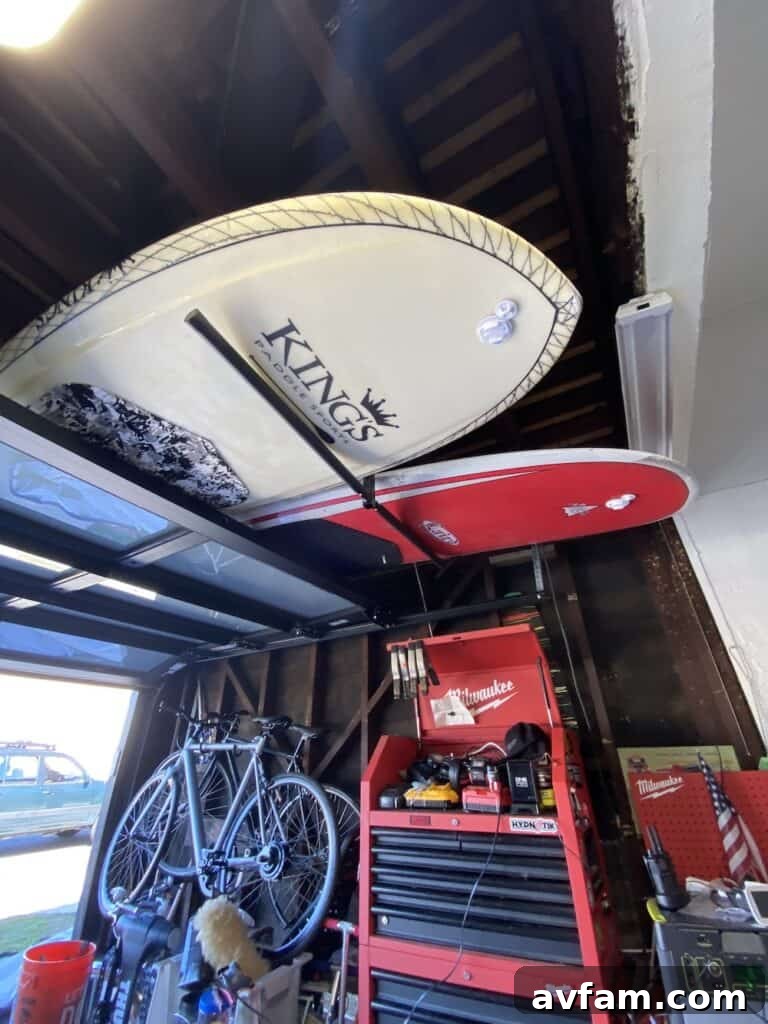

For years, my beloved surfboards endured the elements, stored precariously outdoors. This less-than-ideal arrangement not only jeopardized their condition but also deprived me of the peace of mind that comes with proper equipment care. Recognizing the urgent need for a superior storage solution, I finally embarked on a mission to install a robust hanging garage surfboard rack. This decision marked a turning point in how I protected my valuable quiver, ensuring their longevity and readiness for every surf session.
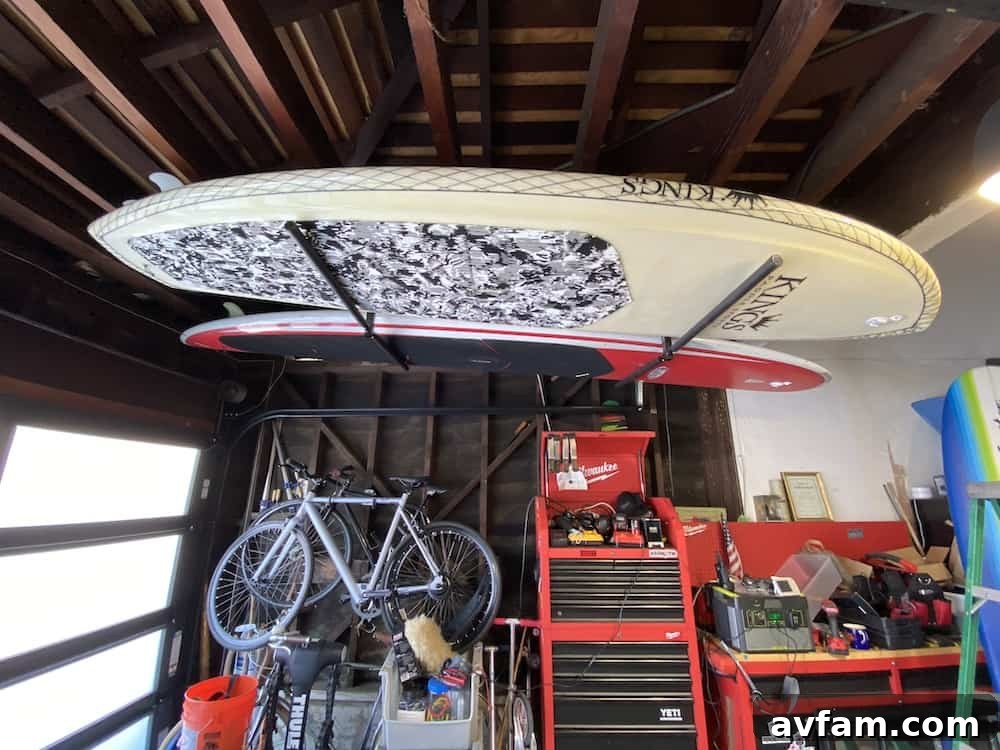
My collection of surfboards is diverse, each with its unique storage requirements. It primarily features an impressive 11-foot Surftech Laird Standup Paddleboard (SUP), an 8-foot Kings SUP, a classic 9-foot Becker longboard, and a versatile 8-foot Wavestorm foam board. While my quiver occasionally sees additions and subtractions, these four boards form the foundation of my surfing adventures. Shortboards, being compact and lightweight, generally pose fewer storage challenges. However, the larger dimensions and increased weight of standup paddleboards and longboards demand a more strategic and space-efficient approach to storage. In our previous home, these longer boards were often relegated to board bags, leaning precariously against the exterior wall of our detached garage. This temporary solution, while functional, offered minimal protection and consumed valuable ground space.
The Perils of Outdoor Surfboard Storage
Upon moving into our new residence, I managed to find a small niche at the base of our stairs where I could stand my boards vertically. While this offered a slightly more organized appearance, the fundamental problem of exposure to the elements persisted. Even when meticulously wrapped in board bags, my surfboards remained vulnerable. Over the years, I went through countless board bags, each one succumbing to the relentless assault of the hot sun. UV rays, temperature fluctuations, and moisture infiltration are silent destroyers, gradually eroding the structural integrity and aesthetic appeal of surfboards. Beyond the visible damage to the bags, the boards themselves were at risk of delamination, color fading, and reduced lifespan. This constant battle against environmental degradation highlighted the urgent need for a truly protected, indoor storage solution that would not only preserve my boards but also eliminate the recurring expense of replacing worn-out board bags.

Exploring Alternatives: Surfboard Racks and Custom Sheds
The quest for optimal surfboard storage led me to explore several alternatives. For a time, I entertained the ambitious idea of constructing a dedicated surfboard rack in our backyard, or even a full-fledged surf shed. The romantic notion of a custom-built storage haven for my boards was appealing. However, upon closer examination, these options presented their own set of challenges. A backyard rack, while potentially attractive, would still leave the boards partially exposed to the harsh sun and occasional rain, failing to offer the comprehensive protection I desired. A surf shed, while providing full enclosure, would consume valuable yard space – a commodity I was keen to preserve. Furthermore, the construction effort, cost of materials, and ongoing maintenance for such a structure seemed disproportionate to the primary goal of simply protecting my boards efficiently.
Another common solution I considered was a wall-mounted surfboard rack for the garage. Many surfers opt for these aesthetically pleasing and space-saving racks that display boards like art. While attractive, this option quickly became impractical for my current garage setup. My garage walls are already heavily utilized, lined with an assortment of storage shelves, tool chests, and various other organizational systems. There simply wasn’t enough clear wall space to accommodate a multi-board wall rack without significant rearrangement, which I preferred to avoid. This extensive evaluation of different storage methods ultimately solidified my conviction that an overhead, hanging solution would be the most effective and least intrusive way to safeguard my surfboards and reclaim valuable floor and wall space.
The Ultimate Solution: A Hanging Garage Surfboard Rack
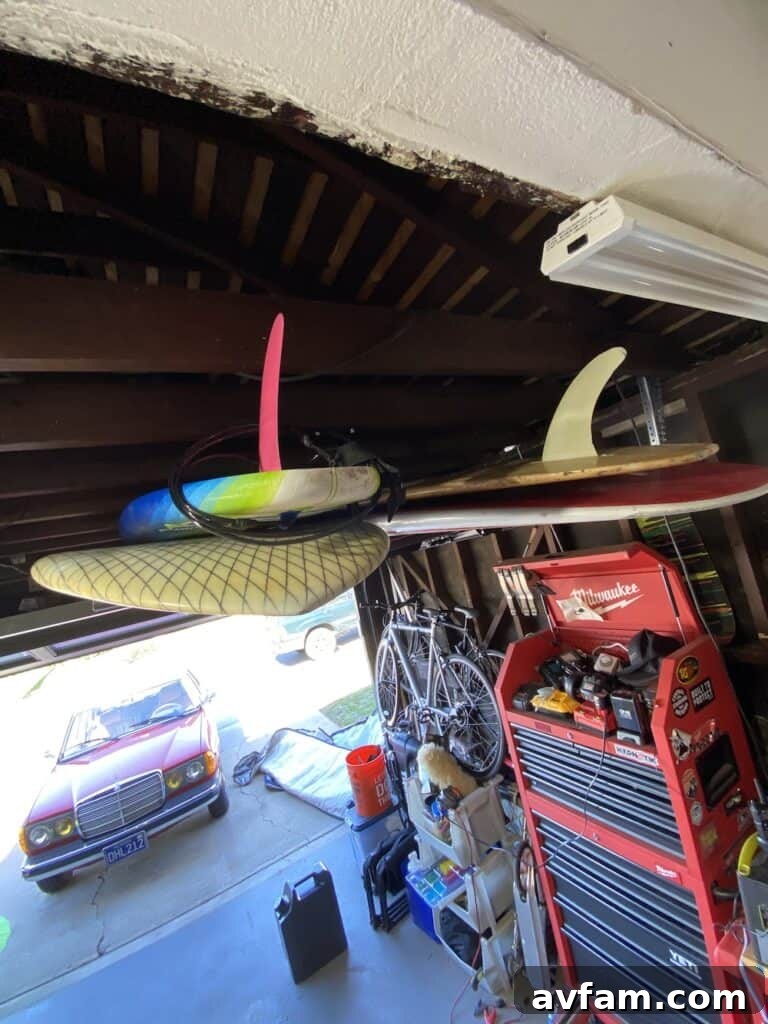
A hanging garage surfboard rack emerged as the clear winner, offering a comprehensive solution to my long-standing storage dilemmas. This innovative approach addresses a multitude of issues: it efficiently lifts boards off the ground, instantly freeing up precious floor space in both the garage and yard; it shields surfboards from the damaging effects of sun, rain, and fluctuating temperatures; and perhaps most importantly, it keeps my entire quiver easily accessible, making pre-surf preparations seamless and hassle-free. The decision to invest in this type of rack was driven by its practicality, protective capabilities, and its ability to transform an often-cluttered space into a model of organization.
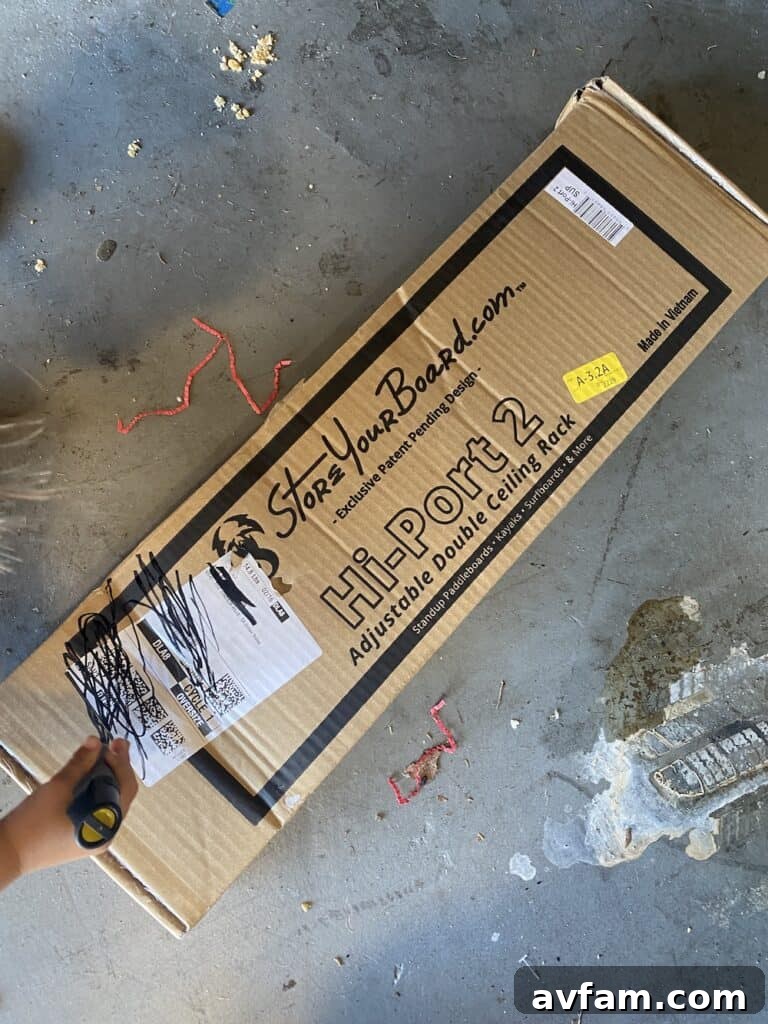
After researching various options, I discovered an excellent hanging garage surfboard rack on Amazon. Its attractive price point and straightforward installation instructions immediately caught my attention. A significant advantage in my situation was the presence of exposed beams in my garage ceiling. This structural feature eliminated the need for complex mounting solutions, promising a truly simple and secure installation process. Knowing that my surfboards would be safely suspended, protected from accidental bumps and environmental wear, provided immense peace of mind. This decision not only resolved my immediate storage concerns but also enhanced the overall functionality and aesthetics of my garage. Below, I detail the step-by-step process I followed to securely install this efficient and essential piece of equipment.
Here are the detailed steps to securely install your own hanging garage surfboard rack:
- Carefully plan the spacing of the rack arms to accommodate your longest boards.
- Install the robust lag bolts into your garage ceiling beams for maximum security.
- Attach the padded support arms, choosing the appropriate length for your quiver.
- Adjust the rack’s height to ensure optimal clearance and ease of access.
- Finally, load your surfboards, enjoying your newly organized and protected space.
Step 1: Spacing the Rack Arms for Optimal Board Support
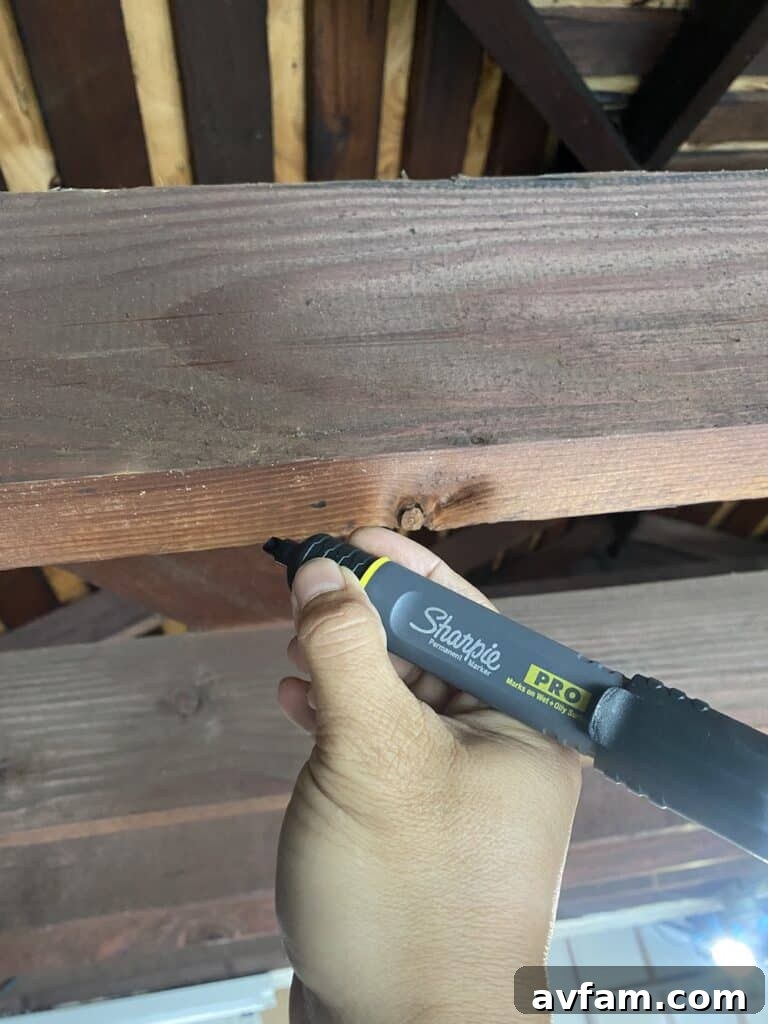
The crucial first step in installing your hanging surfboard rack is meticulous planning, focusing on the dimensions of your longest board and the available space within your garage. For my quiver, the 11-foot SUP is both the longest and thickest board, setting the benchmark for the rack’s support capabilities. Ensuring that this board could be securely accommodated meant all my other, smaller boards would fit effortlessly. I carefully measured and marked two sturdy beams, positioning them to create a support span perfectly suited for my largest SUP. This translated to placing the support bars approximately 32 inches from each end of the 11-foot board. While this wider spacing might be too expansive for a short, 6-foot board, it provides ideal support for both of my standup paddleboards, with ample room to stack my longboards conveniently on top.
When determining your own spacing, consider the distribution of weight and the overall stability required for your specific board collection. It’s often wise to err on the side of slightly wider spacing for longer boards to prevent bowing or uneven pressure points. Always double-check your measurements against the actual boards to visualize how they will rest on the rack. This initial planning phase is vital for a stable, functional, and long-lasting storage solution, preventing potential damage to your boards and ensuring ease of loading and unloading.
Step 2: Installing the Lag Bolts for Secure Mounting
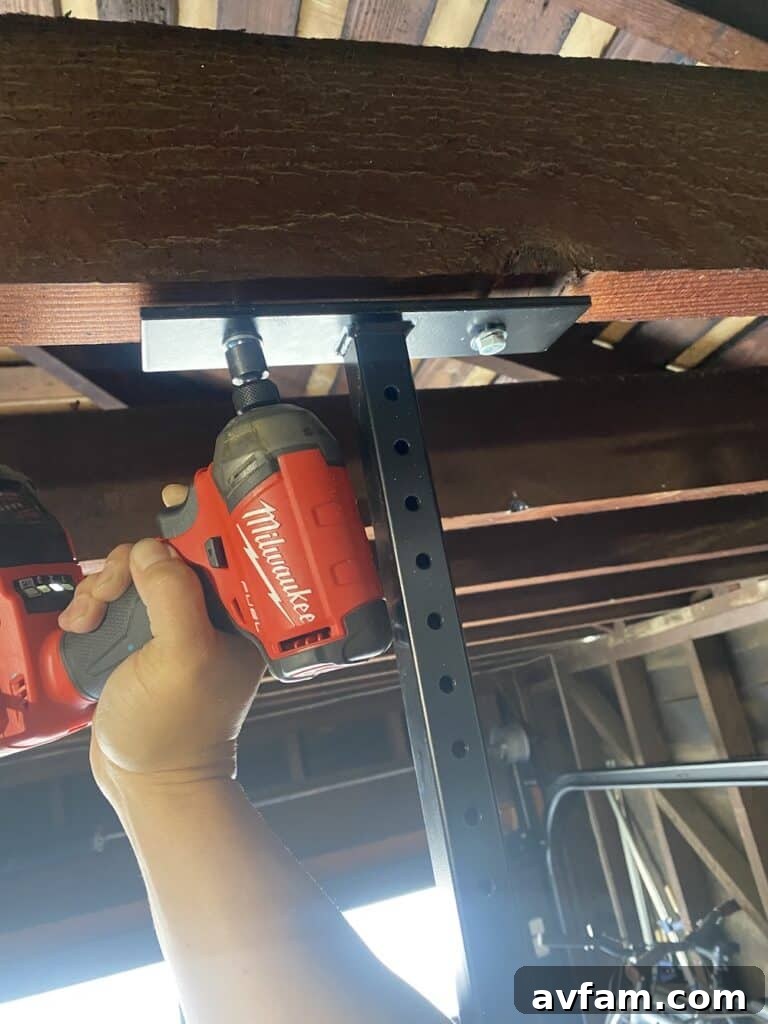
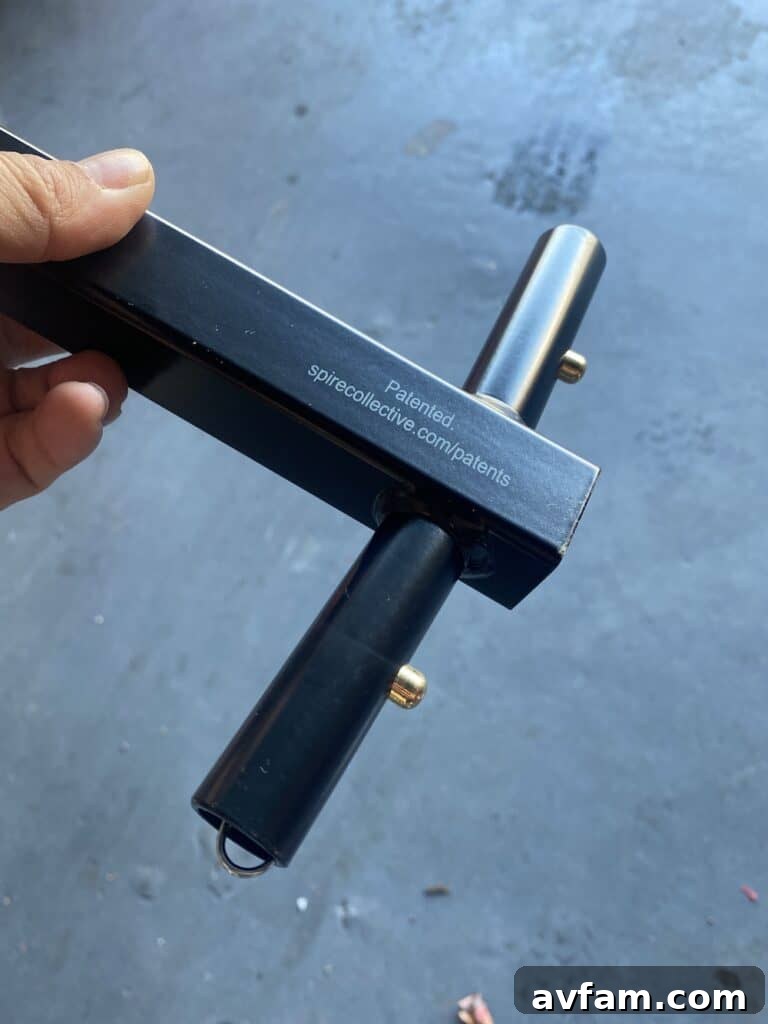
The hanging surfboard rack came equipped with four robust lag bolts, two designated for each side of the rack, designed to anchor it firmly to the ceiling beams. Although some online reviews had suggested the included hardware might be “flimsy,” I found these concerns largely unfounded. While they may not be crafted from high-grade stainless steel, the bolts felt sufficiently durable and well-engineered to provide a secure mount for both the rack and my valuable surfboards. The key to a strong installation lies not just in the quality of the bolt, but also in the proper installation technique.
To ensure maximum security and prevent stripping or weakening of the wood, I always recommend drilling pilot holes into the beams before driving in the lag bolts. The size of the pilot hole should be slightly smaller than the diameter of the lag bolt’s threaded shaft, allowing the threads to bite firmly into the wood. I utilized my Milwaukee Surge M18 impact driver for this task, which made quick work of securing the bolts into the exposed ceiling beams. The impact driver provided excellent torque and control, resulting in an exceptionally strong and stable installation. After tightening, each side of the rack felt rock-solid, instilling complete confidence in its ability to safely support my entire quiver.
Step 3: Attaching the Support Arms and Choosing the Right Length
The hanging rack offers a choice between two lengths for its support arms: 25-inch and 30-inch. This decision is critical for both board support and ease of use. Despite owning several large, wide boards, including my SUPs, I deliberately opted for the shorter 25-inch arms. My reasoning was two-fold: firstly, I wanted to ensure that sliding boards on and off the rack would be as effortless as possible. Longer arms can sometimes create more friction or require more reach, especially when dealing with heavier boards. Secondly, I found that the 25-inch arms provided more than adequate support for even my widest boards. The robust construction and thoughtful design of the rack ensured that the boards were well-balanced and securely cradled, without any undue stress points.
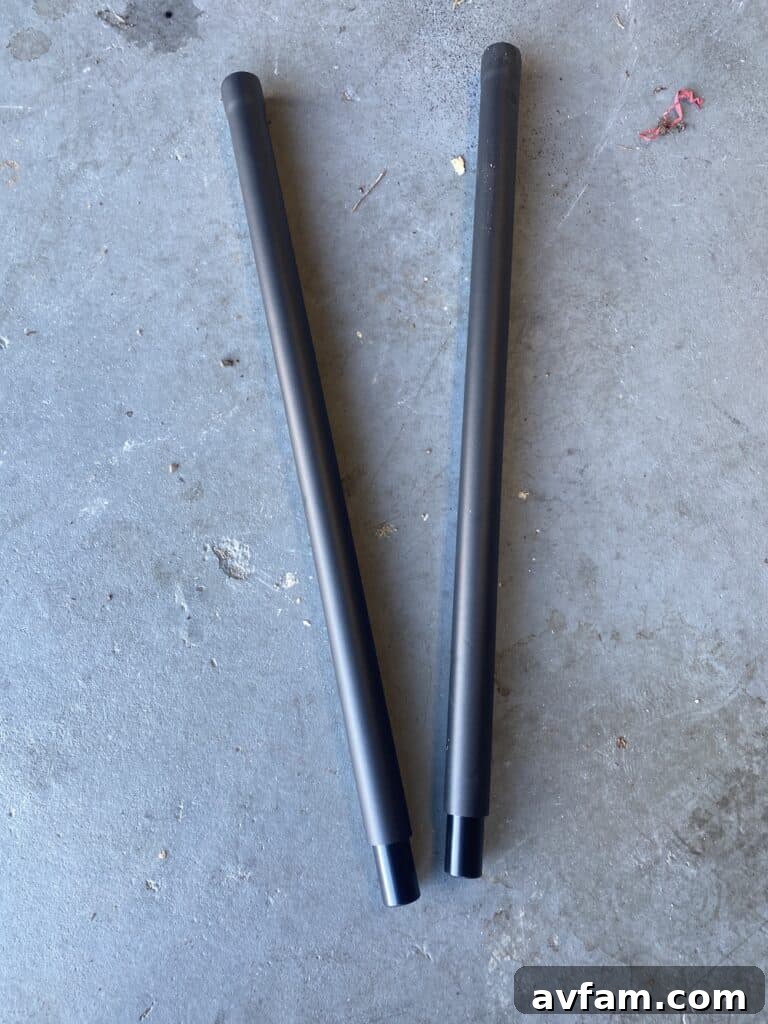
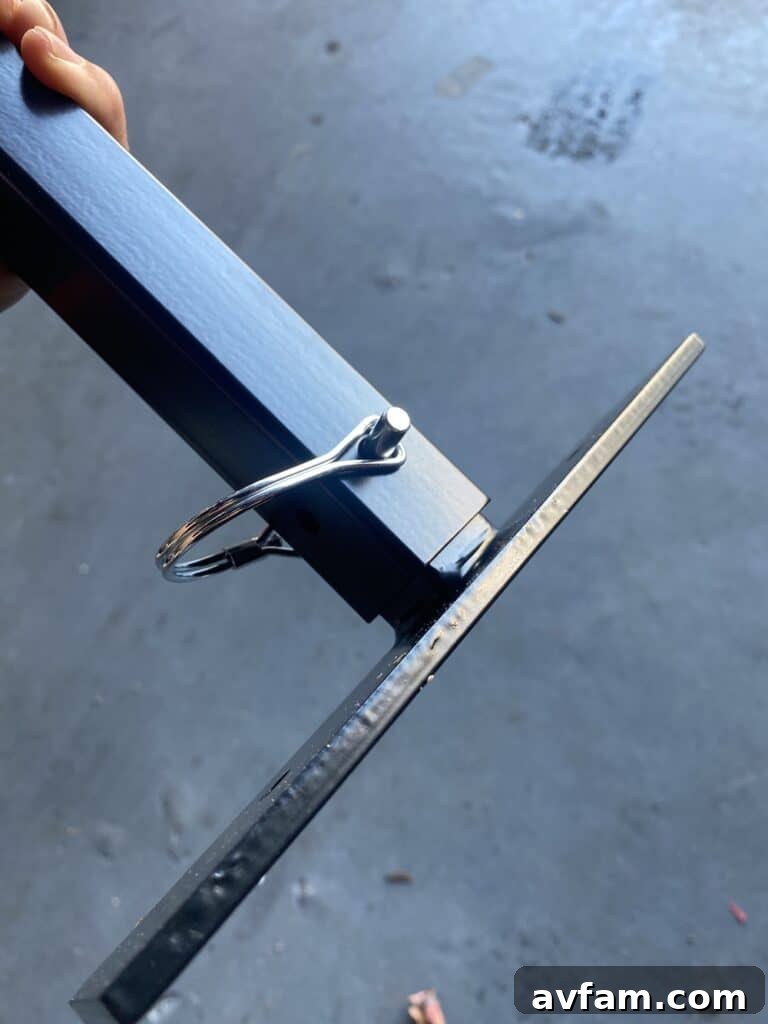
Attaching the support arms is incredibly simple and intuitive. Each arm is designed to slide smoothly onto the main extension arm of the rack. Once properly aligned, a spring-loaded popup button securely locks the support arm into place. This mechanism ensures that the arms are firmly attached and won’t dislodge during board loading or unloading, offering a reassuring level of stability. The padded sleeves on the support arms are an essential feature, providing soft cushioning that protects the delicate rails and surfaces of your surfboards from dings, scratches, and pressure marks. This attention to detail in design ensures both the safety of your boards and the durability of the rack itself.
Step 4: Adjusting the Rack Height for Clearance and Accessibility
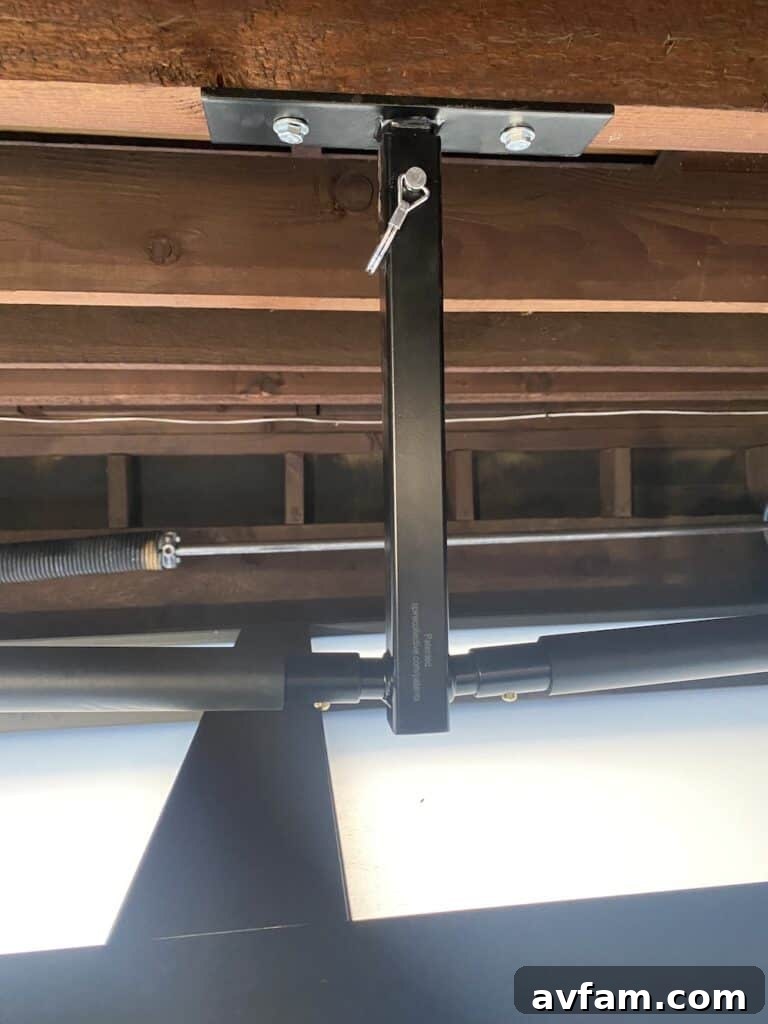
The final crucial step before loading your surfboards onto their new home is to precisely determine and adjust the hanging height of the rack from the ceiling. This adjustment capability is a standout feature, allowing for customization between a minimum of 10 inches and a maximum extension of 18 inches from the ceiling. The flexibility of this design ensures that the rack can adapt to various garage configurations and user preferences, balancing overhead clearance with ease of board access.
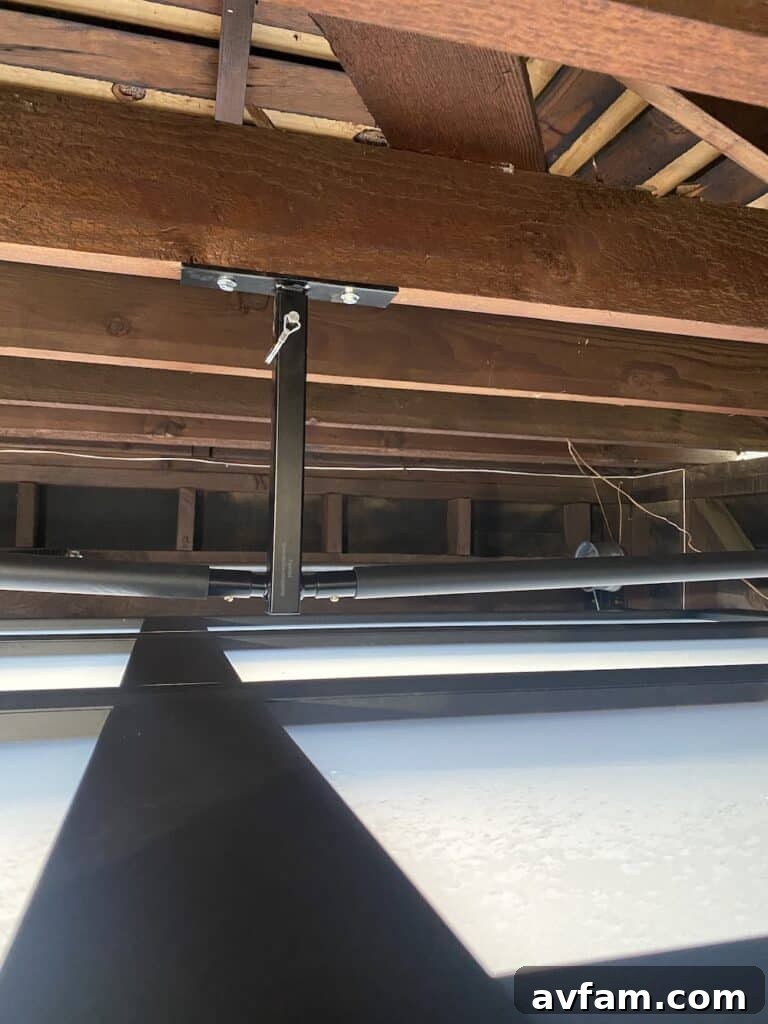
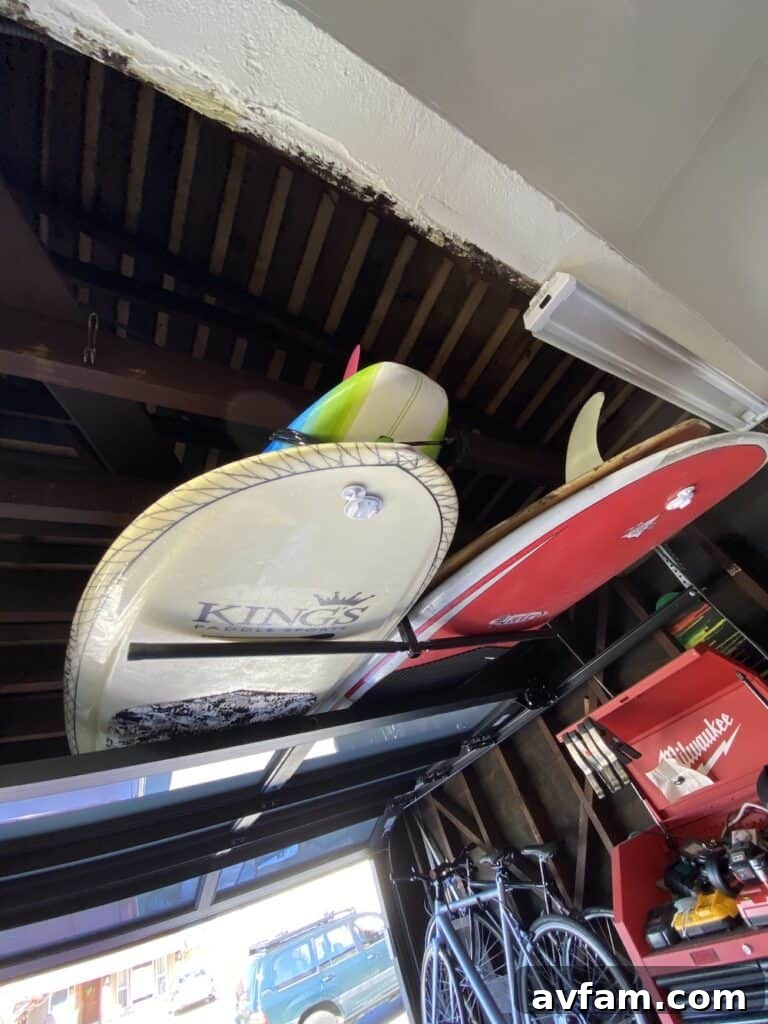
In my specific setup, one side of the garage required ample clearance for the automatic garage door as it opens and retracts into the ceiling space. To accommodate this, I set that side of the rack almost entirely flush with the ceiling, at approximately 11 inches. This ensured there would be no interference or potential for collision when the door was fully open. Conversely, the other side of the garage had no such overhead obstruction. For this section, I strategically lowered the rack to 14 inches. This slight downward slope from front to back, though gradual, significantly enhances the ease of loading and unloading boards. The angle is subtle enough that there is absolutely no risk of boards accidentally sliding off, yet pronounced enough to provide a helpful incline that aids in maneuvering even the heavier SUPs onto the rack with minimal effort. This thoughtful height adjustment not only maximizes garage utility but also optimizes the user experience.
Step 5: Loading Your Surfboards for Perfect Garage Organization
With the rack securely installed and adjusted, the final and most satisfying step is to load it with your standup paddleboards and surfboards. The earlier decision to opt for the shorter 25-inch support arms proved invaluable during this stage, making the process of sliding boards onto the rack noticeably easier. Furthermore, the ability to slightly lower the front end of the rack by a couple of notches (creating that gentle slope discussed earlier) was a game-changer. This subtle downward angle provides an ergonomic advantage, allowing boards to glide smoothly onto the padded arms with minimal lifting and maneuvering, especially beneficial for heavier or longer boards.
I am genuinely thrilled with both the robust construction and exceptional performance of this hanging garage surfboard rack. My only regret is not having installed it much sooner. The transformation it has brought to my garage is remarkable, turning a previously cluttered and underutilized overhead space into a highly organized and efficient storage area. The rack’s impressive capacity, capable of holding up to 75 pounds per side, offers incredible versatility. This substantial weight limit means it can comfortably accommodate multiple surfboards and SUPs, along with the potential to store other cumbersome items like standup paddles, kitesurfing gear, or even surplus lumber. This ability to get so much weight up and off the floor not only clears valuable garage real estate but also protects my equipment from accidental damage and prolonged exposure to dust and dirt. I am so pleased, in fact, that I am seriously considering adding another hanging surfboard rack to further expand my storage capabilities and continue enhancing my garage organization system.
Hanging Surfboard Rack: Available for $79.99 with Amazon Prime