
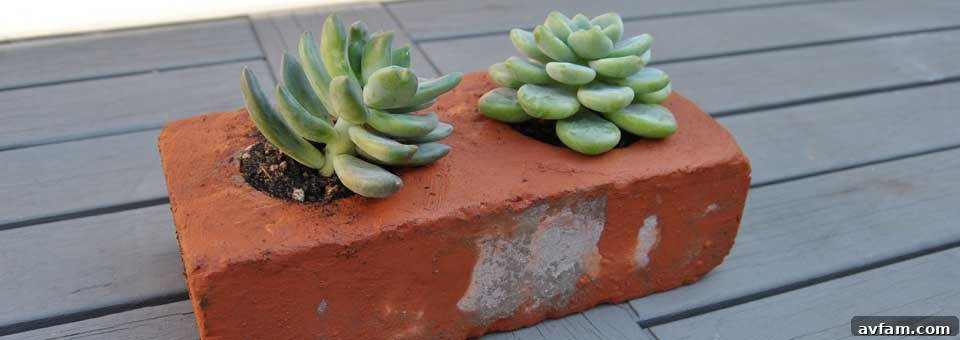
Craft Your Own Rustic Succulent Oasis: A DIY Brick Planter Guide
Succulents have captivated the hearts of plant enthusiasts worldwide with their striking aesthetics, incredible resilience, and minimal care requirements. These charming plants come in an astonishing array of shapes, sizes, and colors, making them perfect for creating unique and vibrant displays both indoors and out. While they thrive in a variety of containers, there’s something uniquely captivating about housing them in repurposed materials that add character and a story to your garden. This DIY project introduces you to crafting exquisite brick planters that infuse an organic, rustic elegance into any space.
Imagine a cluster of vibrant succulents nestled within the weathered contours of an old brick, each tiny plant a miniature world of green, red, or purple. This project isn’t just about making a planter; it’s about transforming a humble construction material into a work of art, giving it a second life as a home for your beloved succulents. The result is a stunning, natural-looking container that beautifully complements the natural beauty of the plants. Best of all, it’s a relatively straightforward and incredibly rewarding endeavor that even beginner DIYers can tackle. While it might get a little messy – a small price to pay for such a unique outcome – the satisfaction of creating something beautiful with your own hands is truly unparalleled.
Why Choose Bricks for Your Succulent Planters?
Beyond their aesthetic appeal, bricks offer several practical advantages for succulent planting. Their porous nature allows for excellent drainage and airflow, which are crucial for the health of succulents that are prone to root rot in overly moist conditions. The thermal mass of bricks can also help regulate soil temperature, providing a more stable environment for your plants. Furthermore, using reclaimed or “beat-up” bricks adds an immediate sense of history and weathered charm that new pots often lack. Each chip, crack, and stain tells a story, making your planter truly one-of-a-kind. Opting for repurposed materials also aligns with sustainable living practices, turning potential waste into a beautiful and functional object.
Whether you’re aiming for a shabby-chic aesthetic, a modern industrial vibe, or a warm cottage garden feel, brick planters are incredibly versatile. They look fantastic arranged in groups, lined up along a garden path, or used as standalone decorative pieces on a patio table. Their sturdy nature means they can withstand the elements, making them a durable choice for outdoor succulent displays. Plus, the process of creating them is a fantastic way to engage with a hands-on craft, offering a satisfying break from digital screens and an opportunity to connect with nature.
Gather Your Essentials: What You’ll Need
Before you begin, ensure you have all the necessary tools and materials at hand. Safety is paramount, so consider wearing eye protection and gloves, especially when drilling and breaking the brick.
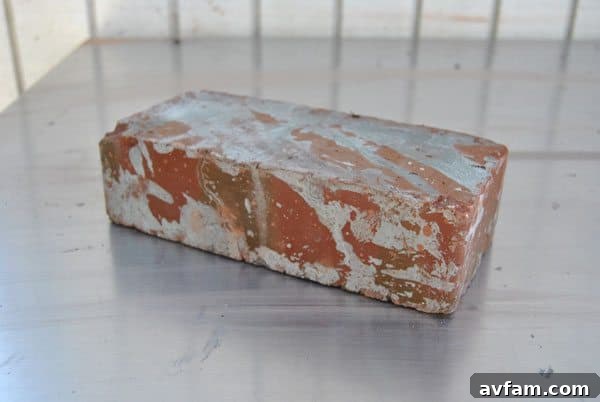
- Bricks: The star of our project! You can choose new, clean-looking bricks for a more uniform, contemporary look, or opt for preferably used, slightly beat-up, or damaged bricks for that coveted organic, weathered charm. Reclaimed bricks from old construction sites or demolition projects are perfect for this, adding instant character.
- Drill: A powerful drill, preferably a hammer drill, will make the job much easier, especially when dealing with tough masonry.
- Carbide-Tipped Masonry Hole Saw Bit: This specialized bit is essential for drilling through the hard material of a brick. Ensure it’s the appropriate size for the succulent cuttings you plan to plant. A common size is 2-3 inches in diameter.
- Clamp: A sturdy clamp (or two) is non-negotiable for securely fastening your brick to a workbench or stable surface. This prevents the brick from moving during drilling, ensuring both safety and precision.
- Succulent Cuttings: Choose healthy succulent cuttings. Many succulents are incredibly easy to propagate from cuttings, making this an economical and exciting way to expand your plant collection.
- Well-Draining Soil: A specialized succulent or cactus potting mix is ideal. This type of soil ensures proper drainage, preventing water from pooling and causing root rot.
- Water Bottle (with a nozzle): Essential for cooling the drill bit and the brick during the drilling process, and for minimizing dust.
- Chisel or Screwdriver: For breaking away the inner core of the brick once you’ve drilled around it.
- Hammer: To tap the chisel or screwdriver.
Step-by-Step Guide: Crafting Your Brick Planters
With your materials ready, let’s dive into the creative process. Remember to work in a well-ventilated area and take all necessary safety precautions.
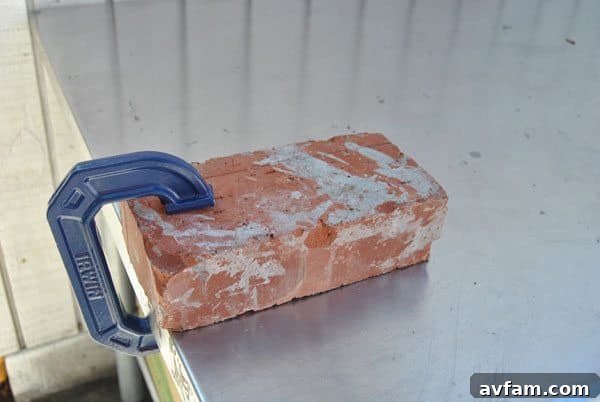
1. Securely Clamp Your Brick
This is arguably the most important safety step. Place your chosen brick on a stable workbench or table. Use one or more clamps to fasten it down as tightly as possible. The brick must not wobble or shift during drilling. A moving brick is not only dangerous but will also make it nearly impossible to drill a clean hole. Double-check its stability before proceeding.
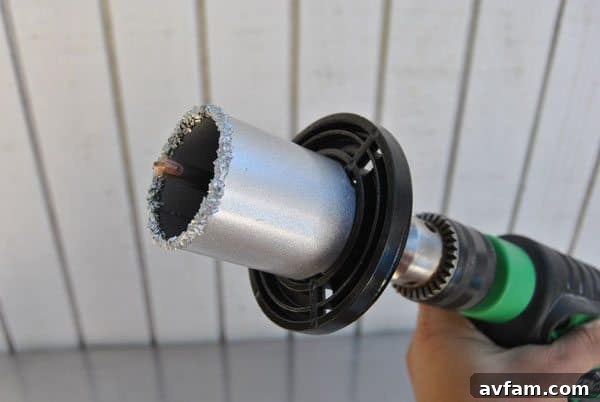
2. Set Up Your Masonry Hole Saw
Attach the carbide-tipped masonry hole saw bit securely to your drill. Ensure it’s tightened properly and that the bit is aligned straight. Familiarize yourself with your drill’s settings, especially if it has a hammer drill function, which can be very effective for masonry but also generates more heat and dust.
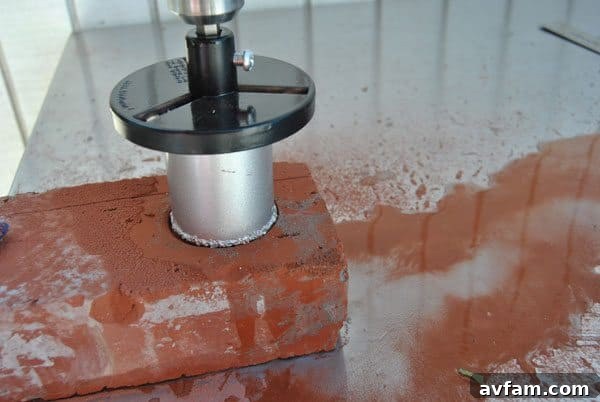
3. Start Drilling and Apply Water
Begin drilling into the brick. Start slowly to create a guide groove, then apply steady, firm pressure. As you drill, continuously pour a small stream of water from your water bottle directly into the cutting area. This serves several critical purposes: it keeps the drill bit and the brick cool, prevents overheating and premature wear of the bit, lubricates the cutting action for easier drilling, and significantly reduces the amount of dust generated. Drill about halfway through the brick’s thickness.
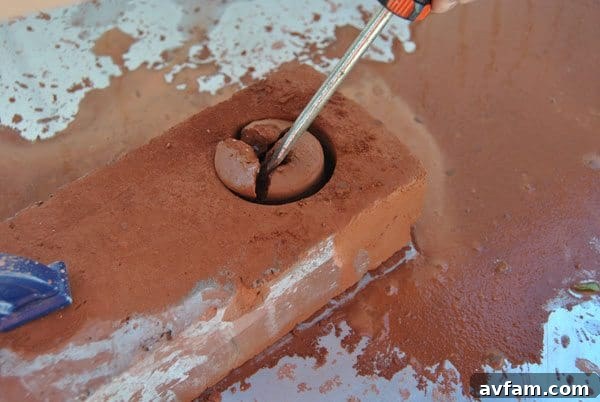
4. Break Away the Inner Core
Once you’ve drilled about halfway, you’ll have a circular groove. Remove the drill. Take your chisel or a sturdy flat-head screwdriver and insert it into the groove you’ve created. Gently tap the handle of the chisel with a hammer, working your way around the inner circle. The goal is to break away the central core of the brick. This part might require a bit of force and patience, as brick can be quite brittle. Be careful not to damage the outer edges of your newly formed hole.
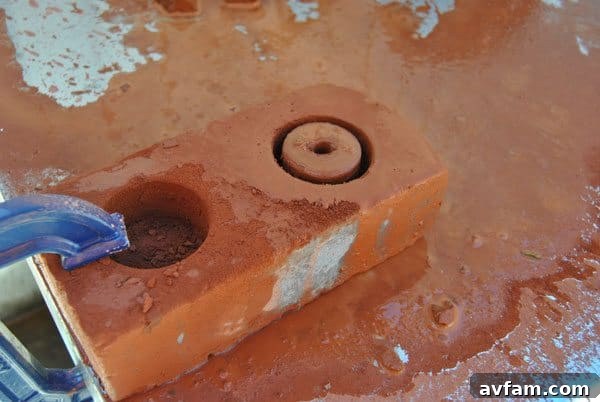
5. Flip the Brick and Repeat
Carefully unclamp the brick, flip it over, and re-clamp it securely. Now, repeat steps 3 and 4 from the other side. This method ensures a clean, complete hole through the entire brick. Trying to drill all the way through from one side can be difficult, often resulting in an uneven break-out on the opposite side. Drilling from both sides creates a cleaner, more controlled opening. Once both sides are complete, the central core should easily break free, leaving a perfect pocket for your succulent.
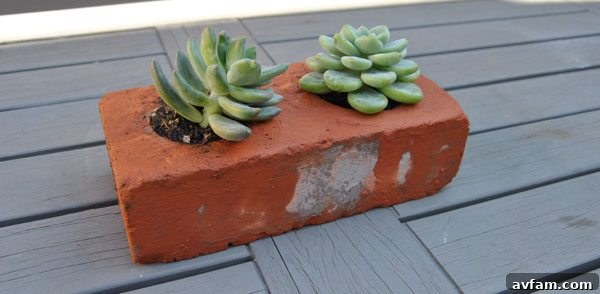
6. Prepare and Plant Your Succulents
Now comes the exciting part – planting! Fill your newly created brick pocket with well-draining succulent soil. Gently place your succulent cutting into the soil. If your cutting doesn’t have roots yet, simply insert it into the soil, and it will root over time. Lightly firm the soil around the base of the cutting. Avoid overwatering immediately; succulents prefer a “drink and dry” cycle. Give them a light watering a few days after planting to encourage root growth.
Caring for Your Brick Succulent Planters
Your brick planters are now home to beautiful succulents, but a little ongoing care will ensure they thrive. Since bricks are porous, they dry out faster than traditional plastic or glazed ceramic pots. This is excellent for succulents, but it means you might need to water them slightly more frequently, especially during hot, dry weather. Always check the soil moisture before watering; it should be completely dry a few inches down. Ensure your succulents receive plenty of bright, indirect sunlight. Most succulents need at least 6 hours of sunlight per day to maintain their vibrant colors and compact growth.
Consider the placement of your brick planters. For indoor displays, ensure they are near a south-facing window or under a grow light. Outdoors, choose a spot where they are protected from extreme heat or prolonged direct afternoon sun, which can scorch some varieties. During winter months in colder climates, it’s advisable to bring your brick planters indoors to protect the succulents from frost. The beauty of these planters is their versatility; move them around to find the perfect spot for both the brick and its green inhabitant.
Creative Display Ideas and Variations
The beauty of DIY projects lies in their adaptability. Don’t stop at just one brick planter! Create a collection and arrange them in various ways:
- Stacked Displays: Stack two or three bricks to create multi-tiered succulent gardens. Ensure stability with a strong adhesive or careful placement.
- Path Edging: Line a garden path or patio edge with a series of brick planters for a cohesive, natural look.
- Table Centerpieces: A single brick planter can make a stunning, rustic centerpiece for an outdoor dining table or indoor coffee table.
- Paint or Decorate: For a different look, consider painting your bricks with outdoor-appropriate paints. You could use bold colors for a modern touch or pastels for a softer aesthetic. Stenciling patterns or numbers on them could also add a personalized flair.
- Mixed Media: Combine your brick planters with other natural elements like driftwood, pebbles, or larger rocks to create a miniature landscape.
- Drainage Holes: While the brick itself is porous, for extra precaution, you can slightly tilt the brick during drilling or drill a smaller drainage hole at the lowest point of the pocket using a smaller masonry bit.
Conclusion: Embrace the Beauty of Handmade
Creating your own brick succulent planters is more than just a craft project; it’s an opportunity to infuse your living space with unique character, sustainability, and the undeniable charm of handmade items. From the satisfying rumble of the drill to the delicate placement of tiny succulent cuttings, each step in this process brings you closer to a beautiful and functional piece of art. These rustic, organic planters will undoubtedly become a focal point, drawing admiration and sparking conversations. So, gather your tools, choose your bricks, and embark on this rewarding DIY journey. Enjoy the process, revel in the beauty of your creations, and watch your succulent garden flourish in its unique new home!