
A Beginner’s Guide to Using a Moisture Meter for Home Inspection
Hidden moisture is one of the most persistent threats to any home. It doesn’t announce its arrival with a sudden flood; instead, it creeps in silently, often developing behind walls, under floors, or in forgotten corners of an attic or basement. Because of its subtle nature, a serious moisture problem can go unnoticed for months or even years, leading to costly structural damage, mold growth, and compromised indoor air quality. By the time visible signs like stains or musty odors appear, the damage is often already extensive.
For many homeowners, a moisture meter seems like a complex tool reserved for professional inspectors. However, once you learn to use one, it transforms from an intimidating gadget into an indispensable ally in home maintenance. Using a moisture meter is not about deciphering complicated data; it’s about developing a deeper awareness of your home’s health. It allows you to understand how your property breathes, how different materials react to changing conditions, and where subtle shifts in moisture levels might indicate a problem that needs attention. This guide will walk you through the essential lessons every beginner learns when they start using a moisture meter, empowering you to protect your investment proactively.

Photo: SensoraHome
1. Understanding Readings: It’s About Comparison, Not Just Numbers
One of the most common misconceptions among beginners is that a moisture meter will provide a simple “good” or “bad” number. While specific percentages are important, the true diagnostic power of a moisture meter lies in comparative readings. Homeowners looking into moisture meters for home inspection quickly learn that context is everything. The goal is to establish a baseline for what’s “normal” in your home and then look for anomalies.
Start by taking a reading in an area you know is dry, such as the middle of an interior wall far from any plumbing. This reading becomes your control or baseline. As you move the meter across the surface and into different areas, you are looking for significant deviations from this baseline. For example, if most of your drywall reads around 7% moisture content (MC), but a section near a window frame suddenly jumps to 15%, that sharp contrast is your red flag. The spike indicates an area of elevated moisture that warrants further investigation, even if there are no visible signs of a leak. Brands like SensoraHome focus on creating user-friendly meters that help homeowners easily identify these critical variations. By focusing on patterns and contrasts rather than isolated numbers, you can spot potential trouble spots with far greater accuracy.
2. Different Materials Have Different Moisture Rules
As you begin scanning various parts of your home, you will quickly realize that wood, drywall, and concrete all interact with moisture in unique ways. A reading that is perfectly normal for one material could be a major concern for another. Understanding these differences is crucial for accurate interpretation.
For instance, wood is hygroscopic, meaning it naturally absorbs and releases moisture from the air. Its moisture content will fluctuate with changes in humidity. A reading of 8-12% MC might be perfectly acceptable for wood flooring or framing in most climates. However, a reading above 16% could indicate a water issue and create conditions for rot. Drywall, on the other hand, is much less tolerant. It loses its structural integrity when wet, and readings above 1% can be a sign of a problem. Concrete can hold a lot of water and takes a very long time to dry, so a new foundation might show higher baseline readings for months. Learning the acceptable moisture range for each material in your home turns confusing data into clear, actionable information.
3. Surface Readings Don’t Always Reveal the Whole Story
A moisture meter is an excellent tool for identifying moisture, but it’s important to understand its limitations. Most meters measure moisture at or just below the surface they are scanning. This means a significant issue could be lurking deeper within a wall cavity or subfloor without being immediately detected.
For example, a slow leak inside a wall from a pipe may saturate the insulation and wood studs long before the moisture makes its way to the surface of the drywall. Your meter might show a normal reading on the wall, giving a false sense of security. Conversely, a high surface reading isn’t always a catastrophe. It could be caused by temporary condensation, recent cleaning, or high ambient humidity. This is why a moisture meter reading should be treated as a clue, not a conclusion. If you find an unusually high reading, use it as a starting point. Look for other corroborating signs like discoloration, peeling paint, or musty smells to determine if it’s a surface-level event or a sign of a deeper problem.
4. How Environmental Conditions Influence Your Results
Moisture readings are not static; they are a dynamic snapshot of a specific moment. The environment inside and outside your home plays a significant role in these measurements. Factors like ambient humidity, temperature, and recent weather can all cause temporary fluctuations in moisture levels.
A basement wall, for example, will likely show higher moisture levels after several days of heavy rain. A bathroom wall may register elevated moisture right after a hot shower due to steam and condensation. Understanding this context prevents panic over normal variations. To distinguish between a temporary environmental effect and a persistent moisture problem, take readings in the same area at different times. If the high reading in the bathroom disappears an hour after the shower, it was likely just condensation. However, if the reading near a window remains high days after a storm has passed, it’s a strong indicator of a potential leak that needs to be addressed.

Photo: SensoraHome
5. Choosing Your Meter: Pin vs. Pinless Explained
When selecting a moisture meter, you’ll encounter two primary types: pin and pinless. Each operates differently and is suited for different tasks. Understanding the distinction will help you choose the right tool for your needs.
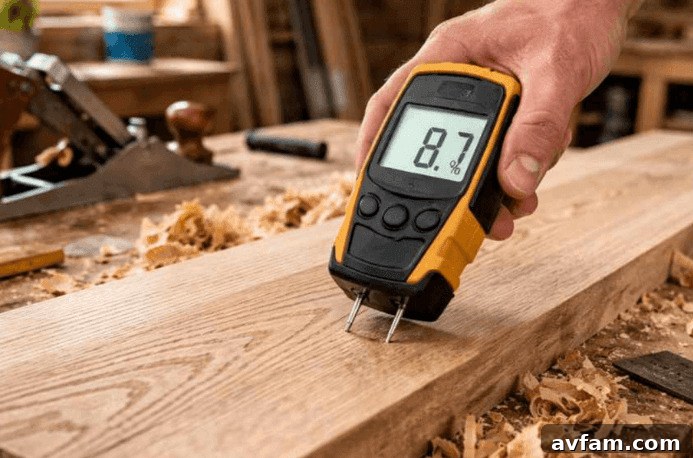
Pin-style meters have two metal probes that must physically penetrate the material to measure electrical resistance between the pins. The less resistance, the higher the moisture content. Pin meters provide a very precise reading at a specific point and are excellent for testing wood or other soft materials. However, their main drawback is that they leave small but visible holes, making them less ideal for finished surfaces like painted drywall or cabinetry. Pinless meters, also known as non-invasive scanners, use an electromagnetic sensor pad to measure the density of a material just below the surface. They allow you to scan large areas quickly without leaving any marks. Many beginners prefer pinless meters for their ease of use and non-destructive nature, making them perfect for routine home inspections. Some professionals use both: a pinless meter to quickly find a problem area and a pin meter to get a precise reading within that area.
6. From Novice to Confident: The Importance of Practice
Your first few times using a moisture meter will likely be filled with some uncertainty. You’ll see a number on the screen and ask yourself, “What does this actually mean?” This is a normal part of the learning curve. Building confidence with a moisture meter comes from consistent use and observation.
Make it a habit to regularly scan your home, even when you don’t suspect a problem. Check around windows and doors after it rains. Scan under the kitchen and bathroom sinks every few months. Take readings in the basement during different seasons. With each scan, you will become more familiar with your home’s normal moisture patterns. What once seemed like random numbers will begin to form a clear and understandable baseline. Over time, you’ll develop an intuitive sense of what’s right and what’s not, allowing you to trust your tool and your judgment. This repetition transforms the meter from a confusing device into a reliable instrument for home care.
7. The Ultimate Goal: Proactive Awareness, Not Perfect Diagnosis
It’s easy to think that the purpose of a moisture meter is to find and diagnose every potential issue with pinpoint accuracy. In reality, its most important function is much simpler: to build awareness. The meter is your early warning system. It empowers you to see the invisible and notice subtle changes that you would otherwise miss.
You don’t need to be an expert to use it effectively. The goal isn’t to have a definitive answer for every reading. Instead, it’s about recognizing when something is different from the established norm. The meter alerts you to areas that deserve a closer look, prompting you to check for a leaky pipe, failed sealant, or poor ventilation. This proactive approach is the key to preventing minor issues from escalating. By catching a small leak early, you can prevent a major mold infestation or a rotted subfloor, saving you thousands of dollars and significant stress down the road.
Final Thoughts
A moisture meter, on its own, doesn’t solve problems. But it provides something incredibly valuable: knowledge. It reveals the hidden patterns, subtle differences, and critical changes in your home’s environment that are impossible to detect with the naked eye. For a homeowner, the journey of learning to use this tool is less about mastering technical data and more about becoming a keen observer of your own living space. The more you use it, the more intimately you will understand your home’s condition. This early awareness is the single most powerful tool you have to protect your property from the silent, destructive force of unwanted moisture, ensuring your home remains safe, healthy, and secure for years to come.