
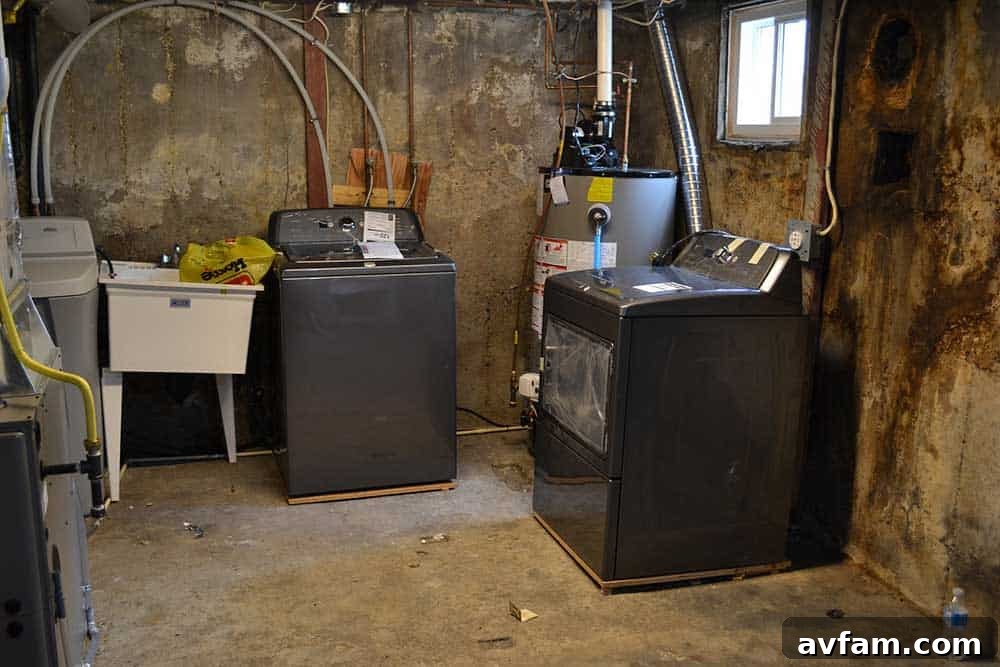
Comprehensive Guide: Repairing Flooded Appliances After Water Damage
Experiencing a flood can be devastating, and the damage to your home appliances often feels like an insurmountable challenge. Many homeowners immediately assume their water-damaged washers, dryers, refrigerators, and freezers are beyond repair and destined for the scrap heap. However, this isn’t always the case. With a methodical approach, proper safety precautions, and a willingness to troubleshoot, you might be able to salvage your valuable appliances and save a significant amount of money.
This detailed guide will walk you through the essential steps to assess, clean, dry, and test your major appliances that have been exposed to floodwaters. We’ll cover everything from initial safety measures to specific repair options for various types of machines, helping you determine if they are still safe and functional for continued use. Don’t rush to discard them; investing a little time and effort could bring your appliances back to life.
Initial Steps: Safety First When Dealing with Flooded Appliances
Before you even consider touching any flooded appliance, your absolute priority must be safety. Floodwaters can carry contaminants and pose significant electrical hazards. Appliances that have been submerged, even partially, are at risk of electrical shorts, motor damage, and hidden mold growth.
Crucial Safety Precautions:
- Disconnect Power Immediately: Ensure the main power supply to your home, or at least to the affected circuits, is completely turned off before you approach any water-damaged appliance. Never touch a flooded appliance if there’s any chance it’s still connected to electricity.
- Assess Water Level: This guide specifically addresses appliances that have been flooded with more than one foot of water. The extent of submersion will influence the repair feasibility.
- Unplug All Appliances: Even after the main power is off, it’s vital to individually unplug all affected appliances from their wall outlets. This prevents accidental power-ups and ensures a safe working environment.
- Personal Protective Equipment (PPE): Wear rubber gloves, waterproof boots, and potentially even a mask, especially when dealing with floodwater that might contain sewage or chemicals.
Once the floodwaters have receded and you’ve taken these critical safety steps, you can begin the process of assessing your machines. The goal is to carefully evaluate their condition and determine the best course of action.
Restoring Your Flooded Washer and Dryer
Washers and dryers are complex machines with electrical components, motors, and intricate controls. When they’ve been submerged, the priority is to clean out contaminants, thoroughly dry all internal parts, and then carefully test their functionality. Do NOT power them up immediately to “see if they work.” This can cause further damage or pose an electrocution risk.
Thoroughly Clean Your Washer and Dryer
The first step in salvaging your washer and dryer is meticulous cleaning. Floodwaters are often dirty and can leave behind mud, silt, and various contaminants that can corrode metal parts, clog filters, and promote mold growth.
- Exterior Cleaning: Wash the entire exterior of both machines with a mild detergent and warm water. Avoid using harsh chemicals like bleach, as chlorine can accelerate rust formation on metal surfaces.
- Interior Cleaning (Dryer): Open the dryer door and thoroughly clean the dryer drum. Pay close attention to the lint filter and its housing, as flood debris can easily become trapped here, posing a fire hazard later.
- Interior Cleaning (Washer): Clean the washer tub inside and out. If accessible, wipe down agitator components in top-loaders or the drum interior and gasket in front-loaders. Run a preliminary wash cycle with no clothes and a strong cleaner later, but first focus on manual cleaning.
- Ventilation Hoses: Inspect and clean or replace any ventilation hoses, as they can harbor mold and debris.
Thoroughly Dry Your Washer and Dryer
Moisture is the enemy of electrical components. Even after cleaning, residual water can cause short circuits and long-term corrosion. Drying is a crucial step that requires patience.
- Sun Drying (Preferred): If possible, move your washer and dryer to a sunny, well-ventilated area outdoors. Allow them to dry thoroughly for at least 8 hours, or even longer, depending on the humidity and temperature. Sunlight can help evaporate moisture and inhibit mold growth.
- Internal Components: The exposed wiring in the large drive motors is a primary concern. Dirty floodwater can soften the varnish on motor windings, making them susceptible to shorting out when power is applied. Ensuring these are completely dry is paramount.
- Accelerated Drying: If you have power and can safely access the drive motor via an access panel (always unplug first!), a hair dryer on a cool setting can help speed up the drying process for internal components. Direct airflow into nooks and crannies where moisture might linger.
- Ventilation: Keep appliance doors and panels open to allow for maximum air circulation during the drying process.
Test Your Washer and Dryer for Functionality
Once your appliances are clean and thoroughly dry, it’s time for careful testing. Remember, safety first! Ensure you have an appropriate grounded electrical outlet.
Testing an Electric Dryer:
Plug your electric dryer into a grounded wall outlet. Do not connect the exhaust duct just yet. Set the controls to a low heat setting and press the start button.
- Initial Run: A faint smell of smoke may occur if dirt, lint, or residue from the floodwaters is burning off the heater coils. This can be normal for a short period. Monitor it closely.
- Circuit Breaker Trip: If the circuit breaker immediately trips or the dryer stops abruptly, it indicates a significant electrical issue, most likely a damaged drive motor. If this happens, proceed to the “Failed Test Options” section.
- Timer Issues: If the dryer runs but the cycle control knob doesn’t advance, the small motor within the timer switch may be damaged. While the dryer might still produce heat, it will no longer automatically shut off. You would need to use an external timer or manually monitor drying times, or replace the timer switch.
Testing a Washer:
Hook up the washer drain and water hoses securely. Plug the washer into a grounded power outlet. Select any wash cycle with the lowest possible water level. Do not load any clothes yet.
- Start Cycle: Start the wash cycle and observe. Wait until the water level is satisfied.
- Agitation/Rotation: For a top-loader, watch if the agitator starts moving. For a front-loader, observe if the drum begins to turn. This indicates the motor and basic controls are functioning.
- Cycle Completion: Declare a victory if the washer successfully finishes the entire cycle, including draining and spinning.
- Cycle Stalling: If the washer gets stuck in the agitate cycle and fails to advance to drain or spin, the cycle selector or a related control component may need replacement.
- Post-Test Cleaning: If successful, run several empty wash cycles with higher water levels and a strong detergent to further flush out any remaining dirt and sanitize the tub.
Failed Test Options: Repair or Replace?
If your washer or dryer fails any of these tests, you have a decision to make. While some minor component failures might be worth repairing, significant motor damage or multiple system failures can make repair costly and impractical.
- DIY Repair: The internet is an invaluable resource for appliance repair. Websites dedicated to appliance parts and repair procedures (like those recommended by experienced technicians) coupled with instructional videos on platforms like YouTube can guide you through replacing specific components. Parts for common failures (like timer switches or simple motors) are often relatively inexpensive and the repair can be done by an average homeowner with basic tools.
- Professional Repair: Be prepared for potential costs. Waiting weeks for a technician and paying for parts and labor that might exceed half the cost of a new machine may not make economic sense. Get multiple quotes if you consider this option.
- When to Discard: If multiple major components are compromised, or if the cost of repair approaches the price of a new, energy-efficient appliance, it might be time to take the unit to the curb. However, many components are replaceable, giving these machines a second chance.
Bringing Your Flooded Refrigerator or Freezer Back to Life
A flooded refrigerator or freezer presents unique challenges, primarily due to spoiled food and the potential for severe contamination. The decision to restore or discard often hinges on sanitation and the extent of damage to critical cooling components.
Revive or Discard: Assessing Your Refrigerator or Freezer
The sight and smell of spoiled food in a flooded, powerless refrigerator or freezer can be overwhelming. Before attempting any repairs, you must make a critical decision based on its initial performance after being reconnected to power.
- Initial Power-Up: Plug the refrigerator or freezer into a grounded outlet. Confirm that power is reaching the unit by checking if the internal light comes on when the door is opened.
- Signs of Hope: If the internal light works and you hear the compressor humming or a fan running, and the freezer section begins to cool (you might feel a noticeable temperature drop after 30-60 minutes), there is hope for revival.
- Time to Discard: If power is on (light works) but absolutely nothing is moving or making noise (no fan sounds, no compressor hum), then the motor or control board is likely ruined, and discarding the machine is the most sensible option.
- Food Safety: Any food that was in the unit during the flood and power outage should be immediately and safely discarded. Floodwaters can introduce bacteria and pathogens that make food unsafe to consume.
Thoroughly Clean Your Refrigerator or Freezer
If you’ve decided to keep the machine, an intensive cleaning process is mandatory to eliminate odors and harmful bacteria.
- Empty and Turn Off: Remove all contents (and safely dispose of spoiled food). Turn off the refrigerator/freezer using its thermostat control. This allows the internal lights to illuminate the interior during cleaning without the unit actively cooling.
- Sanitation: All traces of food, debris, and mold must be meticulously removed. Clean all interior surfaces, shelves, drawers, and especially the seals and seams of the plastic liner. Use a strong disinfectant suitable for food-contact surfaces. A solution of warm water and dish soap, followed by a bleach solution (1 tablespoon bleach per gallon of water) for disinfection, is often recommended, but ensure thorough rinsing afterwards.
- Condenser Coils: The condenser coils are usually located at the bottom, behind the toe plate or a rear access panel. These coils dissipate heat, and if clogged with flood debris and lint, the appliance won’t cool efficiently. Carefully clean as much lint and dirt off the coils as you can using a brush and vacuum.
- Important Note on Moving: Do not lay a refrigerator or freezer down on its side or back to gain access to the condenser coils or for cleaning. If it has been laid down for any reason (moving or cleaning), stand it upright for at least 24 hours before plugging it back in. This allows the compressor oil to settle properly, preventing potential damage.
Test Your Refrigerator or Freezer for Cooling Performance
After thorough cleaning and allowing the unit to stand upright for 24 hours (if moved), it’s time to test its cooling capabilities.
- Temperature Monitoring: Place a thermometer in the freezer section and let the refrigerator or freezer run for several hours. Ideal freezer temperatures approach 0 degrees Fahrenheit (-18 degrees Celsius).
- Cooling Issues: If the machine struggles to reach 32 degrees Fahrenheit (0 degrees Celsius), check the condenser fan located at the bottom near the coils. A malfunctioning fan means heat isn’t being efficiently removed, impacting cooling performance.
- Defrost System: If the freezer section cools initially but then warms up to around 32 degrees Fahrenheit after a day or two, and frost appears, the defrost heaters or the defrost timer motor/switch may not be working correctly. You might be able to manually force the machine into and out of defrost by advancing the defrost timer/switch, which is usually a small knob or dial accessible from an access panel.
- Wet Insulation: Sweating or condensation on the outside of the cabinet or doors indicates that the fiberglass insulation inside the walls is wet. This is a very difficult, often impossible, repair for a homeowner, as exposing and thoroughly drying this type of insulation is extremely challenging. Wet insulation significantly reduces efficiency and can lead to mold, making the appliance a health hazard.
Repairing Your Refrigerator or Freezer
For refrigerators and freezers, major repairs to the sealed refrigerant gas components (compressor, evaporator coils, or condenser coils themselves) are usually not feasible or cost-effective for a homeowner. These require specialized tools and certification.
However, many common failures occur in the electrical parts, which are often more accessible and repairable:
- Defrost Timer/Switch: As mentioned, these can fail, leading to excessive frost and poor cooling.
- Fan Motors: Both the condenser fan (bottom, near coils) and evaporator fan (inside freezer) can fail, hindering airflow and cooling.
- Defrost Heaters: These warm up to melt frost. If they fail, ice builds up.
- Thermistor/Temperature Sensors: These help regulate temperature and can be replaced.
These parts are generally relatively inexpensive, and with online resources (parts diagrams, troubleshooting guides, YouTube videos), the repair procedures can often be performed by the average homeowner. Always ensure the appliance is unplugged before attempting any electrical repairs.
This article was submitted by Oron Schmidt, who has been an expert in the appliance repair business for 30 years. He was inspired to write this piece after witnessing the devastation of Hurricane Harvey in his home state of Texas, providing invaluable advice for those facing similar challenges. He recommends researching reputable resources, such as specialized appliance repair websites, for detailed repair procedures and part sourcing.