
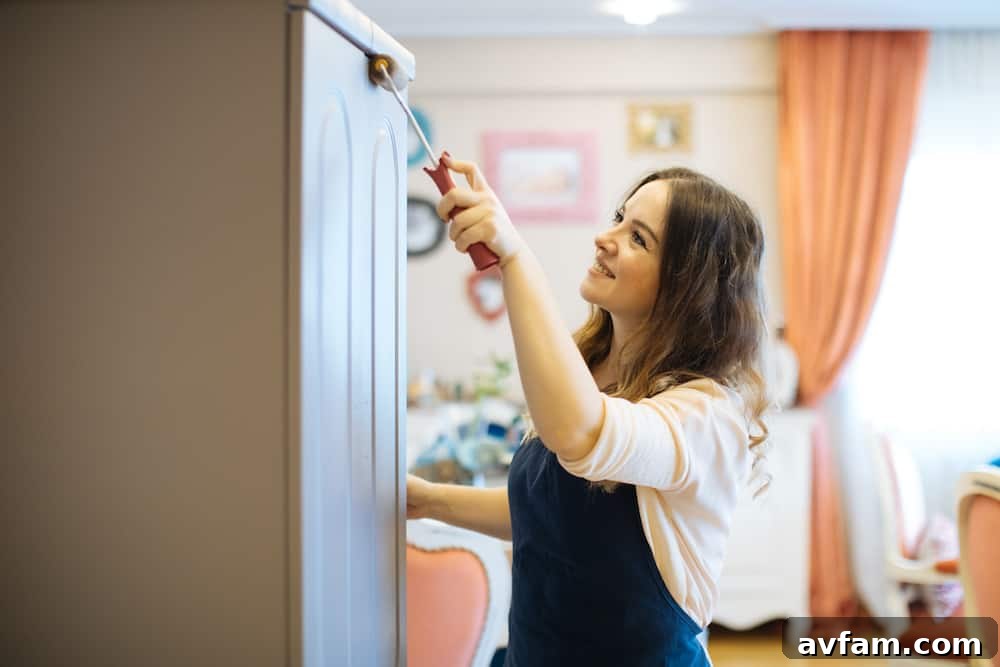
Is your kitchen starting to feel a bit tired, perhaps even uninspired? Are your current cabinets showing signs of wear and tear, or simply looking outdated? Do you dream of revitalizing this central hub of your home without the hefty price tag of a full remodel? If your answer is yes, then giving your kitchen cabinets a fresh coat of paint is an incredibly effective, budget-friendly, and immensely rewarding solution.
This comprehensive and easy-to-follow guide will walk you through every essential step of painting kitchen cabinets, making the process straightforward and enjoyable. We’ll transform those old, weary cabinets into stunning, vibrant focal points that breathe new life into your entire kitchen space. From meticulous cleaning and strategic sanding to flawless primer application, precise painting, and the final flourish of new hardware, we’ll cover all the details. This isn’t just about painting; it’s about giving your kitchen a complete facelift with just a few simple, yet impactful, steps.
Whether your goal is a subtle refresh to brighten the room or a dramatic change to give your kitchen an entirely new personality, join us on this journey. We’ll unveil the exciting possibilities and immense satisfaction that come with giving your beloved kitchen cabinets the tender loving care they deserve, resulting in a space you’ll be proud to show off.
Introduction: The Transformative Power of Painting Your Kitchen Cabinets
Painting your kitchen cabinets is more than just a home improvement project; it’s a powerful tool for transformation, allowing you to imbue your space with an entirely new personality without the prohibitive costs often associated with kitchen renovations. Whether you envision a subtle, elegant refresh or a more bold and drastic change, painting your cabinets stands out as one of the most affordable, accessible, and impactful ways to achieve a significant makeover in any room, especially the kitchen.
Beyond the aesthetic appeal, a fresh coat of paint serves a crucial protective function. It helps to shield your cabinets from the daily wear and tear, moisture, and grime that are inherent to kitchen environments, extending their lifespan and preserving their integrity. More importantly, it empowers you to unleash your creativity, allowing you to craft a unique look that perfectly mirrors your personal style and taste. With an extensive palette of colors, sheens, and finishes available today, you are sure to discover the ideal combination to create a stunning, custom kitchen aesthetic that feels uniquely yours.
The beauty of painting cabinets also lies in its surprising simplicity. While it requires careful preparation and patience, it’s a project that many homeowners can confidently tackle themselves. All you truly need is some dedicated prep work, the right selection of paint brushes, rollers, and a quality primer. So, there’s no need to hesitate. Embrace this opportunity to revitalize those outdated, perhaps even forgotten, cabinets. Give them the attention they deserve and watch as they are reborn with an exciting new look, courtesy of a fresh, vibrant coat of paint today. It’s an investment in your home’s beauty and your daily enjoyment.
Preparing to Paint: Essential Supplies for a Professional Finish
The secret to achieving a durable, smooth, and professional-looking finish when painting your kitchen cabinets lies almost entirely in the preparation. Before you even think about opening a can of paint, it’s absolutely crucial to gather all the necessary supplies. Having everything on hand ensures that your project flows smoothly, efficiently, and correctly, preventing frustrating interruptions and delays.
While some tools are universally essential for any painting endeavor, such as various grits of sandpaper, protective drop cloths, and a selection of high-quality paint brushes and rollers, there are several other items that, while less obvious, are equally vital for a successful outcome. Here’s a detailed list of what you’ll need:
- Cleaning Supplies: A heavy-duty degreaser or a mild detergent (like dish soap), sponges, and clean rags are essential for removing grease and grime. For metal cabinets, a specific metal surface cleaner might be required.
- Sanding Materials: An orbital sander (highly recommended for efficiency) with a range of sandpaper grits (e.g., 120-grit for initial sanding, 220-grit for smoothing). Sanding blocks for corners and intricate details are also very useful.
- Primer: Select a high-quality primer specifically designed for the material of your cabinets (e.g., wood, laminate, metal). Shellac-based or oil-based primers are excellent for blocking stains and ensuring strong adhesion, especially over glossy or problematic surfaces.
- Paint: Choose a durable paint formulated for cabinetry. Oil-based enamels or water-based acrylic-urethanes are excellent choices for their hardness and resistance to chipping. Consider the sheen: satin, semi-gloss, or gloss are common for kitchens due to their cleanability.
- Application Tools: High-quality synthetic brushes (angled brushes for details, flat brushes for larger areas), foam rollers or microfiber rollers (for smooth finishes), and paint trays.
- Protection: Drop cloths or old sheets to protect floors and countertops, painter’s tape (blue tape for delicate surfaces, green for longer adhesion), and plastic sheeting to cover appliances.
- Safety Gear: Safety glasses to protect your eyes, gloves to keep your hands clean and protected, and a respirator mask, especially when sanding or using oil-based paints/primers for ventilation.
- Hardware Storage: Clearly labeled plastic bags or containers for storing cabinet hardware (hinges, knobs, pulls) as you remove them. This prevents loss and confusion during reinstallation.
- Screwdriver/Drill: To remove and reattach cabinet doors and hardware.
- Optional but Recommended: Wood filler for minor imperfections, tack cloths for dust removal, and a deglosser liquid (chemical deglosser) as an alternative or supplement to sanding for certain surfaces.
With all these materials diligently at the ready, you’ll be fully equipped to tackle this task efficiently, without the frustration of pausing your progress to search for forgotten items. This meticulous preparation is the bedrock of a successful and satisfying cabinet painting project.
Step One: Thorough Cleaning for Optimal Adhesion
The inaugural and perhaps most critical step in successfully painting your kitchen cabinets is ensuring they are impeccably clean. This isn’t just about aesthetics; it’s about creating the perfect foundation for your primer and paint to adhere smoothly, evenly, and durably. Any residual grease, grime, or dirt will compromise adhesion, leading to peeling, bubbling, or an uneven finish down the line.
Begin by meticulously removing all existing hardware from your cabinets. This includes door handles, hinges, and drawer pulls. As you remove each piece, immediately place it into a clearly labeled plastic bag. Group hinges together, pulls together, and label them if necessary (e.g., “upper left cabinet hinges”) to ensure safe keeping and easy reinstallation. This also allows for thorough cleaning and painting of all surfaces.
Next, tackle the cleaning process with a heavy-duty degreaser or a strong solution of mild detergent (like dish soap mixed with warm water). Kitchen cabinets, especially those above the stove or near the sink, accumulate layers of grease, food residue, and general grime that regular cleaning might miss. Apply your chosen cleaning agent generously with a sponge or cloth, focusing on high-touch areas, corners, and edges where grease tends to build up. Allow the degreaser to sit for a few minutes to break down stubborn gunk, then scrub thoroughly.
After scrubbing, it’s imperative to wipe down each cabinet surface with a clean, damp cloth. Rinse your cloth frequently to avoid spreading contaminants. The goal is to remove all traces of the cleaning solution and loosened grime. Be careful not to saturate wooden cabinets, as excessive moisture can cause swelling or warping. Work section by section, ensuring each area is clean and free of residue. Once the wiping is complete, allow the cabinets to air dry completely. You can also use a clean, dry cloth to speed up the process. Even a slight film of moisture can interfere with adhesion, so patience here is key.
For cabinets with metal doors or frames, such as those found in some older or industrial-style kitchens, additional preparation is essential to prevent rust and ensure paint adhesion. Start by using an appropriate metal cleaner to remove any oxidation or surface contaminants. Follow this with a light sanding using a fine-grit sandpaper (around 320-grit) to create a mechanical bond. Then, go over the entire metal area with mineral spirits to remove any remaining oils or dust. Finally, rinse thoroughly with water and allow it to dry completely before applying a rust-inhibiting primer. This extra attention to metal surfaces will prevent potential issues like bubbling or rust bleeding through your paint.
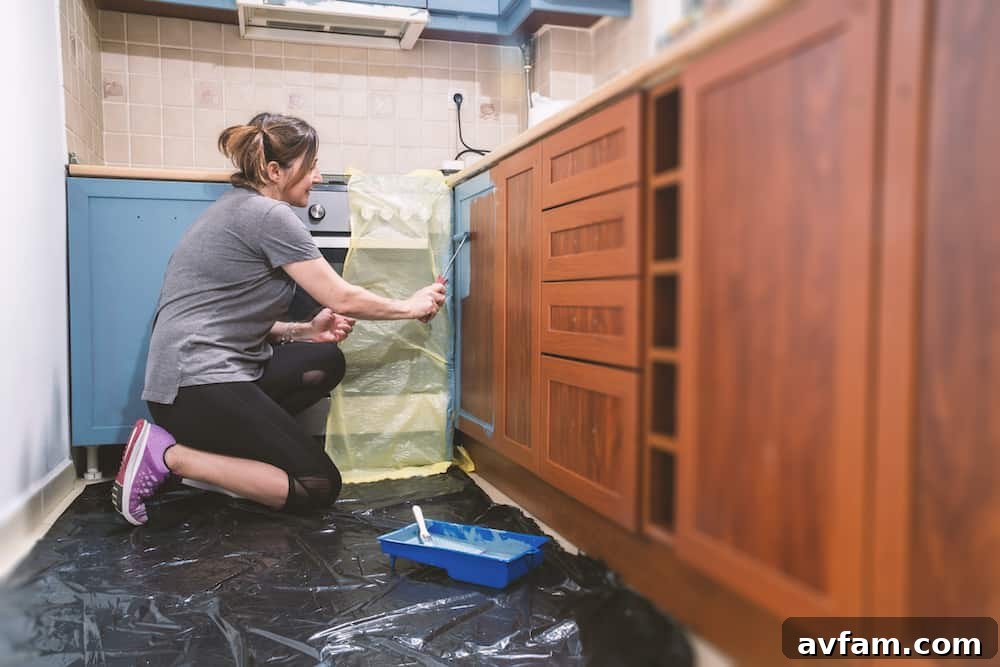
Step Two: Precision Sanding for a Flawless Foundation
Once your cabinets are immaculately clean and completely dry, the next crucial step in preparing them for a professional paint finish is sanding. Sanding serves multiple vital purposes: it creates a “tooth” for the primer and paint to grip onto, removes any remaining imperfections or old finishes, and ensures an incredibly smooth surface that will translate directly into a flawless final coat. Skipping this step or doing it inadequately is a common mistake that can lead to poor adhesion, uneven finishes, and overall dissatisfaction.
For efficient and effective sanding of your kitchen cabinets, an orbital sander equipped with 120-grit sandpaper is highly recommended for the initial pass. This grit is coarse enough to effectively remove the existing glossy finish, old stain, or minor surface imperfections, without being so aggressive that it damages the wood. Begin by lightly sanding each cabinet surface – doors, drawer fronts, and cabinet boxes – until all traces of gloss or sheen are gone. The goal is to create a dull, uniform surface. When operating an electric sander, maintain a steady, progressive motion, moving it consistently over each area. Avoid lingering in one spot for too long, as this can create divots, burn the wood, or leave unsightly streaks that will be visible through your paint.
After completing the initial sanding with 120-grit paper, meticulously go back over all surfaces with a finer 220-grit sandpaper. This finer grit will smooth out any minuscule scratches left by the coarser paper, ensuring an ultra-smooth surface ready for priming. For intricate details, corners, or areas where the orbital sander cannot reach, use a sanding sponge or a piece of sandpaper wrapped around a sanding block for precise control. Once all sanding is complete, use a shop vacuum with a brush attachment to remove the bulk of the dust, followed by a tack cloth to meticulously pick up any lingering fine dust particles. A completely dust-free surface is essential for proper adhesion.
While cleaning and sanding provide an excellent foundation, an additional step that can significantly improve adhesion and overall finish is the application of a deglosser. Deglossers are special chemical solutions specifically formulated to break down and remove the gloss from wooden or previously finished surfaces, creating an ideal surface for new paint. They also help to fill in tiny pores, minimizing the chance of air pockets forming later. Many deglossers are fast-drying, making them ideal for projects with time constraints. Carefully follow the manufacturer’s instructions for application, typically applying liberally across each surface with a clean cloth, and allowing it to set for the recommended time before wiping clean. This chemical roughening can be particularly beneficial for tricky surfaces or as an extra insurance policy for optimal paint bonding. Remember to always work in a well-ventilated area and wear appropriate safety gear when using chemical deglossers.
Step Three: The Critical Role of Applying a Quality Primer
Applying primer to your kitchen cabinets is an absolutely non-negotiable step and arguably one of the most important stages in the entire painting process. Primer is not merely an optional extra; it’s a foundational layer that performs multiple critical functions, directly impacting the durability, appearance, and longevity of your painted cabinets. It acts as a crucial bridge, creating a superior bond between the prepared cabinet surface and the topcoat of paint, while also offering enhanced protection against moisture, stains, and the notorious “tannin bleed-through” common with certain wood types.
To ensure you achieve excellent coverage and optimal adhesion of the primer, it’s highly recommended to use a high-quality brush or a small foam or microfiber roller specifically designed for smooth finishes. While spray primers exist, they can be harder to control for even coverage on detailed cabinet surfaces, often leading to overspray and uneven application. Begin by applying the primer with long, even strokes, covering all surfaces thoroughly. Work in manageable sections, ensuring each area receives an adequate, uniform coat. Avoid applying too thickly, as this can lead to drips and prolonged drying times. Once the first coat is applied, allow at least two to four hours for it to dry completely, or follow the manufacturer’s specific drying time recommendations, before considering a second coat or moving on to painting.
When applying primer, meticulous attention to detail is paramount, especially around corners, edges, and any intricate profiles of your cabinet doors. These areas are inherently more prone to chipping or peeling later on if not properly primed. For these tight spaces and detailed sections, utilize a small, angled brush, which provides greater control and allows you to reach into crevices without leaving unsightly streaks or drips. Furthermore, if you are painting the inside of your cabinet drawers, ensure that all sides are coated with an equal and even amount of primer. Uneven application or skipping interior surfaces can lead to moisture absorption discrepancies, potentially causing the wood to warp over time. After priming, it’s often beneficial to allow the primer to cure overnight, especially if you plan to do a light sanding with 320-grit sandpaper between primer coats (if applying two) or before the first paint coat. This additional sanding ensures maximum smoothness and helps knock down any raised grain, providing an even more professional final finish.
Step Four: Expert Techniques for Painting Your Cabinets
Painting the cabinets is the stage where your vision truly comes to life, and mastering the application techniques is paramount to achieving that coveted professional-looking finish. The choice of paint, coupled with careful application, will determine the durability and aesthetic appeal of your rejuvenated kitchen. To ensure your project meets and exceeds expectations, careful selection and methodical execution are key.
Begin by selecting an appropriate paint specifically formulated for kitchen cabinetry. Durability is non-negotiable in a high-traffic area like the kitchen. Excellent choices include oil-based enamel paints, renowned for their hard, resilient finish and excellent resistance to chipping, and water-based acrylic-urethane paints, which offer fantastic durability, a smoother flow, easier cleanup, and quicker drying times with less odor. When considering sheen, semi-gloss and satin finishes are popular for cabinets; they strike a good balance between durability, ease of cleaning, and a subtle luster that doesn’t overemphasize imperfections like a high-gloss finish might. Avoid flat or matte paints for cabinets, as they are notoriously difficult to clean and less durable.
When it comes to application, the right tools make all the difference. For intricate details, corners, and recessed panels, high-quality angled brushes (1.5 to 2 inches) provide precision and control, helping you cut into tight spaces cleanly. For larger, flat surfaces like door panels and cabinet frames, a high-density foam roller or a fine-nap microfiber roller (typically 4 or 6 inches) will deliver the smoothest, most brush-stroke-free finish. Load your brush or roller moderately; over-loading leads to drips and runs. Start by painting the detailed areas and edges with your brush, then immediately follow with your roller on the flat surfaces, “back-rolling” into the wet brush strokes to ensure a seamless transition and even coverage.
Apply the paint in light, thin coats rather than one thick layer. Thin coats dry faster, reduce the likelihood of drips, and allow for better adhesion between layers, resulting in a much more durable and professional finish. Aim for at least two to three thin coats. After each coat, allow ample drying time according to the paint manufacturer’s instructions – typically several hours. Rushing this step will lead to tacky surfaces, brush marks, and potential peeling. Lightly sand with 320-grit sandpaper between coats after the paint has fully dried to achieve an even smoother surface and ensure better inter-coat adhesion, then wipe clean with a tack cloth before applying the next coat. This intermediate sanding is crucial for a truly glass-smooth finish.
Finally, once all your cabinets have received their final coat of paint and have been allowed adequate drying time (this can be at least 24-48 hours, with full curing taking several days to weeks, so handle with care), you are ready for the exciting step of reattaching them to their frames and adding the hardware. Ensure the paint is hard enough to withstand handling before putting everything back together to avoid nicks and scratches. This patient approach will ensure a beautiful, long-lasting painted finish that looks like it was done by a professional.
Step Five: The Finishing Touch – Adding New Hardware
The final, yet immensely impactful, step in your kitchen cabinet transformation is the addition of new hardware. This isn’t merely functional; it’s an essential design element that ties the entire look together, ensuring a polished, professional finish that perfectly complements your newly painted cabinets. The hardware acts as the jewelry of your kitchen, capable of defining or redefining its style, from classic elegance to sleek modernity.
The type of hardware you choose should align with the overall aesthetic you’re aiming for. For instance, if you’re leaning towards a more traditional or farmhouse look, decorative knobs and pulls featuring raised edges, intricate carvings, or classic finishes like oil-rubbed bronze or brushed brass would be ideal. These details add character and a sense of timelessness. Conversely, if a contemporary, minimalist aesthetic appeals to you, then sleek, linear metal bar pulls, discreet finger pulls, or simple round knobs in chrome, brushed nickel, or matte black would be better suited. These styles emphasize clean lines and understated elegance, contributing to a modern, uncluttered feel. Regardless of the style, it’s crucial that all individual pieces of hardware – knobs, pulls, and even hinges if visible – match in finish and style to create a cohesive and unified look throughout the entire kitchen, even if individual elements vary slightly in color or texture.
Before beginning the installation of your new hardware, there are several vital considerations. First and foremost, verify compatibility: will your chosen hardware fit the existing holes on your cabinets and drawers? If you’re replacing old hardware with new pieces that have different drilling specifications, you might need to fill existing holes with wood filler, sand them smooth, and drill new ones. This is a common scenario and an opportunity to upgrade the hardware spacing if desired. Secondly, and critically, measure twice (or even thrice!) before making any cuts or drilling any new holes into your newly painted cabinet surfaces. Precision is key here. Use a hardware template, a ruler, and a pencil to meticulously mark the exact placement for each knob or pull. This attention to detail ensures uniformity and prevents costly mistakes like misaligned hardware or unnecessary holes, ensuring that nothing gets wasted and everything looks perfectly aligned when completed.
Finally, once all measurements are confirmed and any new holes are carefully drilled, use the appropriate screws provided by the manufacturer to securely attach the hardware. Be mindful not to overtighten, especially on painted surfaces, as this can crack the paint or damage the wood. Hand-tightening with a screwdriver is often preferred over power drills for the final snugness. Stand back and admire your handiwork! Your cabinets, now adorned with their chosen accessories, should be ready for their grand reveal. After hours of diligent preparation and careful application, these new additions are the perfect complement, transforming your kitchen into a truly personalized and stunning space.
Conclusion: A Fresh, Updated Look for Your Kitchen & Lasting Value
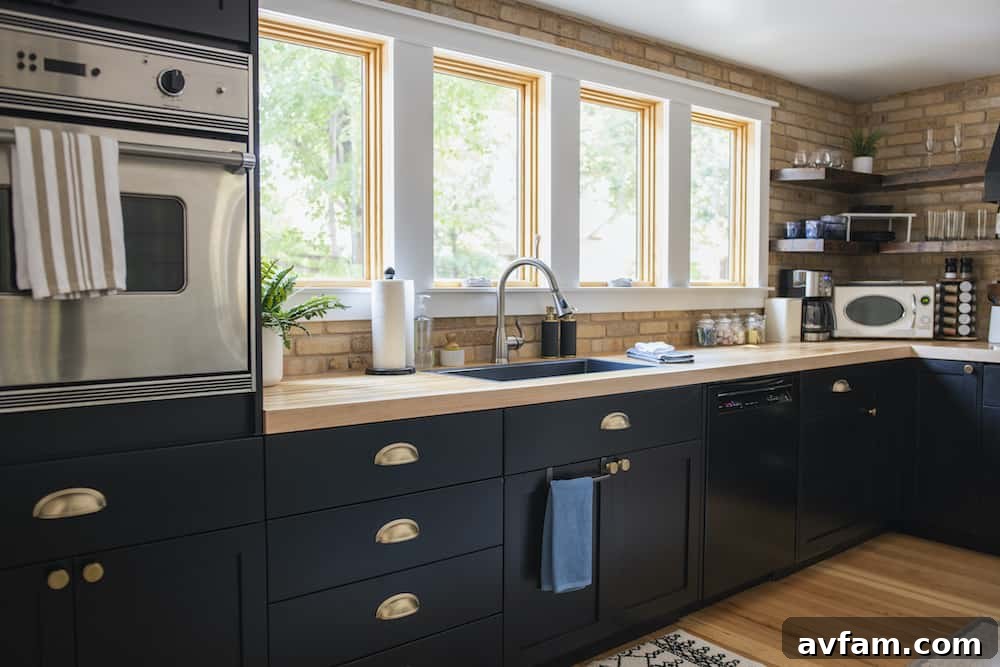
The culmination of your kitchen cabinet painting project is a deeply rewarding experience, one that transcends mere aesthetics. You and your family now have the pleasure of enjoying a beautifully updated kitchen, a space that feels fresh, vibrant, and entirely renewed for years to come. The strategic application of new colors, coupled with the thoughtful addition of complementary hardware, breathes an invigorating sense of life into your home without necessitating the significant financial outlay typically associated with a complete kitchen renovation.
The transformation from dull, outdated, or worn cabinets into something strikingly modern, inviting, and personally tailored is truly remarkable. This stunning metamorphosis is achieved through a series of logical, manageable steps – all it demands is a commitment of time, a steady hand, and the dedication to meticulously follow the process. When executed correctly, this DIY endeavor not only enhances your daily living environment but also provides tangible benefits for your home’s long-term value. Potential buyers, when the time comes for resale, are significantly more likely to be attracted by an updated, well-maintained kitchen, often considering it a major selling point that reflects positively on the entire property.
Ultimately, investing your effort and a modest amount of resources into painting your kitchen cabinetry is an investment that yields substantial returns, both financially and aesthetically. It empowers you to create a personalized sanctuary, a kitchen that truly reflects your style, while simultaneously boosting your home’s appeal and market value. So, there’s no reason to postpone this impactful project any longer. Seize this opportunity today, embark on your cabinet painting journey, and revel in the joy and pride of a beautifully transformed kitchen.