
Revitalize Your Lawn: A Comprehensive Guide to DIY Sprinkler Head Replacement and PVC Pipe Repair
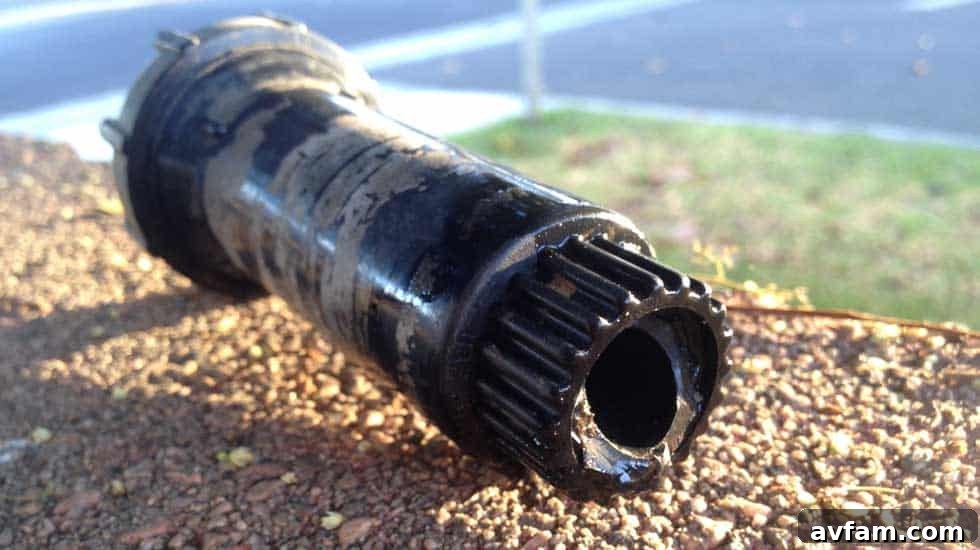
There’s nothing quite as frustrating for a homeowner as witnessing patches of their once vibrant, green lawn wither and turn brown. Often, the culprit isn’t a lack of watering, but rather a hidden issue with the irrigation system. This was precisely the situation I encountered recently when a prominent section of our front lawn began to die off, despite being in a somewhat shaded area where grass had always thrived. A quick inspection of the sprinkler heads revealed a common, yet often overlooked problem: one of the heads was completely detached from its PVC pipe, severed by an encroaching tree root.
Tree roots are relentless in their search for water, and unfortunately, sprinkler pipes often provide an irresistible target. Over time, as roots grow thicker and stronger, they can exert immense pressure, leading to cracks, disconnections, or even complete shearing of PVC pipes and sprinkler heads. While this might seem like a daunting repair, especially for those new to DIY projects, I’m here to assure you that with the right tools and a systematic approach, replacing a broken sprinkler head and repairing the underlying PVC pipe is a perfectly manageable task. This detailed guide will walk you through every step of the process, ensuring your lawn gets back to its lush, green glory in no time.
Identifying the Culprit: Signs of a Damaged Sprinkler Head
Before diving into the repair, it’s crucial to accurately diagnose the problem. Dead or dying patches of grass are a tell-tale sign of inadequate watering, but what else should you look for? Here are some common indicators of a compromised sprinkler system:
- Dry, Brown Patches: As in my case, isolated areas of your lawn turning brown despite regular irrigation cycles often point to a non-functioning sprinkler head in that zone.
- Waterlogged Areas: Conversely, if you notice overly saturated or muddy spots, it could be a sign of a leaking pipe or a broken sprinkler head spraying continuously in one spot, leading to inefficient water distribution and potential waste.
- Visible Damage: Sometimes the damage is obvious. A sprinkler head might be sitting askew, completely popped off, or visibly cracked. Inspecting each head in the affected zone is a good first step.
- Low Water Pressure: If the entire zone seems to have reduced pressure, it could indicate a larger leak somewhere along the main line or a significant break at a specific head.
- Unusual Spray Patterns: A sprinkler head that’s sputtering, spraying erratically, or not covering its intended area suggests internal damage or blockage.
In my situation, the cause was clear: a sprinkler head physically separated from its connection, undoubtedly a result of a strong tree root. This required not just replacing the head, but also a section of the pipe.
Prepping for the Repair: Digging Down to the Problem
Once you’ve pinpointed the damaged area, the next step is excavation. This requires a bit of patience and care, especially if you’re dealing with stubborn tree roots. My initial task involved carefully digging around the remaining pipe, which proved to be quite a workout due to the dense network of roots. It’s important to create enough space to comfortably work on the pipe without further damaging the system or your hands.
When digging, use a small shovel or a sturdy garden trowel. Begin by removing the top layer of soil, expanding the perimeter until you can clearly see the full extent of the damaged pipe and its connection point. Be mindful of any surrounding utility lines; it’s always a good idea to call 811 (in the US) before any significant digging to avoid accidentally severing electrical, gas, or communication lines.
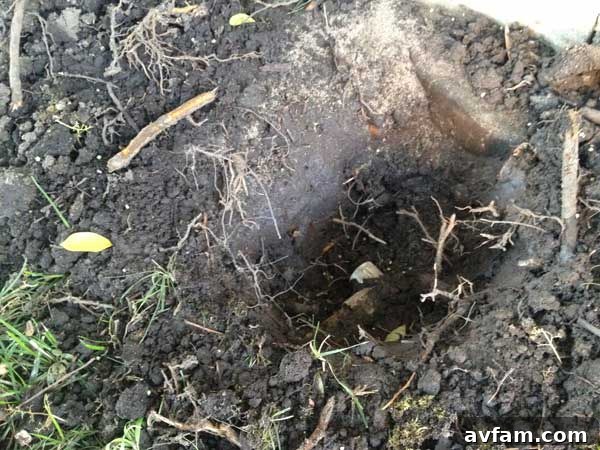
For the roots, a sharp pair of pruning shears or even a small hand saw might be necessary. Cut away any roots that are directly impeding your access or appear to be contributing to the damage. While it’s tempting to rip them out, clean cuts are better for the tree’s health and prevent further issues down the line. Keep digging until you have a clear, spacious trench around the pipe, allowing for easy access to cut, clean, and cement new sections.
Assessing the Damage and Gathering Materials
Upon further inspection of my broken sprinkler head, it became clear that the threaded connection piece had snapped off, leaving a clean break. This meant simply attaching a new head wouldn’t suffice; I needed to cut out the existing damaged section of PVC pipe and replace it, along with the elbow connecting it to the main line. This is a common scenario when root pressure is the cause.
Essential Tools:
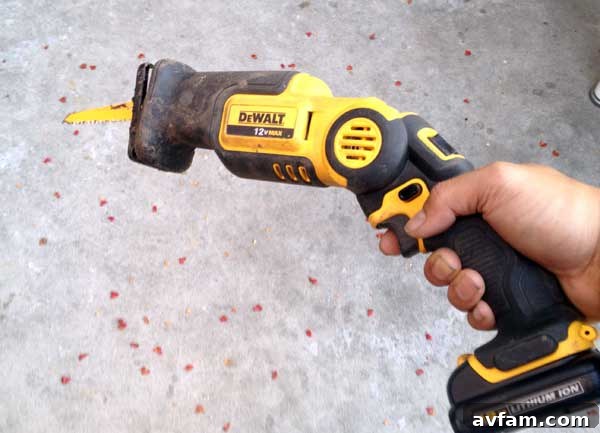
- Pipe Cutter: A PVC pipe cutter (ratcheting style) offers the cleanest, most precise cuts. A hacksaw or a reciprocating saw (like my DeWALT pivot recip saw) can also work, but require more care to ensure straight edges.
- Measuring Tape: Crucial for accurate pipe measurements.
- Shovel/Trowel: For excavation.
- Safety Glasses and Gloves: Always protect your eyes and hands when working with tools and chemicals.
- Utility Knife or File: To deburr pipe edges after cutting.
Materials List:
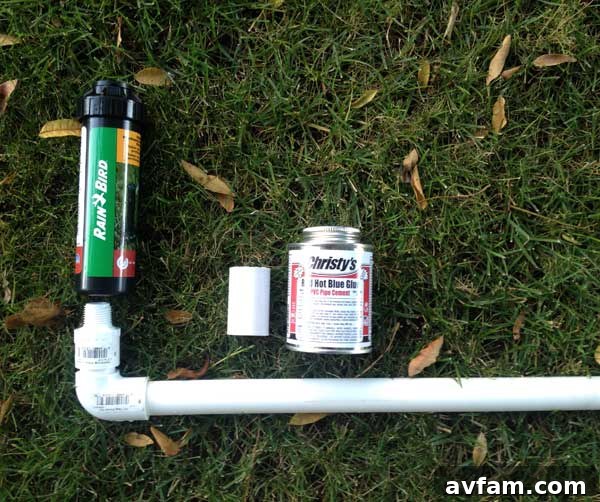
A quick trip to your local home improvement store will arm you with everything you need. Here’s what I picked up:
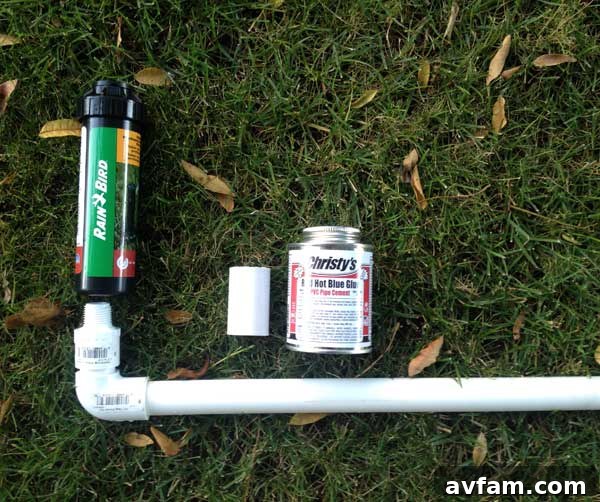
- PVC Pipe (3/4 inch): Ensure you match the diameter of your existing irrigation lines. I needed 3/4 inch pipe. Buy a length slightly longer than you anticipate needing.
- PVC Elbow (3/4 inch): To connect the new pipe section at the correct angle.
- Threaded Step-Down Adapter (3/4 inch to 1/2 inch): Most rotor sprinkler heads have a 1/2 inch threaded inlet, while main lines are often 3/4 inch or 1 inch. This adapter bridges the size difference.
- New Sprinkler Head: I opted for a Rain Bird rotor sprinkler head, known for its efficiency and coverage. Consider replacing with the same model to ensure consistent performance across your zone, or upgrade if necessary.
- PVC Primer and Cement: Absolutely critical for creating strong, watertight seals. Don’t skip the primer!
- Teflon Tape or Pipe Dope: For sealing the threaded connection of the sprinkler head.
Pro Tip: Before purchasing, I always recommend dry-fitting the PVC components (pipe, elbow, adapter) at the store. This helps visualize the assembly, confirm you have the correct sizes, and ensures you buy enough straight pipe length for any extensions or repairs.
The Repair Process: Step-by-Step
1. Shut Off the Water Supply
This is the most crucial first step. Locate the main shut-off valve for your irrigation system (or the main water supply to your house if you don’t have a separate irrigation valve) and turn it off completely. Running water through a broken pipe can cause significant flooding and further damage.
2. Removing the Damaged Pipe Section
With the water off and the area excavated, it’s time to cut out the compromised pipe. Using your chosen cutting tool (PVC cutter, hacksaw, or reciprocating saw), make clean, straight cuts on either side of the damaged section. Aim to cut far enough past the break to ensure you’re working with structurally sound pipe. For my project, I needed to replace the section leading up to the sprinkler head and the elbow connecting it.
I utilized my DeWALT pivot recip saw, which made quick work of the old pipe. If you’re using a hand saw, ensure your cuts are as straight as possible, as this will aid in creating a strong seal later. After cutting, lightly deburr the edges of the existing pipe using a utility knife or file to remove any plastic shavings and create a smooth surface for cementing.
3. Measuring and Cutting New Pipe Sections
Now, measure the length needed for your new PVC pipe segment. This is where precision matters. Account for the depth that the pipe will seat into the fittings (elbow, adapter). You want the sprinkler head to eventually sit flush with the ground, or slightly above, once installed. In my case, I measured the length needed to extend the pipe and position the new sprinkler head approximately two inches from a nearby wall, ensuring optimal spray coverage.
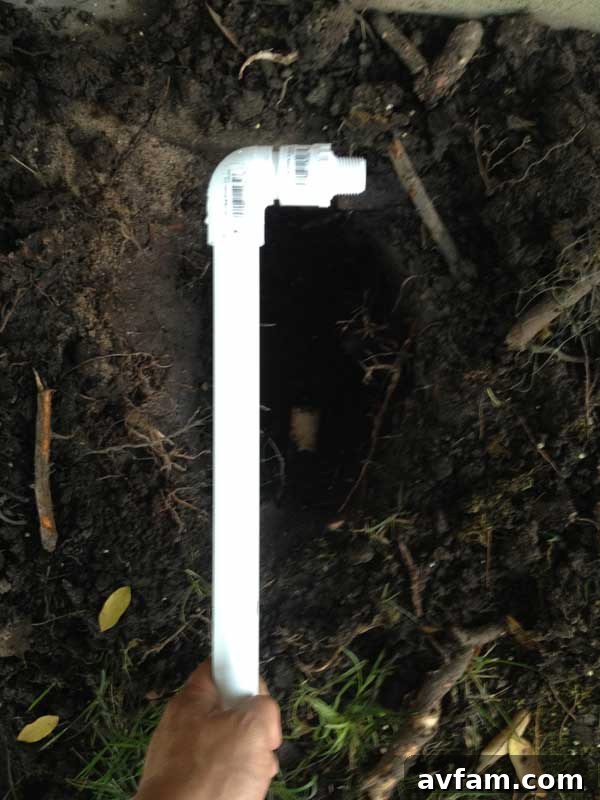
Cut your new PVC pipe to the precise measurement. Again, deburr the cut edges to ensure a clean surface for adhesion.
4. Dry-Fitting the New Assembly
Before applying any primer or cement, dry-fit all the new components: the new pipe section, the elbow, and the threaded adapter. This allows you to confirm that all parts fit together correctly, the alignment is right, and the overall length is accurate. Make any necessary adjustments to pipe length during this stage. Once you’re confident with the dry fit, mark the alignment of the parts with a marker to guide you during the cementing process.
5. Applying PVC Primer and Cement
This is the step that ensures a leak-proof repair. PVC primer and cement work by chemically welding the plastic components together. Always work in a well-ventilated area and wear your safety gloves and glasses.
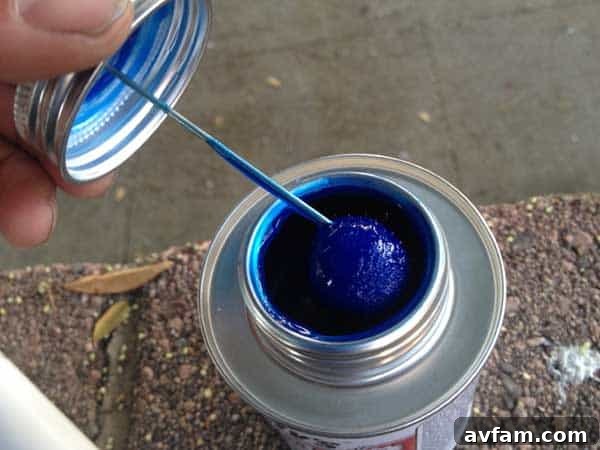
- Apply Primer: Using the dauber attached to the primer can, apply a liberal coat of primer to the outside end of the pipe and the inside of the fitting (elbow, adapter). The primer cleans and softens the PVC, preparing it for the cement. You’ll notice the purple color (or clear, depending on type).
- Apply Cement: Immediately after priming (while it’s still wet), apply a generous, even coat of PVC cement to both the primed pipe end and the inside of the primed fitting.
- Join Components: Quickly insert the pipe into the fitting, twisting it a quarter turn to evenly distribute the cement and ensure a strong bond. Hold the joint firmly for about 10-30 seconds to prevent the pipe from pushing out.
- Wipe Excess: Wipe away any excess cement that squeezes out with a rag.
Repeat this process for all joints in your new assembly – connecting the new pipe to the existing main line, attaching the elbow, and then securing the threaded adapter to the elbow. Proper technique here is key to preventing future leaks.
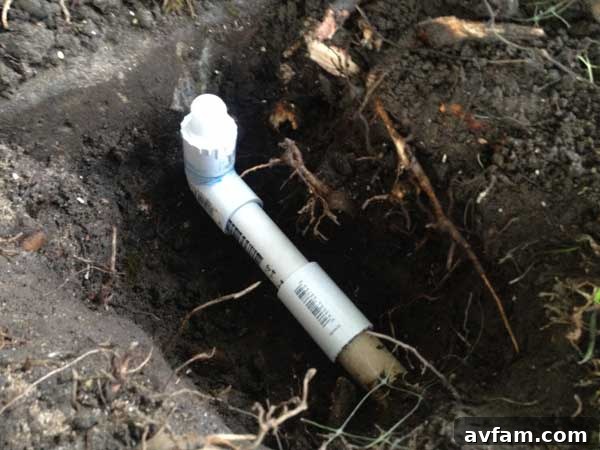
6. Installing the New Sprinkler Head
Once all the PVC components are securely cemented, the final step is to attach the new sprinkler head. Wrap the threads of the step-down adapter with 3-4 layers of Teflon tape (also known as plumber’s tape) in a clockwise direction. This helps create a watertight seal and makes future removal easier.
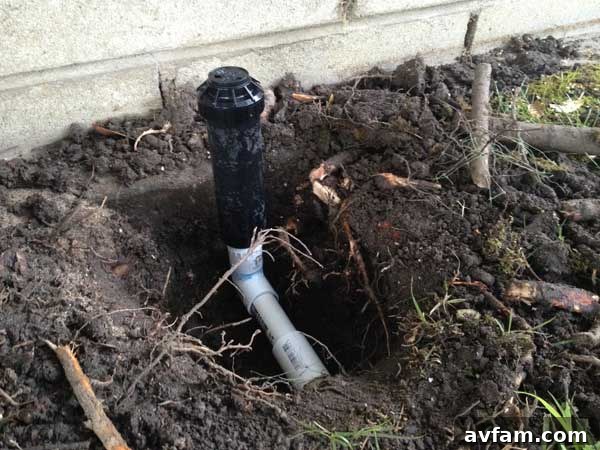
Carefully screw the Rain Bird sprinkler head onto the threaded adapter. Hand-tighten it until it’s snug, then use a wrench to give it an extra half-turn or so. Be careful not to overtighten, as this can crack the plastic threads. Ensure the sprinkler head is level with the ground and oriented in the direction you want it to spray.
7. Curing Time and Leak Test
PVC cement needs time to cure properly to reach its full strength. Check the manufacturer’s instructions on your cement can, but generally, it’s advisable to wait at least 2-4 hours before turning on the water pressure, and ideally 24 hours for full curing, especially if you live in a colder climate. Rushing this step can lead to immediate leaks.
Once the curing time has passed, slowly turn on your irrigation system’s water supply. Carefully inspect all the newly cemented joints and the sprinkler head connection for any signs of leaks. Small drips can sometimes be remedied by tightening the sprinkler head slightly, but persistent leaks at the PVC joints usually mean you’ll need to cut out and re-cement that section. Address any leaks before proceeding to the next step.
8. Backfilling the Trench and Final Adjustments
After a successful leak test, you can begin to backfill the trench with soil, carefully compacting it around the new pipe and sprinkler head. Ensure the sprinkler head is still level and its top is flush with the ground or slightly above, allowing it to pop up without obstruction. For rotor heads, you may need to adjust the spray arc and range according to the manufacturer’s instructions to ensure optimal coverage of your lawn area.
Our grass is already beginning to grow back in that dry, bare spot, a testament to the effectiveness of a properly functioning irrigation system!
Preventing Future Damage from Tree Roots
While I now have the knowledge to fix this issue, preventing it from happening again is even better. Tree roots are a persistent problem for underground irrigation. Here are some strategies to minimize future damage:
- Root Barriers: Consider installing physical root barriers around larger trees, especially those known for aggressive root systems. These can be sheets of plastic or metal that are buried vertically to divert root growth away from pipes.
- Strategic Planting: When planting new trees or shrubs, consider their mature root systems. Plant them a safe distance from irrigation lines.
- Regular Inspection: Periodically check sprinkler heads for proper function and any signs of ground disturbance around them. Early detection of a small leak or a slightly raised pipe can prevent a major break.
- Relocate Pipes: If a specific area is constantly plagued by root intrusion, it might be worth considering rerouting the irrigation line further away from the tree.
- Durable Piping: In highly problematic areas, some homeowners opt for more durable piping materials, though this is often a more extensive and costly undertaking.
Conclusion: A Greener Lawn and DIY Confidence
Repairing a broken sprinkler head and damaged PVC pipe might seem intimidating at first, but it’s a highly satisfying DIY project that can save you considerable money on professional landscaping services. By following these steps, you not only restore your lawn’s health and beauty but also gain valuable hands-on experience and confidence in tackling home repairs. My once-perplexed situation turned into a straightforward fix, and now our front lawn is well on its way to recovery. Hopefully, this detailed guide empowers you to tackle your own irrigation challenges with success, ensuring a lush, green landscape for years to come.