
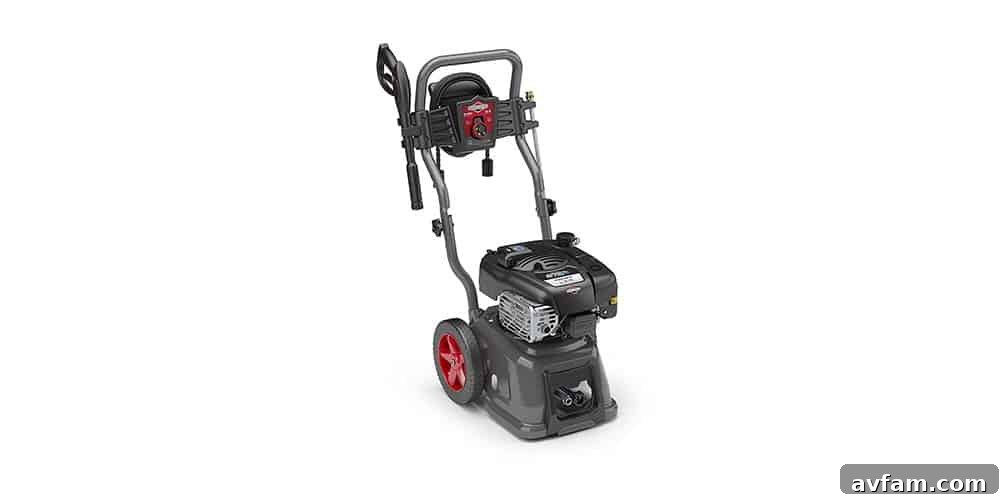
As the colder months approach, it’s vital to prepare your seasonal equipment for storage. For homeowners and professionals alike, a pressure washer is an invaluable tool for maintaining cleanliness around your property, tackling everything from dirty driveways to grimy siding. However, neglecting proper winterization can lead to costly damage, frustrating delays when you need it most, and significantly shorten the lifespan of your investment. This comprehensive guide will walk you through the essential steps to expertly winterize your pressure washer, ensuring it remains in peak condition and is ready to tackle grime when spring arrives. These crucial steps are particularly important if you plan on storing your pressure washer for more than 30 days, or if temperatures in your area are expected to consistently drop below freezing.
The Importance of Pressure Washer Winterization: Protect Your Investment
Winterizing your pressure washer isn’t just a suggestion; it’s a critical preventative measure that safeguards your equipment. Without it, residual water inside the pump, hoses, and spray gun can freeze, expand, and crack vital components such as manifolds, valves, and seals, leading to expensive repairs or even total pump failure. Beyond freezing, unaddressed moisture can lead to rust and corrosion within the intricate parts of the engine and pump, diminishing performance over time. Furthermore, old gasoline left in the fuel tank and lines can degrade, especially ethanol-blended fuels, forming gum and varnish deposits that clog the carburetor and make your machine incredibly difficult, if not impossible, to start next season. By dedicating a small amount of time to proper winterization, you effectively protect your pressure washer against these common issues, ensuring easy startup in the spring, optimal performance, and extending its overall service life for many years to come. It’s a proactive step that saves you money and hassle in the long run, preserving the efficiency and power you rely on.
Step 1: Stabilize Your Fuel System
One of the most crucial steps in preparing any gas-powered tool for extended storage is adding a high-quality fuel stabilizer. Modern gasoline, particularly blends containing ethanol, can degrade rapidly when left stagnant, leading to oxidation, gum, and varnish deposits. These deposits can clog carburetors, fuel lines, and injectors, which are primary causes of hard-starting or non-starting engines after storage. To properly stabilize your fuel, add a recommended fuel stabilizer, such as a reputable brand like Briggs and Stratton fuel stabilizer or a universal equivalent designed for small engines, directly to your pressure washer’s fuel tank. It’s imperative to follow the product instructions for the correct dosage, typically measured based on your tank’s capacity. Once the stabilizer is added, securely replace the fuel cap and start the pressure washer. Allow the engine to run for at least two to five minutes. This critical circulation period ensures that the stabilizer thoroughly mixes with the fuel and travels through the entire fuel system, including the fuel lines and carburetor, coating and protecting these vital components from corrosion and fuel degradation. After ensuring complete circulation, turn off your pressure washer and allow the engine to cool down completely before proceeding to the next maintenance steps. This simple action will save you countless headaches, potential repair costs, and ensures reliable starting when you’re ready to use your machine again in the warmer months.
Step 2: Thoroughly Clean and Flush the Detergent System
Leaving detergent or soap residue in your pressure washer’s soap tank and injection system can cause significant problems during storage, far beyond just sticky buildup. Detergents, especially those with harsh chemicals or concentrated formulas, can become corrosive over time, eating away at rubber seals, plastic lines, and even internal pump components. They can also dry out and leave stubborn, sticky residues that clog the system, impairing its performance or preventing proper soap application next season. To prevent this, a thorough flush of the detergent system is absolutely essential. First, ensure any remaining soap in the canister or tank is completely emptied. This can usually be done by running the pressure washer with the detergent function engaged until no more soap is drawn into the system. Once the soap reservoir is visibly empty, remove it and clean it manually with water and a brush, ensuring all internal residue is removed. Then, to flush the internal lines, either fill the now-empty soap tank with clean, fresh water or, if your model allows, bypass the soap system by connecting your garden hose directly to the pump inlet. Start the pressure washer and allow it to run for a minimum of five minutes with clean water circulating through the system. This ensures that all traces of detergent are thoroughly flushed out from the injector, internal hoses, and any other internal pump components that may have come into contact with the soap. After this comprehensive flush, turn off your pressure washer and then turn off the water supply. Disengage the spray gun and pull the trigger to relieve any residual water pressure trapped within the high-pressure hose and pump. This step is vital for preventing component strain and safely preparing the unit for the next stage of winterization.
Step 3: Disconnect and Properly Store Hoses and Accessories
The hoses and accessories of your pressure washer are just as susceptible to damage from freezing water and improper storage as the main unit itself, making their proper care a crucial step in winterization. Start by completely disconnecting both the high-pressure hose (which runs from the pump outlet to the spray gun) and the garden hose (which supplies water from your spigot to the pump inlet). Once disconnected, the most important task is to ensure all water is expelled from them. Lift each hose vertically, allowing gravity to drain all remaining water. You might need to gently shake or carefully coil them while draining to expel every last drop. Any water trapped inside, even a small amount, can freeze, expand, and burst the hose walls, rendering them useless and requiring costly replacements. While draining, take the opportunity to inspect both hoses thoroughly for any signs of wear, cracks, kinks, leaks, or significant abrasions. Now is the ideal time to replace any damaged hoses to avoid frustration and potential water damage later. After draining, use a clean cloth to wipe down the exterior of the hoses, removing any dirt, grime, or chemical residues. Coil the high-pressure hose neatly, avoiding sharp bends or kinks that could damage its internal reinforcement. Store your hoses, spray gun, and any nozzles, wands, or other attachments in a clean, dry location, preferably alongside your pressure washer. Keeping them organized and protected from extreme temperatures will significantly extend their longevity and prevent premature failure, ensuring they are ready for action when you need them.
Step 4: Protect Your Pump with Pump Saver or Antifreeze
The pump is undeniably the heart of your pressure washer, and it’s the most vulnerable component to cold weather damage. Even if you’ve meticulously drained the hoses, small amounts of water can remain trapped inside the intricate passages of the pump, leading to catastrophic damage if temperatures drop below freezing. This is where a pump saver product, such as a specialized Briggs and Stratton pump saver or a similar high-quality product, becomes absolutely indispensable. These specialized solutions serve multiple critical purposes: they act as an antifreeze, preventing any remaining water from freezing and expanding; they lubricate the internal components like pistons, seals, and valves, reducing wear and tear; and they help to break down and remove mineral deposits that can accumulate over time, which can hinder pump efficiency. To apply, ensure you wear appropriate safety glasses to protect your eyes, as these chemicals can be irritating. Follow the specific instructions on your chosen pump saver product, but typically, you’ll connect the pump saver bottle to the water inlet of your pressure washer. Slowly squeeze the bottle, allowing the solution to be drawn into the pump until it begins to exit from the high-pressure outlet (where the high-pressure hose typically connects). Some products might instruct you to briefly pull the spray gun trigger to ensure complete distribution throughout the entire pump head and associated fittings. Continue squeezing until a consistent stream of the brightly colored pump saver fluid emerges, indicating that it has fully displaced any water. This protective layer will shield your pump from the harsh realities of winter, ensuring optimal performance and significantly extending its life. If a dedicated pump saver isn’t readily available, an RV-specific non-toxic antifreeze can be used with caution, but always consult your pressure washer’s owner’s manual for recommendations on approved alternatives to avoid voiding warranties or causing unforeseen damage.
Step 5: Prepare the Engine for Long-Term Storage
Beyond the pump and fuel system, the engine itself requires careful attention for proper winterization, especially for gas-powered models, to ensure it starts reliably next season. First, ensure the engine’s exterior is clean. Use a damp cloth to wipe away any dirt, oil, or debris that may have accumulated. This not only keeps your machine looking good but also prevents corrosive substances from degrading engine components over extended periods. Next, consider checking your engine oil. While not always strictly necessary for a single short winter storage, for very long-term storage (over six months) or if the oil is due for a change, draining the old, potentially contaminated oil and replacing it with fresh, clean oil is highly recommended. Old oil can contain acids and contaminants that can harm engine internals during extended periods of inactivity. For an added layer of protection against internal corrosion, particularly in the cylinder, you can perform an engine fogging procedure. Remove the spark plug and pour a small amount (about a tablespoon) of clean engine oil or a specialized fogging oil directly into the cylinder bore. Gently pull the recoil rope a few times (without starting the engine) to distribute the oil across the cylinder walls, which creates a protective coating against rust. Then, reinstall the spark plug. Finally, take a moment to clean or replace the air filter if it’s dirty or clogged. A clean air filter ensures proper airflow and efficient engine operation from the very first start next spring. These engine preparation steps, combined with proper fuel stabilization, ensure your power plant remains robust, protected, and ready for immediate, reliable use.
Step 6: General Storage and Final Checks
With the critical internal systems of your pressure washer thoroughly protected, the final step involves preparing the entire unit for its dormant period and selecting an appropriate storage environment. Before putting your pressure washer away, take a moment to conduct a thorough visual inspection of the entire unit. Check all connections, bolts, and fasteners to ensure they are tight and secure. Look for any visible signs of damage, such as cracked plastic housings, frayed electrical wires (if applicable), or worn components that might need attention or replacement before next season’s use. Thoroughly clean the exterior of the pressure washer; removing caked-on mud, grass, grease, or chemical residues will prevent long-term staining, corrosion, and make it easier to maintain in the future. A simple wipe-down with a damp cloth and mild detergent is usually sufficient, followed by a dry wipe. Once clean and inspected, find a suitable storage location. It is absolutely imperative that your pressure washer is stored in a clean, dry, and climate-controlled environment where temperatures will not drop below freezing. Garages, heated sheds, or basements are typically ideal, provided they meet these criteria. Avoid damp areas, as lingering moisture can still promote rust and corrosion on external components even after internal winterization. Finally, consider covering your pressure washer with a breathable cover or tarp. This will protect it from dust, debris, and accidental bumps or scratches during its long period of inactivity. By meticulously following these comprehensive winterization steps, you are not just storing a tool; you are actively preserving its performance, significantly extending its life, and ensuring it’s a reliable workhorse for many seasons to come, year after year.
Conclusion: Maximize Your Pressure Washer’s Lifespan and Performance
Taking the time to properly winterize your pressure washer is a small effort that yields significant, long-term rewards. By systematically addressing crucial steps such as fuel stabilization, thorough detergent system flushing, meticulous hose and accessory care, essential pump protection, and careful engine preparation, you are actively preventing common and often expensive issues associated with cold weather and extended storage. This proactive approach ensures that when the warmer weather returns and you’re ready to tackle your spring cleaning projects, your pressure washer will start easily, run smoothly, and perform at its absolute best, season after season. Don’t let the harshness of winter compromise your valuable equipment. Invest a little time now to diligently protect your investment, maximize its lifespan, and enjoy reliable, powerful performance for years to come. Your future self, and your wallet, will undoubtedly thank you for the foresight and care you put into maintaining your essential outdoor power equipment.