
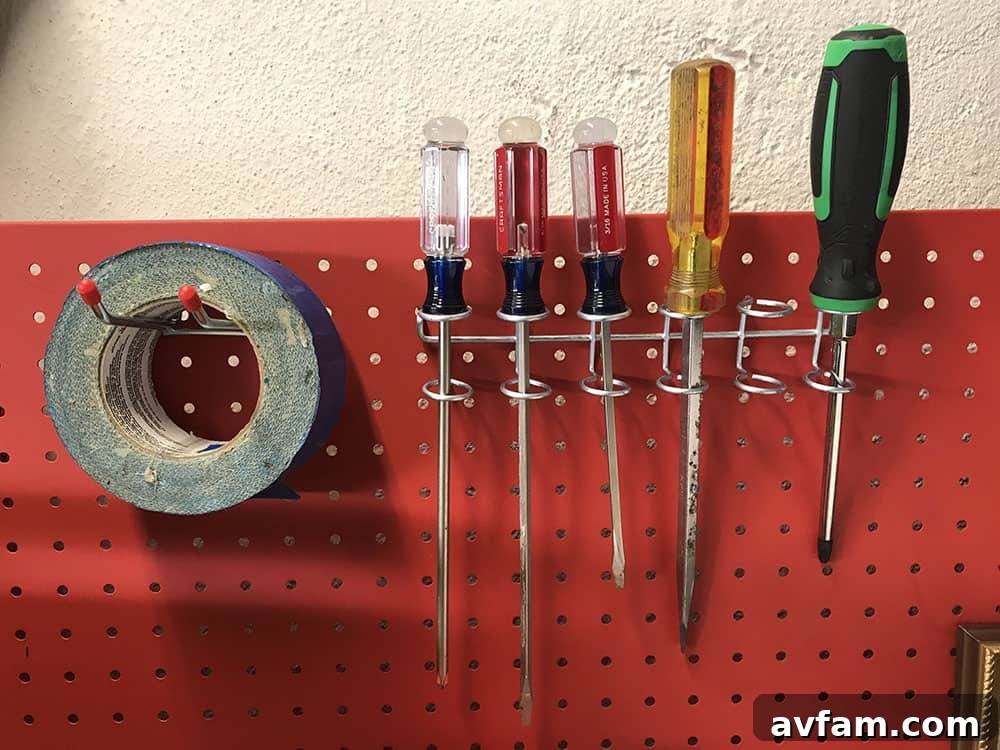
Maximize Your Workspace: The Ultimate Guide to Pegboard Tool Organization
For decades, pegboards have been the undisputed champion of garage, workshop, and craft room organization. Their unparalleled versatility and efficiency in keeping tools and supplies visible and accessible make them a cornerstone of any productive workspace. Far more than just a place to hang hammers, a well-planned pegboard system can transform clutter into streamlined efficiency, saving you time and frustration. This comprehensive guide will walk you through everything you need to know to organize and make the absolute best use of your pegboard tool system, turning your chaotic workspace into a model of order and productivity.
The Enduring Appeal of Pegboards: Revolutionizing Your Workspace
In a world of ever-evolving storage solutions, the humble pegboard continues to reign supreme. Its simple yet brilliant design allows for infinite customization, adapting to your changing needs and tool collection. No more rummaging through cluttered drawers or piles of tools to find that elusive wrench or screwdriver. With a pegboard, every item has its designated spot, ready to be grabbed at a moment’s notice.
Why Pegboards Stand the Test of Time
- Visual Accessibility: The most significant advantage of a pegboard is that your tools are always on display. This eliminates the guesswork and wasted time spent searching for items hidden in drawers or bins.
- Space Optimization: Pegboards utilize vertical wall space, freeing up valuable floor and workbench real estate. This is particularly beneficial in smaller garages or workshops where every inch counts.
- Flexibility and Customization: With a vast array of hooks, shelves, and bins available, pegboards can be configured to hold virtually any tool or supply, from tiny screws to bulky power drills. The layout can be easily changed as your collection grows or your workflow evolves.
- Protection for Tools: Hanging tools individually prevents them from knocking against each other, reducing wear and tear, and keeping them in better condition.
- Enhanced Safety: Keeping sharp or heavy tools securely hung and off the floor reduces the risk of accidents in the workspace.
Getting Started: Choosing the Right Pegboard System and Hardware
The foundation of an effective pegboard organization system lies in selecting the right materials and accessories. It’s not just about hanging tools; it’s about creating a robust, functional system that serves your specific needs. Before you even think about hanging the first hook, consider the type of pegboard that best suits your environment and the tools you intend to display.
Selecting Your Pegboard Material
Pegboards come in a variety of materials, each with its own advantages:
- Standard Hardboard (Wood Fiber): This is the most common and economical option. It’s lightweight and easy to cut, but can be susceptible to moisture and may warp or degrade over time in humid environments. Best for light to medium-duty tools.
- Metal Pegboard: Much more durable and moisture-resistant than hardboard, metal pegboards are ideal for heavy-duty tools, humid garages, or professional workshops. They are also fire-resistant. While more expensive, their longevity often justifies the investment.
- Plastic Pegboard: A good middle-ground option, plastic pegboards are resistant to rust and moisture, lightweight, and often available in various colors to add a touch of style to your workspace. They are generally suitable for light to medium loads.
Prioritizing Your Tools: What Goes on the Wall?
It’s tempting to want to display every single tool you own on your pegboard, but a cluttered pegboard can be just as overwhelming as a disorganized drawer. The key is to prioritize. Begin by determining which tools you reach for most frequently. These are your prime candidates for pegboard display.
Focus on your top 10-20 most-used tools. Consider items like screwdrivers, wrenches, hammers, pliers, tape measures, and frequently used power tools. Tools that are rarely used or are very large and heavy might be better stored in cabinets or on heavy-duty shelving. This focused approach ensures your pegboard remains a highly functional and easily navigable system, rather than a dense wall of indistinguishable items.
Essential Pegboard Hooks and Accessories
Once you’ve identified your priority tools, it’s time to select the right hardware to hang them. The quality of your hooks is paramount for security and longevity. Flimsy hooks can bend under pressure, leading to tools falling and potentially causing injury or damage.
National Hardware offers an excellent selection of durable peg hooks, available in convenient small and large kits. These kits often provide a variety of hook types, ensuring you have the right fit for different tools. For those starting from scratch or looking for a comprehensive solution, their garage workshop kit can be a fantastic all-in-one purchase, often including a mix of hooks, trays, and other organizational components.
Look for hooks with secure designs, such as those that lock into place or have multiple prongs for better stability. Different tools require different hook types:
- Single Hooks: Best for tools with holes, like wrenches or screwdrivers.
- Double Hooks (J-hooks, L-hooks): Provide more stability for heavier items or tools without specific hanging holes.
- Curved Hooks/Loops: Ideal for power tools with cords or handles, such as drills, saws, or extension cords.
- Spring Clips: Excellent for holding items like screwdrivers, chisels, or files securely.
- Specialty Hooks: Designed for specific items like hammers, pliers, or garden tools, ensuring a snug fit and preventing accidental drops.
Beyond Hooks: Trays, Bins, and Shelves
Pegboards aren’t just for hanging. To truly maximize storage, incorporate trays, bins, and small shelves. These accessories are invaluable for organizing items that can’t be hung, such as:
- Small Hardware: Keep nuts, bolts, screws, washers, and nails sorted in small bins.
- Consumables: Store drill bits, sandpaper, glue sticks, or safety glasses.
- Irregularly Shaped Tools: Mallets, odd-sized clamps, or measuring tapes can sit neatly on shelves or in larger trays.
We’ve found that larger kits, like the National Hardware large kit, often include these versatile trays and jars, which are incredibly useful for decluttering your workbench and keeping all those small odds and ends in plain sight and easily accessible.
Strategic Layout: Designing Your Pegboard for Maximum Efficiency
Once you have your pegboard and hardware, the next crucial step is designing an intelligent layout. A well-thought-out arrangement isn’t just aesthetically pleasing; it significantly enhances your workflow and overall productivity. While personal preference plays a huge role, adhering to a few key principles can elevate your pegboard from merely organized to truly optimized.
Ergonomic Design Principles
Think about how you move and work in your space. The most frequently used tools should be placed at eye level and within easy arm’s reach. This minimizes bending, stretching, and unnecessary movement, reducing fatigue and making your work more efficient. Heavier tools should generally be placed lower on the board to make them easier to lift and reduce stress on the pegboard and hooks. Reserve the highest and lowest spots for tools you use less frequently or items that are lighter and easier to manage.
Logical Grouping and Tool Zones
A fundamental principle of effective organization is grouping similar items together. Imagine your pegboard divided into “zones” for different types of tools or tasks:
- Wrench Zone: All your wrenches (open-end, box-end, adjustable) neatly arranged.
- Screwdriver Zone: Flatheads, Phillips, Torx, and specialty screwdrivers together.
- Pliers and Clamping Zone: Various pliers, cutters, and small clamps.
- Measuring and Marking Zone: Tape measures, rulers, squares, pencils, and chalk lines.
- Drilling Zone: Drills, drill bit sets, and impact drivers.
This logical grouping makes it intuitively easy to find what you need. When you grab a wrench, you know exactly where to look, and just as importantly, where to put it back.
Optimizing for Workflow and Future Needs
Consider the typical progression of your projects. If you frequently perform a specific task, such as woodworking or automotive repair, group all the tools required for that task in close proximity. This creates a highly efficient “workstation” directly on your pegboard.
Additionally, it’s wise to leave a bit of open space on your pegboard. Your tool collection will undoubtedly grow over time, and having a buffer allows you to integrate new tools without completely overhauling your entire system. Remember, flexibility is a core strength of the pegboard system.
The Art of Hanging: Securing Your Tools Effectively
Once your layout is conceptually sound, the practical step of hanging your tools begins. This phase is where your plans meet reality, and you’ll find that a flexible approach is essential for achieving the best results.
Trial and Error: The Flexibility of Pegboard Layouts
Even with the best initial plan, some adjustments will almost certainly be necessary. You might discover that a hammer or screwdriver is longer than anticipated, interfering with a tool below it, or that a power tool is heavier than expected, requiring a more robust hook or a different placement. Don’t be afraid to experiment! The beauty of a pegboard is that you can easily move hooks and rearrange tools until you achieve a layout that feels just right and functions optimally for your specific tools and workflow. Think of it as an iterative process – hang a few tools, step back, assess, and adjust as needed.
Ensuring Tool Security and Longevity
While pegboards offer incredible convenience, ensuring the secure attachment of your tools is paramount for both safety and the longevity of your system. Always use sturdy, high-quality pegboard hooks that are appropriate for the weight and shape of the tool they will hold. Before hanging a tool, give the hook a firm tug to ensure it is properly seated in the pegboard holes. If you ever notice a hook bending, warping, or showing signs of stress, replace it immediately. A compromised hook is a recipe for a falling tool, which can damage the tool itself, your workspace, or even cause injury. Regularly inspect your entire pegboard setup, especially after heavy use, to maintain its integrity.
To Outline or Not to Outline: A Pegboard Dilemma
One common practice you might observe in professional workshops, factories, or shared workspaces is the outlining of tools on the pegboard. This technique, often referred to as a “shadow board,” serves a specific purpose, but its utility for a home workshop or personal use can be debatable.
When Shadow Boards Make Sense
The primary benefit of outlining tools on a pegboard is to provide an unmistakable visual cue for where each tool belongs. This is incredibly useful in environments where:
- Multiple Users: If several people use the same set of tools, outlines ensure that every tool is returned to its correct spot, promoting accountability and preventing items from going missing.
- Critical Operations: In manufacturing or maintenance settings, quickly identifying a missing tool (known as “tool control”) is vital to prevent errors or ensure all tools are accounted for before closing a project.
- Training and Standardization: Outlines can serve as a training aid for new employees, teaching them the standard organization system.
For these scenarios, a clear outline (often painted or drawn directly onto the board) can be an invaluable organizational tool.
Alternatives for Home Workshops
However, for the average homeowner or DIY enthusiast, outlining tools on a pegboard might be more trouble than it’s worth. The main drawback is the loss of flexibility. If you ever need to rearrange your tools, add new ones, or change your workflow, those permanent outlines can become visually distracting and outdated, showing ghosts of past layouts behind entirely different tools. For personal use, where you are the primary operator, you generally know where your tools belong.
Instead of permanent outlines, consider these alternatives for your home workshop:
- Labels: Use small, clear labels to designate areas for tool types (e.g., “Wrenches,” “Pliers”). These are easy to change or remove.
- Color-Coding: You could color-code the handles of your tools or the hooks themselves to group items visually.
- Logical Grouping: Rely on the ergonomic and logical grouping strategies discussed earlier. Your muscle memory will quickly learn where everything is.
Ultimately, whether you outline your tools comes down to personal preference and the specific needs of your workspace. Unless you truly appreciate the aesthetic or have a compelling reason for strict tool control, the flexibility of a non-outlined pegboard often outweighs the benefits for individual home use.
Installation Essentials: Setting Up Your Pegboard for Success
Before you can enjoy a perfectly organized pegboard, it needs to be securely installed. Proper installation ensures your pegboard can safely hold the weight of your tools and will last for years to come.
- Locate Studs: Whenever possible, mount your pegboard directly into wall studs for maximum strength and stability. Use a stud finder to locate them and mark their positions.
- Use Spacers: Pegboards require a gap between the board and the wall for hooks to insert properly. Use spacers (often included with pegboard kits or sold separately) or small wood furring strips behind the board.
- Secure Mounting Hardware: Use appropriate screws and washers that are long enough to penetrate the studs or secure into wall anchors designed for heavy loads. Ensure the screws are flush or slightly recessed to avoid interfering with hook placement.
- Start with a Level Line: Use a level to ensure your first pegboard panel is perfectly horizontal. This will make subsequent panels easier to align and ensure a professional-looking installation.
Maintaining Your Organized Workspace
An organized pegboard isn’t a one-time project; it’s an ongoing commitment to efficiency. Regular maintenance will keep your system functioning at its best.
- Regular Dusting: Dust can accumulate on tools and the pegboard itself. A quick wipe-down with a cloth or a pass with a shop vacuum keeps things clean.
- Tool Cleaning: Make it a habit to clean tools before returning them to the pegboard, especially after messy projects. This prevents the spread of grime and helps maintain your tools.
- Hook Inspection: Periodically check all hooks for signs of bending, rust, or wear. Replace any damaged hooks immediately to prevent tools from falling.
- Re-evaluate Layout: As your tool collection changes or your projects evolve, take time to re-evaluate your pegboard layout. Don’t be afraid to adjust and optimize for new needs.
Beyond Traditional Tools: Creative Pegboard Uses
While renowned for tool organization, pegboards are incredibly versatile and can be used to organize a myriad of other items around the home:
- Craft Rooms: Store scissors, rulers, spools of thread, fabric, and other craft supplies.
- Kitchens: Hang pots, pans, utensils, or even small spice racks.
- Cleaning Closets: Organize brooms, mops, dustpans, and cleaning bottles.
- Kids’ Playrooms: Keep art supplies, small toys, or dress-up accessories tidy and accessible.
- Gardening Sheds: Hang trowels, pruners, gloves, and small pots.
The adaptability of pegboards makes them a smart organizational choice for almost any space where you need to keep items visible and within reach.
Conclusion: The Power of an Organized Pegboard System
Investing time in properly setting up and maintaining a pegboard tool organizer is an investment in your productivity, safety, and peace of mind. By carefully choosing your hardware, designing an ergonomic layout, and committing to regular upkeep, you can transform a chaotic workspace into a highly efficient and enjoyable environment. A well-organized pegboard doesn’t just store your tools; it empowers you to work smarter, faster, and more effectively, allowing you to focus on your projects rather than the search for the right tool. Embrace the power of the pegboard and unlock the full potential of your workspace today!
This post is sponsored by National Hardware. All opinions are 100% those of Timothy Dahl of Charles & Hudson.