
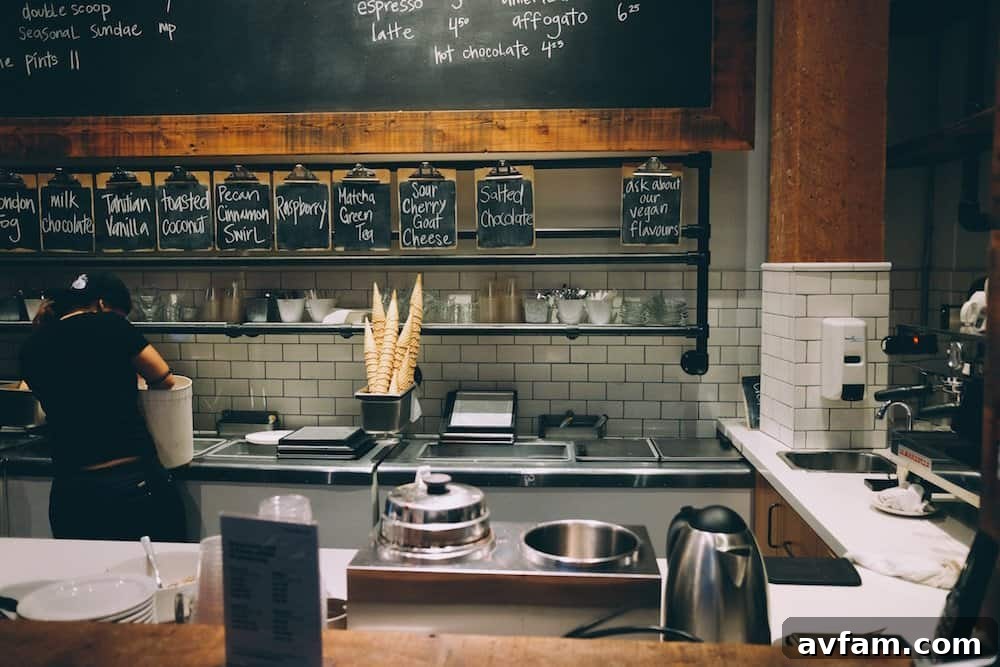
Subway tiles have long transcended their humble origins to become a ubiquitous and highly sought-after design element in homes and commercial spaces alike. Their enduring appeal lies in a unique blend of classic charm, remarkable versatility, and a clean aesthetic that complements virtually any interior style. This comprehensive guide delves into everything you need to know about subway tiles, from their fascinating history and diverse material options to creative design applications and a detailed installation walkthrough, ensuring you’re well-equipped for your next tiling project.
The Timeless Appeal and History of Subway Tiles
The story of subway tiles begins in 1904, with the opening of New York City’s first subway system. Architects George C. Heins and Christopher Grant LaFarge designed these distinctive 3×6-inch glazed ceramic tiles for the station walls. Their choice was deliberate: the bright, reflective white surface was easy to clean, highly durable, and helped to illuminate the dimly lit underground tunnels, providing a sense of hygiene and order to the bustling new transit system. Little did they know, this practical solution would spark a design revolution.
From the subway stations, these tiles quickly made their way into urban homes, particularly kitchens and bathrooms, during the early 20th century. Their association with cleanliness, light, and modern sanitation made them an instant hit. Today, over a century later, subway tiles continue to capt dominate the design landscape, proving their status as a true design classic. They effortlessly bridge the gap between vintage charm and contemporary sophistication, making them a go-to choice for homeowners, designers, and contractors alike.
Why Subway Tiles Remain a Design Favorite
The persistent popularity of subway tiles is not merely a trend; it’s a testament to their inherent qualities that resonate with diverse design sensibilities:
- Unmatched Versatility: Whether your home leans towards farmhouse rustic, sleek modern, industrial chic, or classic traditional, subway tiles adapt beautifully. Their simple, geometric form provides a neutral canvas that allows other design elements to shine, or they can be the star of the show with the right color, texture, or pattern.
- Clean and Bright Aesthetic: The classic glazed finish, especially in white, is excellent at reflecting light, which can make smaller spaces feel larger and brighter. This creates an open, airy atmosphere that is highly desirable in kitchens and bathrooms.
- Durability and Longevity: Made predominantly from ceramic or porcelain, subway tiles are incredibly robust. They are resistant to moisture, stains, and general wear and tear, making them ideal for high-traffic and wet areas. Properly installed, they can last for decades.
- Ease of Maintenance: Their smooth, non-porous surface is exceptionally easy to clean. A simple wipe-down with a damp cloth is often enough to keep them sparkling, an essential feature for busy kitchens and bathrooms.
- Cost-Effectiveness: Compared to many other tiling options, standard ceramic subway tiles are often one of the most budget-friendly choices per square foot. This affordability, combined with their timeless appeal, offers excellent value for any renovation project.
- Timeless Appeal: Unlike fleeting design trends, subway tiles possess a classic quality that ensures they will not quickly look dated. Investing in subway tiles means choosing a design element that will remain stylish for years to come.
Exploring the Diverse World of Subway Tile: Beyond the Classic White
While the iconic white, glossy 3×6-inch ceramic tile remains a staple, the world of subway tiles has expanded dramatically, offering an incredible array of materials, colors, finishes, and sizes to suit any vision.
Materials that Define Your Space:
- Ceramic: The most common and economical choice, ceramic subway tiles are versatile, durable, and available in a vast range of colors and finishes. They are suitable for most indoor applications.
- Porcelain: More dense and less porous than ceramic, porcelain subway tiles offer superior water resistance and strength, making them ideal for shower surrounds, high-traffic floors, and even outdoor use in certain climates.
- Glass: As mentioned, glass subway tiles introduce a contemporary edge. They add depth and a unique luminosity, reflecting light beautifully. Available in translucent, opaque, and frosted finishes, they can create a sleek, luxurious, or even ethereal look.
- Natural Stone: For a more luxurious and organic feel, subway tiles crafted from marble, travertine, or granite offer unique veining and natural variations. These require proper sealing to protect against stains and moisture.
- Zellige and Terracotta: These handcrafted tiles bring a rustic, artisanal charm. Zellige tiles, originating from Morocco, feature beautiful, subtle irregularities and a distinctive glaze that adds texture and warmth.
A Spectrum of Colors and Finishes:
- Classic White: The quintessential choice, perfect for creating a clean, crisp, and bright aesthetic.
- Neutral Tones: Shades of gray, beige, and cream offer a softer, more subdued backdrop, easily complementing other elements in the room.
- Bold Hues: Don’t shy away from color! Vibrant reds, deep blues, emerald greens, or even sunny yellows can inject personality and a contemporary flair into your space, especially when used strategically in smaller areas or as an accent.
- Dark & Dramatic: Black or charcoal subway tiles can create a sophisticated, dramatic, and modern statement, particularly when paired with contrasting grout.
- Glossy: The traditional finish, highly reflective and easy to clean, enhancing light.
- Matte: Offers a softer, more subtle look that’s less prone to showing smudges and fingerprints, ideal for a contemporary or industrial aesthetic.
- Beveled: Featuring a slight chamfered edge, beveled subway tiles add dimension and a classic, almost three-dimensional effect to your wall.
- Handmade/Irregular: These tiles embrace imperfections, offering a unique, artisanal texture and character that can make a space feel truly bespoke.
Sizing Up Your Options:
While 3×6 inches remains the standard, subway tiles are now available in a multitude of sizes, drastically altering their visual impact:
- Traditional (3×6 inch): The classic, timeless choice.
- Long and Lean (e.g., 2×8, 2×10, 3×12, 4×16 inch): These elongated formats create a more modern, streamlined look, often making a space feel wider or taller.
- Larger Formats (e.g., 4×8, 4×12 inch): Provide a bolder statement with fewer grout lines, contributing to a cleaner, more contemporary appearance.
- Small Formats (e.g., 2×4 inch, brickettes): Can create a tighter, more intricate pattern, often used for detailed work or smaller backsplashes.
Consider also the grout lines. A contrasting grout color (e.g., dark gray grout with white tiles) will highlight the tile pattern, while a matching grout will create a more seamless, monolithic look.
Creative Layout Patterns for Dynamic Designs
The way you arrange subway tiles can dramatically change the feel of a room. Beyond the traditional horizontal offset, there’s a world of patterns to explore:
- Classic Horizontal Offset (Brick Bond): The most recognizable pattern, where tiles are staggered horizontally, mimicking brickwork. This is timeless and universally appealing.
- Stacked Horizontal: Tiles are aligned perfectly, creating clean, parallel lines. This modern, minimalist pattern works well in contemporary settings.
- Stacked Vertical: Similar to stacked horizontal but oriented vertically, this pattern can make ceilings appear taller and is excellent for a sleek, contemporary look.
- Vertical Offset: A vertical variation of the classic brick bond, where vertical tiles are staggered. This adds a unique twist and can also visually extend wall height.
- Herringbone: Tiles are laid in a V-shape pattern, creating a sophisticated and dynamic look. This intricate pattern works wonderfully as a feature wall or backsplash.
- Basketweave: Two or three tiles are grouped to form squares, which are then rotated 90 degrees to create a woven effect. This pattern adds texture and a traditional feel.
- Diagonal: Laying tiles at a 45-degree angle can add movement and a unique visual interest, often making a space feel more expansive.
- Mixing Patterns and Sizes: For the truly adventurous, combining different subway tile sizes or even mixing subway tiles with other tile types (like in a kitchen from the Osprey Eco-Cottage, as previously noted) can create a custom, layered look that is uniquely yours.
Designing with Subway Tiles: Inspiration and Applications
Subway tiles are incredibly versatile and can be used in almost any room of the house, extending their appeal far beyond their original purpose in subway stations. Inspiration for their use is truly everywhere, from high-end design magazines and popular home improvement websites to commercial establishments and friends’ homes. If you spot a tile style you love in a restaurant or boutique, don’t hesitate to snap a quick picture to show your designer or bring it with you to a tile showroom.
Popular Applications:
- Bathrooms: Subway tiles are a cornerstone of bathroom design. They are perfect for shower surrounds, tub backsplashes, wainscoting, or even covering entire walls. Their water resistance and ease of cleaning make them highly practical for this high-moisture environment. Different colors and patterns can create a serene spa-like retreat, a bright family bathroom, or a dramatic powder room.
- Kitchens: From classic backsplashes that protect walls from splatters to full-height feature walls that draw the eye, subway tiles are a kitchen favorite. They offer a clean backdrop that complements both traditional cabinetry and modern appliances.
- Laundry Rooms: Functional and stylish, subway tiles in a laundry room provide a durable, easy-to-clean surface that can withstand spills and heavy use, while adding a touch of design flair.
- Fireplace Surrounds: Elevate your living room with a subway tile fireplace surround. Whether you opt for classic white for a clean look or a darker shade for more drama, it adds a sophisticated and finished touch.
- Entryways and Mudrooms: These high-traffic areas benefit from the durability and easy maintenance of subway tiles, providing a welcoming yet practical surface.
- Commercial Spaces: Beyond residential, subway tiles are extensively used in cafes, bars, hotels, and retail spaces. Their robustness and clean aesthetic make them ideal for creating stylish and functional commercial environments.
Comprehensive Guide to Subway Tile Installation
While the look of subway tiles is clean and simple, the installation process requires precision and patience. It’s generally similar to installing any ceramic tile, but attention to detail is paramount for a professional finish. If this all sounds too daunting, consider exploring platforms like ServiceMagic, an online database of reputable home improvement professionals, or seek recommendations from friends and family.
Pre-Installation Preparation: The Foundation of Success
Proper preparation is crucial for a successful and lasting tile installation. Gather all your tools and materials before you begin:
- Tools: Measuring tape, level (2-foot and 4-foot), chalk line, pencil, notched trowel (e.g., 1/4″ x 3/8″), rubber mallet, tile spacers, tile cutter or wet saw, grout float, sponge, buckets, utility knife, caulk gun, safety glasses, gloves, respirator.
- Materials: Subway tiles (with 10-15% extra for cuts and breakage), thin-set mortar (or mastic for dry areas), grout, grout sealer, silicone caulk, cement board (for wet areas like showers), waterproofing membrane (for showers).
Surface Preparation: The wall must be clean, dry, flat, and structurally sound. Remove any old wallpaper, loose paint, or debris. For bathrooms and showers, it’s essential to install cement board over the studs and apply a waterproofing membrane to prevent moisture damage.
The Critical Layout Planning Phase:
This is where precision pays off. A well-planned layout ensures symmetry and minimizes awkward cuts in visible areas.
- Find Your Starting Point: Typically, you want to start tiling from the most visible wall or the center of your project area. Dry-lay a row of tiles on the floor to visualize the pattern and determine how the tiles will end at corners or edges.
- Establish Level Lines: This is arguably the most important step. Using a long level and a pencil, draw a perfectly horizontal reference line across the wall. Do NOT level to existing countertops or cabinets, as these may not be perfectly straight. For a brick bond pattern, this line often marks the top of your second row of tiles, allowing for a cut tile at the bottom if needed. Repeat this for vertical reference lines if desired.
- Calculate Tile Needs: Measure your area accurately and calculate the number of tiles needed, always adding 10-15% for cuts, mistakes, and future repairs.
Applying Mortar and Setting Tiles:
- Mix Mortar: Follow the manufacturer’s instructions to mix your thin-set mortar to a peanut butter-like consistency. Work in small batches as it has a limited pot life. For an easier, less messy application, consider alternative products like Bondera, a tile adhesive mat, though traditional mortar is often preferred for its strong bond in wet areas.
- Apply Mortar: Using a notched trowel, apply mortar to a small section of the wall (about 2-3 square feet) at a time. Hold the trowel at a 45-degree angle, ensuring even coverage and consistent ridges. The direction of the ridges should typically be consistent (e.g., horizontal).
- Set the Tiles: Press each tile firmly into the mortar, wiggling it slightly to ensure good contact. Insert tile spacers between each tile to maintain consistent grout lines. Use a level frequently to check that your tiles are straight and flush. For larger sections, a temporary horizontal support board (a straight 1×2 or 2×4) can be screwed into the studs below your first full row to prevent tiles from sliding down as they dry.
- Clean as You Go: Immediately wipe off any excess mortar that squeezes through the grout lines or gets onto the tile surface with a damp sponge. Dried mortar is much harder to remove.
Cutting Tiles and Final Setting:
- Precise Cuts: As you approach corners, edges, or obstacles, you’ll need to cut tiles. A wet saw is ideal for precise, clean cuts, especially for glass tiles. For smaller notches or curves, a tile nipper might suffice. Always wear safety glasses when cutting tiles.
- Tap into Place: Once a section of tiles is set, lightly tap the surface with a rubber mallet, or a 2×4 wrapped in cloth, to ensure all tiles are fully embedded and level.
- Drying Time: Allow the mortar to dry completely, typically 24-48 hours, as per the mortar manufacturer’s instructions, before proceeding to grouting.
Grouting and Sealing: The Finishing Touches
- Install Trim: If using trim pieces (bullnose tiles, Schluter strips), install them around the edges of your tiled area, ensuring they fit cleanly and are properly mortared.
- Mix Grout: Choose your grout color carefully (matching for a seamless look, contrasting to highlight the pattern). Mix the grout according to the package directions to a thick, paste-like consistency.
- Apply Grout: Using a rubber grout float, spread the grout over the tiled surface, forcing it into all the grout lines. Hold the float at a 45-degree angle, working diagonally across the tiles to fill the joints thoroughly.
- Clean Excess Grout: After 10-20 minutes (check manufacturer’s recommendation), use a damp sponge to wipe off excess grout from the tile surface. Rinse the sponge frequently. Be careful not to pull grout out of the joints. Repeat until the tiles are clean and the grout lines are smooth and consistent. A slight haze may remain, which can be buffed off later.
- Grout Sealing: Once the grout has fully cured (usually 48-72 hours), apply a silicone-based grout sealer to protect it from moisture and stains, especially important in wet areas and for porous grout types. Follow the sealer manufacturer’s instructions.
- Caulking: Finally, apply a bead of silicone caulk along all internal corners (where two tiled walls meet) and where the tile meets other surfaces like countertops, bathtubs, or shower pans. These are expansion joints that need flexibility, and caulk provides a waterproof, flexible seal.
DIY vs. Professional Installation:
Undertaking a subway tile installation as a DIY project can be incredibly rewarding, saving costs and providing a sense of accomplishment. However, it requires time, patience, and attention to detail. If you lack experience, have a very large area to tile, or prefer a guaranteed professional finish, hiring a qualified tile contractor is a wise investment. They bring expertise, specialized tools, and often a warranty for their work.
Maintenance and Care for Your Subway Tiles
One of the many benefits of subway tiles is their relatively low maintenance. Regular cleaning with a mild, pH-neutral cleaner and a soft cloth or sponge will keep your tiles sparkling. Pay attention to grout lines, as they can sometimes accumulate grime or mildew, especially in bathrooms. Reapply grout sealer every few years, or as recommended by the manufacturer, to maintain its protective barrier.
Conclusion
From their humble beginnings in the bustling tunnels of New York City to becoming a sophisticated design statement in homes worldwide, subway tiles have truly earned their place as a timeless classic. Their unparalleled versatility, durability, and clean aesthetic make them an excellent choice for any renovation project, whether you’re aiming for a traditional look, a modern update, or something entirely unique. With a vast array of materials, colors, sizes, and patterns now available, you have endless possibilities to create a space that is both beautiful and functional. Embrace the enduring charm of subway tiles in your next home improvement endeavor, and enjoy a design that truly stands the test of time. If you’re ready to start your own subway tile journey, major home improvement retailers like Home Depot offer an extensive selection to explore.