
Transforming your kitchen or bathroom can feel like a daunting task, especially when it comes to upgrading countertops. The traditional route often involves significant costs, a messy demolition phase, and extensive downtime, leaving homeowners searching for a more practical and budget-friendly solution. Many desire a fresh look – a change in color, an updated texture, or simply a way to conceal existing stains and minor imperfections – without the commitment of a full replacement.
- Rust-Oleum Countertop Transformations: An Affordable Kitchen Makeover
- The DIY Advantage: How to Install Rust-Oleum Countertop Transformations
- Choosing Your Style: Rust-Oleum Countertop Transformations Finishes
- Maintaining Your Transformed Countertops
- Why Choose Rust-Oleum Countertop Transformations?
The kitchen countertop is arguably the most hardworking surface in any home. It endures daily wear and tear, from hot pans and spills to countless preparations and heavy appliances. More than just a functional element, countertops significantly impact the overall aesthetic of your kitchen, serving as a focal point that can either elevate or detract from its appeal. Given their central role and constant exposure, finding a durable yet stylish solution for their upkeep is paramount.
Rust-Oleum Countertop Transformations: An Affordable Kitchen Makeover
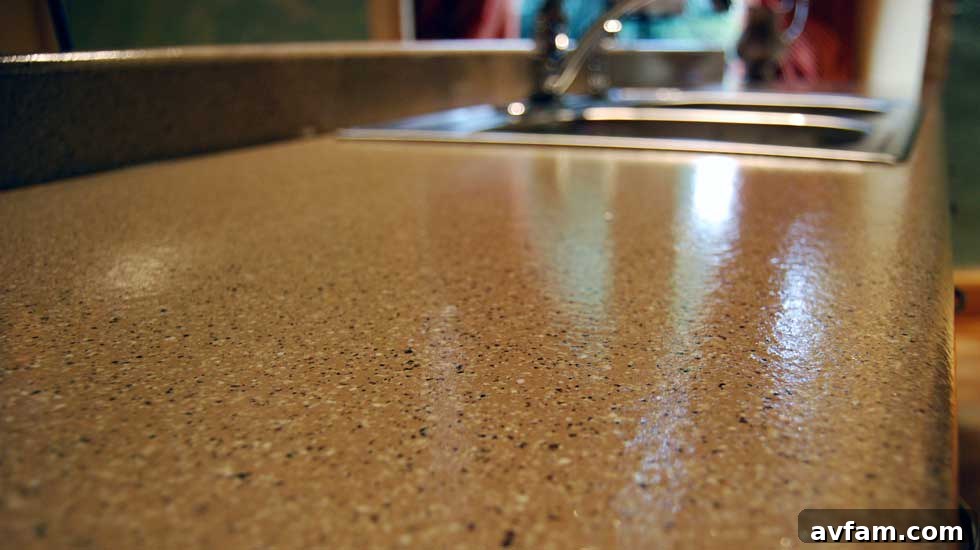
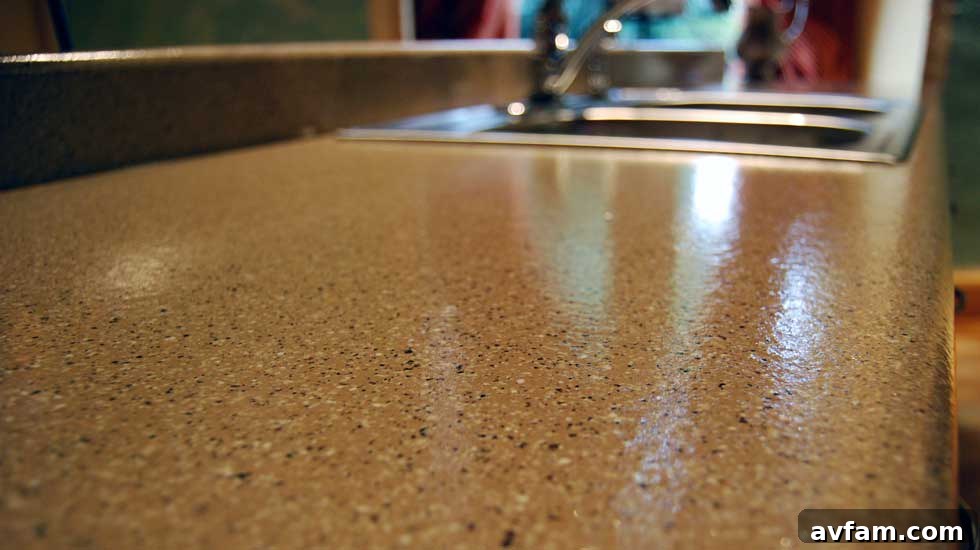
For those dreaming of a kitchen refresh without breaking the bank or enduring a lengthy renovation, Rust-Oleum offers a groundbreaking solution: the Countertop Transformations Do-It-Yourself Countertop Coating System. This innovative product is specifically engineered to revitalize existing laminate countertops, granting them a premium, designer-inspired finish that mimics the elegance of natural stone – all without the prohibitive expense, extensive mess, or inconvenient downtime typically associated with full countertop replacement.
The beauty of the Rust-Oleum Countertop Transformations kit lies in its comprehensive, all-inclusive design, meticulously crafted with the DIY enthusiast in mind. It empowers homeowners to take control of their kitchen’s aesthetic, providing all the necessary components and clear instructions for a successful project. This approach drastically cuts down on costs, eliminating the need to hire professional contractors, which can be a significant portion of a traditional renovation budget.
Ashley Lehrmann, Rust-Oleum’s senior brand manager, highlights the product’s appeal: “Today’s homeowners are actively seeking countertop surfaces that not only offer impressive durability and functionality but also align seamlessly with their personal sense of style. Countertop Transformations stands out as a highly durable and visually appealing alternative to expensive new countertops, backed by a guarantee of lasting for years to come.” This commitment to quality and longevity underscores Rust-Oleum’s confidence in their product, offering peace of mind alongside a beautiful finish.
While Rust-Oleum aims to replicate the sophisticated look of natural stone, it’s important to understand its unique identity. Upon closer inspection or touch, one might discern that it isn’t genuine stone. However, this isn’t a drawback; rather, it introduces a distinct, new surface material to the market. Countertop Transformations doesn’t merely imitate; it creates a fresh, resilient surface that offers a unique aesthetic and tactile experience, standing proudly as an innovative category of its own. Its ability to provide a high-end look at a fraction of the cost makes it an exceptionally attractive option for modernizing dated kitchen or bathroom spaces.
Beyond kitchen counters, the versatility of the Countertop Transformations system extends to various other surfaces. Homeowners can confidently apply this coating to bathroom vanities, creating cohesive design themes throughout their home, or even refresh tired bar tops and tabletops. This multi-purpose application amplifies its value, making it a go-to solution for multiple home improvement projects seeking durability and a renewed appearance without the traditional expenses.
The DIY Advantage: How to Install Rust-Oleum Countertop Transformations
Embarking on a DIY countertop transformation project with Rust-Oleum is a straightforward process, broken down into five manageable steps. While it requires attention to detail and a commitment to thorough execution, the results are a testament to the system’s effectiveness and user-friendliness. Let’s delve into each step to ensure a smooth and successful application:
- Step 1: Prepare the surface with the Diamond Embedded Sanding Tool (included).
Surface preparation is the cornerstone of any successful painting or coating project, and Rust-Oleum Countertop Transformations is no exception. Begin by meticulously cleaning your countertops, ensuring they are free from grease, grime, and any residues. A strong degreaser is recommended. Once clean and dry, use the included diamond-embedded sanding tool to scuff the entire surface. This crucial step creates a “tooth” for the adhesive base coat to grip onto, ensuring maximum adhesion and durability. Focus on achieving an even, dull finish across all areas, including edges and corners. While the kit provides a hand sander, some experienced DIYers might consider using a palm sander with a 120-180 grit paper for larger, flat areas to expedite the process. However, it’s imperative to consult the official instructions before deviating, as Rust-Oleum specifically recommends against power sanding to avoid over-sanding or creating an uneven surface, which could compromise the final finish. After sanding, meticulously wipe away all sanding dust with a damp cloth, followed by a tack cloth, to ensure a pristine surface for the next step. Mask off adjacent areas like sinks, walls, and appliances to protect them from splatters. - Step 2: Apply the Countertop Transformations Adhesive Base Coat.
With the surface perfectly prepped, it’s time for the adhesive base coat. This specialized coating serves a dual purpose: it provides the strong bonding agent for the decorative color chips and acts as the initial color foundation for your new countertop. Apply the base coat evenly and thinly, working in manageable sections. Use a roller or brush as directed by the instructions to achieve a smooth, consistent layer. Avoid applying too thickly, as this can lead to uneven drying and potential issues with chip adhesion. Pay close attention to edges and seams, ensuring full coverage without drips. Allow the base coat to dry to a tacky finish, as this is the ideal state for the next step. - Step 3: Spread the Decorative Color Chips.
This is where the magic truly happens, bringing the “stone” aesthetic to life. While the base coat is still tacky, use the included chip dispenser to generously broadcast the decorative color chips over the entire surface. The key is to achieve even distribution and full coverage. Don’t be shy; ensure a dense application, as excess chips will be removed later. Working systematically across the countertop ensures no spots are missed. The chips will adhere to the tacky base coat, creating the speckled, multi-dimensional look characteristic of natural stone. Allow sufficient time for the base coat to fully dry and the chips to firmly adhere. - Step 4: Sand and smooth.
Once the chips are fully adhered and the surface is dry, you’ll notice a slightly rough, textured finish. This step is crucial for achieving a smooth, professional-looking countertop. Using the provided sanding block or scraper (or a similar tool as per instructions), gently sand down any raised or sharp edges from the decorative chips. The goal isn’t to remove the chips, but rather to level them, creating a uniform, less abrasive surface. This process also ensures better adhesion for the protective top coat. After sanding, once again, thoroughly clean the surface to remove all dust and loose chips. A vacuum cleaner followed by a tack cloth will be highly effective here. - Step 5: Apply the Countertop Transformations Protective Top Coat.
The final step is arguably the most important for durability and longevity. The protective top coat is a clear, high-performance coating designed to seal in the decorative chips, provide exceptional resistance to abrasions, chemicals, and everyday wear, and impart the desired finish (e.g., gloss or satin). Apply this top coat in thin, even layers, ensuring complete coverage over the entire chip-covered surface. Multiple coats may be required for optimal protection and depth; refer to the kit instructions for specific recommendations. Proper application of the top coat is vital for both the aesthetic appeal and the protective qualities of your new countertop. Allow ample time for the top coat to fully cure, which is different from drying time. While it may be dry to the touch relatively quickly, full hardness and chemical resistance will take several days, during which time careful use of the countertop is advised.
With these five steps, you can achieve a stunning, renewed countertop. The initial sanding is indeed the most labor-intensive part, requiring diligence to create a perfectly prepared surface. Rust-Oleum provides a specialized diamond-embedded hand sander, designed for optimal performance within their system. While the temptation to use power tools for sanding might arise, strict adherence to the manufacturer’s recommendations is crucial to ensure the guarantee and achieve the best possible finish. The success of your project hinges on following each step carefully and patiently.
Choosing Your Style: Rust-Oleum Countertop Transformations Finishes
Rust-Oleum Countertop Transformations offers a thoughtfully curated selection of finishes, primarily focusing on versatile “neutrals” that complement a wide range of kitchen and bathroom decor styles. These finishes are designed to replicate the subtle beauty and texture often found in natural stone, providing a sophisticated backdrop for any aesthetic. Popular choices include Pebbled Ivory, Desert Sand, Java Stone, Onyx, and Charcoal.
- Pebbled Ivory: A light, creamy finish with subtle specks, ideal for brightening spaces and creating an airy, open feel. Perfect for farmhouse, coastal, or classic white kitchens.
- Desert Sand: A warmer, inviting tone reminiscent of natural sandstone, bringing warmth and earthy elegance. Suits rustic, Mediterranean, or traditional designs.
- Java Stone: A rich, deep brown with intricate flecks, offering a luxurious and sophisticated look. Excellent for contemporary, transitional, or more dramatic kitchen aesthetics.
- Onyx: A sleek, dark black finish with subtle variations, providing a bold and modern statement. Ideal for minimalist, industrial, or high-contrast designs.
- Charcoal: A versatile, deep gray that balances between light and dark, offering a contemporary and chic appearance. Works well in modern, urban, or even classic settings for a refreshed look.
Each finish is not only aesthetically pleasing but also engineered for resilience. The transformed surface stands up exceptionally well to the rigors of daily wear and tear, making it a practical choice for busy households. Furthermore, a significant benefit of this system is the inclusion of HomeShield Antimicrobial Protection. This advanced feature actively safeguards the painted surface by inhibiting the growth of mold, mildew, and other odor- or stain-causing microbes. This added layer of hygiene ensures your countertops remain not only beautiful but also cleaner and fresher for longer, contributing to a healthier home environment.
The comprehensive Countertop Transformations kit truly comes with almost everything you need to embark on your refinishing journey. This all-in-one package typically includes the essential Adhesive Base Coat, a Wetting Agent, the Decorative Color Chips that create the faux stone effect, a Diamond-Embedded Sanding Tool for proper surface preparation, a Sanding Block, a specialized Decorative Chip Dispenser for even application, a Decorative Chip Scraper for smoothing, a handy Texture Sample to visualize your chosen finish, and convenient Stir Sticks for mixing. To further simplify the process, each kit is equipped with clear, step-by-step instructions available in both English and Spanish, alongside an instructional DVD. This multimedia approach ensures that even novice DIYers can confidently follow along and achieve professional-looking results.
Rust-Oleum stands firmly behind its product, offering a 100% Satisfaction Guarantee, underscoring their confidence in the kit’s performance and durability. Should you encounter any questions or require assistance during your project, a dedicated Product Support line is readily available, providing expert guidance and peace of mind. This robust support system makes the DIY process less intimidating and more accessible to everyone.
Maintaining Your Transformed Countertops
After investing your time and effort into transforming your countertops with Rust-Oleum, proper maintenance is key to ensuring their longevity and preserving their beautiful finish. The system is designed for durability, but a few simple practices will help keep your surfaces looking their best for years to come.
- Regular Cleaning: For everyday spills and general cleaning, a soft cloth or sponge with mild dish soap and water is typically sufficient. Avoid harsh abrasive cleaners, scouring pads, or steel wool, as these can scratch or dull the protective top coat over time.
- Prompt Spill Cleanup: While the top coat offers excellent resistance, it’s always best to wipe up spills promptly, especially acidic liquids like citrus juices, vinegar, or red wine. Prolonged exposure to highly acidic or staining substances could potentially affect the finish.
- Heat Protection: Although the surface is durable, it’s not impervious to extreme heat. Always use trivets or hot pads under hot pots, pans, and appliances (like slow cookers or toasters) to prevent localized heat damage or discoloration.
- Cutting Boards: Never cut directly on your transformed countertops. Always use a cutting board to protect the surface from knife marks and scratches.
- Avoid Harsh Chemicals: Steer clear of strong chemical cleaners, acetone, nail polish remover, paint thinners, or products containing bleach, as these can damage the finish. If unsure about a cleaning product, test it in an inconspicuous area first.
- Repairs: In the unlikely event of minor chips or scratches, Rust-Oleum often provides guidance or specific products for touch-ups. Consult their product support line for the best advice on how to address any damage.
By adhering to these simple maintenance guidelines, your Rust-Oleum Countertop Transformations will continue to impress with their beauty and performance, providing a refreshed look that stands the test of time.
Why Choose Rust-Oleum Countertop Transformations?
For homeowners contemplating a kitchen or bathroom refresh, the Rust-Oleum Countertop Transformations kit presents a compelling value proposition that addresses common renovation challenges. Priced around $250 for a kit that covers approximately 50 square feet, it represents a mere fraction of the investment required for new stone, solid surface, or even high-end laminate countertops. This makes it an incredibly attractive option for budget-conscious individuals or those looking for a high-impact update without a massive financial outlay.
Beyond the cost savings, the primary appeal lies in its DIY accessibility. This system is tailor-made for homeowners who enjoy hands-on projects and wish to bypass the expense and logistical complexities of hiring contractors. The comprehensive kit, coupled with clear instructions and support, demystifies the renovation process, making it achievable for individuals with varying levels of DIY experience. The minimal disruption compared to a full tear-out and replacement is another significant advantage, allowing you to quickly get back to using your kitchen or bathroom.
The durability, enhanced by HomeShield Antimicrobial Protection, ensures that your newly transformed surfaces are not only beautiful but also practical and hygienic for everyday use. Whether you’re dealing with worn-out laminate, minor stains, or just a desire for a contemporary aesthetic, Rust-Oleum Countertop Transformations offers a robust and visually appealing solution. It’s an ideal choice for refreshing a rental property, preparing a home for sale, or simply giving your most-used spaces a much-needed, long-lasting facelift. Visit your local home center today to explore the available finishes and begin your own countertop transformation journey.