
DIY Giant Ruler Height Chart: A Timeless & Portable Family Keepsake
For many of us, childhood memories are peppered with moments of standing stiffly against a wall, backs straight, as a parent carefully marked our growing height. These impromptu growth charts, often tucked away in a quiet doorway or a secluded corner, became living timelines, each pencil mark a testament to another year of growth, accompanied by our name and the date. While deeply sentimental, this cherished tradition often came with an unspoken challenge: if your family ever moved, those invaluable records of childhood innocence and joyful progression were sadly left behind, lost forever to the next homeowners.
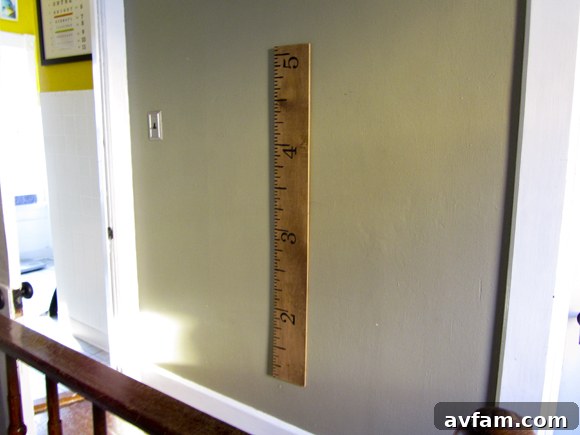
Drawing inspiration from a plethora of creative showcases, particularly on platforms like Pinterest, I stumbled upon an ingenious and aesthetically pleasing solution to this very dilemma: crafting a giant wooden ruler. This brilliant idea elevates the humble height chart from an infantile nursery corner into a striking piece of home decor, proudly displayed in plain view. The most compelling advantage, however, is its portability. This means your family’s unique growth story, meticulously recorded year after year, can accompany you, seamlessly integrating into every new home and new chapter of your life.
Driven by this captivating concept, I embarked on recreating my own giant ruler, with one exciting stipulation: I committed to using only materials I already possessed within my home. This challenge resulted in a truly zero-cost DIY project, proving that deeply personal and beautiful creations don’t require a trip to the hardware store or a hefty budget. I am delighted to share this comprehensive guide, empowering you to craft your very own giant ruler height chart, transforming discarded items into a cherished family heirloom and a striking decorative element.
Why Every Family Needs a DIY Giant Ruler Growth Chart
Beyond its sentimental value, a DIY giant ruler offers a host of practical and aesthetic benefits:
- Permanent Memory Preservation: Unlike wall markings, this portable ruler ensures your family’s precious growth history travels with you, safeguarding irreplaceable memories through every move.
- Unique & Charming Home Decor: It serves as a rustic, personalized art piece that adds significant character, warmth, and a focal point to any room, reflecting your family’s story.
- Environmentally & Budget-Friendly: By repurposing salvaged wood and household items, this project promotes sustainability, reduces waste, and eliminates material costs.
- Customizable & Personal: Tailor the design, finish, and numbering to perfectly match your home’s aesthetic and inject your family’s unique style into the decor.
- Engaging Family Project: Involve children in the making process, from sanding to marking, transforming it into a fun, collaborative activity that makes the finished product even more meaningful.
- Inspires Connection: It becomes a tangible piece of family history, a constant reminder of shared moments, growth, and the passage of time.
Step-by-Step Guide: Crafting Your Own Giant Ruler Height Chart
Step 1: Sourcing Your Wood Plank – The Foundation of Your Heirloom
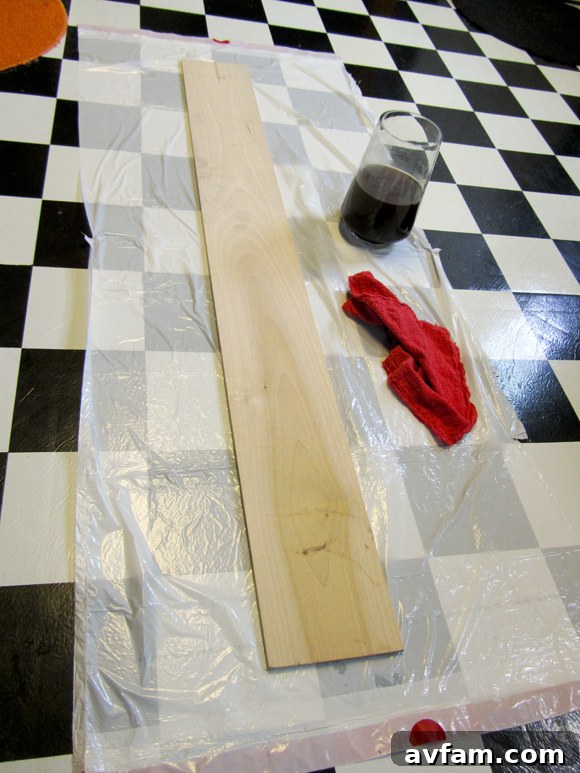
The first and arguably most crucial step is to locate the ideal piece of wood that will serve as the canvas for your giant ruler. In my case, a fortunate rummage through our basement’s “random cuts” pile yielded an unfinished 1×4 plank of suitable length. This provided an excellent starting point, perfectly aligning with my zero-cost objective. When searching for your wood, think creatively about what might be lurking in your garage, shed, or even at local salvage yards.
Consider possibilities like old fence pickets, a discarded shelf, leftover trim from a previous renovation, or even pallet wood if you’re comfortable disassembling and preparing it. The primary goal is to avoid purchasing new materials. If a single, long piece isn’t readily available, don’t be deterred. You can certainly cut down larger boards or, for a truly unique and salvaged aesthetic, piece together several smaller bits of wood. If joining multiple pieces, ensure they are of similar thickness and can be securely fastened together using wood glue and screws for durability. Whatever wood you choose, inspect it for major defects such as large knots, significant warping, or deep cracks, as these can complicate the marking process and compromise the ruler’s longevity. Once you’ve selected your plank, dedicate time to gently sand all surfaces. This essential preparation step not only smooths out any rough edges, making it safe to handle and write on, but also effectively opens up the wood grain, allowing for better absorption and a more even finish in the subsequent staining process.
Step 2: Giving Your Ruler an Authentic Aged Look with Natural Stains
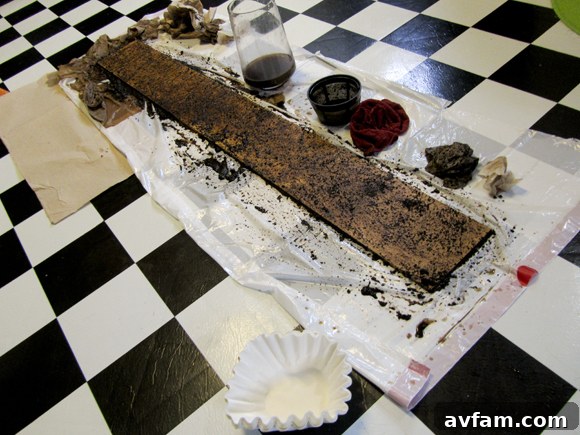
To truly capture the essence of a vintage growth chart, an aged, rustic appearance is paramount. Lacking traditional wood stain, I decided to explore a wonderfully natural and eco-friendly alternative: coffee grounds. This method, widely embraced in the DIY community, harnesses the power of tannins present in coffee to create a beautiful, time-worn patina on wood. For a deeper, richer hue than a mere coffee wash might provide, I generously rubbed fresh, damp coffee grounds directly onto the wood surface multiple times. To further intensify the stain and encourage deep penetration, I then carefully wrapped the entire plank in a large garbage bag, effectively allowing it to “steep” like an oversized tea bag for several hours. This prolonged contact significantly deepened the stain, infusing the wood with a gorgeous, dark tone and imparting a surprisingly pleasant, earthy aroma that lingered for days.
Should coffee grounds not be at your disposal, several other natural options can achieve similar charming effects. Strongly brewed black tea, rich in tannins, is an excellent substitute, imparting a warm, mellow aged look. For an earthier, weathered finish, garden soil mixed with a small amount of water to form a paste can also be surprisingly effective. Another highly popular and versatile method involves soaking steel wool in vinegar for several days; this concoction creates a fascinating chemical reaction with the wood’s natural tannins, yielding a stunning range of gray-brown “weathered wood” tones. Regardless of the natural staining technique you choose, it’s always advisable to perform a small test on a scrap piece of your chosen wood first. This allows you to assess the color intensity and ensure you achieve your desired aged aesthetic before applying it to your main ruler plank.
Step 3: Patient Drying and Essential Tool Gathering
Once your natural staining process is complete, and you’ve diligently cleaned up any excess coffee grounds or other staining agents (a task best performed in an area with an easily washable floor, such as a kitchen, utility room, or garage), the next critical step is to allow your wood to dry thoroughly. This requires patience; rushing the drying stage can lead to an uneven finish, potential warping, or problems with paint adherence in later stages. Depending on your chosen staining method, the humidity levels in your environment, and the thickness of your wood, this drying period could range from several hours to a full day, or even longer. Ensure the wood is completely dry to the touch before proceeding.
While your ruler patiently dries, seize this opportune moment to gather all the remaining tools and materials required for the subsequent phases of the project. A little forethought and preparation will significantly streamline your crafting experience. Here is a comprehensive checklist of essentials:
- Pencil or Fine-Tip Pen: Crucial for initial, precise markings and outlining the numbers.
- Measuring Tape: Absolutely vital for ensuring accurate and consistent measurements along the entire length of your ruler.
- A Standard Ruler or Long Straight Edge: Indispensable for drawing crisp, perfectly straight lines for your measurement marks, ensuring a professional finish.
- Fine Paintbrush: A small, fine-tipped brush is essential for the meticulous task of carefully painting the measurement lines and filling in the numbers. Precision in this step makes a significant difference.
- Dark Paint (preferably Black or Charcoal): I utilized a semi-gloss black with subtle blue undertones (specifically, Behr’s Beluga), which I fortunately discovered in our existing paint stash. My rationale for choosing an off-black or charcoal shade was to achieve a more authentic, aged, and less stark appearance compared to a sharp, glossy black. However, in keeping with the zero-cost ethos of this project, the golden rule prevails: use whatever dark paint you already have on hand. Matte, satin, or semi-gloss finishes can all yield beautiful results, allowing you to tailor the overall aesthetic to your preference.
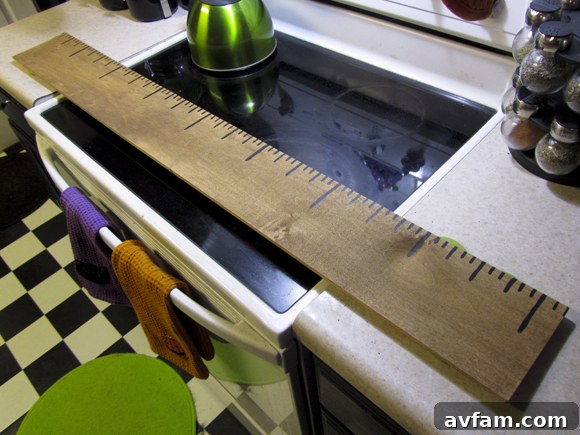
This image showcases what my ruler looked like after it had fully dried from the coffee grounds staining process, revealing its newly acquired depth and character:
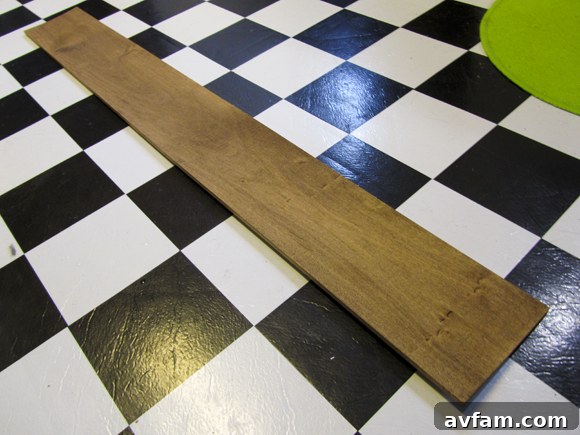
And indeed, it carried the wonderfully comforting scent of freshly brewed coffee for several delightful days!
Step 4: Determining Placement and Meticulously Marking Measurements
With your beautifully stained and thoroughly dried plank now ready, the next pivotal step involves two critical decisions: determining the total height you wish your ruler to measure and, equally important, establishing its ideal hanging position on your wall. Consider the physical length of your plank; for instance, my 4-foot board, when held up to measure a full 6 feet from the floor, appeared disproportionately tall and rather comical against the wall. I discovered that by hanging the ruler approximately one foot off the ground, I could effectively measure heights up to a little over 5 feet, which felt far more proportional and provided ample room for tracking growth without overwhelming the wall space.
To accurately establish your ruler’s starting point, hold the plank against the specific wall where you envision it hanging. Experiment with various heights from the floor until you find a position that is both aesthetically pleasing and provides practical room for future growth measurements. Once this ideal hanging height is confirmed, you must carefully calibrate your ruler. For example, if you decide to hang your ruler exactly 1 foot off the ground, then the “1-foot” mark that you paint onto your wooden ruler should actually align with the 2-foot mark from the floor. This critical calibration ensures that all subsequent measurements taken with your chart will be accurate. Use your measuring tape to precisely determine the true floor height that corresponds to your ruler’s lowest measurement mark (e.g., the 1-foot mark). You can make a light, temporary pencil mark on your ruler at this point to guide your initial numbering.
Now, utilizing your measuring tape, begin the precise task of marking the foot increments along your ruler. For enhanced visual clarity and to mimic the authentic aesthetic of a traditional ruler, I designed the lines denoting each full foot to be approximately 3 inches long. Half-foot marks were made slightly shorter, around 2.5 inches, while quarter-foot marks (or even individual inch marks, if you desire exceptional detail) would be proportionately shorter still. It is absolutely essential to use a standard ruler or a long, sturdy straight edge to guarantee that all your lines are perfectly crisp, straight, and parallel to each other. Maintaining consistency in spacing and line length will significantly contribute to the professional appearance of your finished project. Once you are thoroughly satisfied with your initial pencil markings, carefully trace over them with your fine paintbrush and dark paint. Take your time with this step, focusing on precision and neatness, to create sharp, well-defined measurement lines that will last.
Step 5: Adding the Essential Numbers with Precision
A ruler, no matter how beautifully stained or meticulously marked, remains incomplete without its corresponding numbers. To achieve a clean, classic, and easily readable aesthetic, I opted to use Microsoft Word. I selected a timeless font (Century Schoolbook works exceptionally well for this, offering both elegance and legibility) and scaled it to a substantial 225 font size, ensuring clear visibility from a distance. After printing each number individually, I roughly cut them out. The ingenious trick for transferring these numbers onto your wood without specialized carbon paper is remarkably simple: flip each printed number face down and generously rub the entire back of the paper with a soft pencil. This creates a makeshift carbon layer.
Carefully position your prepared numbers onto the ruler, aligning them precisely with their respective foot marks. Using the same pencil, firmly trace the outline of the printed number onto the wooden plank. When you gently lift the paper, you’ll reveal a faint yet clear pencil outline etched onto your ruler’s surface. With your fine paintbrush and dark paint, carefully and steadily fill in these outlines. For those seeking an alternative approach, stencils offer an excellent and consistent method for numbering. Alternatively, if you possess a particularly steady hand and a keen eye for typography, freehanding the numbers can add a uniquely artistic touch to your personalized growth chart.
Step 6: Sealing Your Masterpiece for Lasting Durability
After all your meticulous painting and numbering have had ample time to completely dry (it’s wise to allow a good few hours, or even overnight, to ensure full curing), it’s time for the crucial step of sealing your giant ruler. This protective layer is vital for safeguarding both the wood and the painted markings from everyday wear and tear, ensuring your cherished growth chart endures for generations. I carefully transported my ruler outdoors to a well-ventilated area and applied a light, even coat of clear satin spray paint, which I happened to have readily available. The satin finish is particularly ideal for this project, as it provides robust protection without imparting an overly glossy sheen. This allows you to comfortably write directly onto the ruler with a permanent marker to mark heights and dates, without concerns about smudging or difficulty in writing.
If clear satin spray paint isn’t in your current inventory, any clear topcoat you have on hand – whether it’s a matte, semi-gloss, or even a very light coat of glossy finish – will offer some level of protection. However, do be mindful that an excessively glossy or lacquered finish might make it more challenging to write on effectively with certain pens or markers. Always prioritize safety: ensure you are working in a well-ventilated area when using spray paints or any sealants, and diligently follow the manufacturer’s instructions for optimal application and drying times. Approximately fifteen minutes later, my ruler was dry to the touch and ready for its very final, satisfying step.
Step 7: The Grand Finale – Hanging Your Cherished Growth Chart
The final, exciting touch is the proper installation of your magnificent giant ruler. I opted to attach a sturdy sawtooth hanger, cleverly salvaged from an old picture frame, to the back of the ruler. The precise placement of this hanger is absolutely critical to accurately maintain your desired starting height from the floor. For example, if your intention is for the ruler’s 1-foot mark to sit exactly 2 feet from the floor (meaning you’ve designed it to hang 1 foot off the ground), you must meticulously measure from the very bottom of the ruler to determine the exact spot where the hanger needs to be placed to achieve this precise alignment. For wider or heavier boards, consider using two D-ring hangers for enhanced stability and security.
Et voila! Your personalized giant ruler height chart is now magnificently complete and ready to capture countless memories! We strategically chose to hang ours upstairs, in a high-traffic area conveniently located near the kids’ rooms and the bathroom, ensuring that growth milestones can be easily observed and joyfully recorded. However, the beauty of this project is its adaptability: you can proudly place yours wherever it makes the most sense for your family and complements your home’s aesthetic—perhaps in a vibrant playroom, a cozy living area, a welcoming entryway, or even a bustling hallway. One invaluable practical tip I’ve learned is to secure the very bottom of the ruler to the wall using a small piece of poster mount tape or a couple of removable Command Strips. This simple addition effectively prevents the ruler from swinging erratically or accidentally being knocked out of alignment, a common occurrence in lively households with active children, ensuring your growth chart remains a stable and reliable record for years to come.
Share Your Inspiring DIY Journey!
Crafting this DIY giant ruler height chart has been an incredibly fulfilling and rewarding endeavor, transforming humble, readily available materials into a cherished family keepsake and a striking piece of decor. It stands as a testament to the immense power of resourceful crafting, the joy of creating something truly personal, and the lasting value of preserving family memories. I am genuinely eager to hear your thoughts on this project! Perhaps you have embarked on a similar creative journey, or you possess other brilliant tips for making wonderful, meaningful things with items you already own. Please don’t hesitate to share your ideas, experiences, and ingenious insights in the comments section below – let’s inspire each other to create more, spend less, and cherish the handmade!